Dynamic forms -Travel Clearance
Use this form to request official approval for international travel.
Step 1
Initiate request
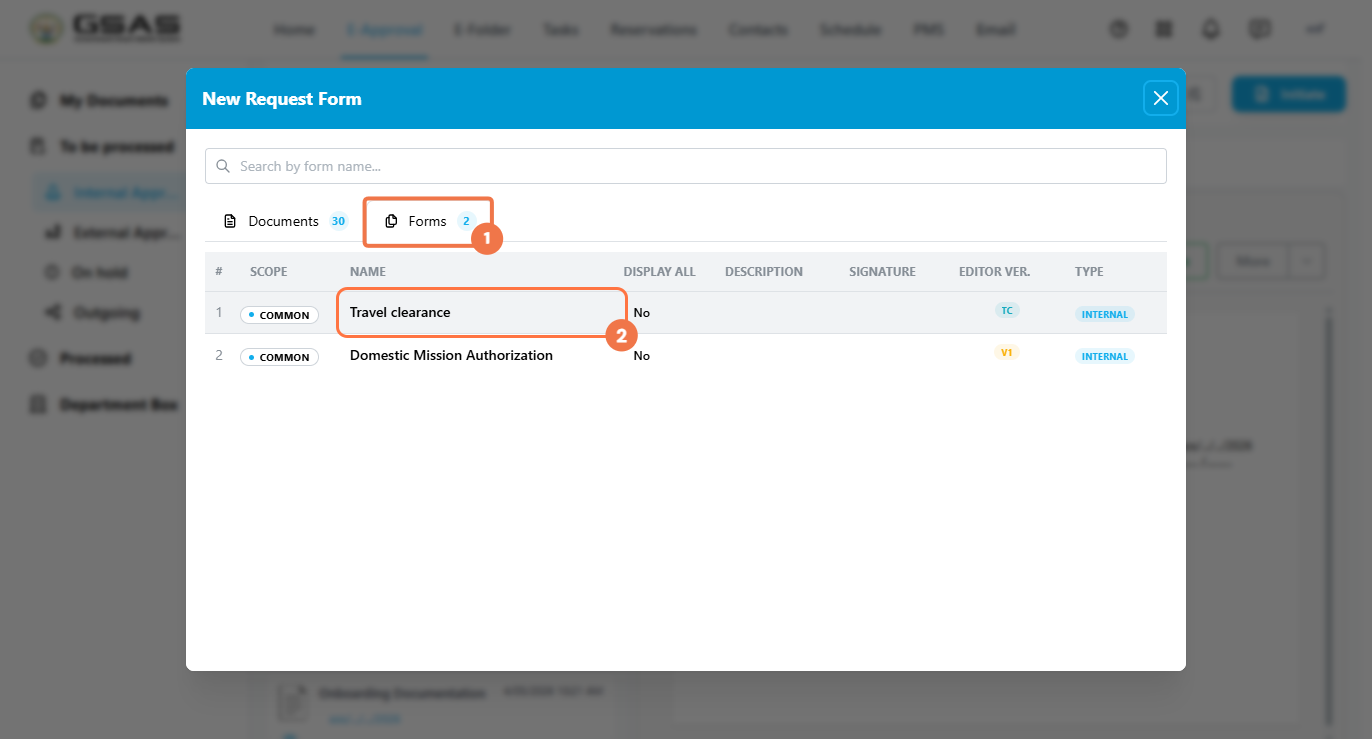
- From the E-Approval module, click Initiate.
- Select the Forms tab, then click Travel clearance from the list.
Step 2
Fill in the Head section
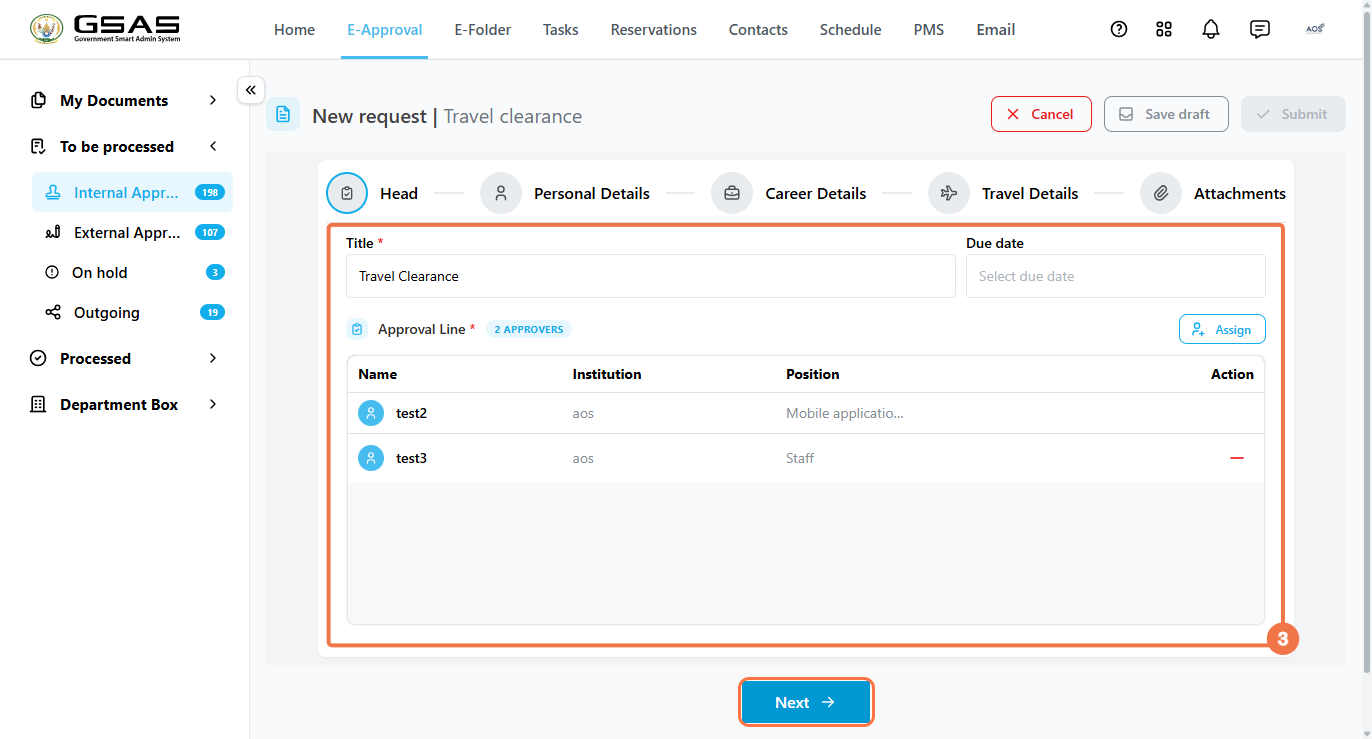
Enter a Title for the request and optionally set a Due Date. The Approval Line lists the approvers assigned to this request, click Assign to add approvers. Click Next when ready.
Step 3
Personal Details
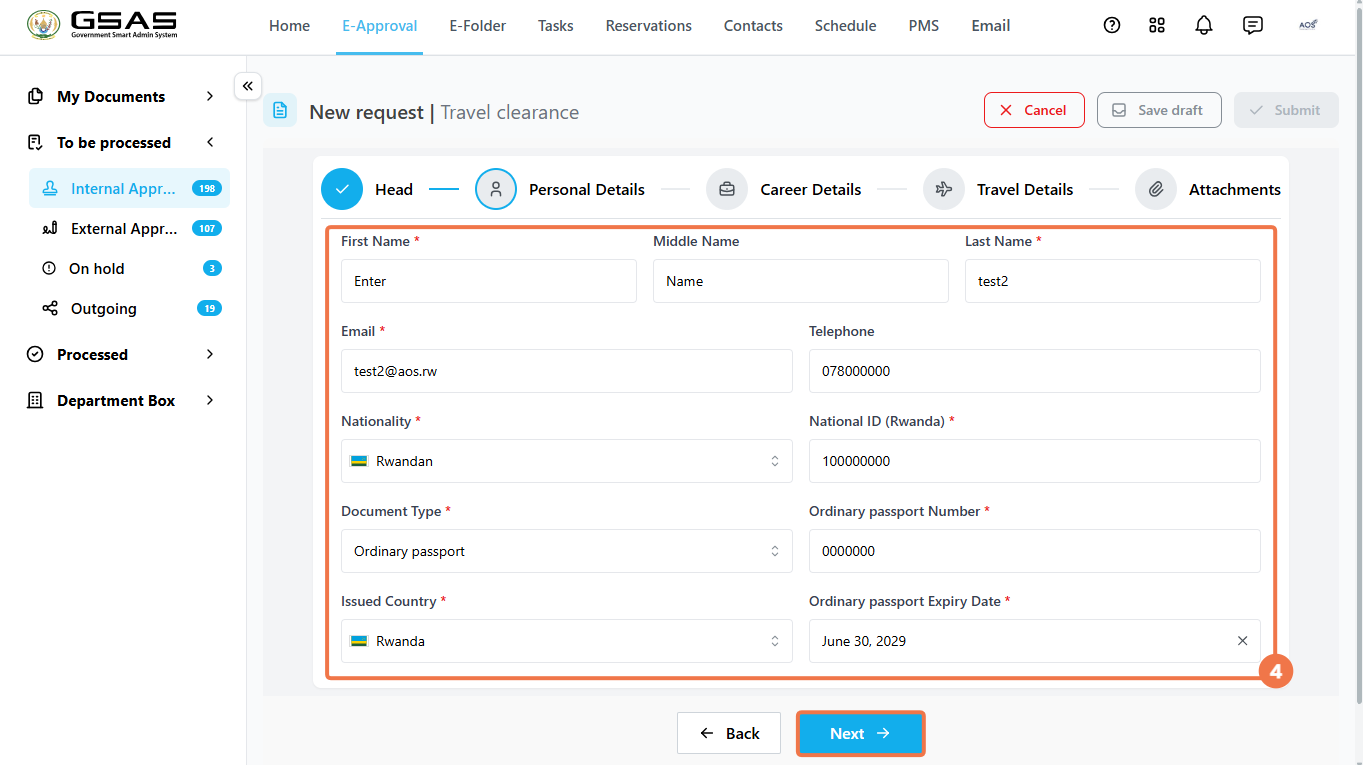
- Fill in your First Name, Middle Name (optional), and Last Name, along with your Email and Telephone.
- Select your Nationality and enter your National ID.
- Under document information, select your Document Type (e.g. Ordinary passport) and provide the number associated with it, Issued Country, and Expiry Date. Click Next to continue.
Step 4
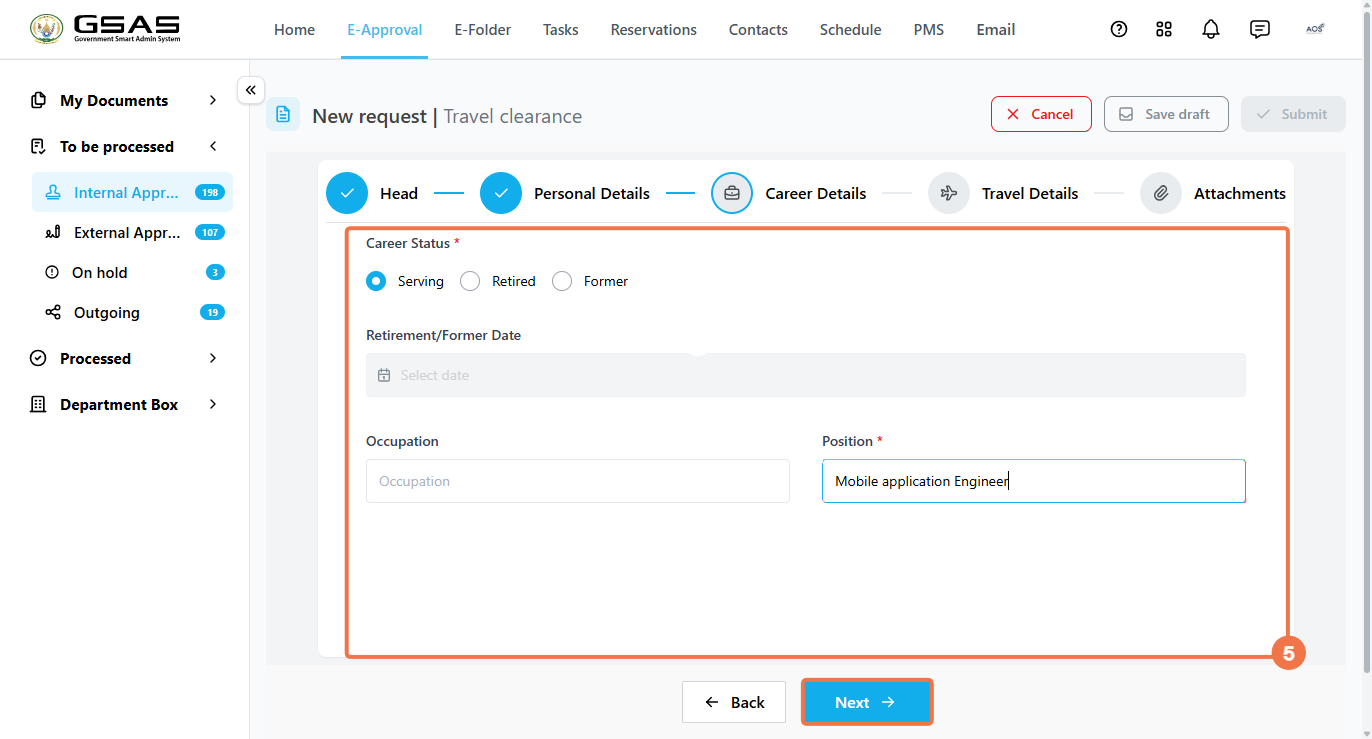
Career Details
- Select your Career Status — Serving, Retired, or Former. If Retired or Former, provide the corresponding date in the Retirement/Former Date field.
- Enter your Position (if it was not automatically filled in) and optionally your Occupation. Click Next to continue.
Step 5
Travel Details
- Select the Destination Country and enter the Destination City.
- Set the Departure Date and Returning Date, then select a Travel Reason.
The fields that follow will change depending on the reason selected. If you choose:
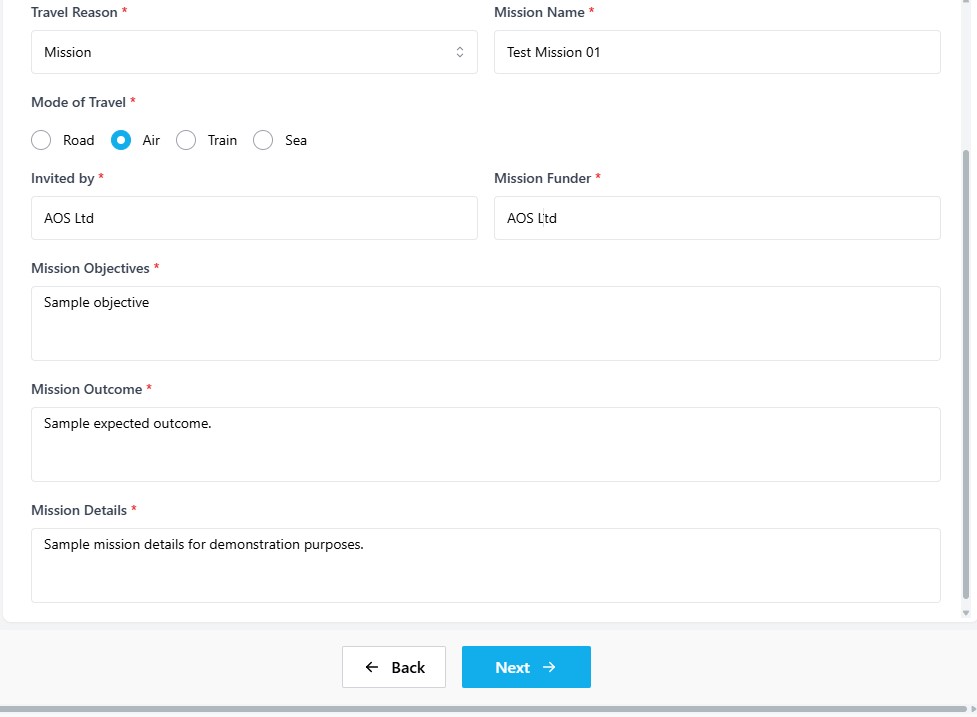
→Mission:
- Enter the Mission Name and select the Mode of Travel.
- Provide the Invited by and Mission Funder, then fill in the Mission Objectives, Mission Outcome, and Mission Details.
→ Meeting:
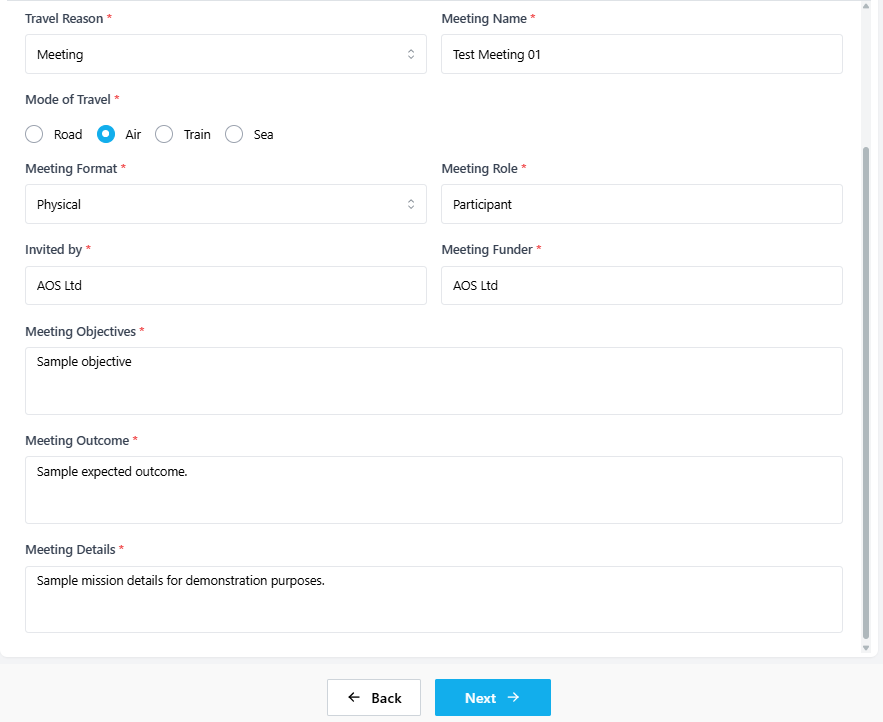
- Enter the Meeting Name and select the Mode of Travel.
- Select the Meeting Format, enter your Meeting Role, and provide the Invited by and Meeting Funder. Fill in the Meeting Objectives, Meeting Outcome, and Meeting Details.
→Event:
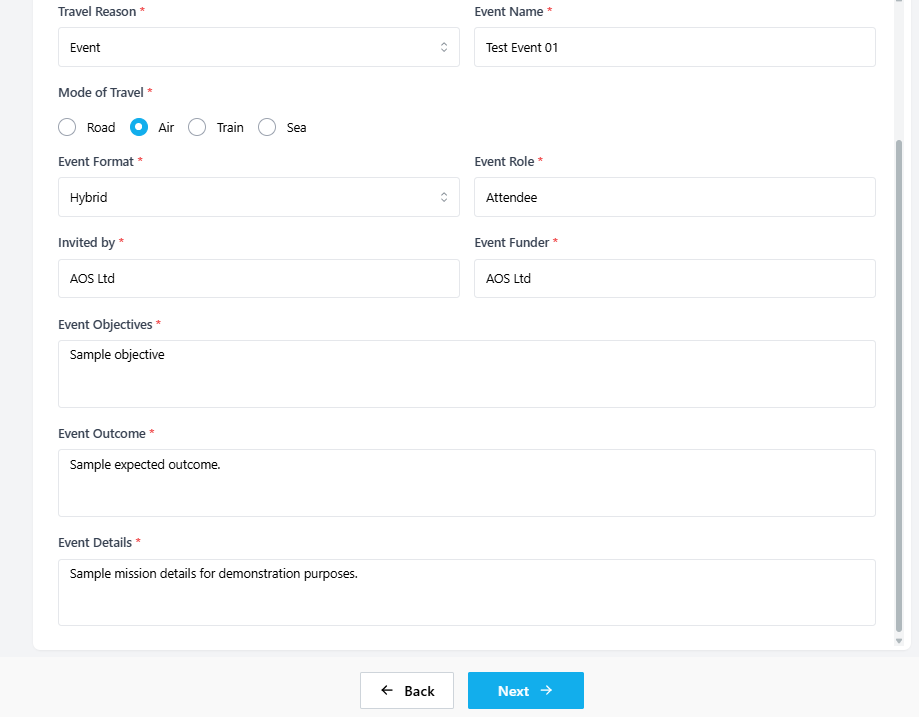
- Enter the Event Name and select the Mode of Travel.
- Select the Event Format, enter your Event Role, and provide the Invited by and Event Funder.
- Fill in the Event Objectives, Event Outcome, and Event Details.
→Leave:
- Select the Mode of Travel (Road, Air, Train, or Sea) and enter the Leave Details describing the purpose of the trip.
- The Leave Name field is not required for this option.
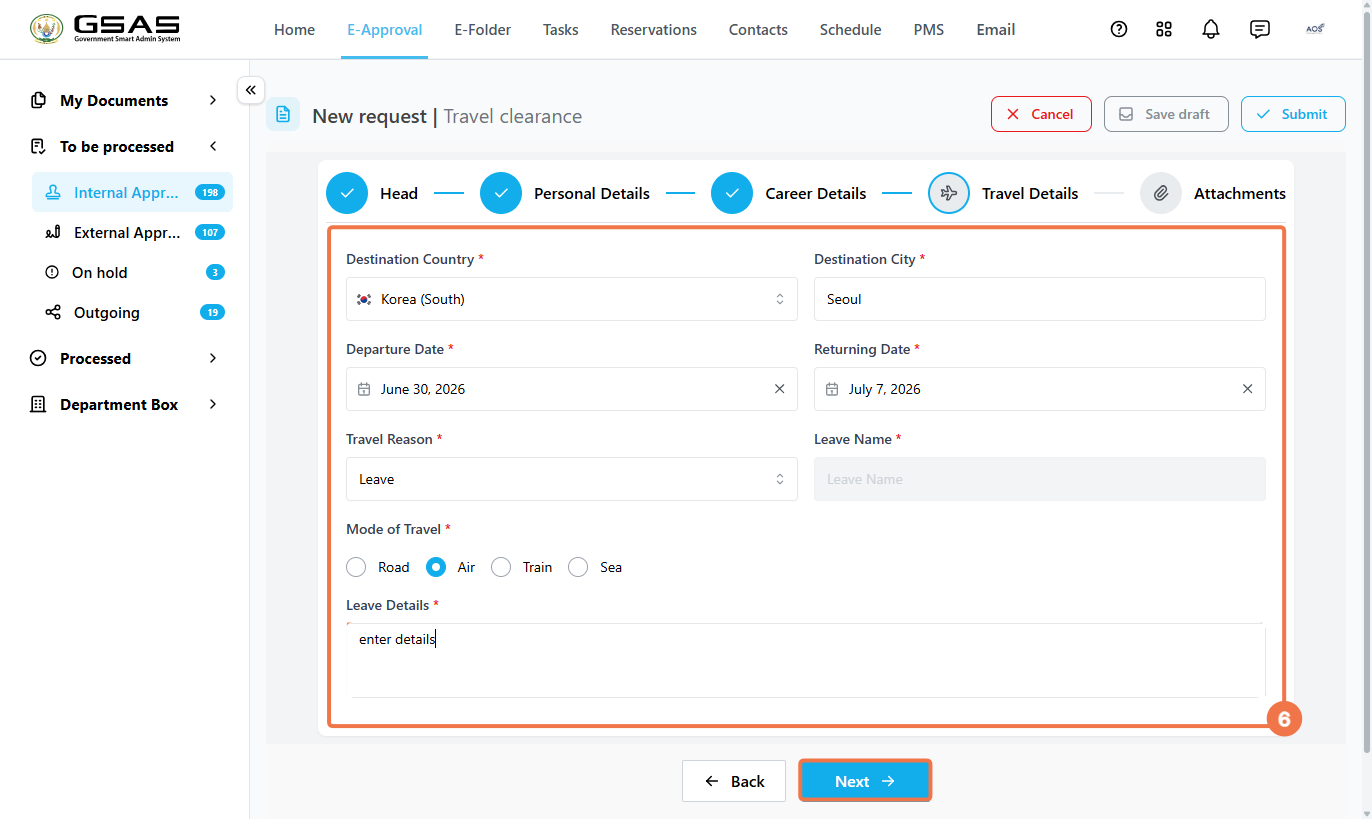
Click Next to proceed once all fields are completed.
Step 6
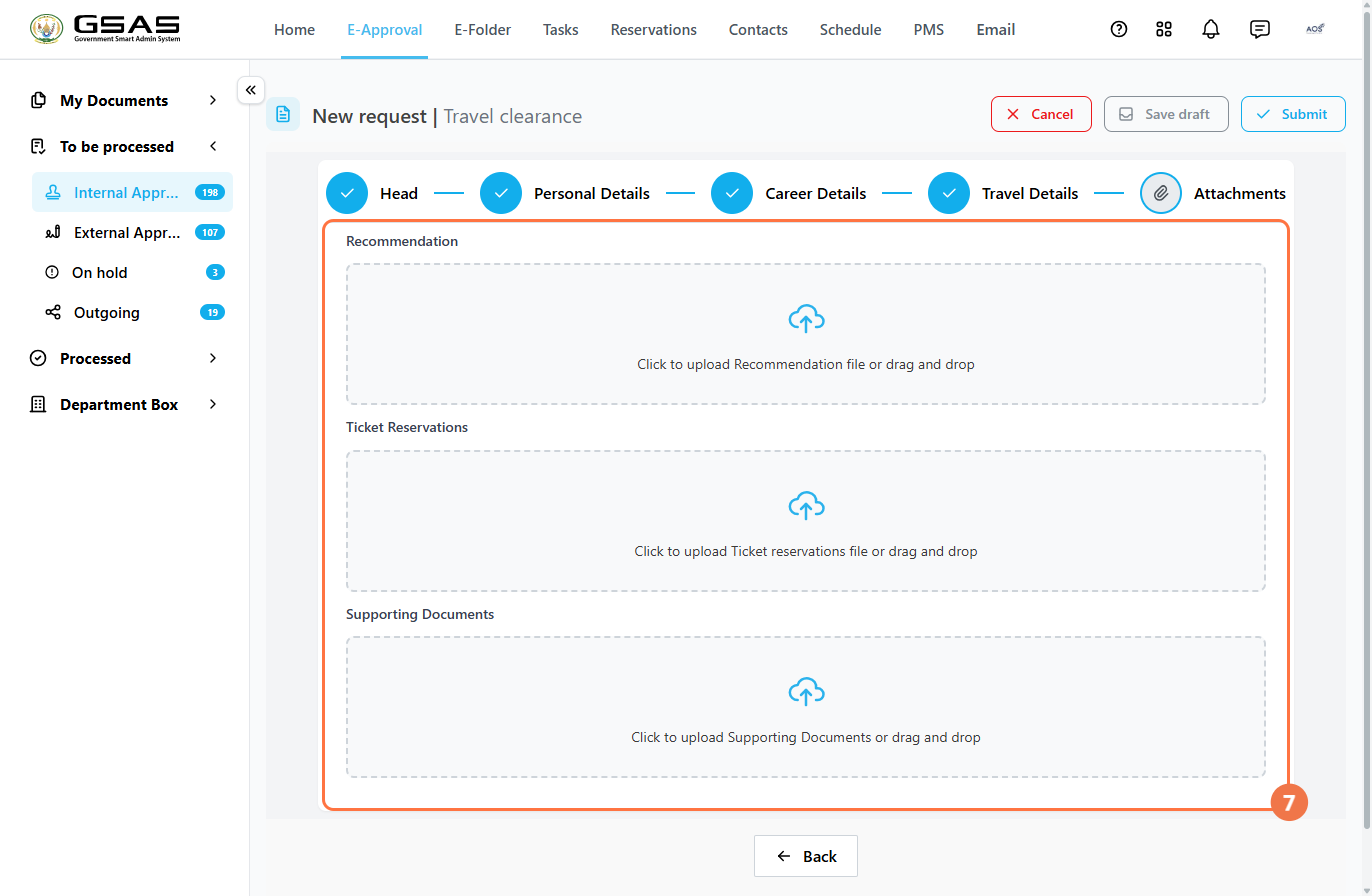
Attachments
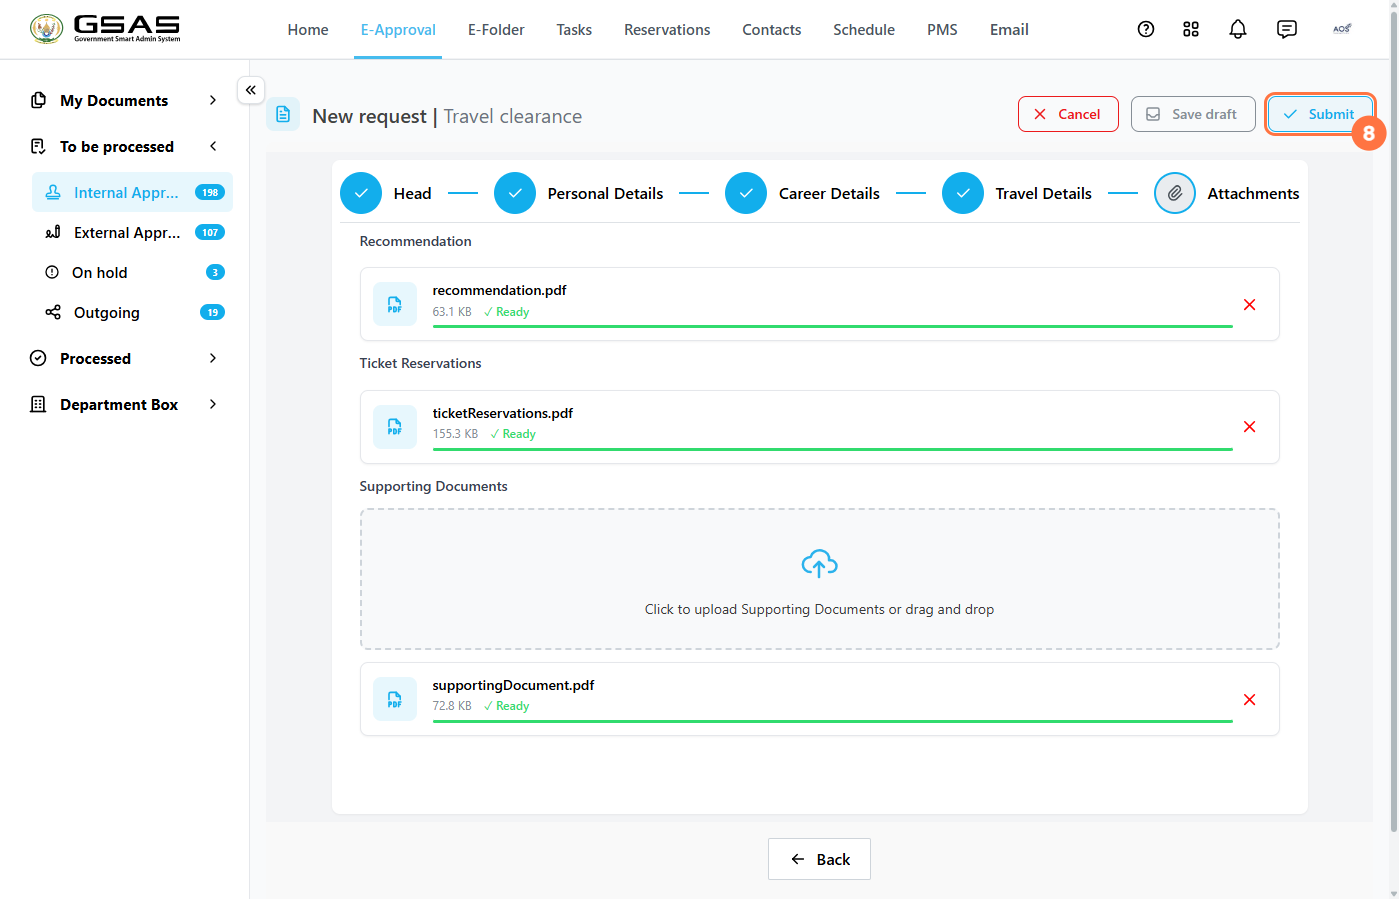
Attach any relevant documents to support your request. All attachment fields are optional. Upload files by clicking the upload area or dragging and dropping. Each file will display a green Ready status once successfully uploaded.
- Recommendation — upload a single recommendation letter.
- Ticket Reservations — upload a single file for travel booking confirmation.
- Supporting Documents — upload one or more additional files relevant to the request.
Step 7
Submit your Request
Once all sections are complete, click Submit in the top right corner. A confirmation dialog will appear, click Submit again to confirm and send the request for approval.