Dynamic forms


Use this form to request official approval for international travel. The form is divided into five sections and is routed through a pre-defined approval line once submitted.


Step 1 — Initiate

    Open

    the Travel Clearance Form

    From the E-Approval module, click + Initiate to open the New Request Form dialog.
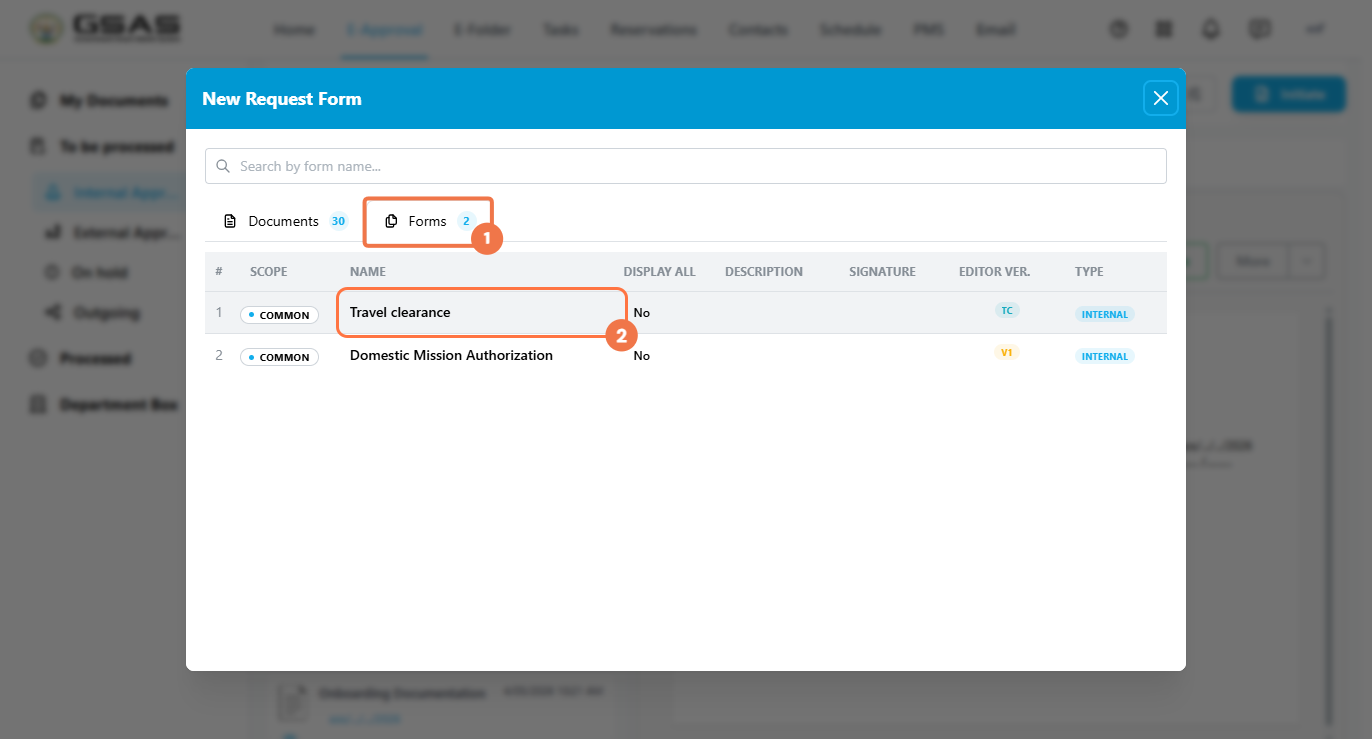
    ClickSelect the Forms tab to(1), viewthen available form templates. Selectclick Travel clearance.clearance (2) from the list.

    image.png


    Step 2

    Fill in the Head section

      Enter a Title for the request.
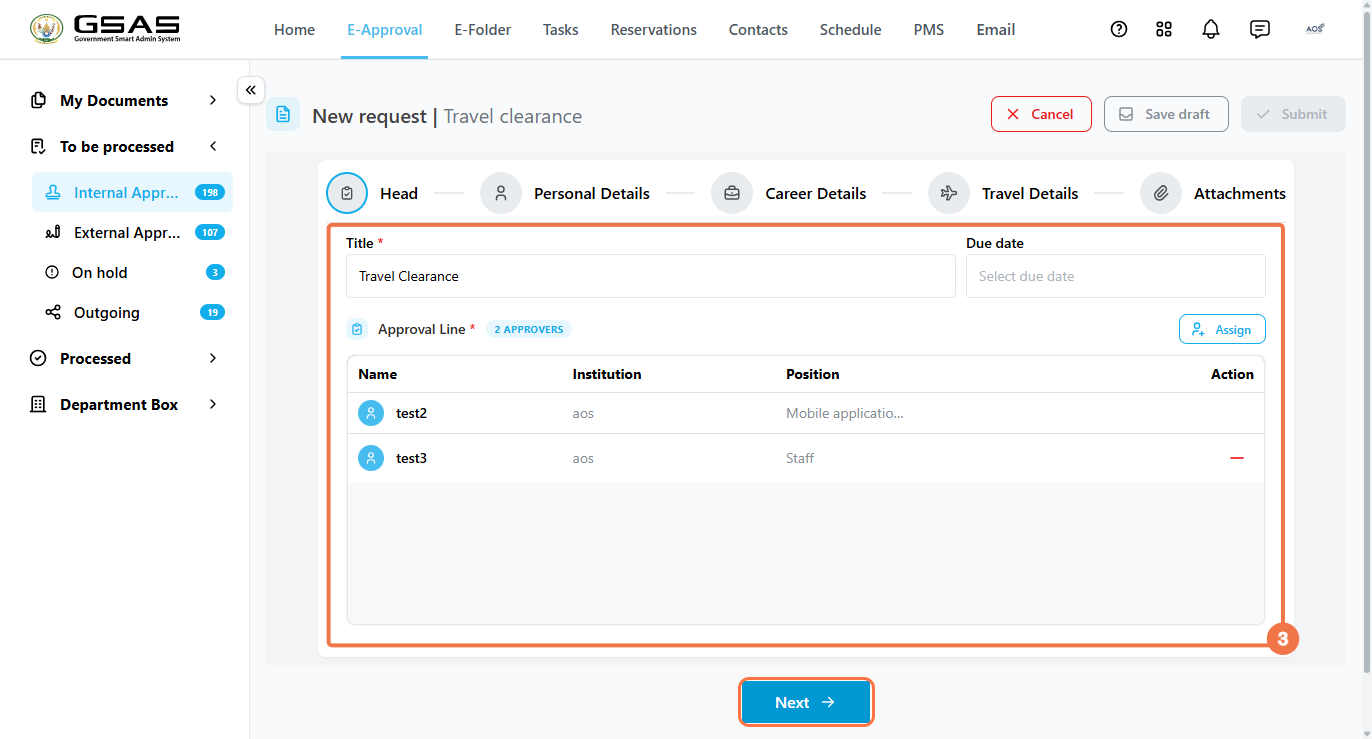
      request Optionallyand optionally set a Due Date. Review or modify theThe Approval Line lists the approvers assigned to this request, click Assign to changeadd approvers. Click Next towhen proceed.ready.

      image.png


      Step 3

      Personal Details

      Fill in Personalyour Details

        First Name, Middle Name, and Last Name, along with your Email and Telephone.

        Select your Nationality and enter your National ID.

        Under

        document information, select your Document Type (e.g. Ordinary passport) and provide the Passport Number, Issued Country, and Passport Expiry Date. Click Next to continue.
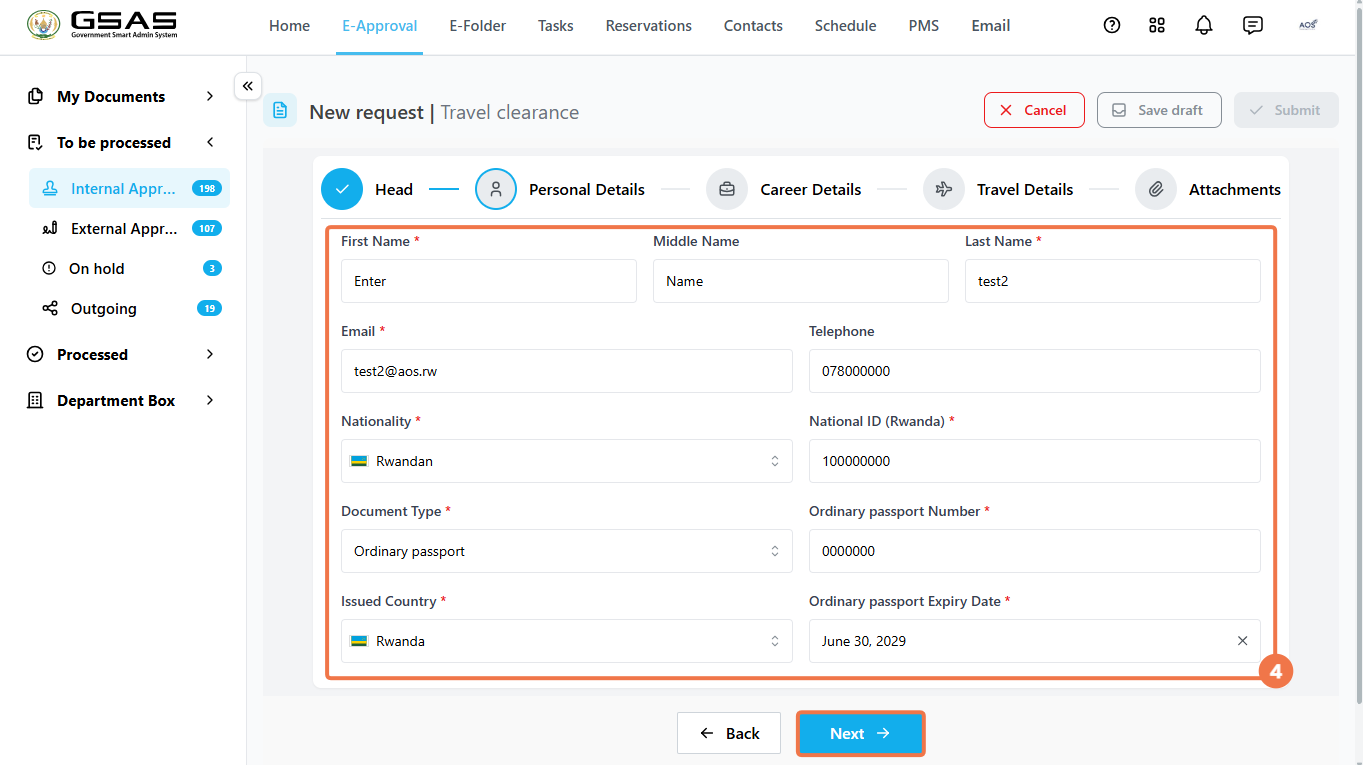
        image.png


        Step 4

        — Fill in

        Career Details

          Select your Career Status: — Serving, Retired, or Former. If Retired or Former, provide the corresponding date in the Retirement/Former Date.

          Optionallyfield. enter

          Enter your Position  (if it was not automatically filled in) and optionally your Occupation.
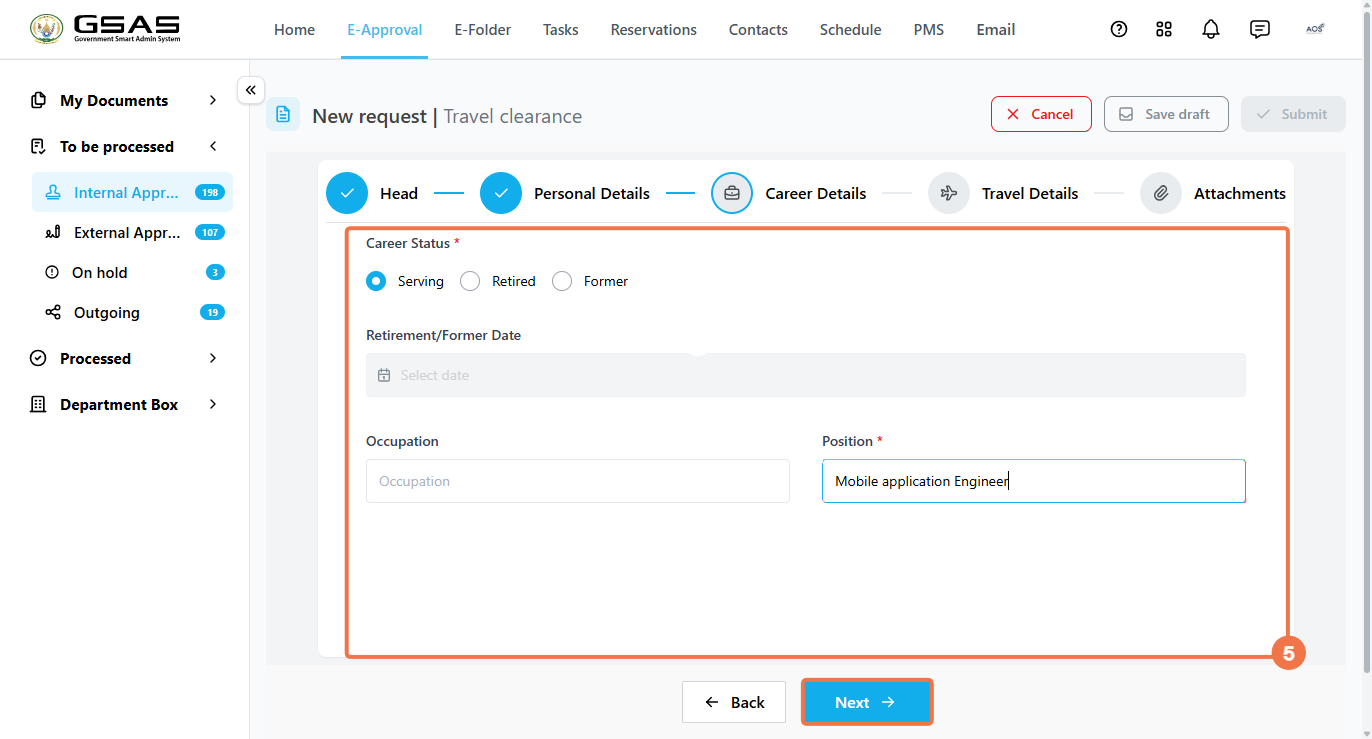
          Enter your Position (required). Click Next to continue.

          image.png


          Step 5

          — Fill in

          Travel Details

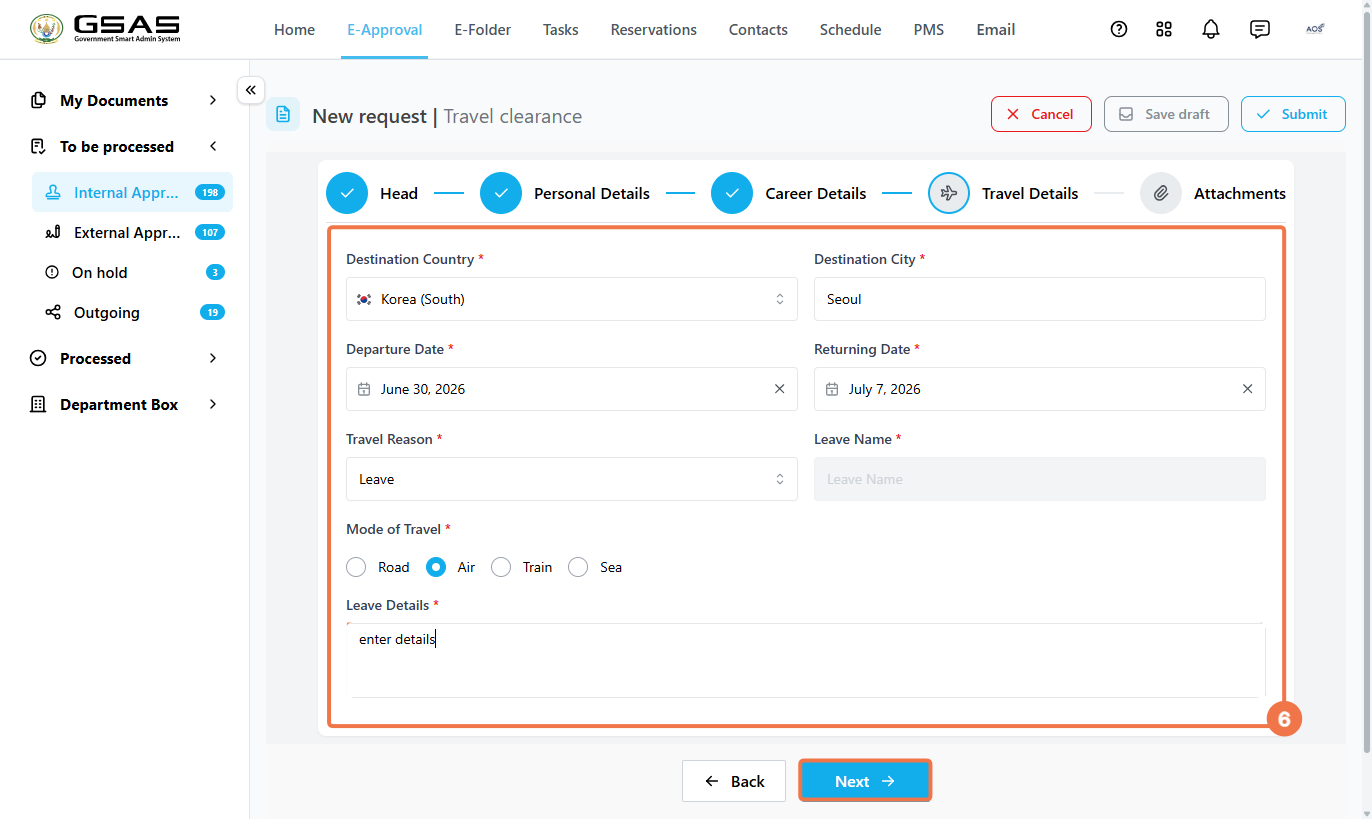
            Select

            the Destination Country and enter the Destination City. Set the Departure Date and Returning Date, then select a Travel Reason.      ifThe Leavefields isthat selected,follow will change depending on the reason selected.

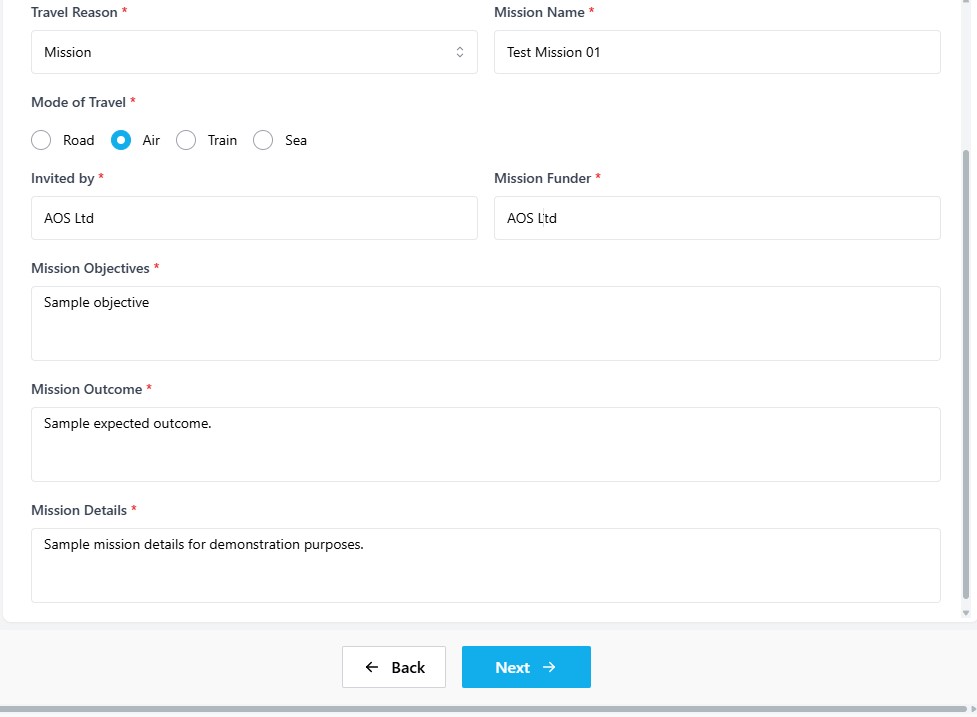
            1. Mission

            Enter the Mission Name and select the Mode of Travel. Provide the Invited by and Mission Funder, then fill in the LeaveMission Objectives, Mission Outcome, and Mission Details.
            1782296258305.jpeg

            2. Meeting

            Enter the Meeting Name field.
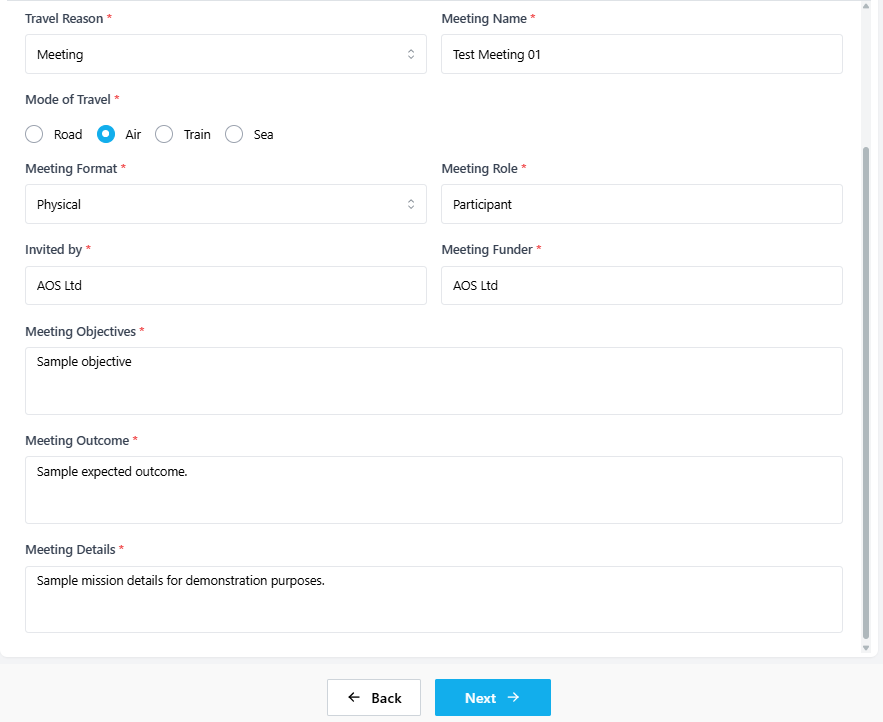
            and select the Mode of Travel:. Select the Meeting Format, enter your Meeting Role, and provide the Invited by and Meeting Funder. Fill in the Meeting Objectives, Meeting Outcome, and Meeting Details.

            7a265374-98ee-4120-80dc-0ede52b86121.png

            3. Event

            Enter the Event Name and select the Mode of Travel. Select the Event Format, enter your Event Role, and provide the Invited by and Event Funder. Fill in the Event Objectives, Event Outcome, and Event Details.
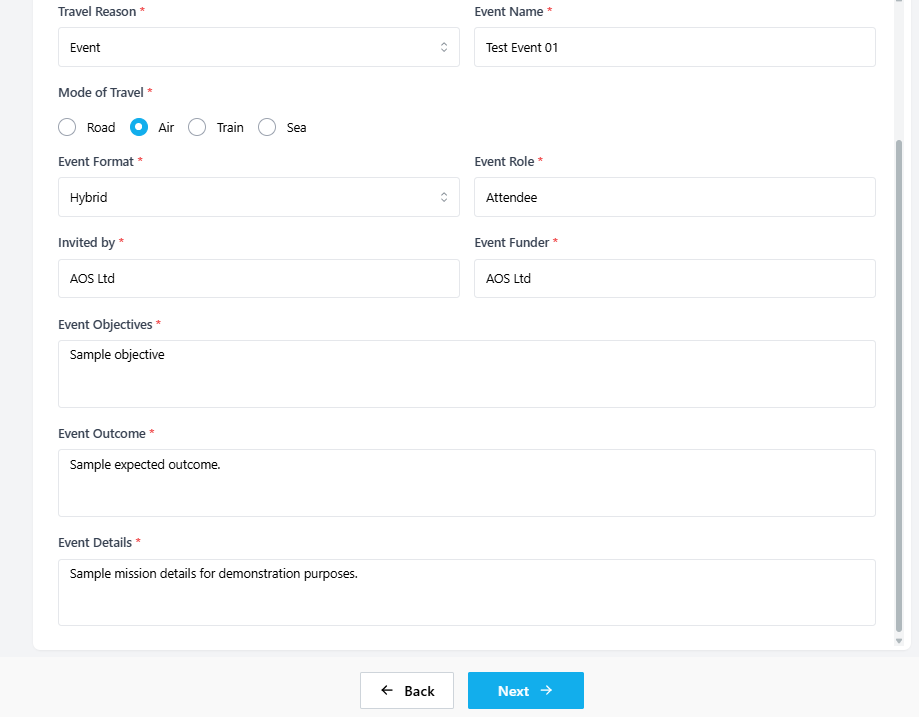
            820ef174-c248-4d49-add1-c7e3d6a0ae81.png

            4. Leave

            Select the Mode of Travel (Road, Air, Train, or Sea.

            Sea) and enter the Leave Details — describedescribing the purpose of travel.the trip. The Leave Name field is not required for this option.

            Click Next to proceed.

            proceed once all fields are completed.

            image.png


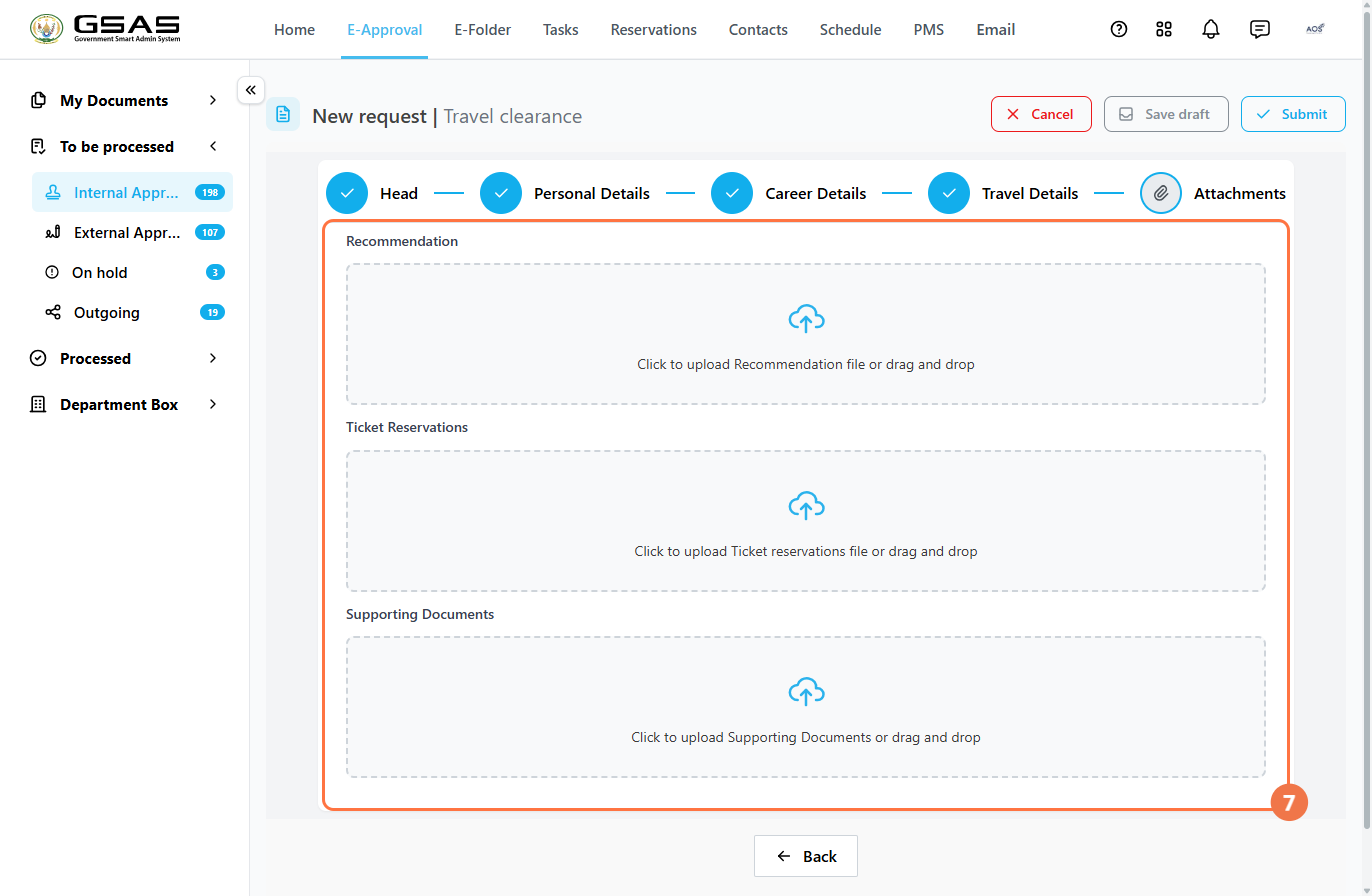
            Step 6 — Upload Attachments

              Attachments

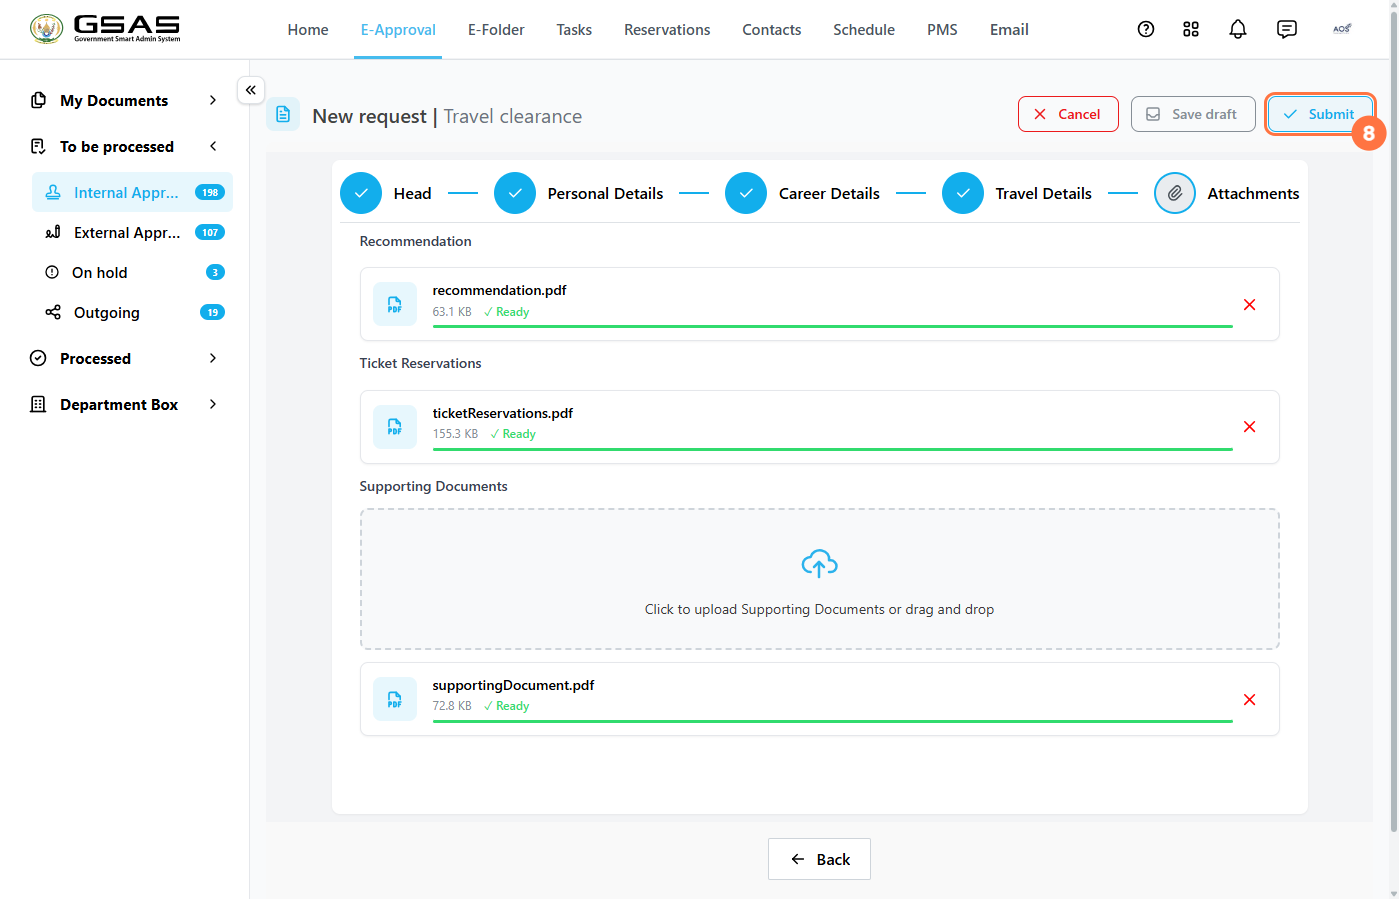
              Attach any relevant documents to support your request. All attachment fields are optional. Upload files by clicking eachthe upload area or dragging and dropping:dropping. Each file will display a green Ready status once successfully uploaded.

              • Recommendation upload a single recommendation letter.
              • Ticket Reservationsupload a single flight or travel booking.booking confirmation.
              • Supporting Documentsanyupload one or more additional files.files relevant to the request.
              Each file will show a green Ready status when successfully uploaded.

              image.png


              Step 7

              Submit your requestRequest

                Once all sections are complete, click Submit  in the top right corner.

                A confirmation dialog will appear —appear, click Submit again to confirm.confirm and

                image.png

                send

                image.png

                the

                image.png

                request

                image.png

                for

                image.png

                image.png


                approval.

                image.png