Invite to sign on Received PDF documents
This section outlines the steps to invite internal users to sign PDF documents using the Invite-to-Sign feature in the Government Smart Administration System.
Key Steps
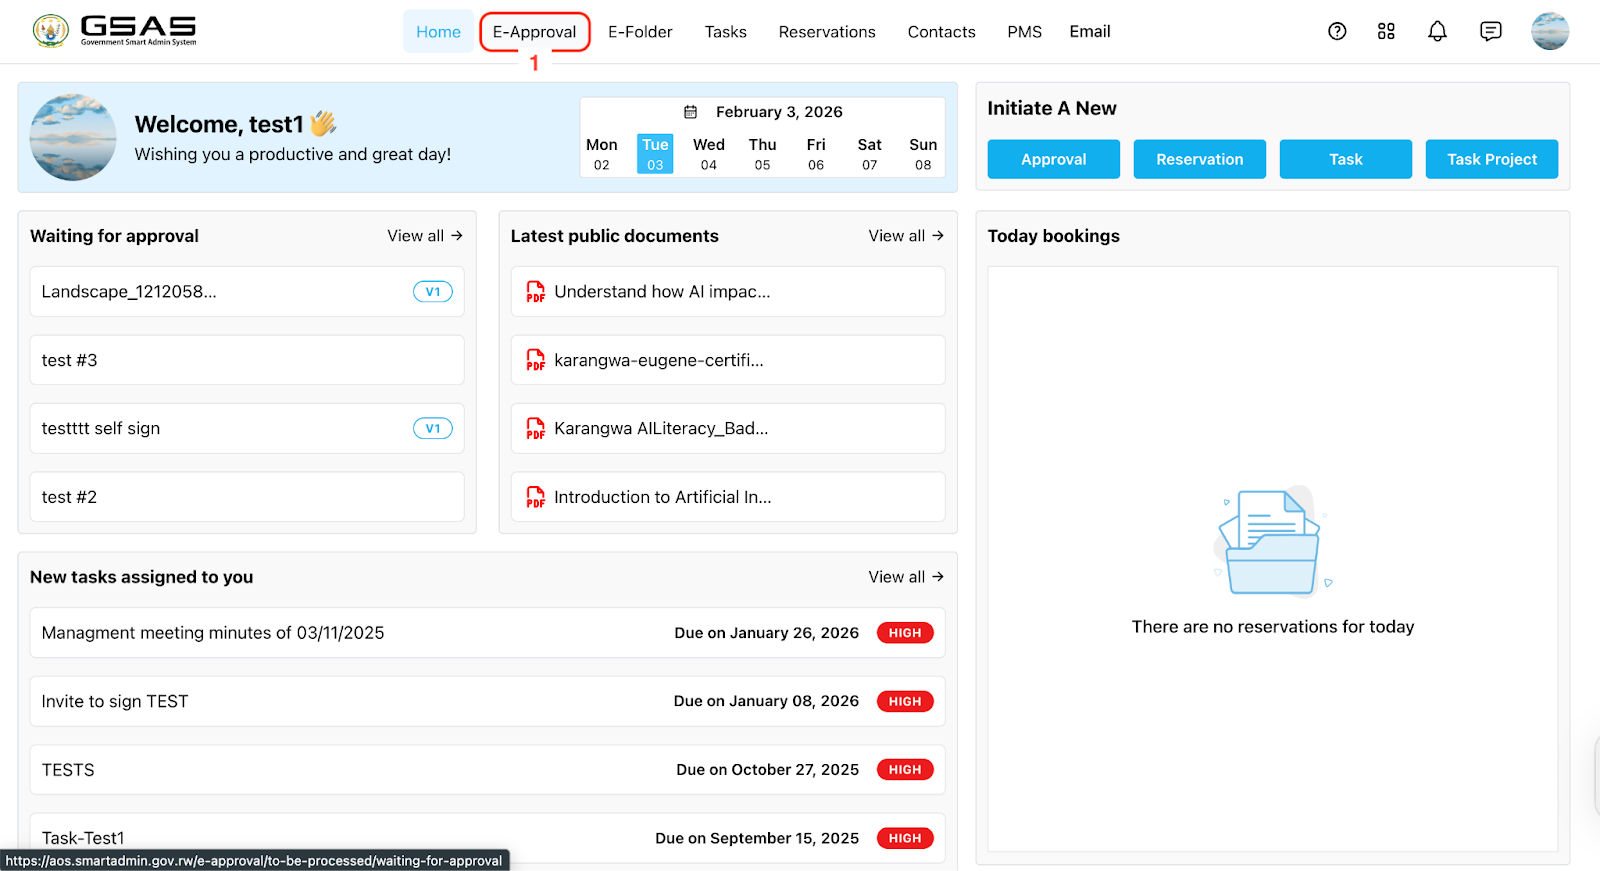
Step 1: Access eApproval
Navigate to the eApproval section of the system.
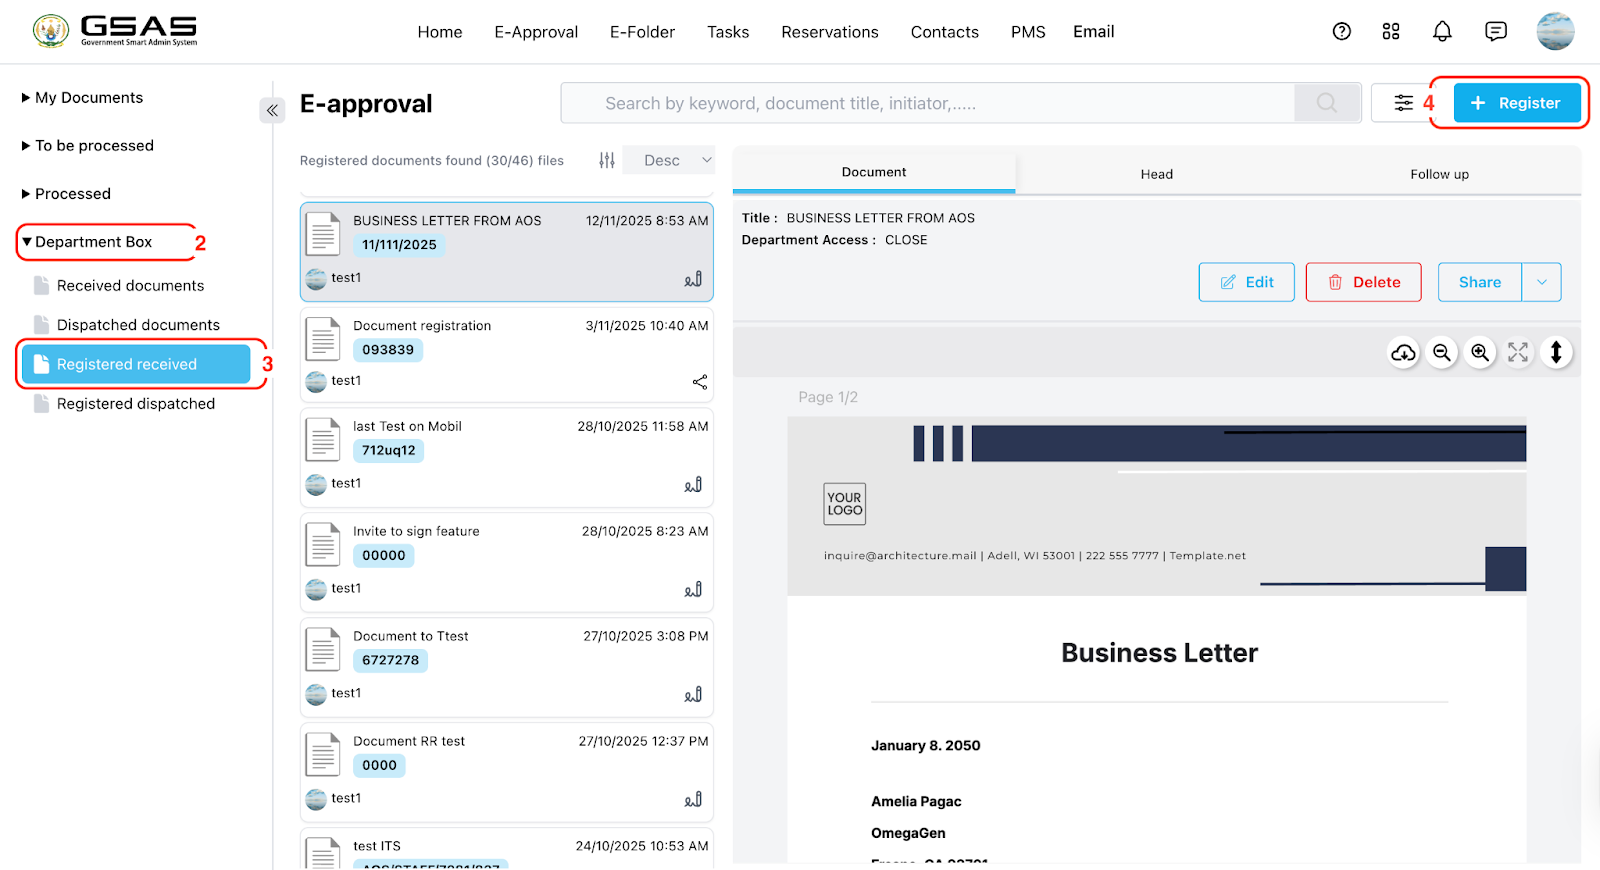
Go to the department box.
Go to Registered Received
Click on the “Register” button to begin the document registration process.
Step 2: Document Details Entry
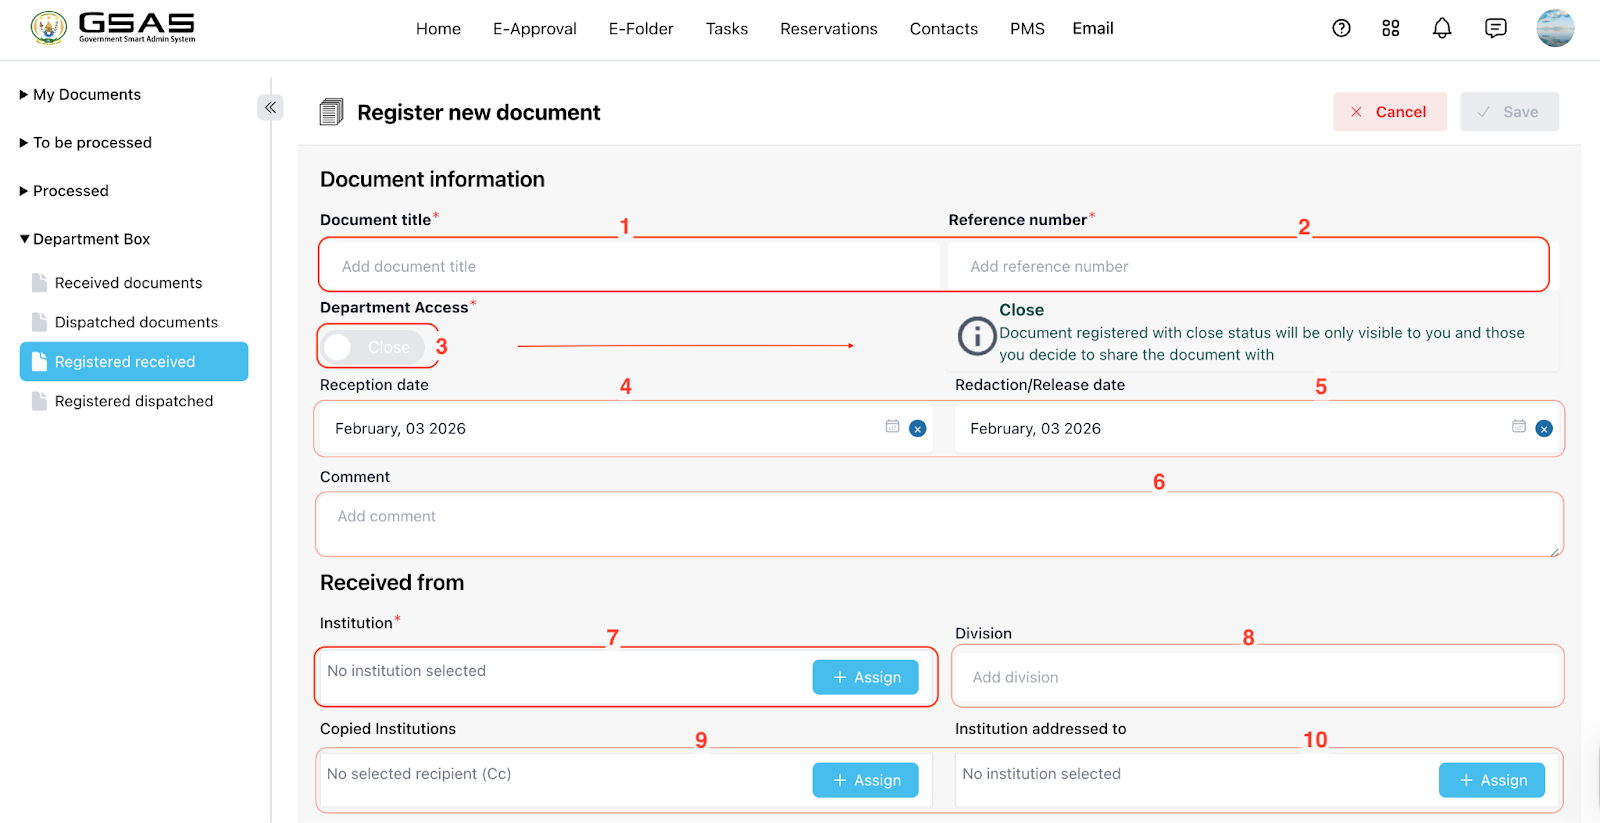
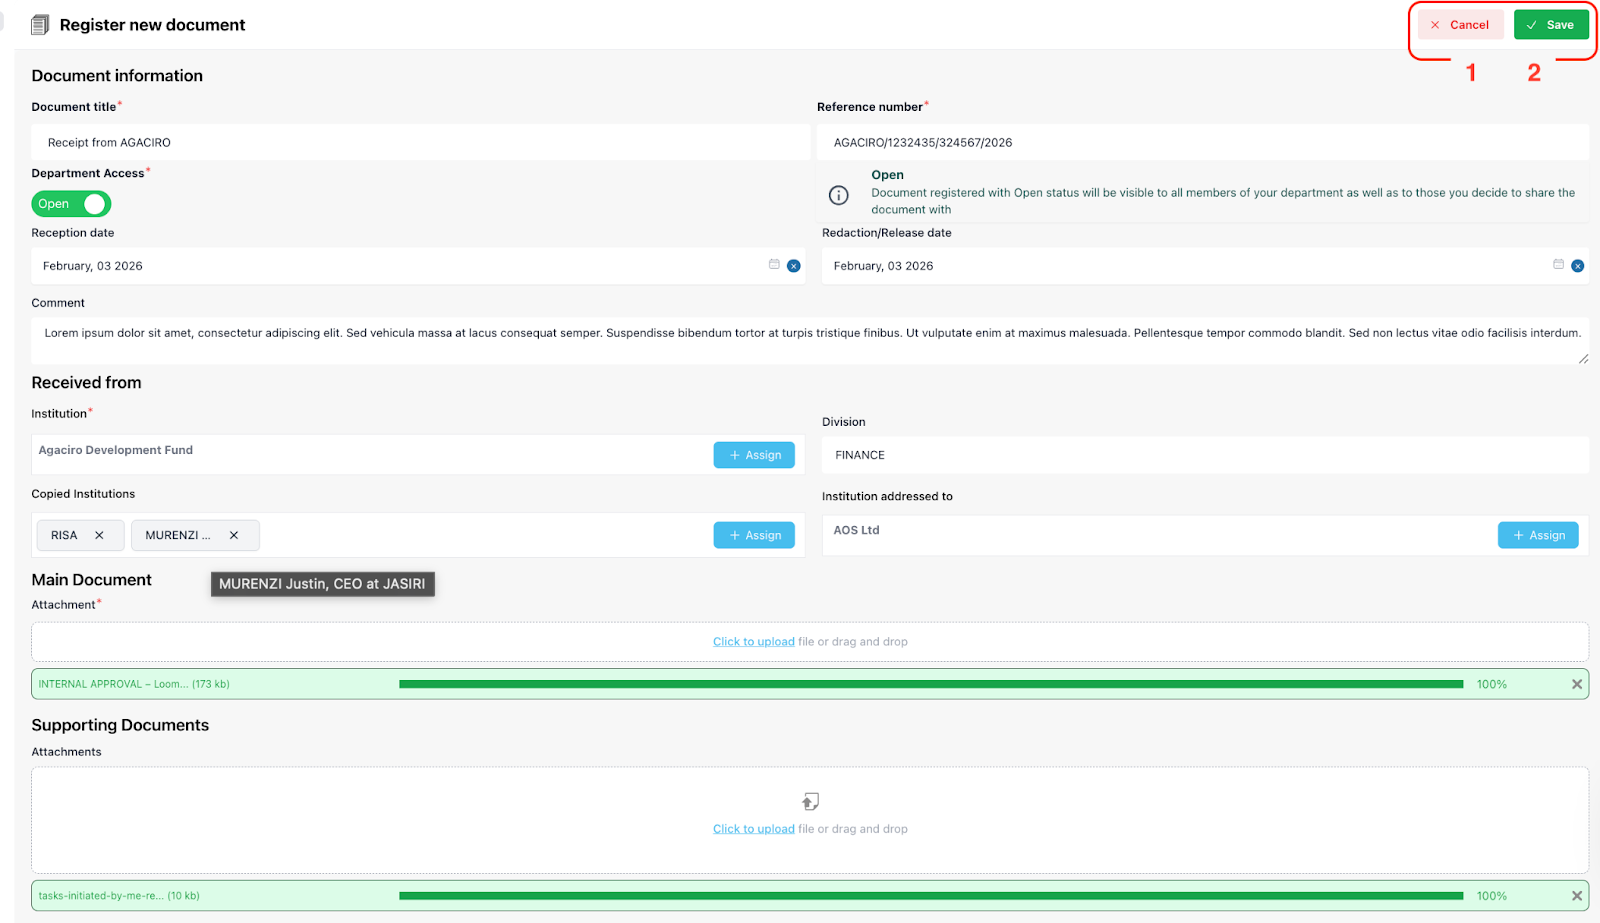
Input the title of your document.
Add the document’s reference number.
Determine access to the document for other team members in your department. (Refer to the cautious message on the side.)
Add reception date
Add redaction date (Date of when the document is/will be handled)
Optionally, add comments summarizing your document.
Enter the institution name (e.g., AOS).
Specify the division (e.g., HR) if necessary.
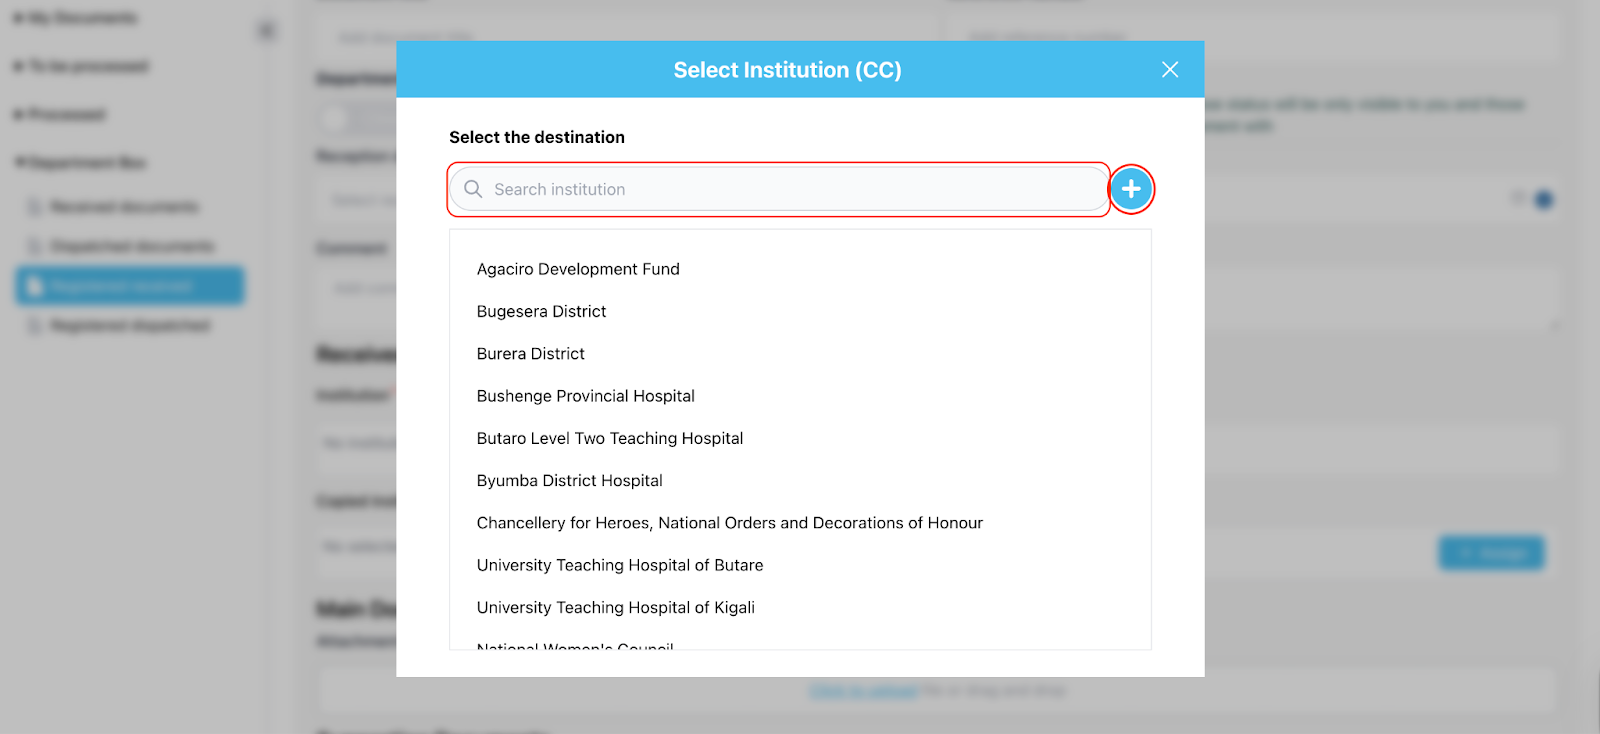
Select/Enter the copied institution or type it using the add (+) button.
Select/Enter the addressed institution or type it using the add (+) button.
→ After clicking the “+ Assign” button, a new model will open.
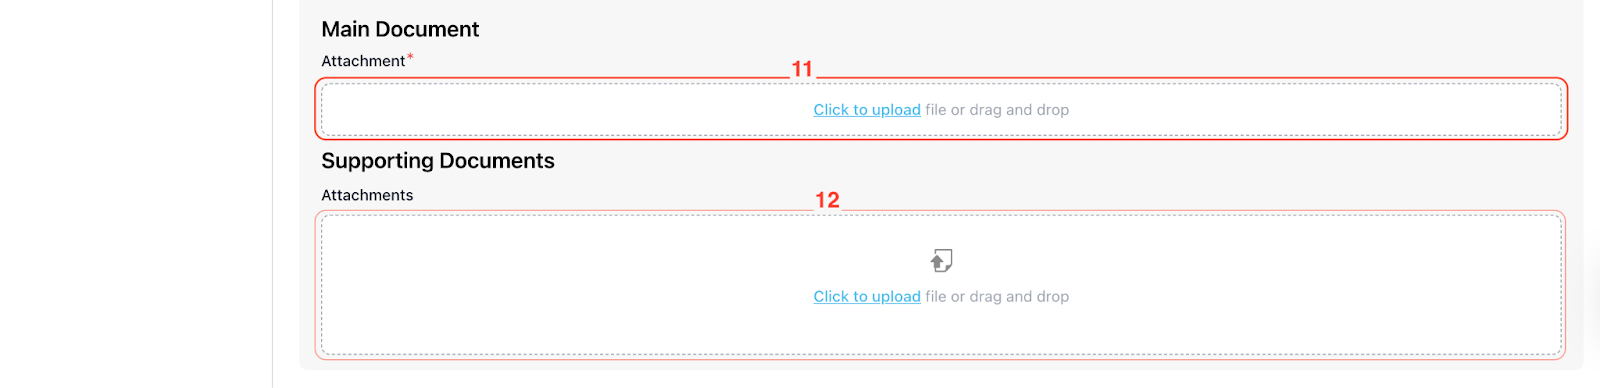
Attach the main PDF document.
If applicable, attach any supporting documents.
Step 3: Save the Document
Click ‘Cancel’ to stop the registration.
Click on 'save' to store the document in the system.
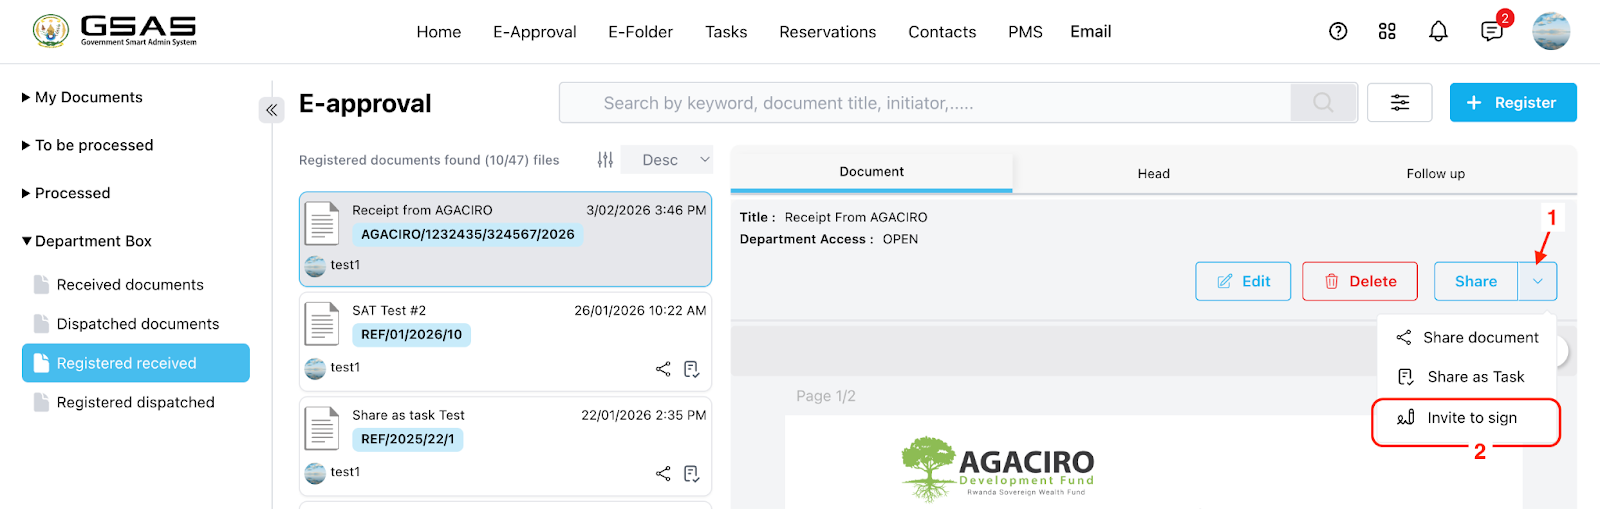
Click on 'Share'
Select 'Invite to sign'.
Step 5: Assigning Signers/Approvers
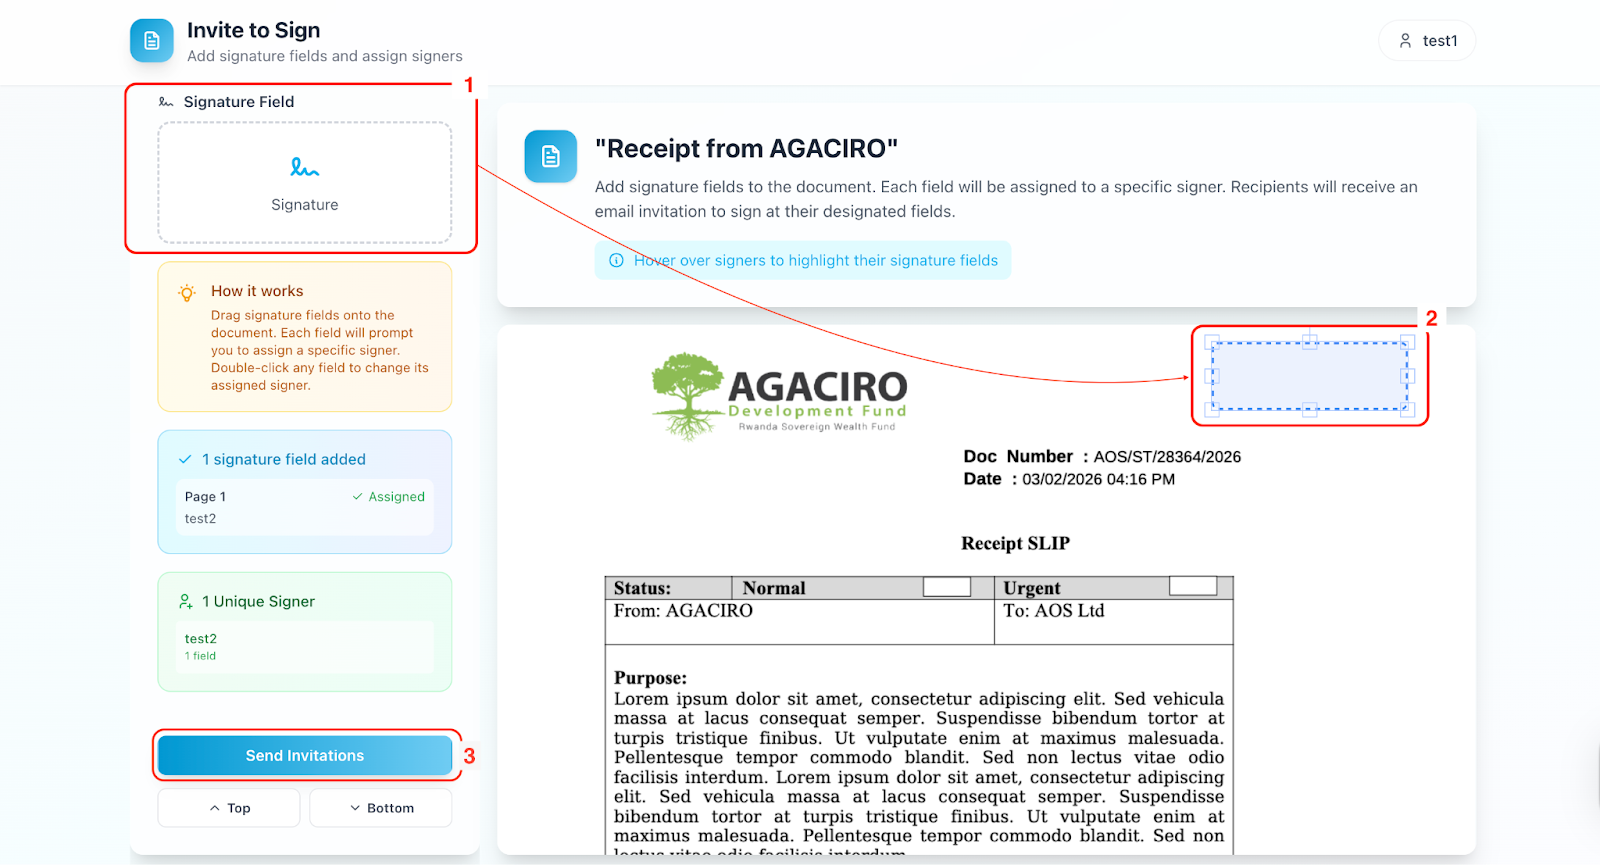
Drag and drop the signature field to the desired location in the document to select the user(s) who need to sign it (e.g., by searching for the user's name).
Adjust the signature fields as necessary.
Click on 'send invitation' to notify the selected users.
Step 6: Signing the Document
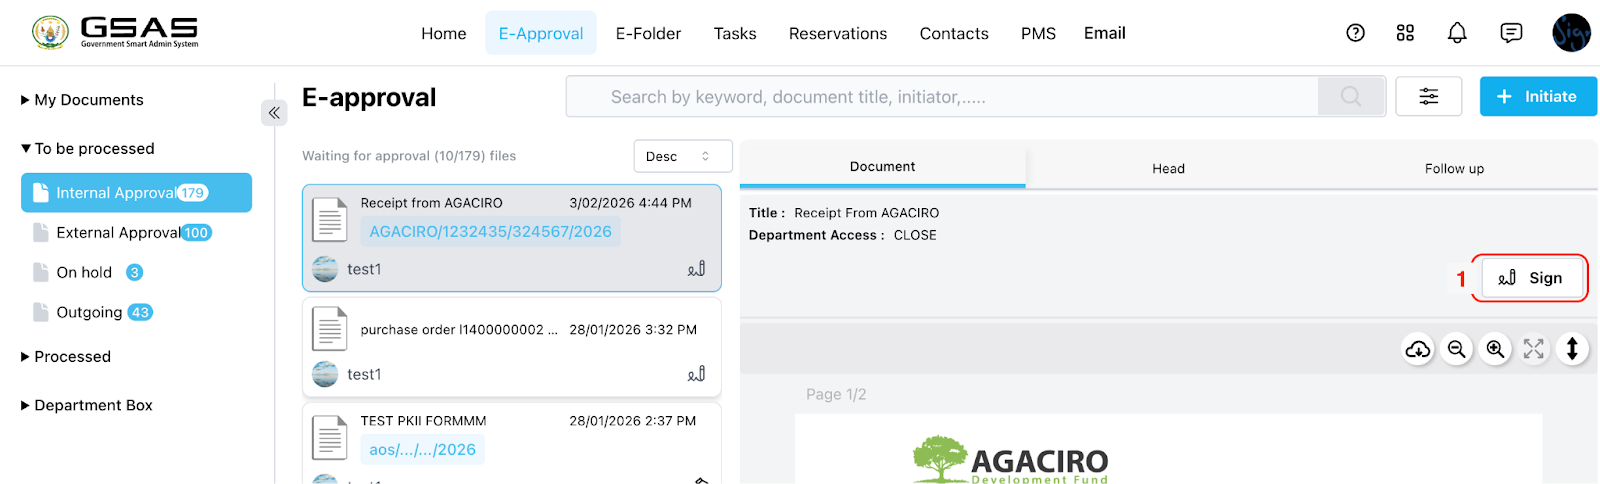
The approver will go to their account → go to eApproval → Go to the ‘To be processed’ folder → Check for the pending document in ‘Internal Approval.’
Select the document to be signed, then click ‘Sign.’
Newly opened tab, ‘Drag & Drop’ your signature to the highlighted field.
The user can also drag & drop other fields, such as date, name, or custom text.
Click 'complete' after signing.

Step 7: Access Completed Document
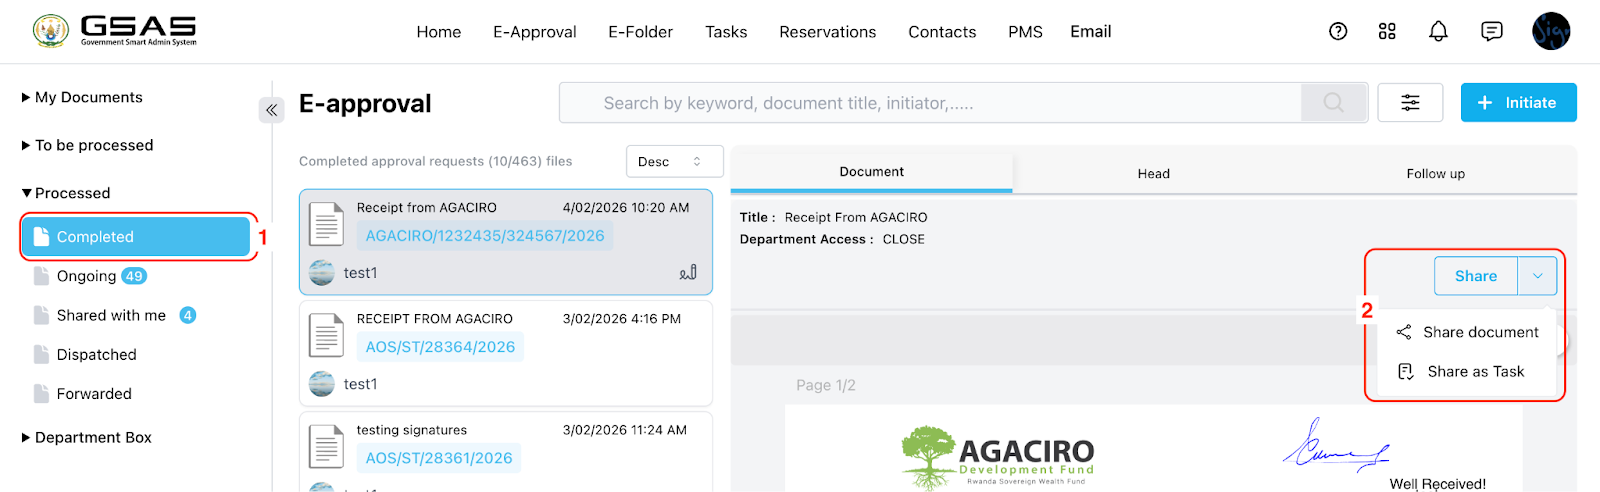
Once all signatures are collected, the document is marked as complete.
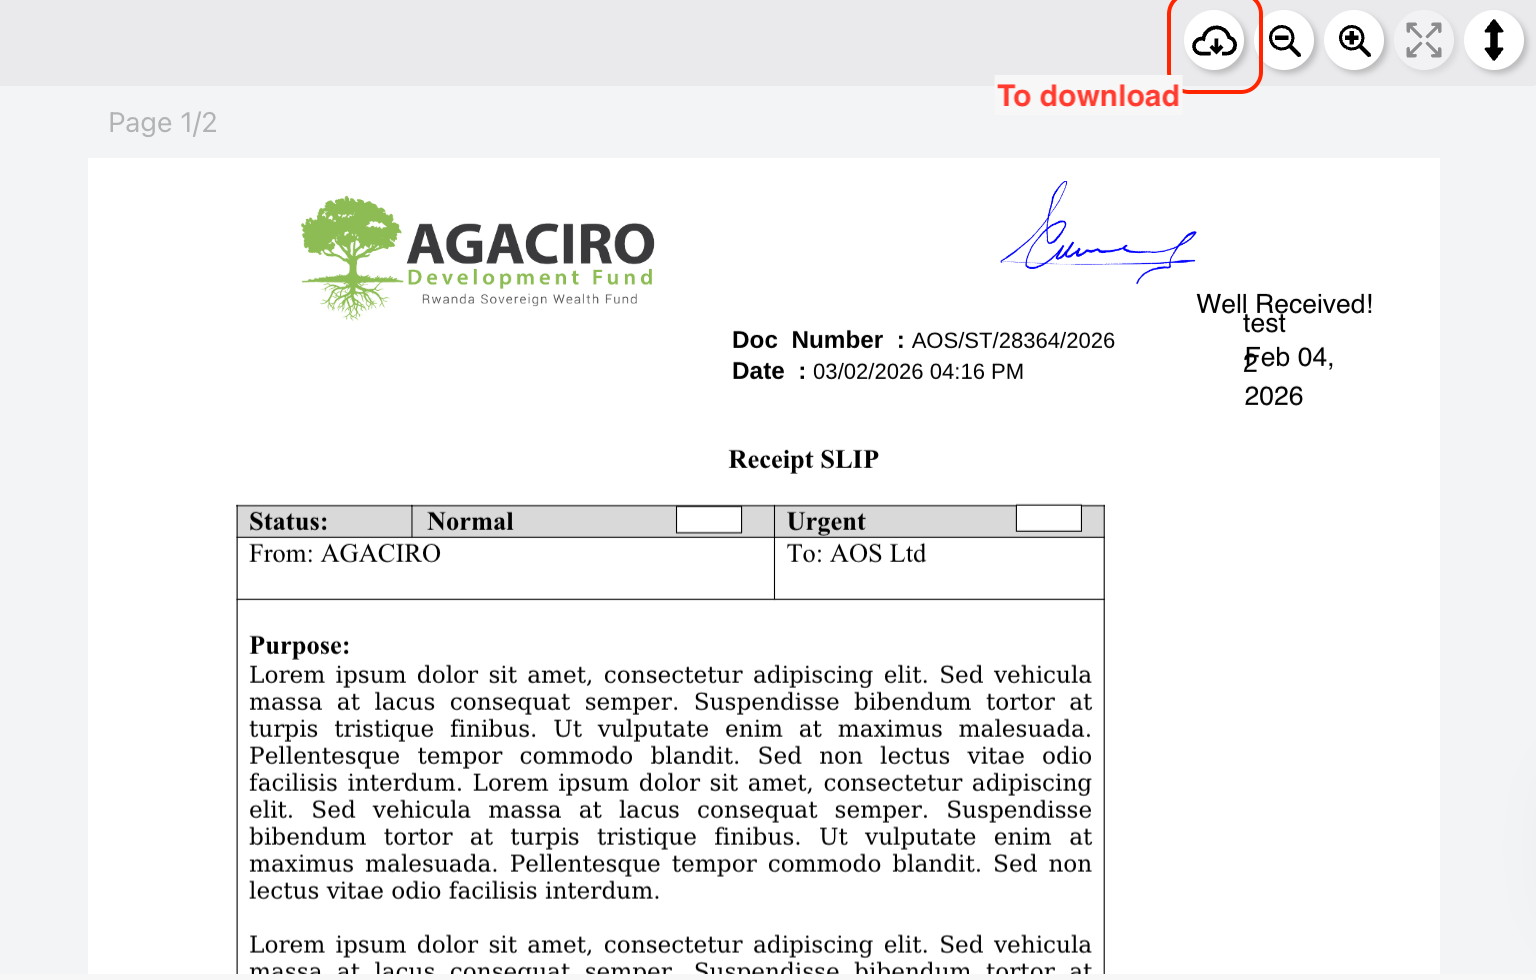
The drafter or approvers can now download, share, or view the completed document.
Notes
Ensure all required fields are filled out before saving the document.
Double-check the email addresses of the users you are inviting to sign up to avoid sending invitations to the wrong individuals.