Your account and profile
Your Profile
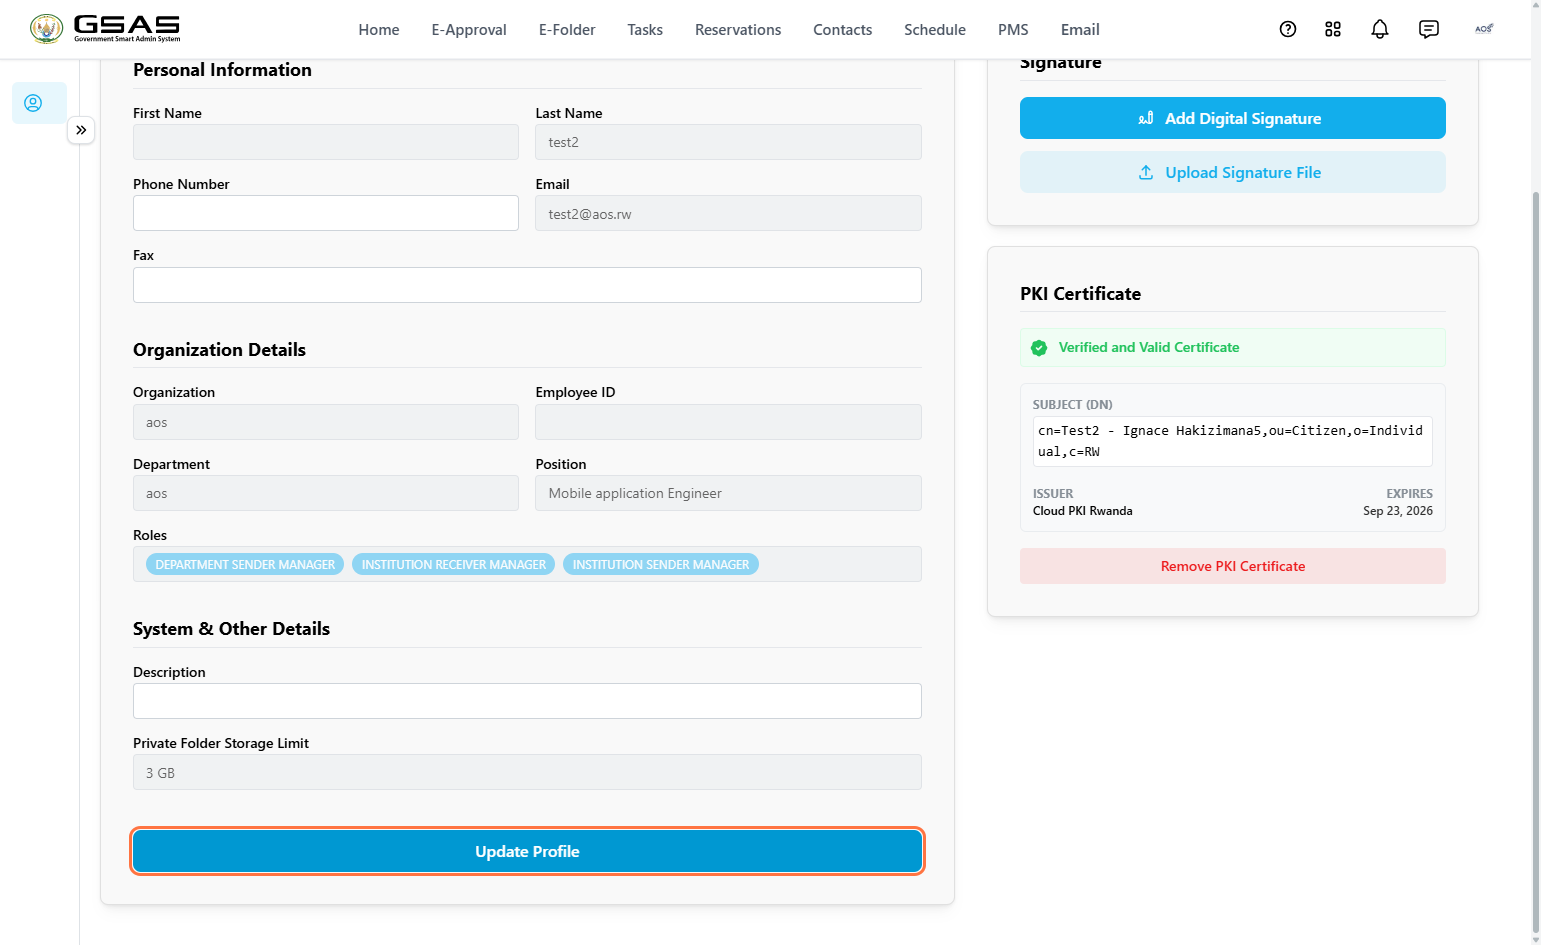
Your profile page gives you an overview of your account and organizational details. Some fields are managed by your administrator, you can only edit a few fields yourself.
| How your account is set up: Once your account is synchronized to Smart Admin, the IT Administrator of your institution sets up your organizational details (department, position) and assigns you any relevant roles. |
Accessing your profile
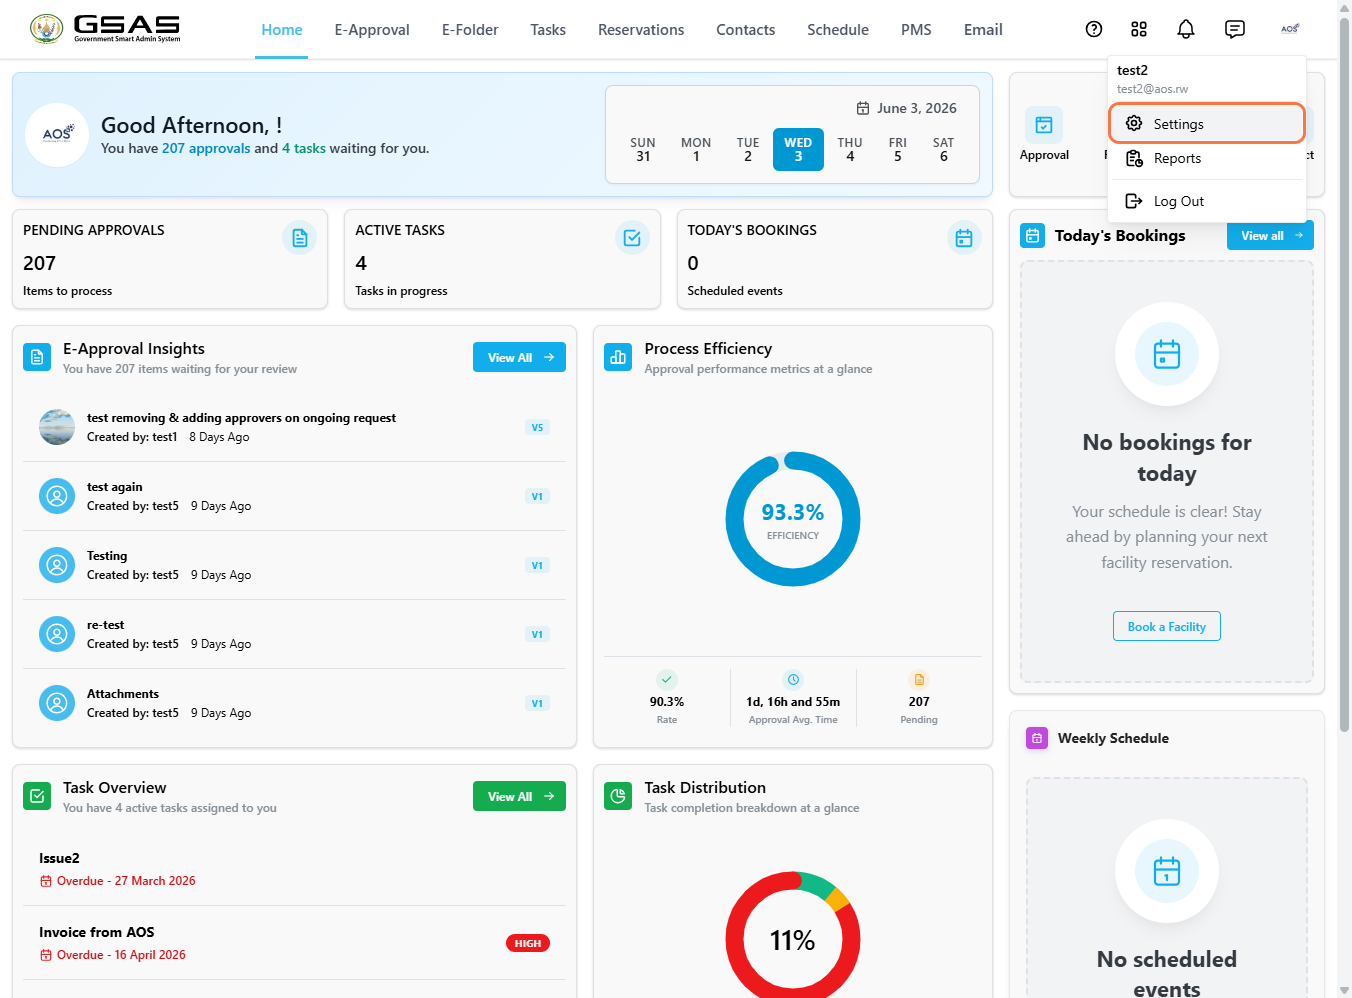
Click your avatar in the top right corner of the screen, then select Settings from the dropdown menu.
Personal Information
These fields identify you within the system. Only Phone Number and Fax can be edited by you. All other fields are set by your administrator.
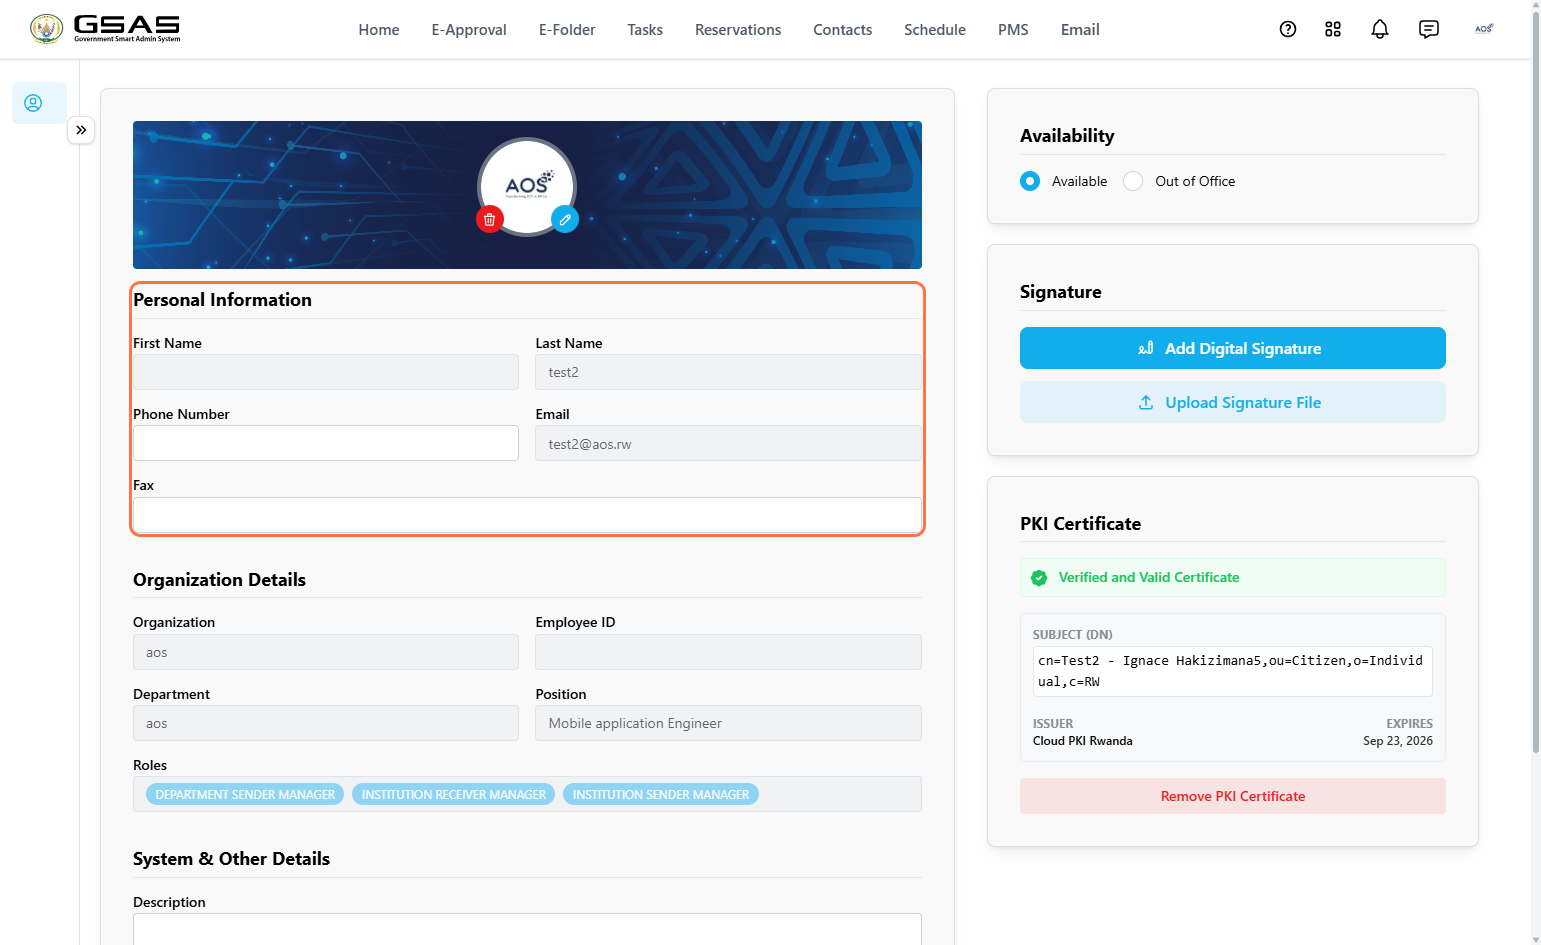
| First Name | Set by your administrator. Contact them if this needs to be corrected. |
| Last Name | Set by your administrator. Contact them if this needs to be corrected. |
| Phone Number | You can update this yourself at any time. |
| Your login email. Not editable. | |
| Fax | You can update this yourself at any time. |
Organization Details
These fields reflect your place within the institution. They are all managed by your administrator, you cannot edit them yourself.
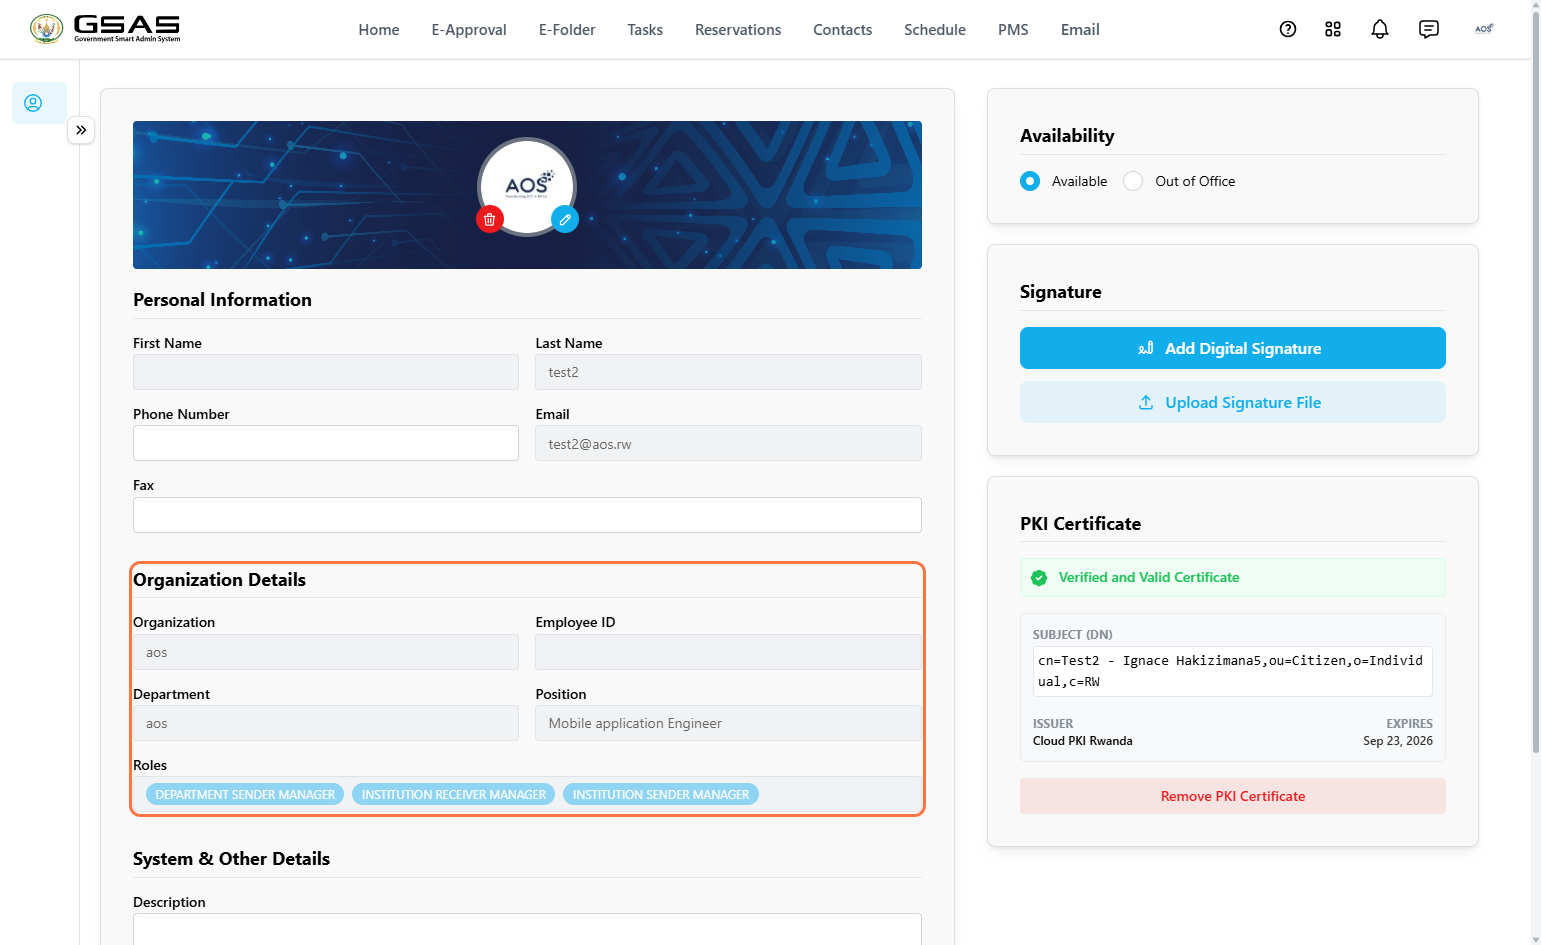
| Organization | The name of your institution. |
| Employee ID | Your employee identification number, if applicable. |
| Department | The department you have been assigned to by your administrator. |
| Position | Your job position within your department. Assigned by your admin. |
| Roles | Roles control what you can see and do in the system. Assigned by your administrator if applicable. |
System & Other Details
Additional details about your account. Only Description can be edited by you.
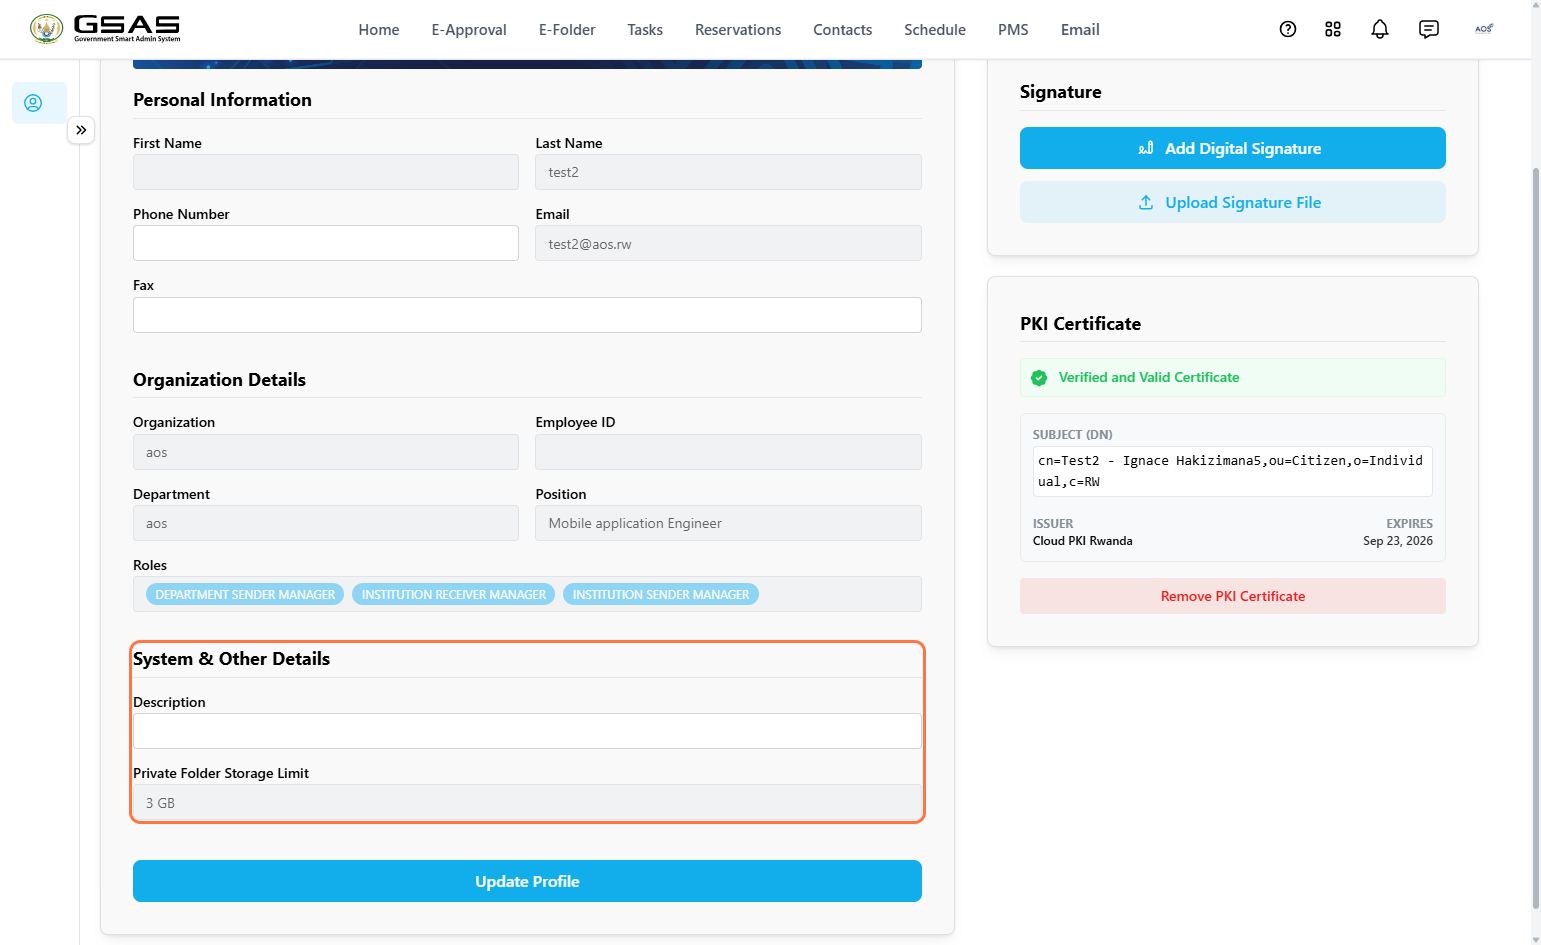
| Description | A short note about yourself. You can update this yourself at any time. |
| Private Folder Storage Limit | Displays the storage limit allocated to your account. The default is 1 GB, but your administrator can increase it if needed. |
Once you have made your changes, click Update Profile at the bottom of the page to save.
Availability
The Availability panel on the right side of your profile lets the system know whether you are currently reachable or away.
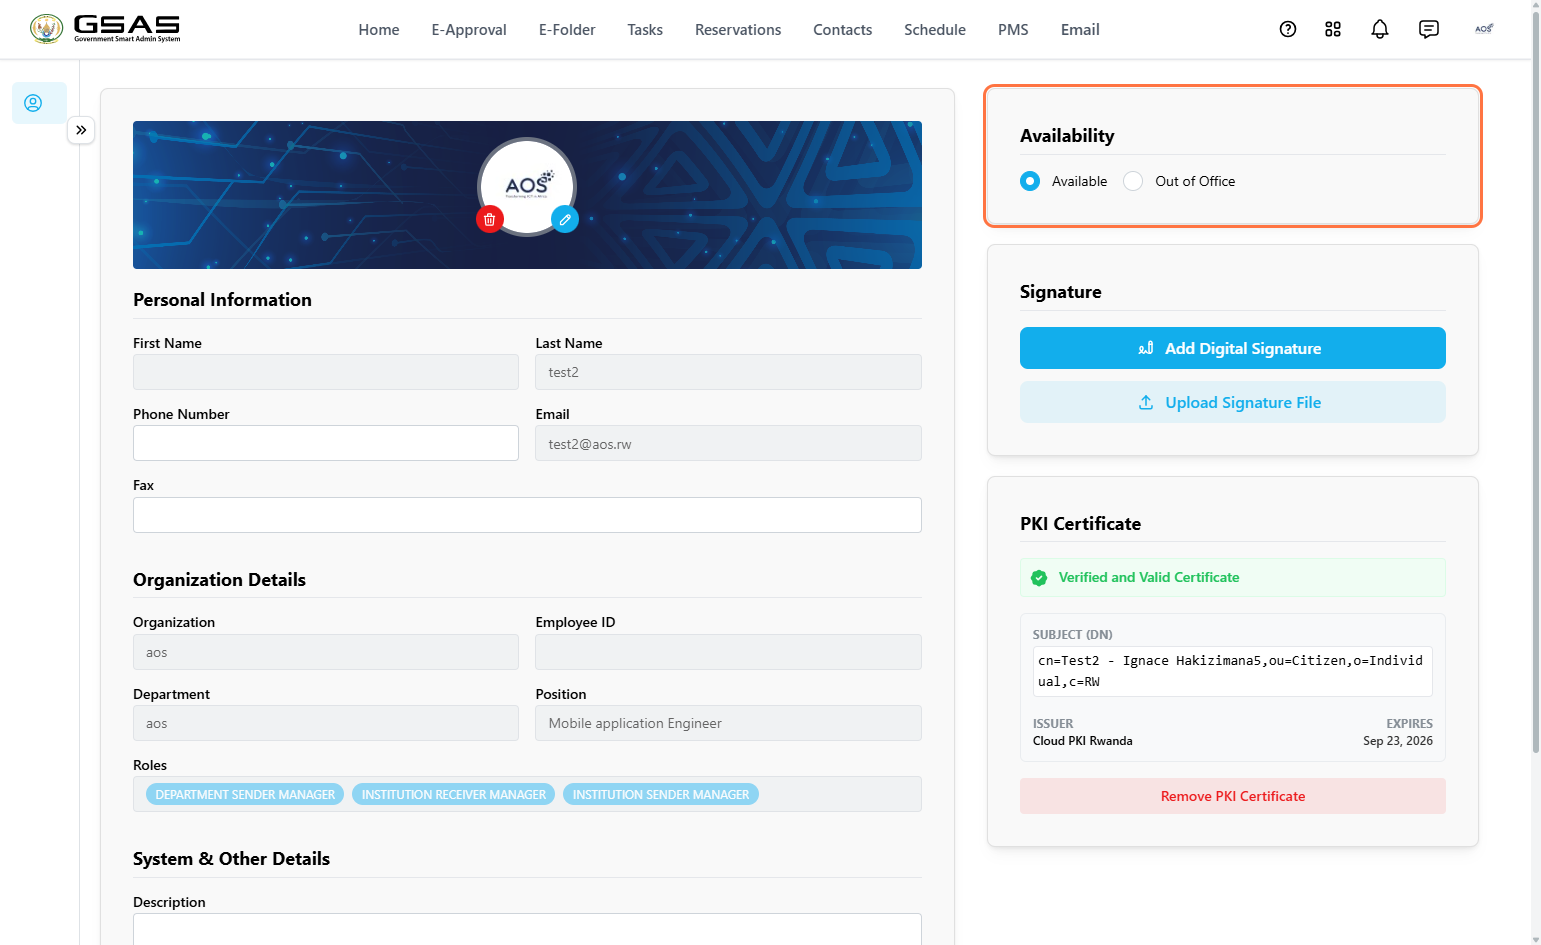
| Available | You are active and reachable. This is the default status. |
| Out of Office | Select this when you are away. You will be asked to assign a stand-in, set a date range, and provide a reason. All requests assigned to you while you are out-of-office will be sent to your stand-in. |
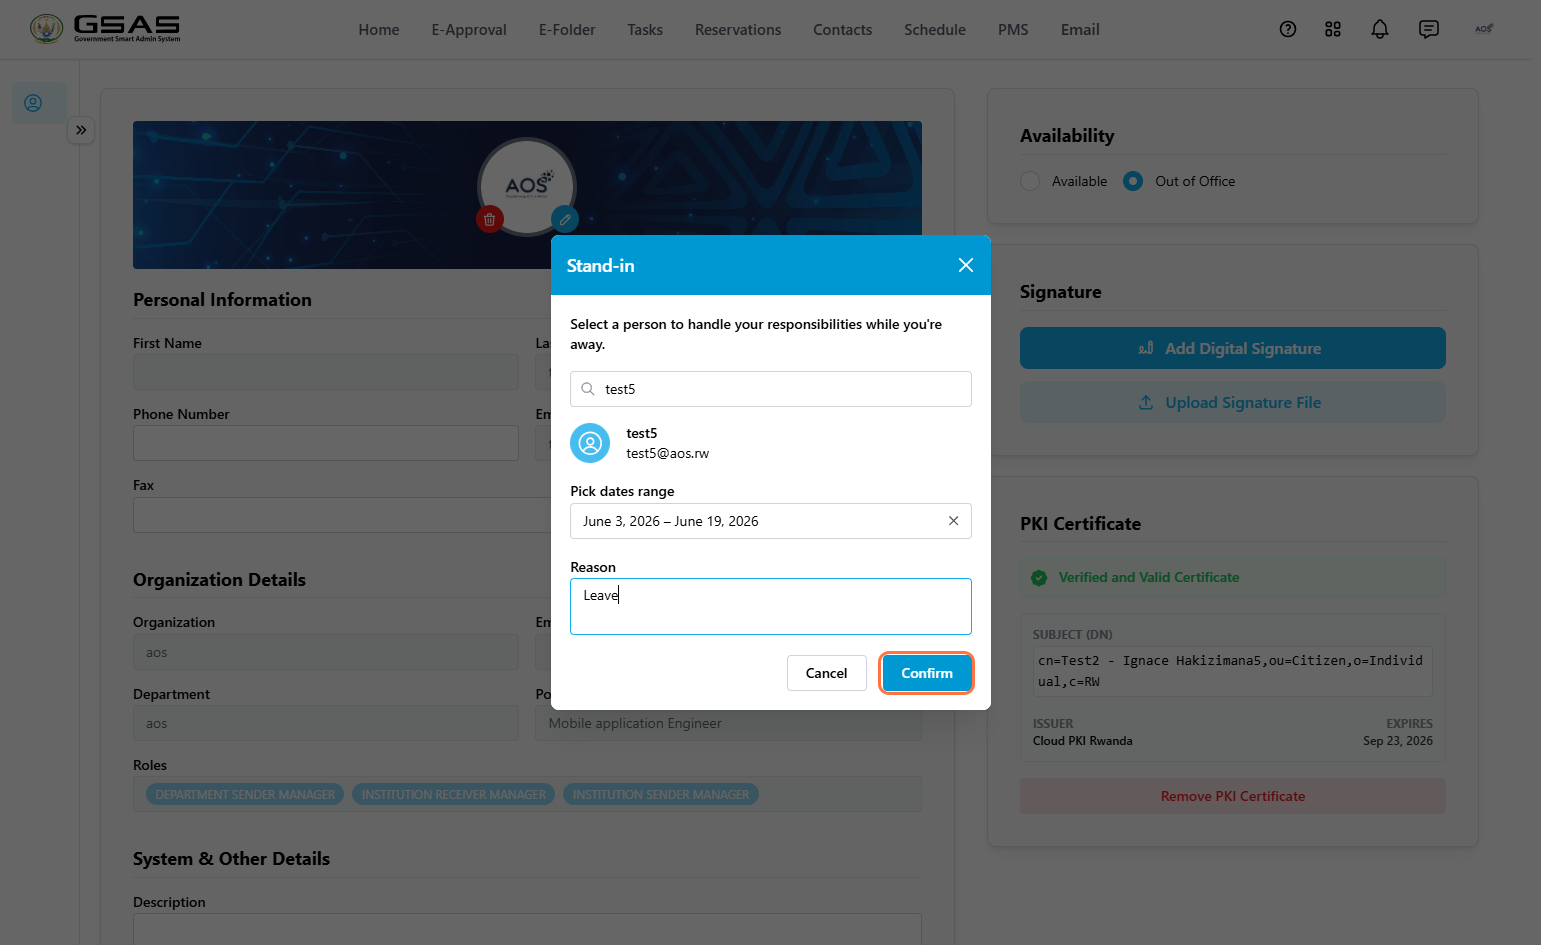
When you select Out of Office, a dialog will appear.
- Search for and select a colleague to act as your stand-in,
- Pick the dates you will be away, and enter a reason.
- Confirm.
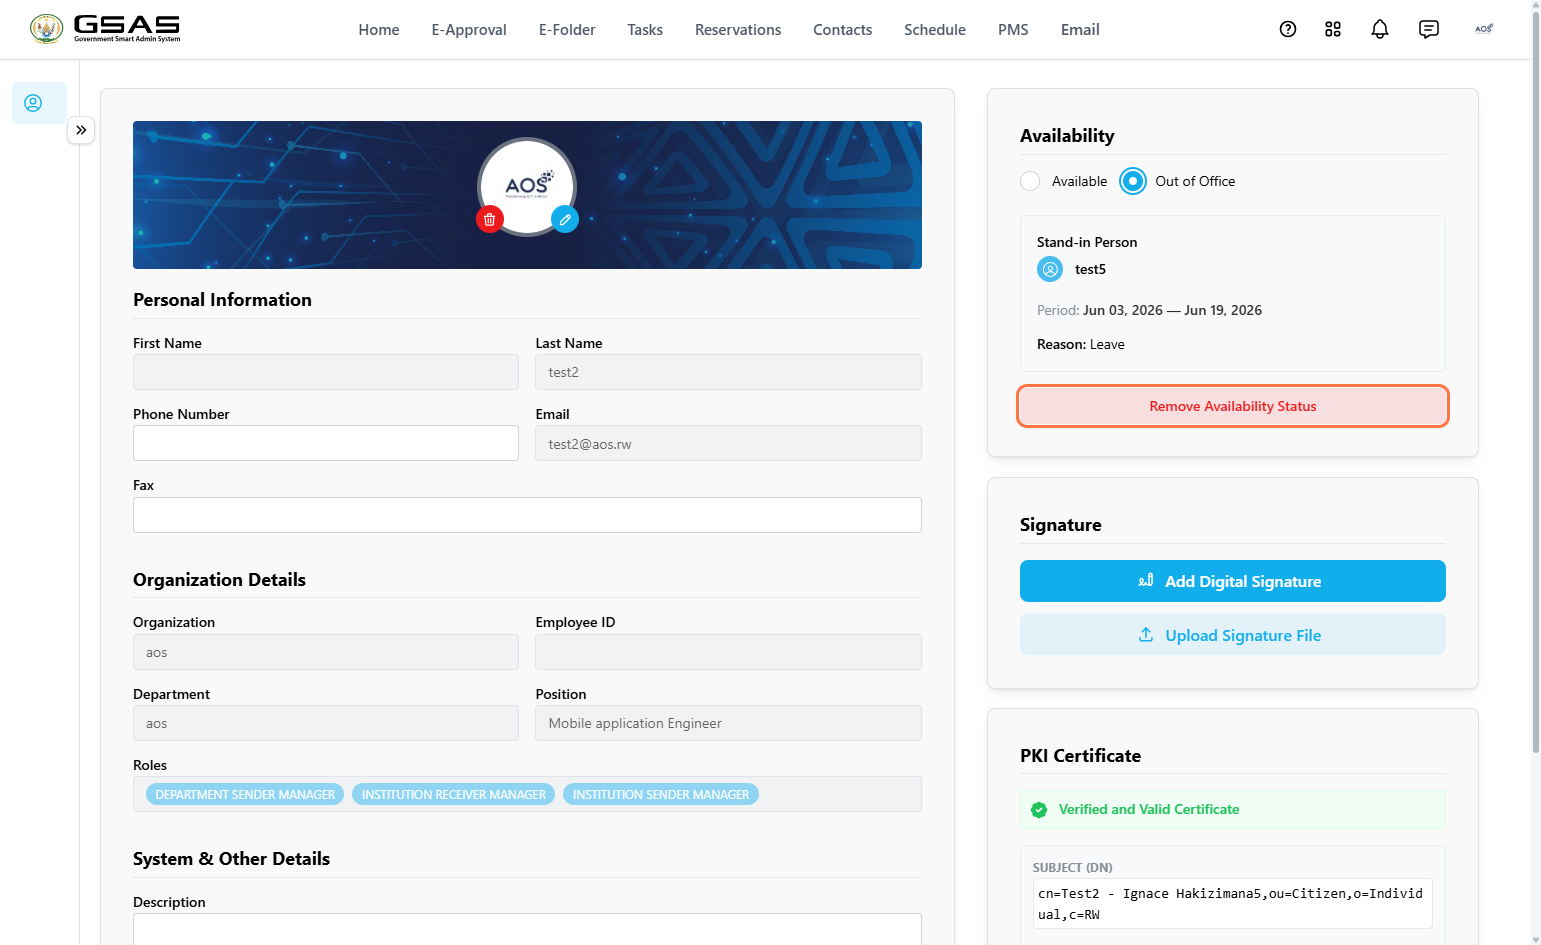
Once confirmed, your stand-in's name, the period, and the reason will appear in the Availability panel. To cancel your out-of-office status, click Remove Availability Status.
Signature
Your signature is used when submitting forms and requests in the system. You can register it in two ways.
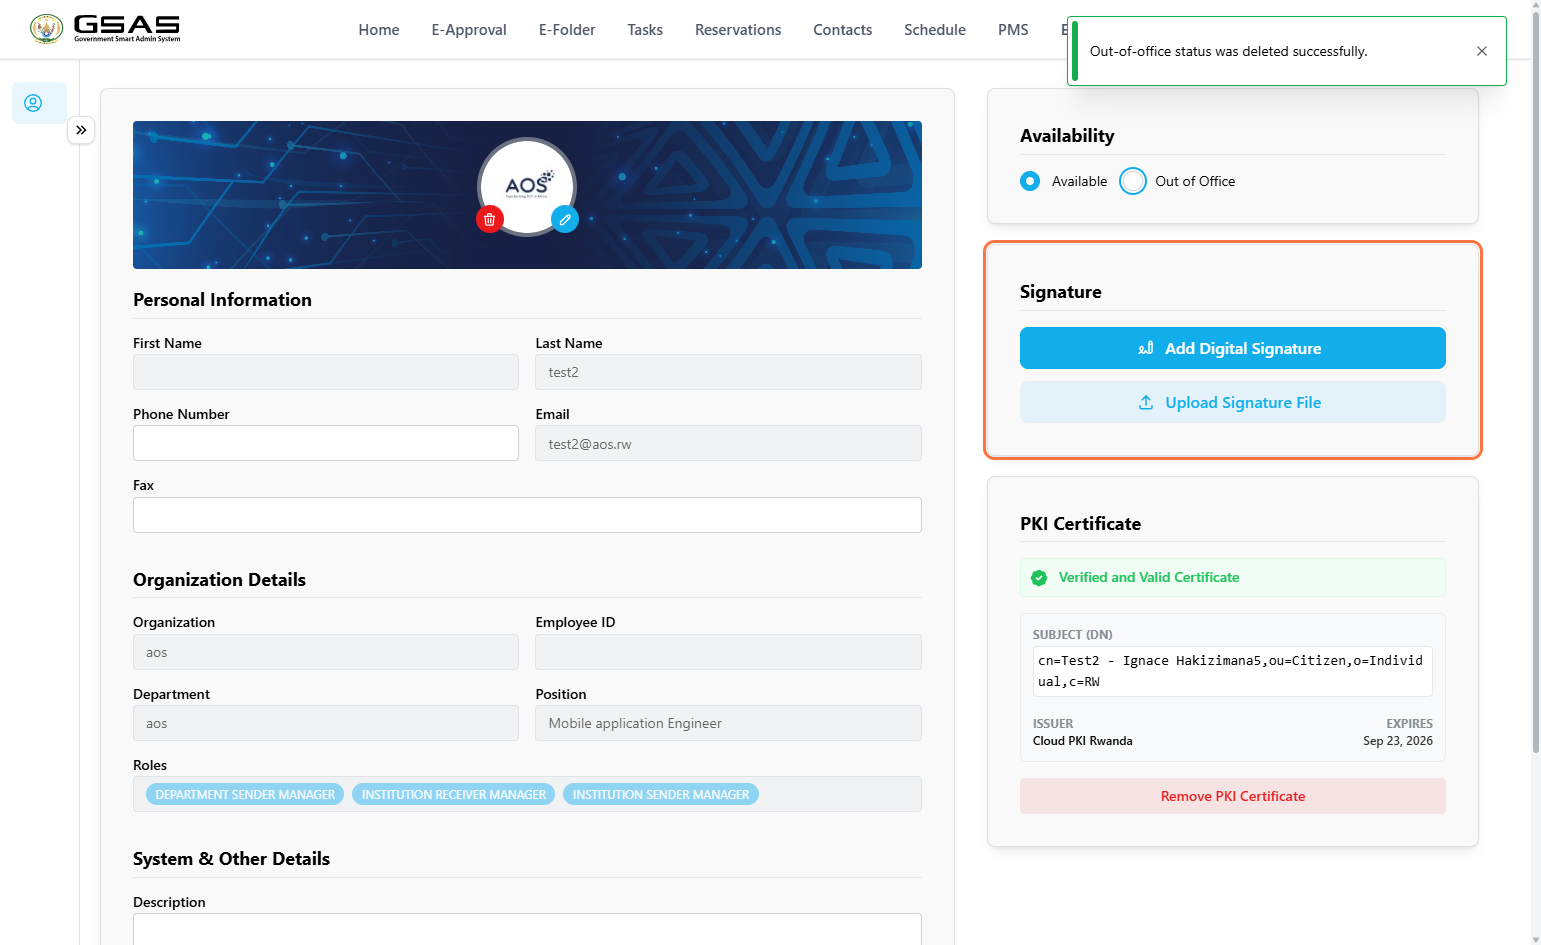
Option 1 — Draw your signature
- Click Add Digital Signature.
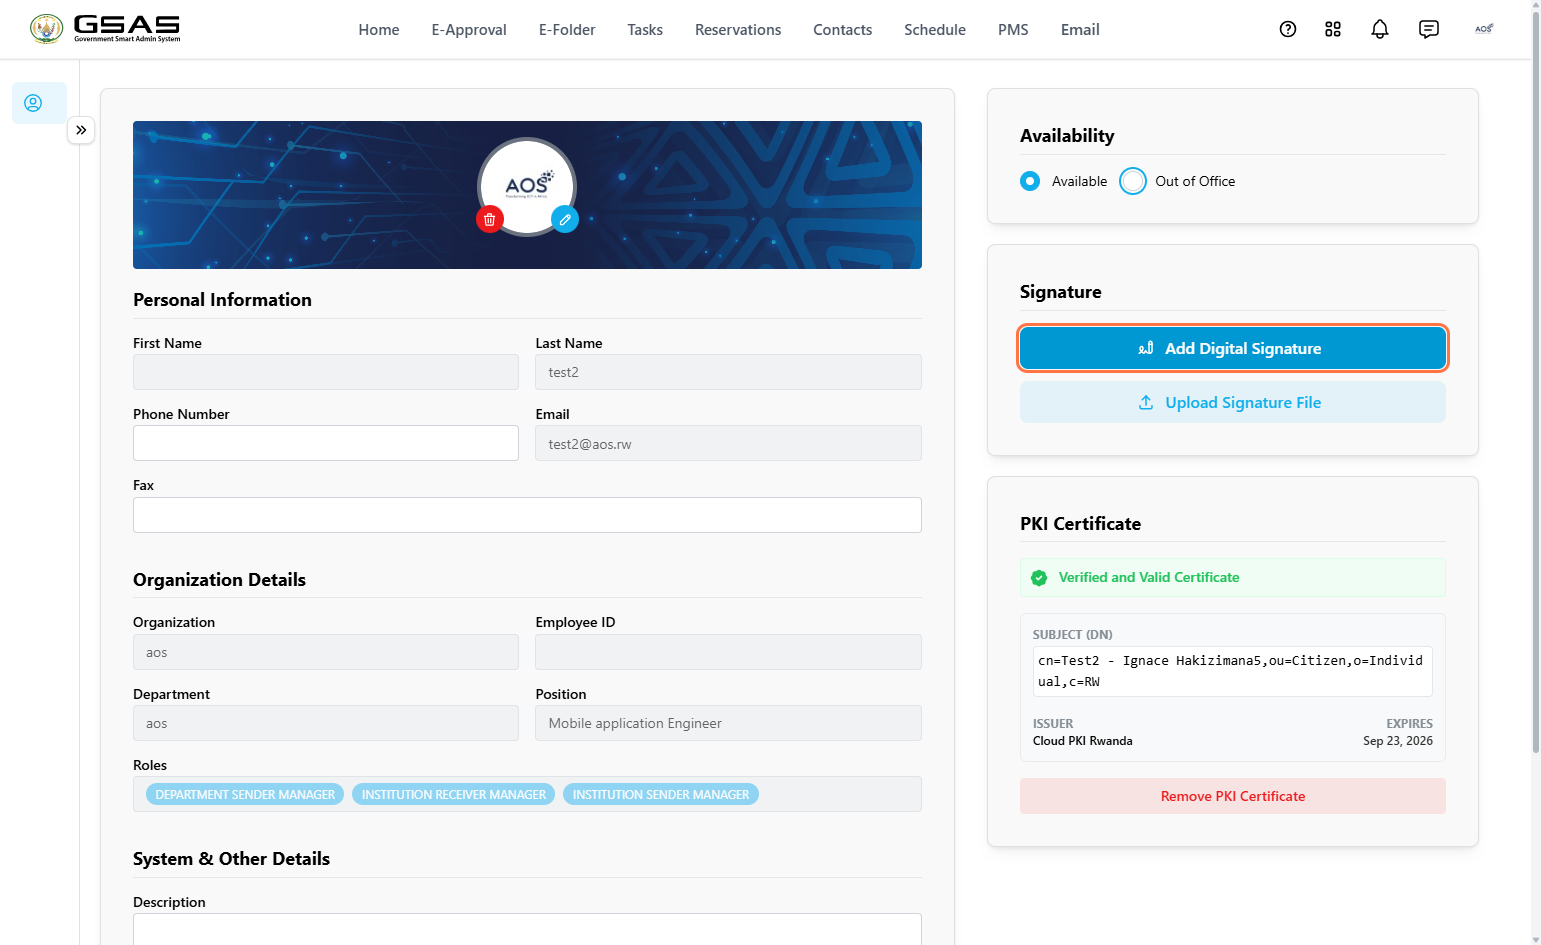
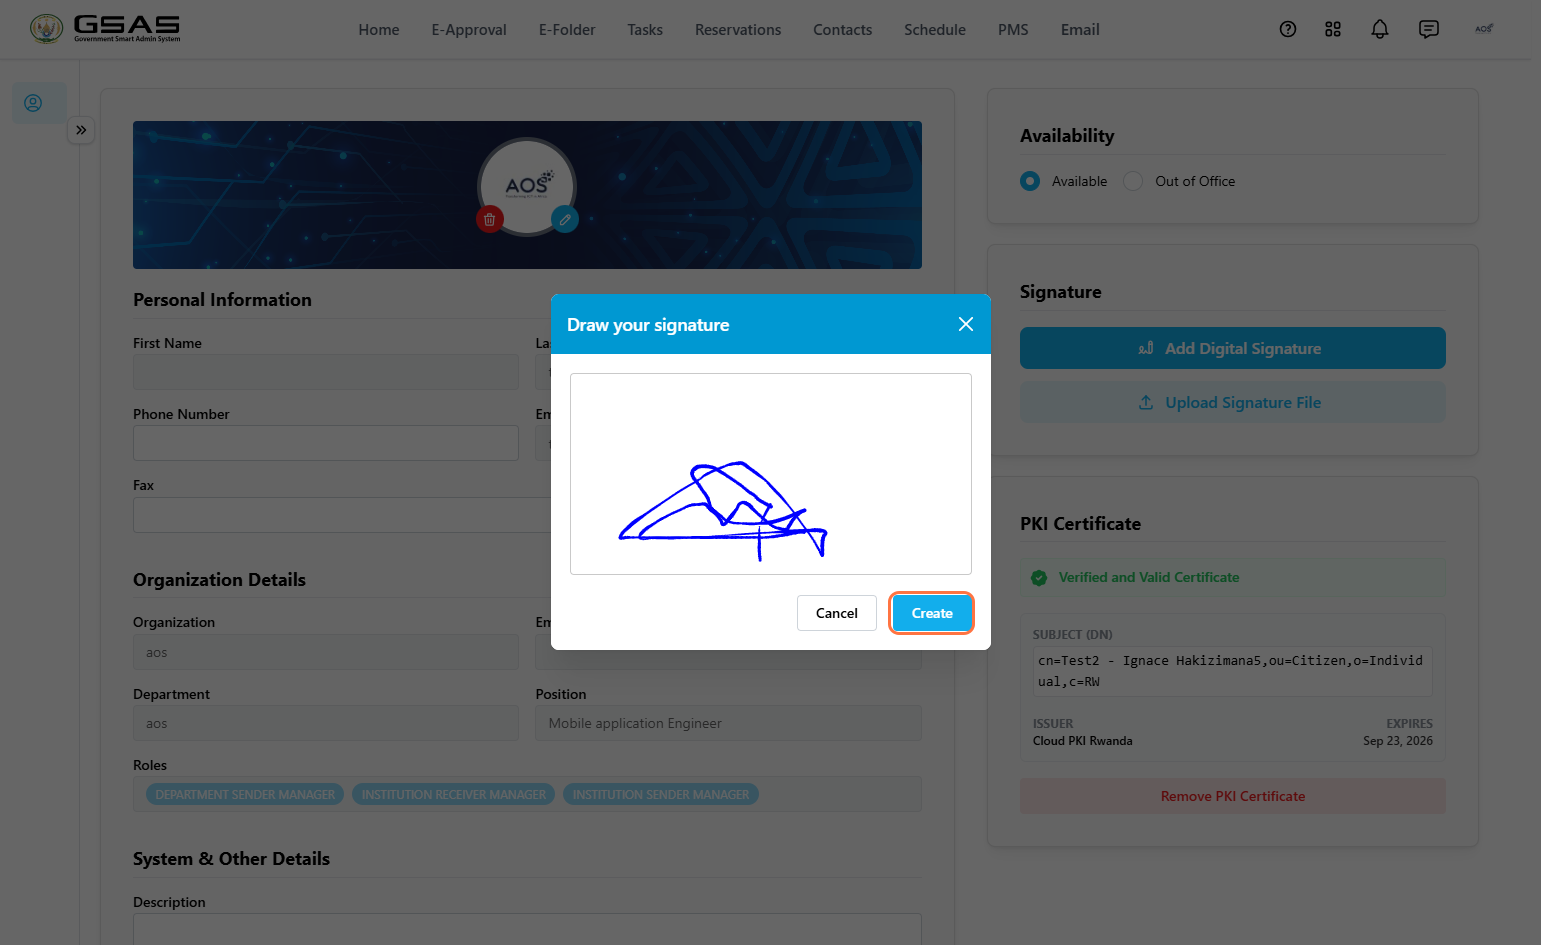
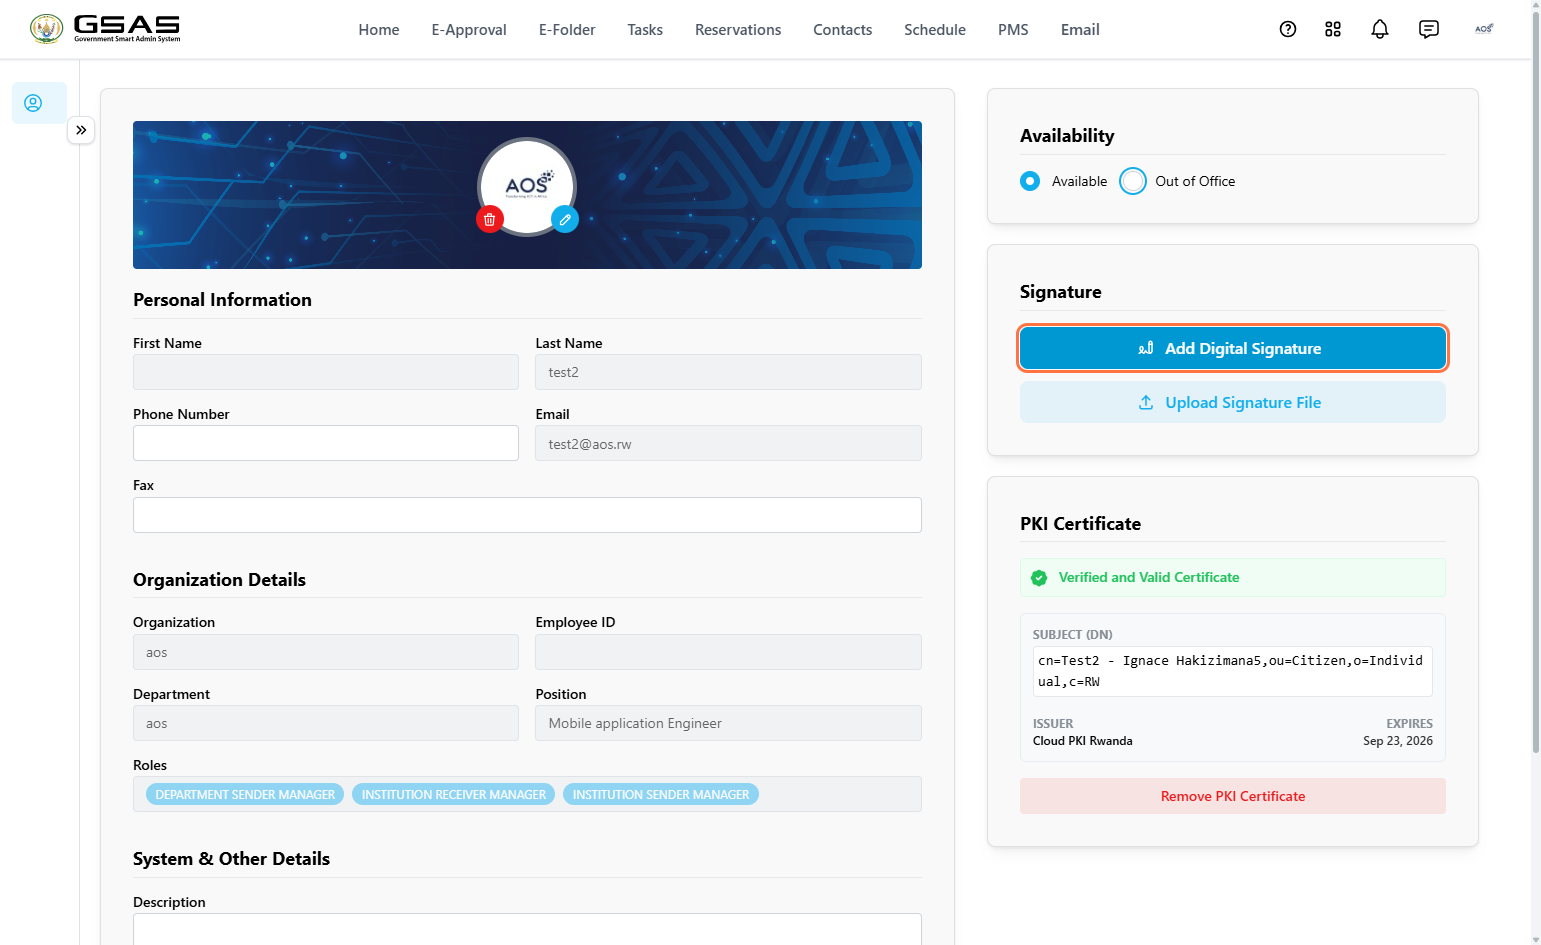
- A drawing canvas will open, use your mouse or touchscreen to draw your signature, then click Create to save it.
Option 2 — Upload a signature file
- Click Upload Signature File.
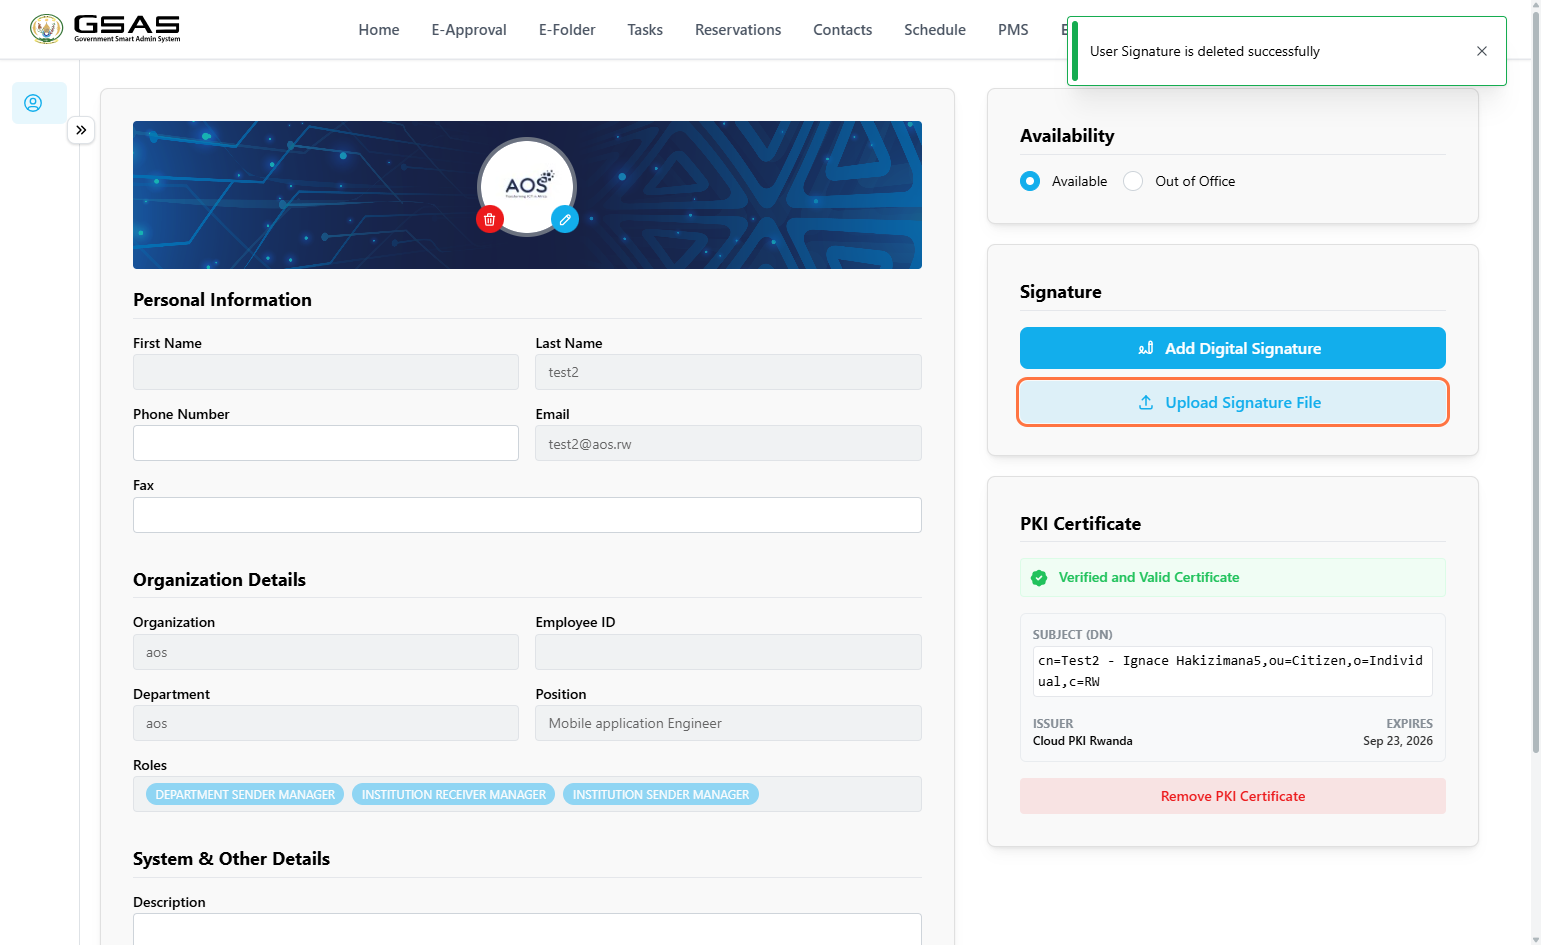
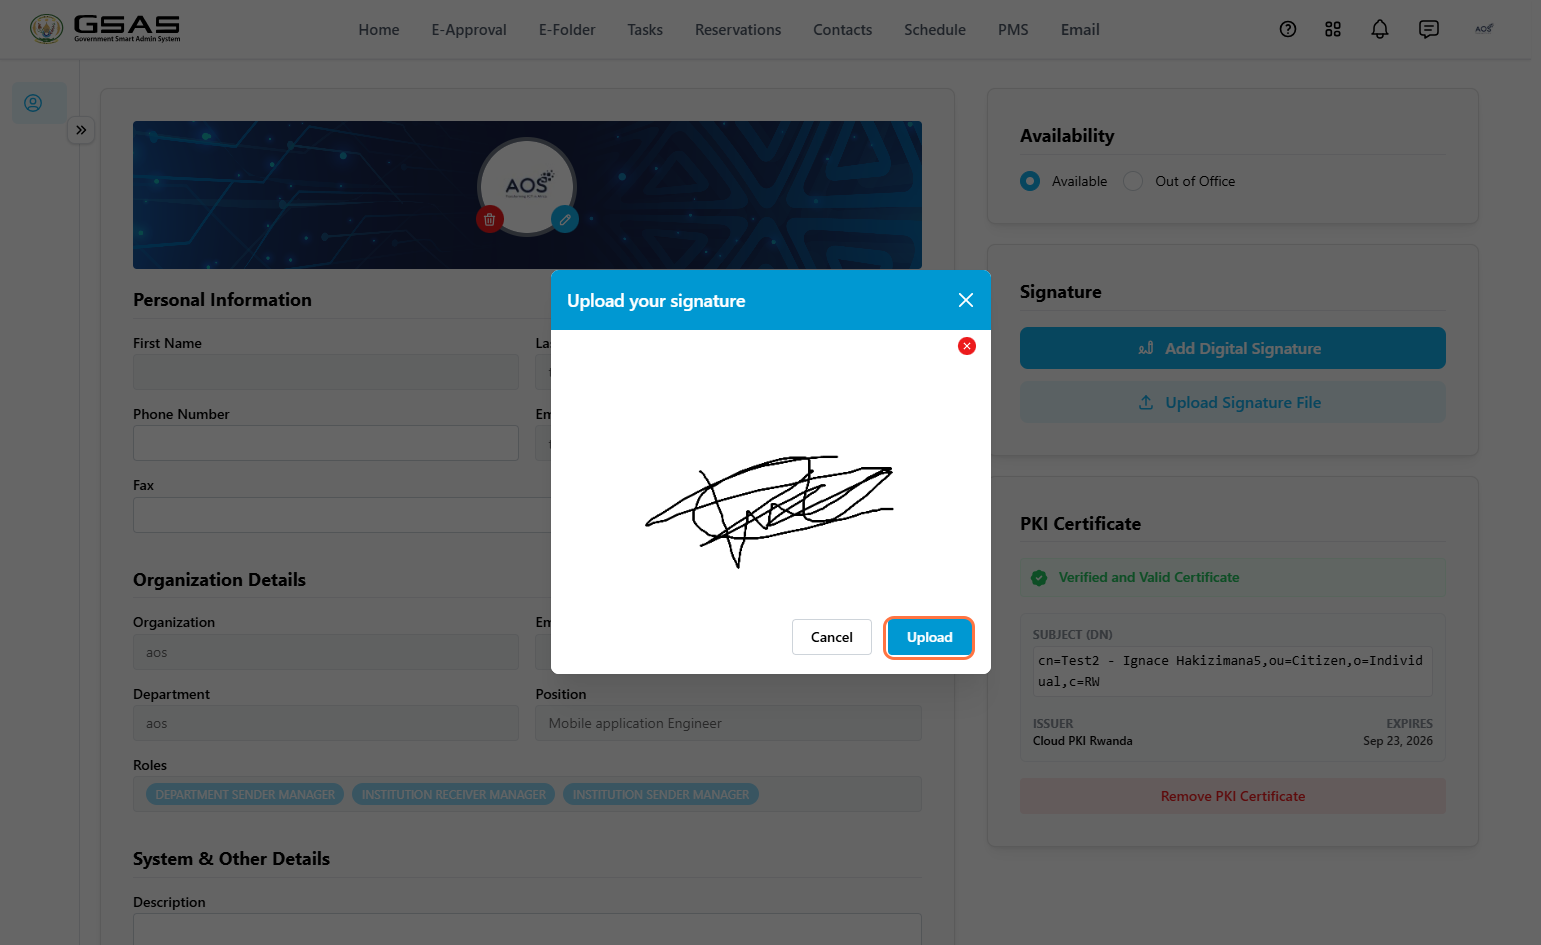
- A preview dialog will open showing your uploaded image. Click Upload to confirm. Once saved, your signature will appear in the panel. To remove it, click Remove Signature.
PKI Certificate
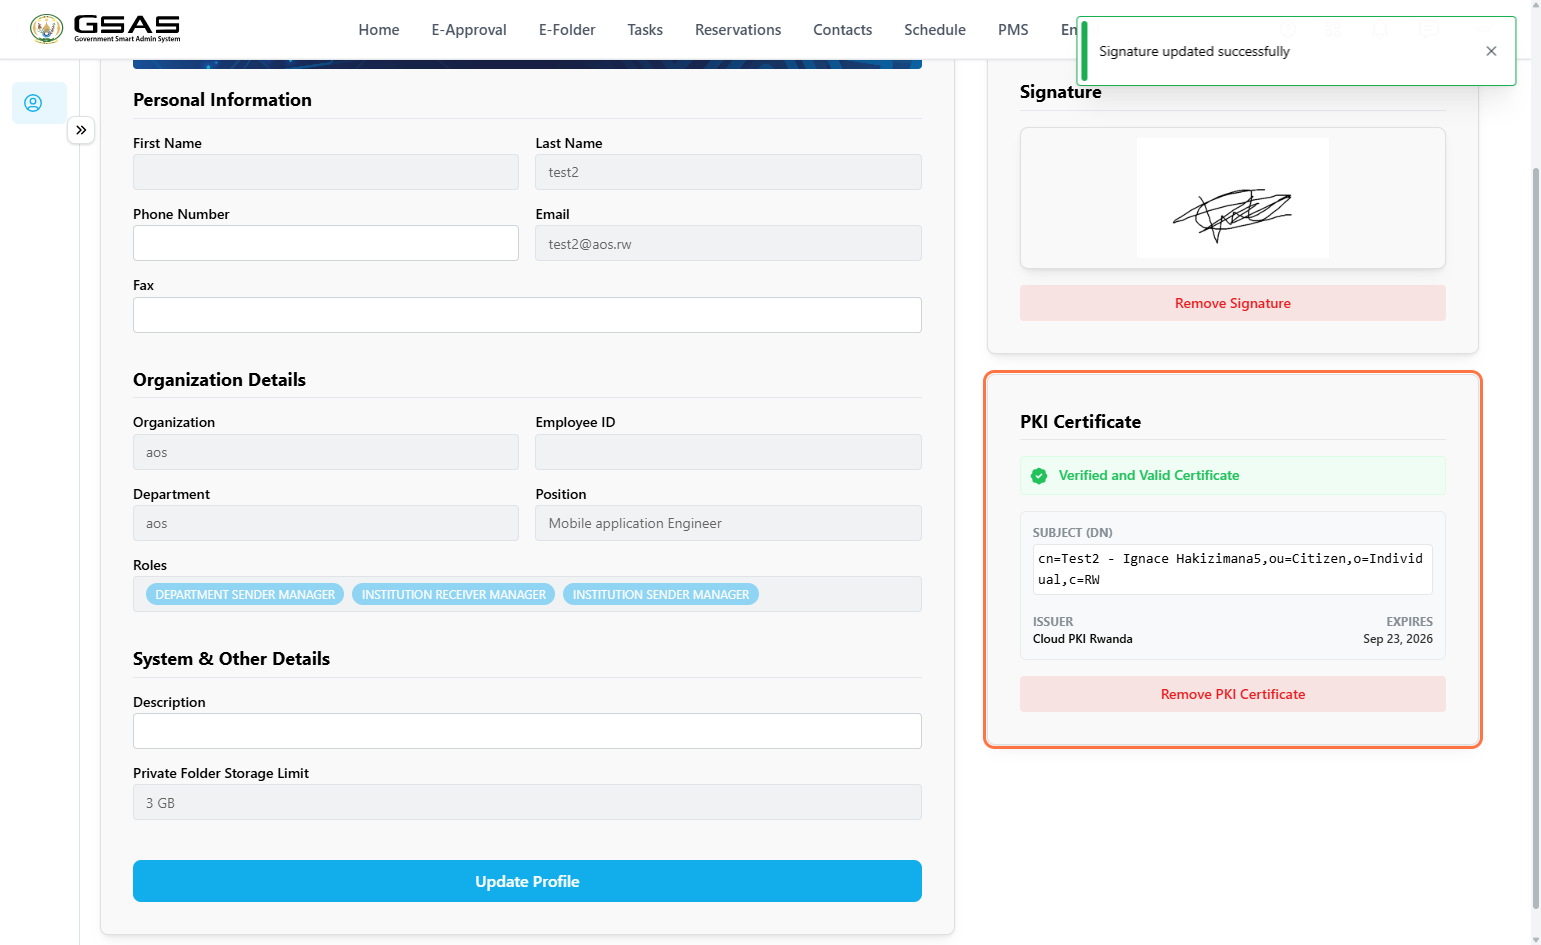
Some forms in the system require a PKI (Public Key Infrastructure) certificate to be submitted. If your account has one registered, it will appear in this panel with its verification status, subject details, issuer, and expiry date. (Scroll down to learn how to register your PKI).
How to register your Public Key Infrastructure
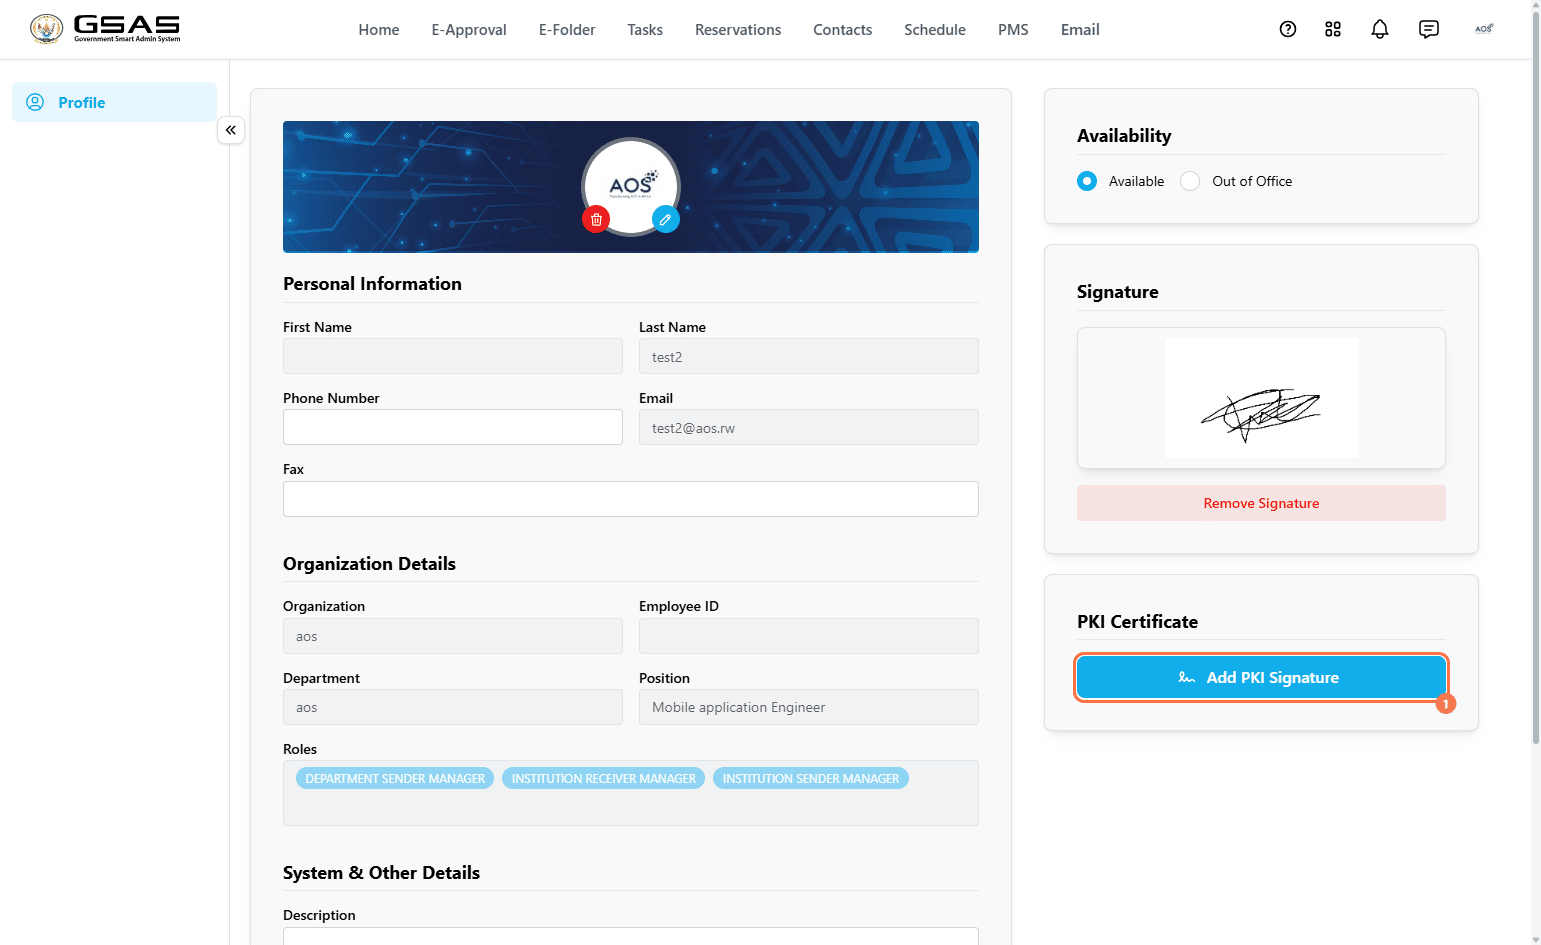
- Click on the Add PKI Signature button.
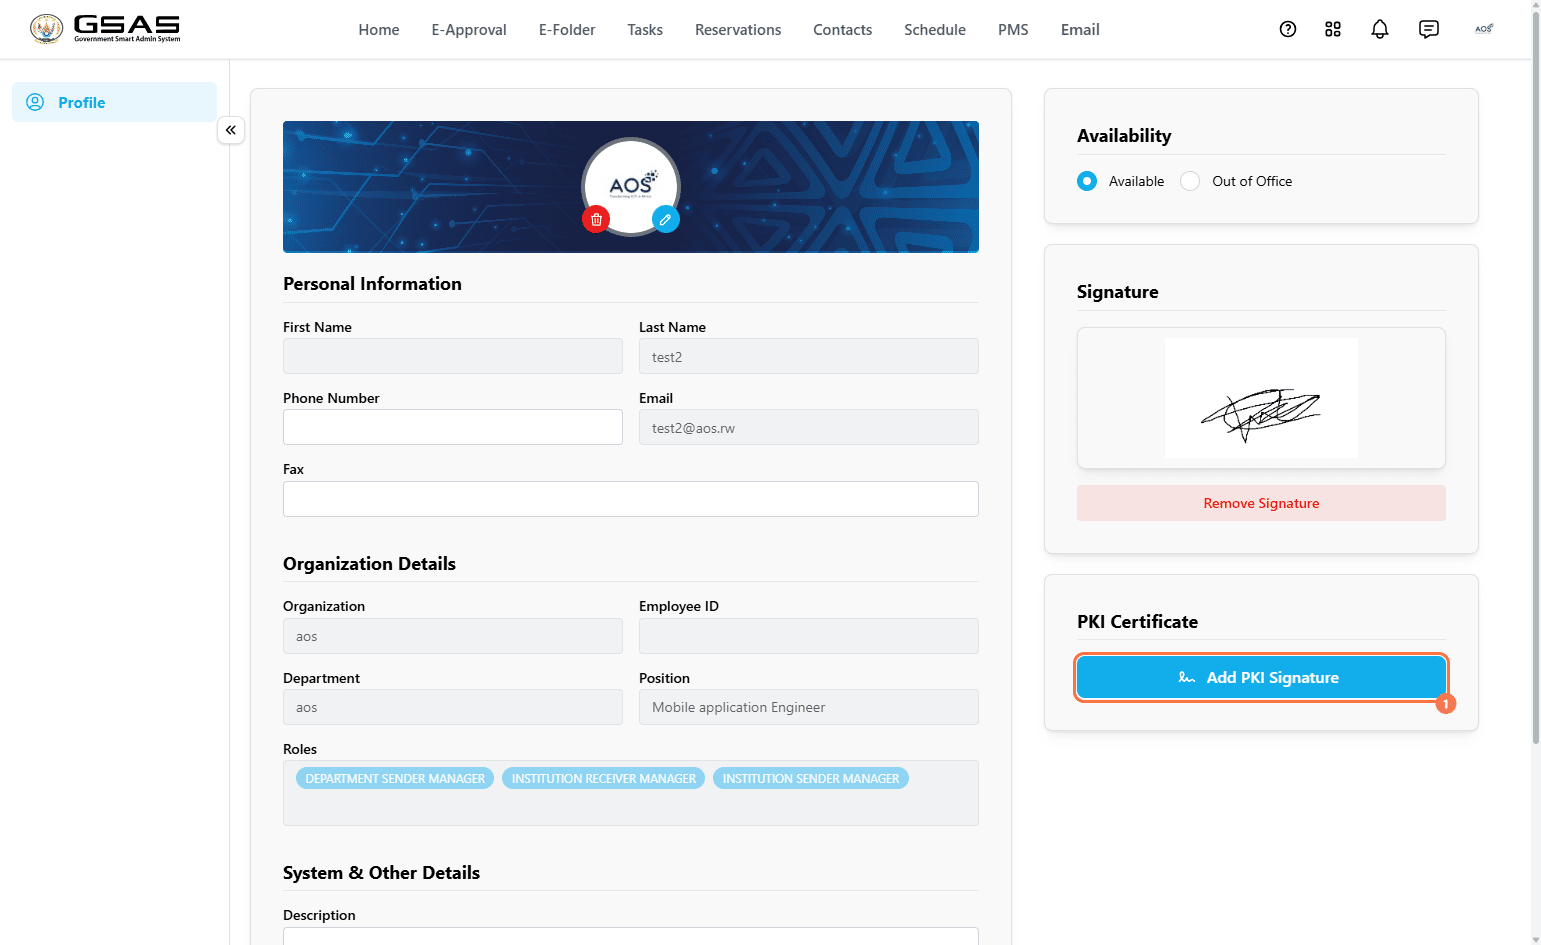
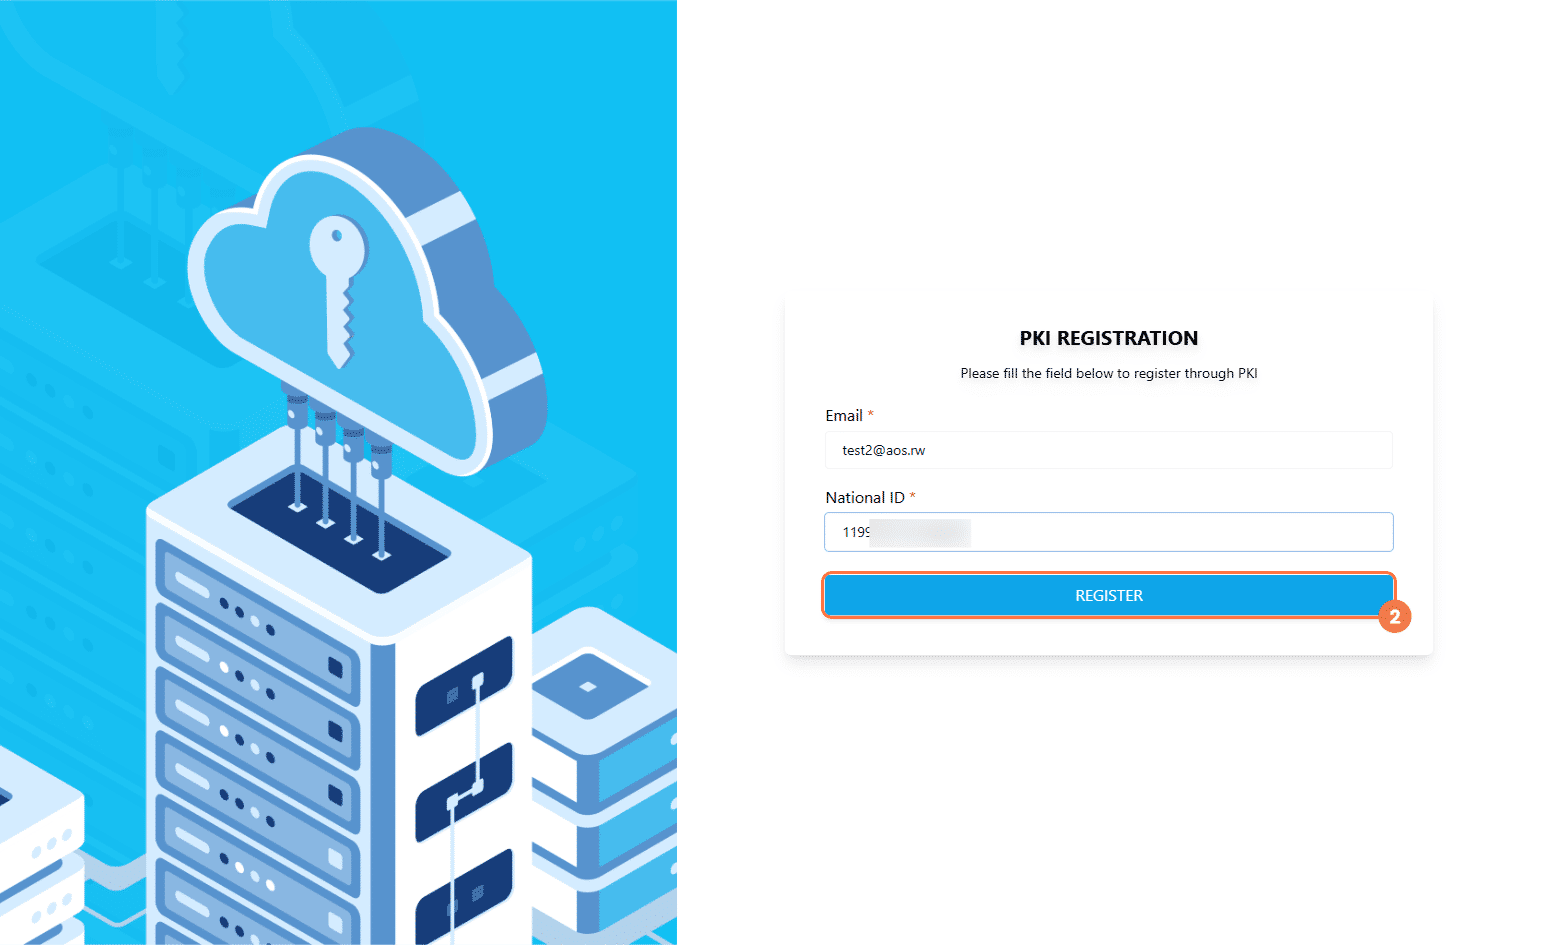
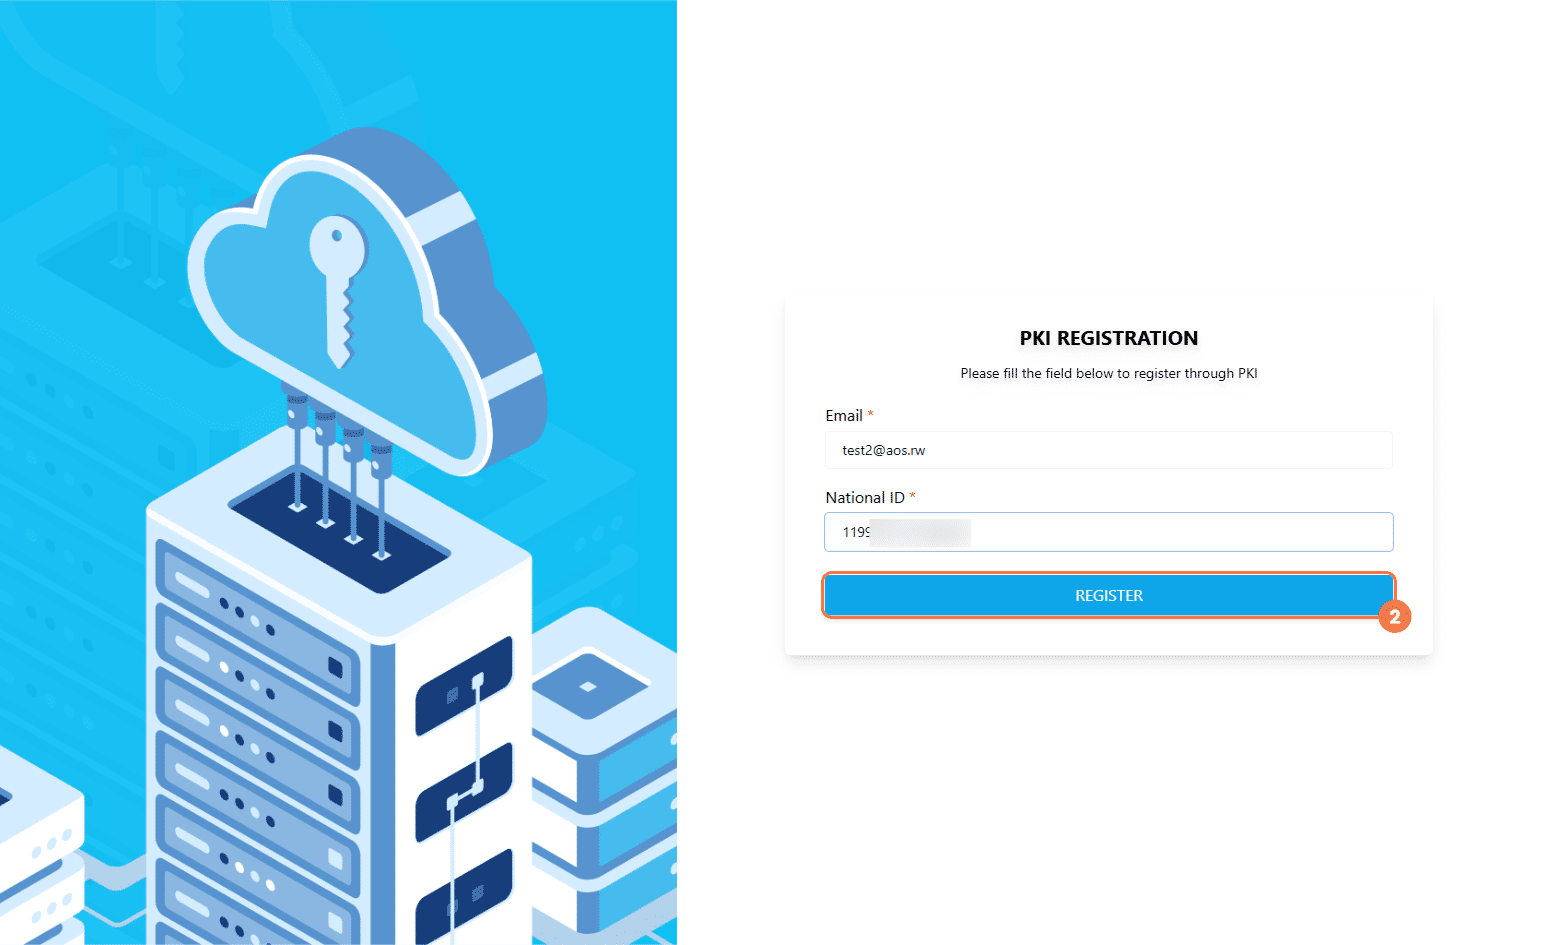
- Enter your email address and National ID number, then click Register.
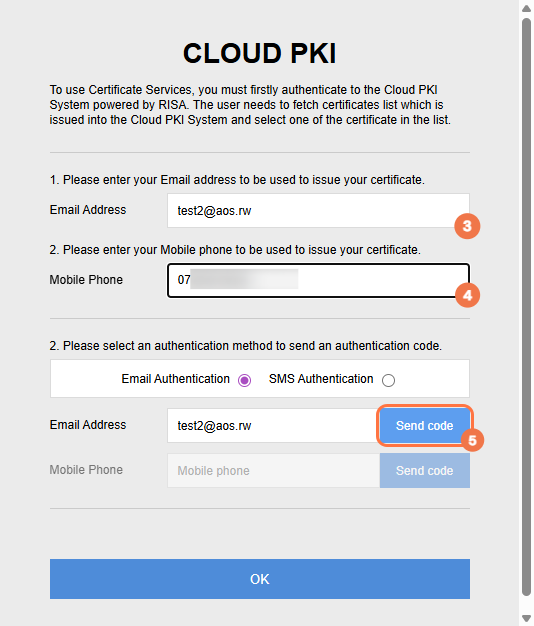
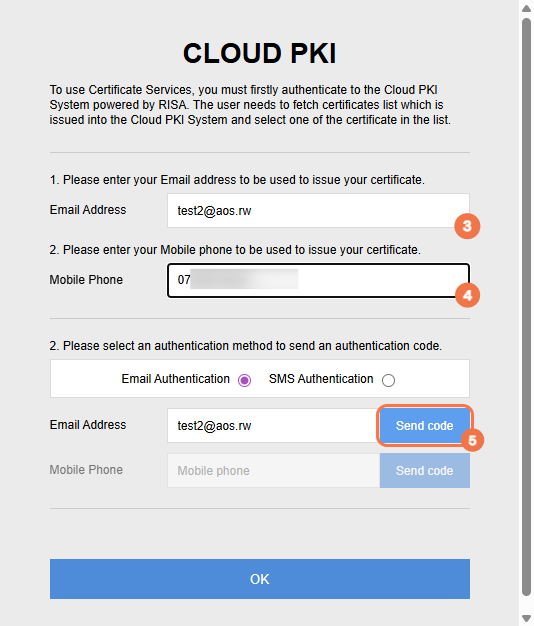
- Enter your email address and mobile phone number, then click Send Code to receive an authentication code.
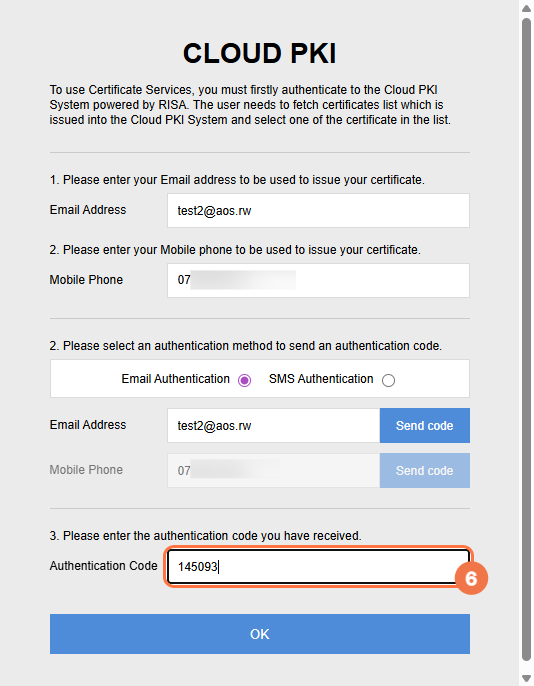
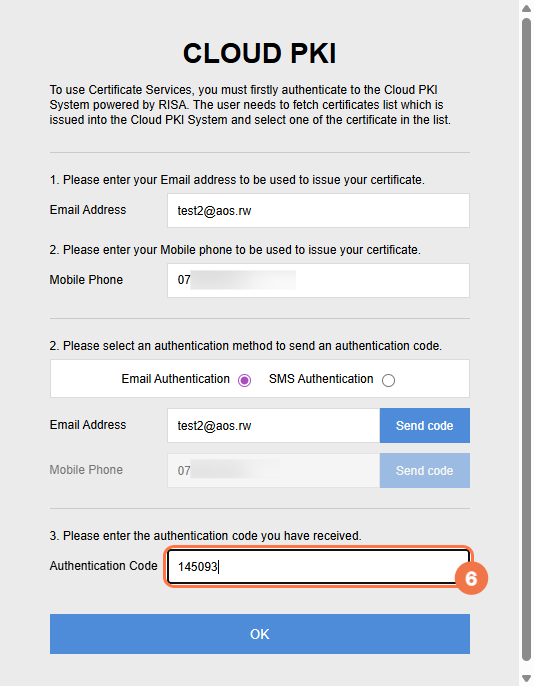
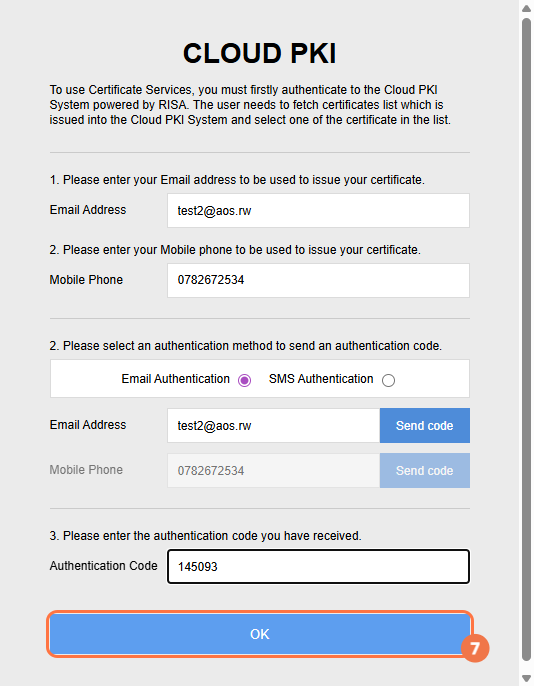
- Enter the authentication code you received, then click OK.
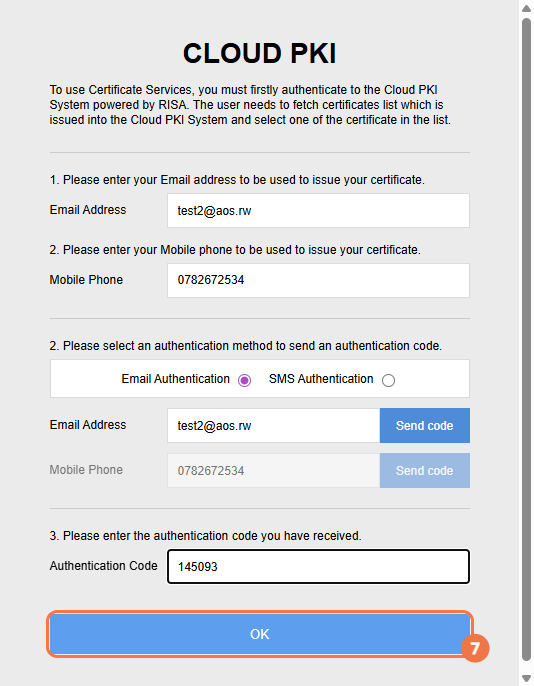
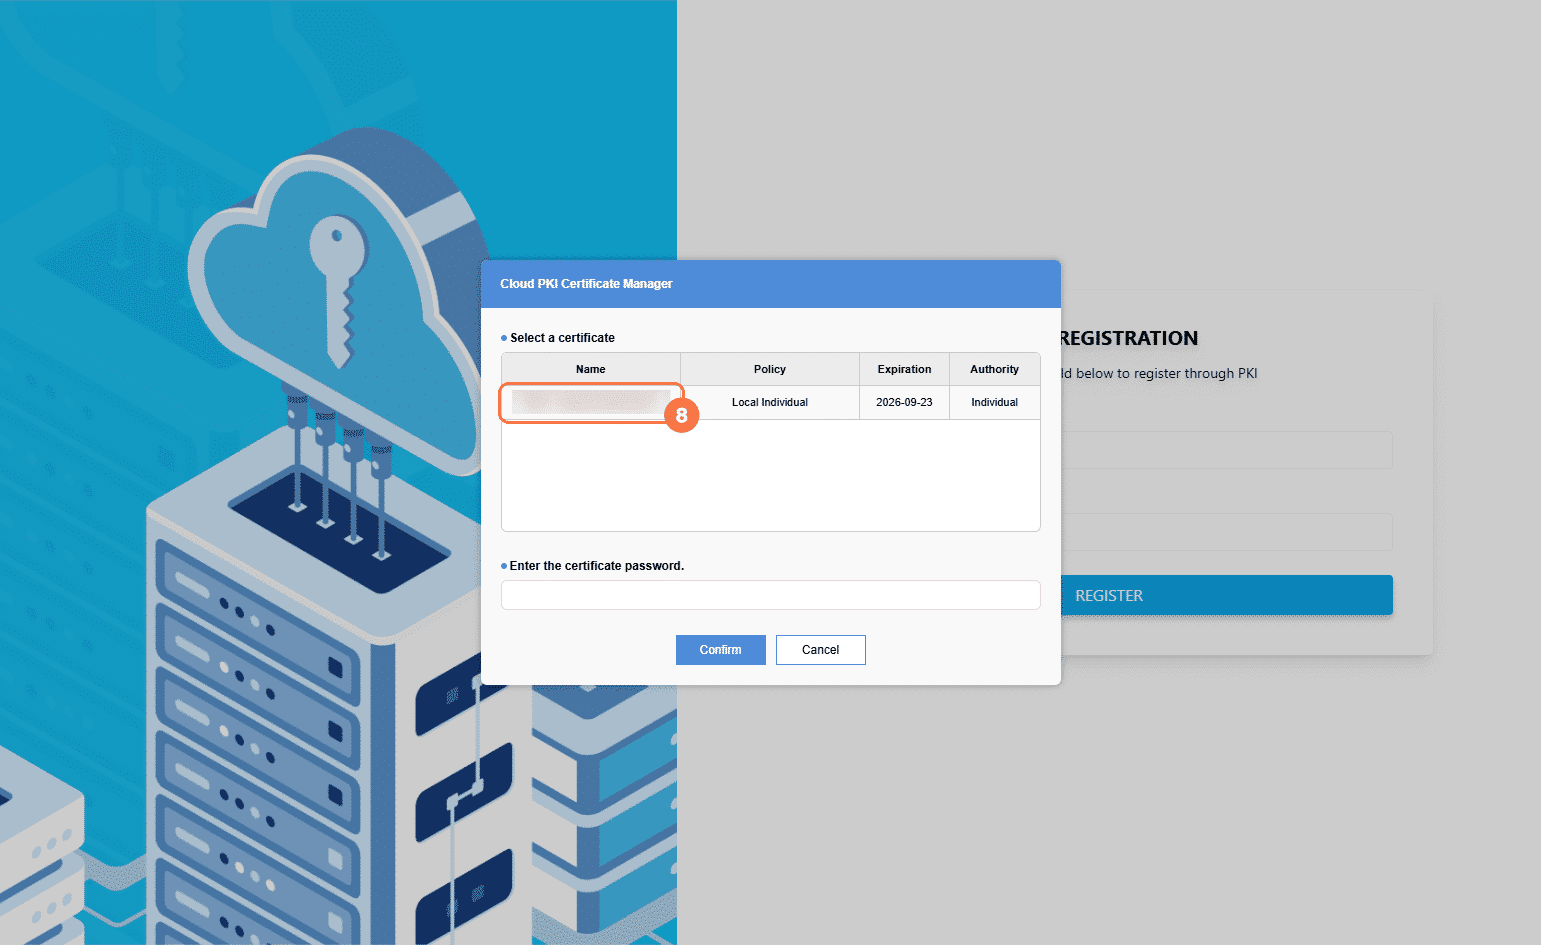
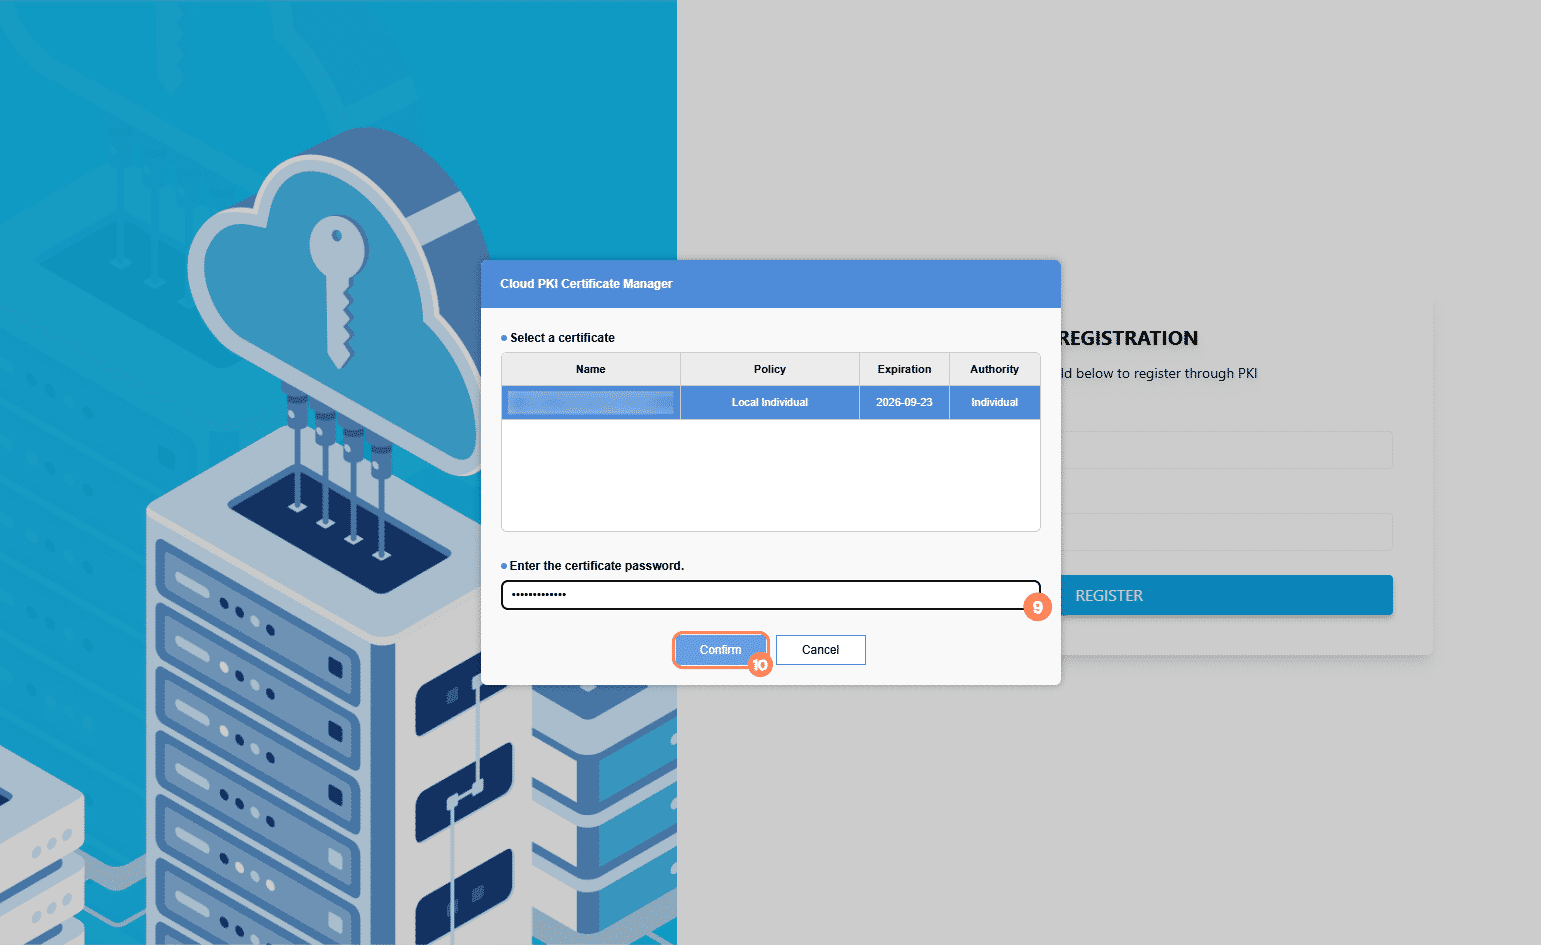
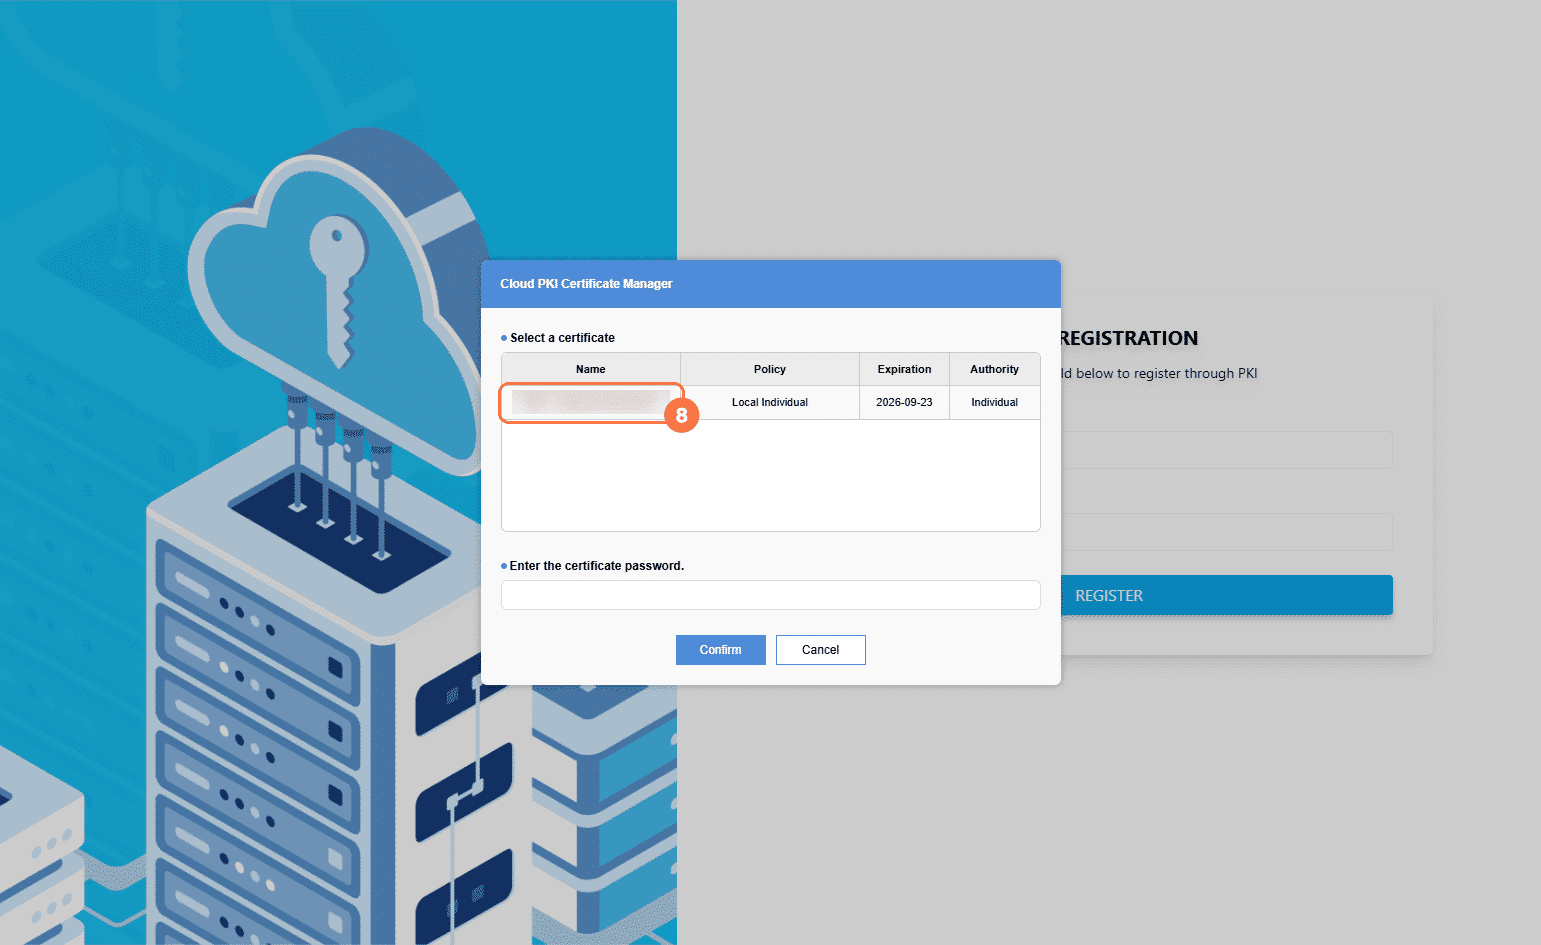
- Click on your name to select your certificate, then enter your password and confirm.
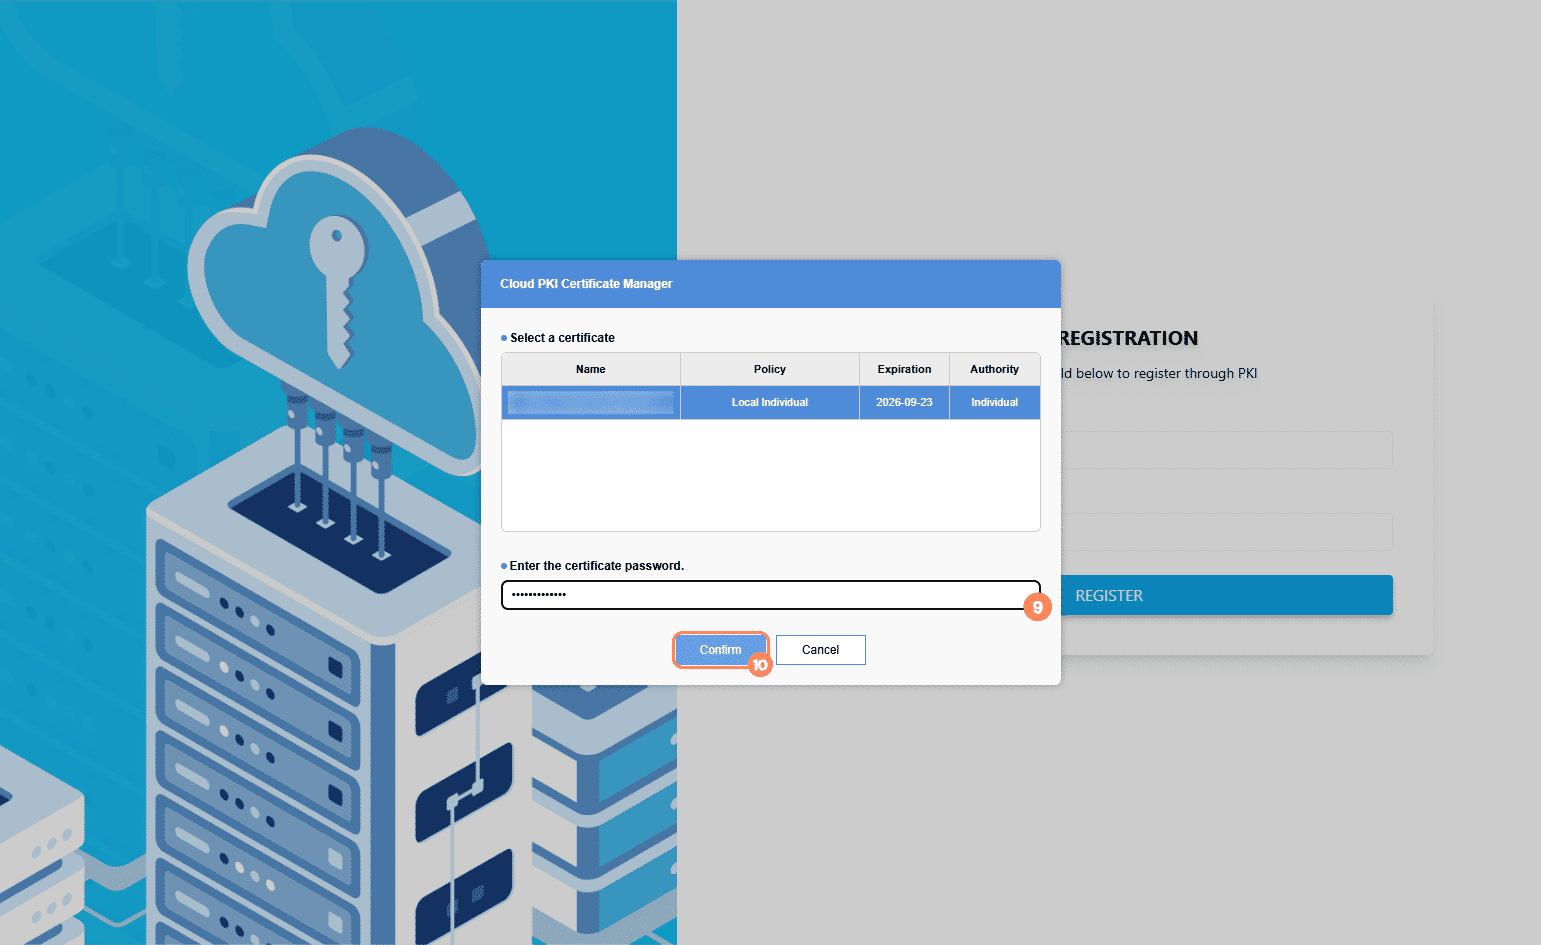
A success message will appear. Re-login to your GSAS account to confirm that the certificate has been registered
| Important: If a form requires a PKI signature and you do not have one registered, you will not be able to sign it. Contact your administrator if you need guidance to set one up. |