Sharing files and folders
Use sharing when internal or external system users, and non-system users need access to a file or folder from E-Folder. You can share both files and folders, and the access you give depends on the permission you select.
| Note: Sharing works the same way for files and folders. If you share a folder, the recipient gets access to everything inside it according to the permission you grant. |
Step 1
Open the sharing options
- Open the folder that contains the file or folder you want to share.
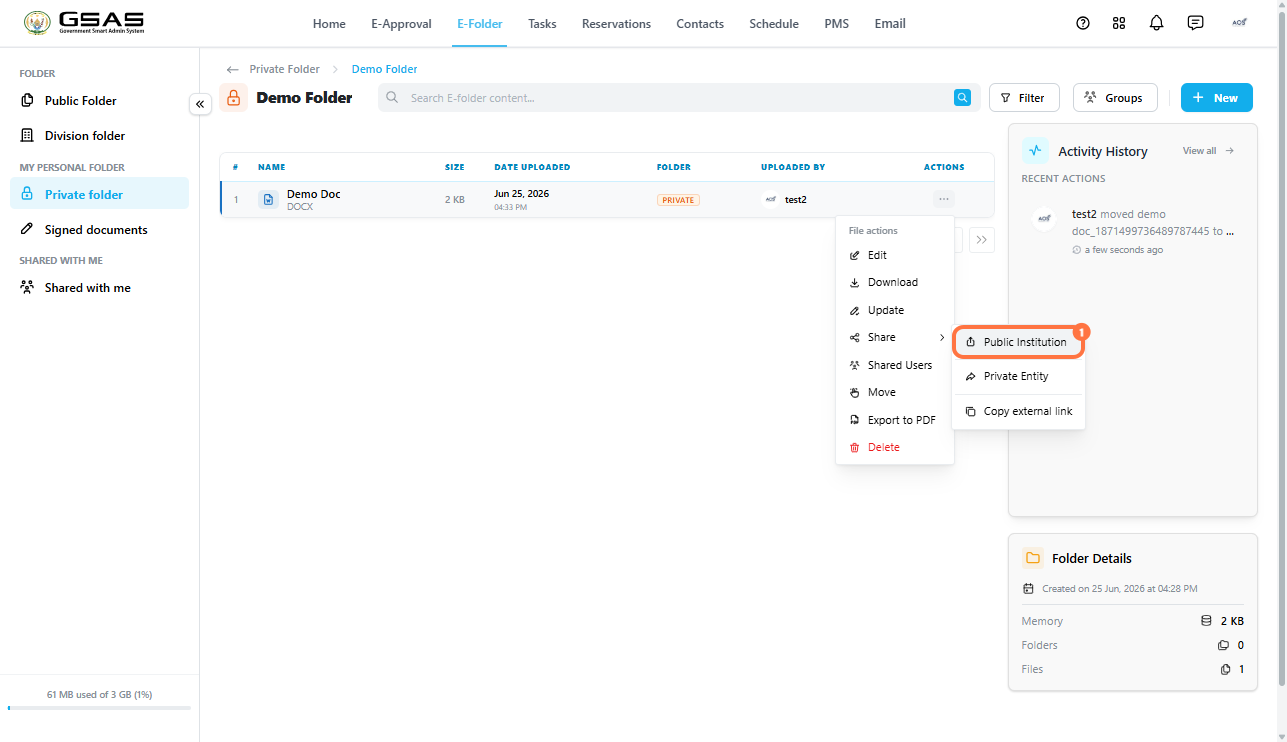
- Click ··· on the item and point to Share, then choose the sharing option you want to use.
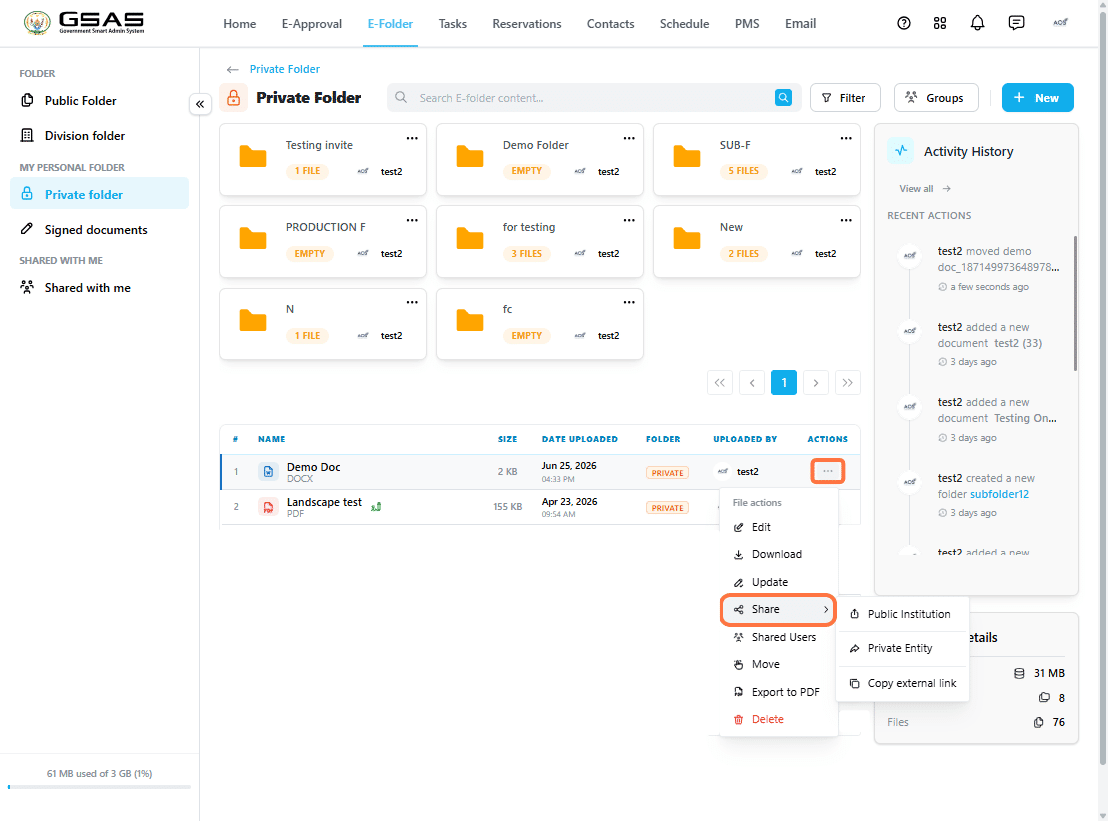
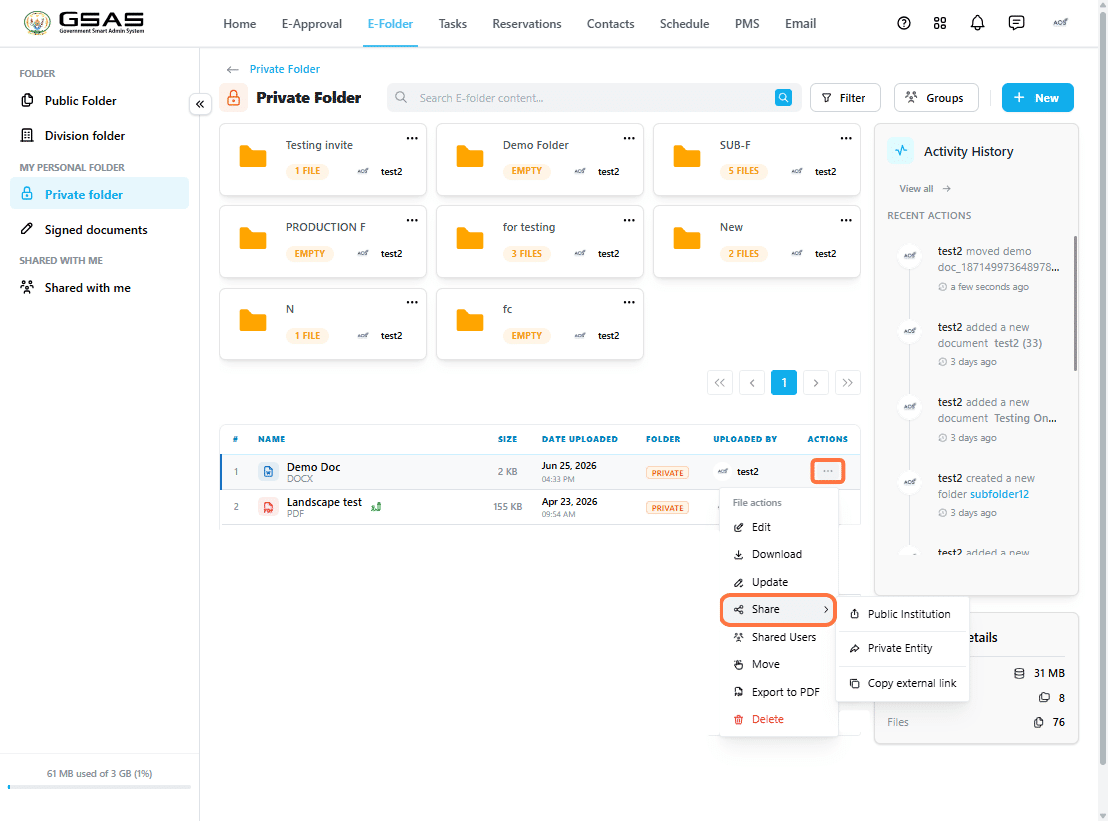
| Public Institution | Share with users from any institution that use the system. |
| Private Entity | Share folders and files externally by email. |
| Copy External Link | Copy a link that anyone can open in a browser to download the file. Available for files only. |
Step 2
Use this option to share with one or more users who have accounts in the system.
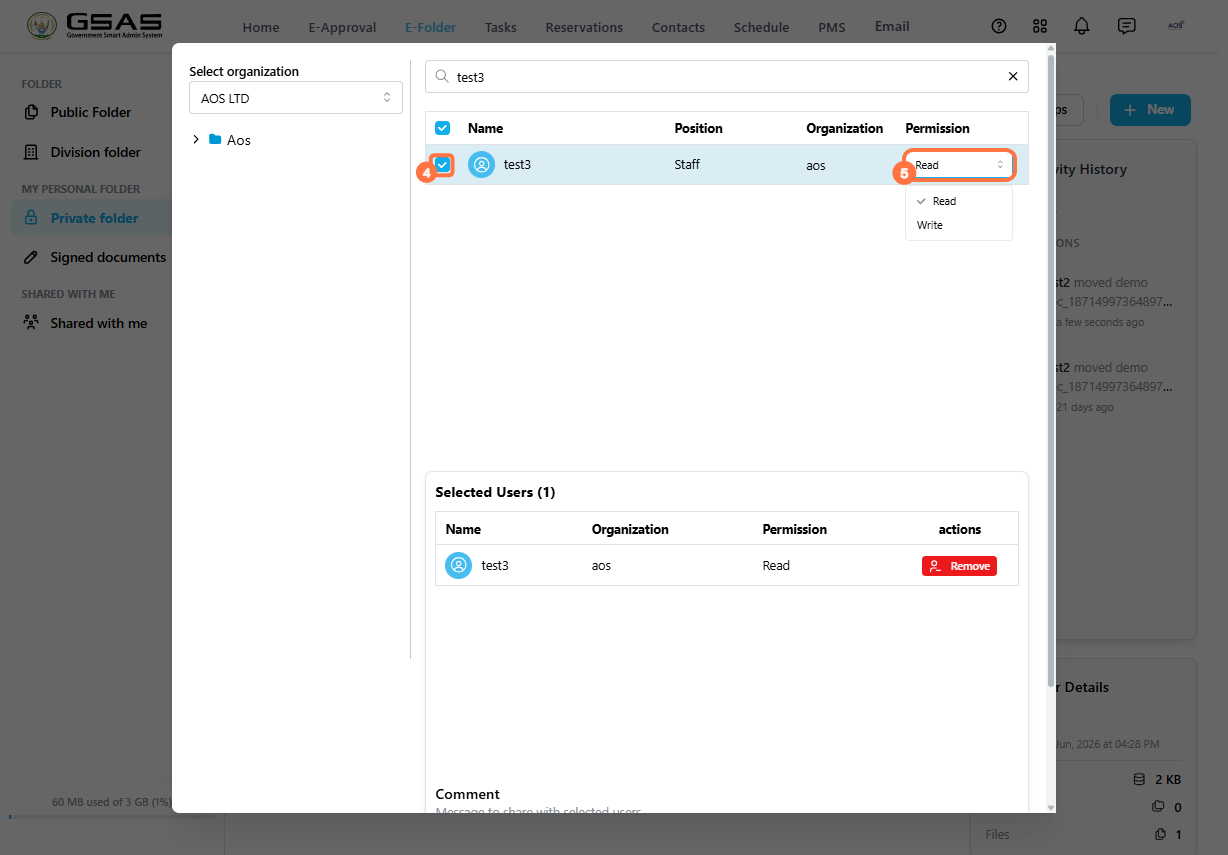
- Select Public Institution.
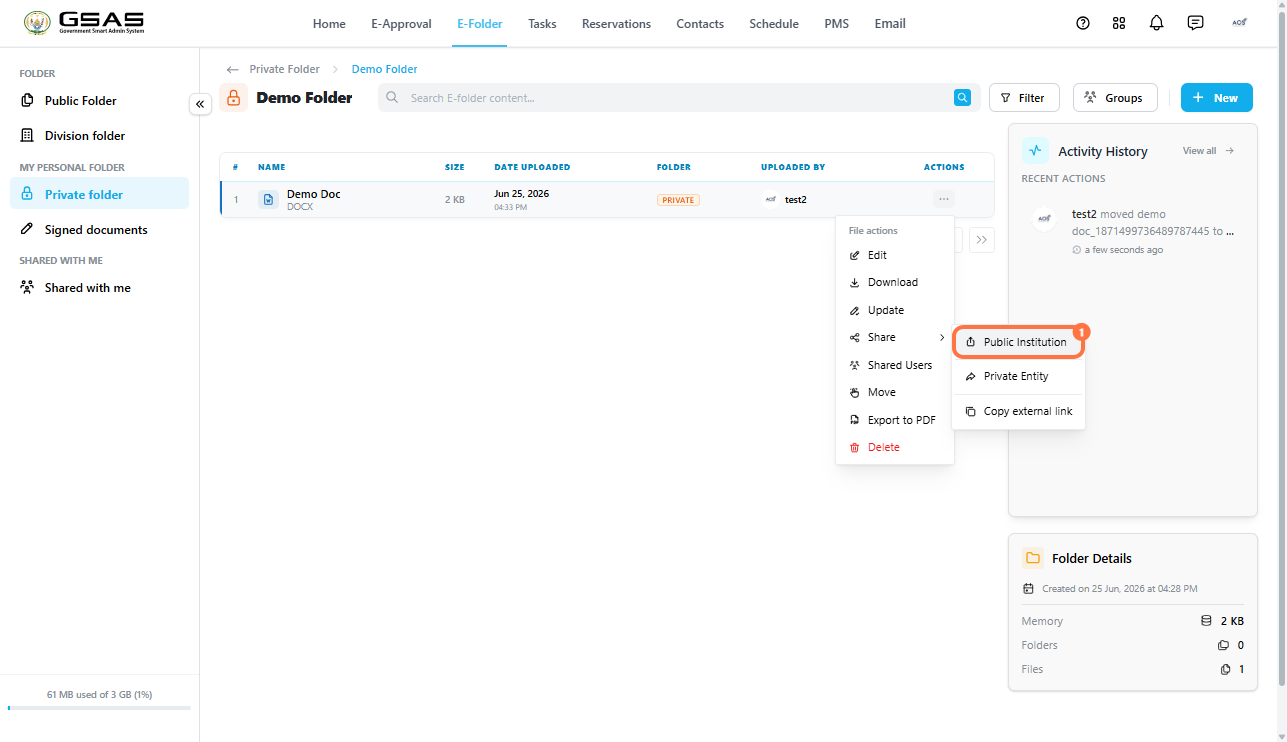
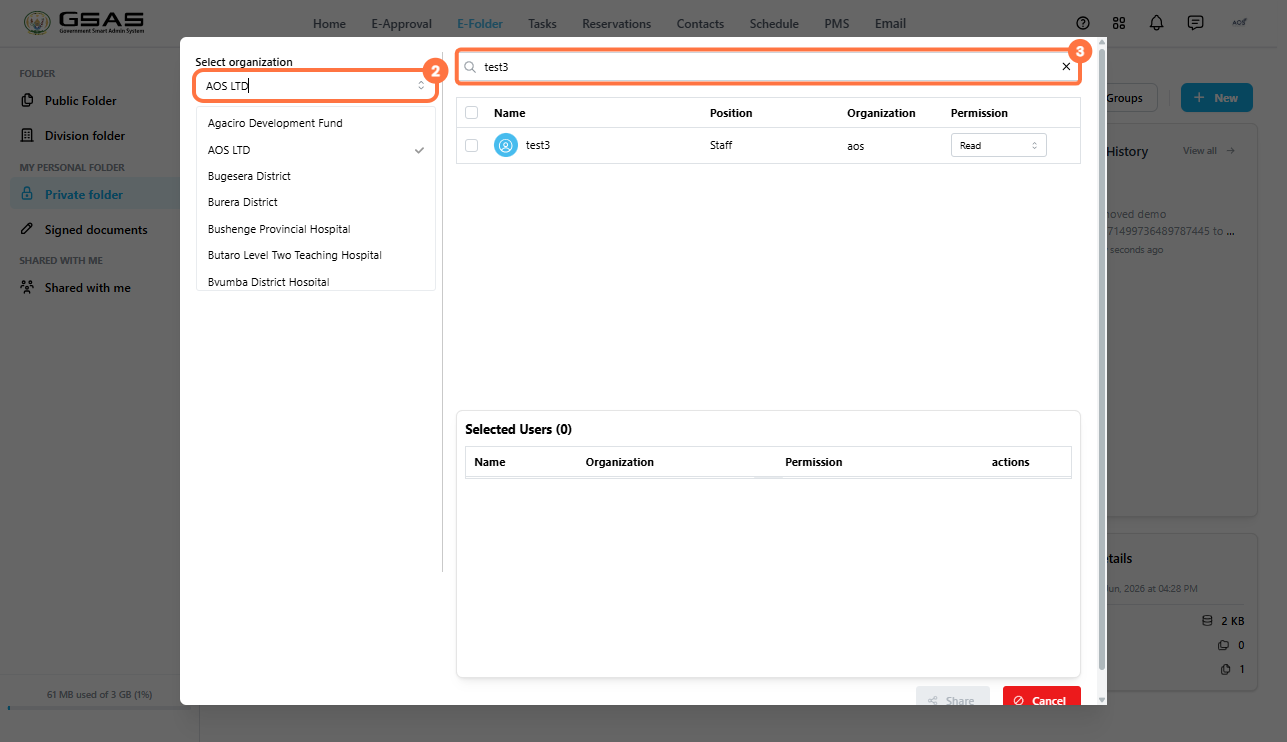
- Choose the organization from the dropdown list on the left.
- Use the search field to find the user by name.
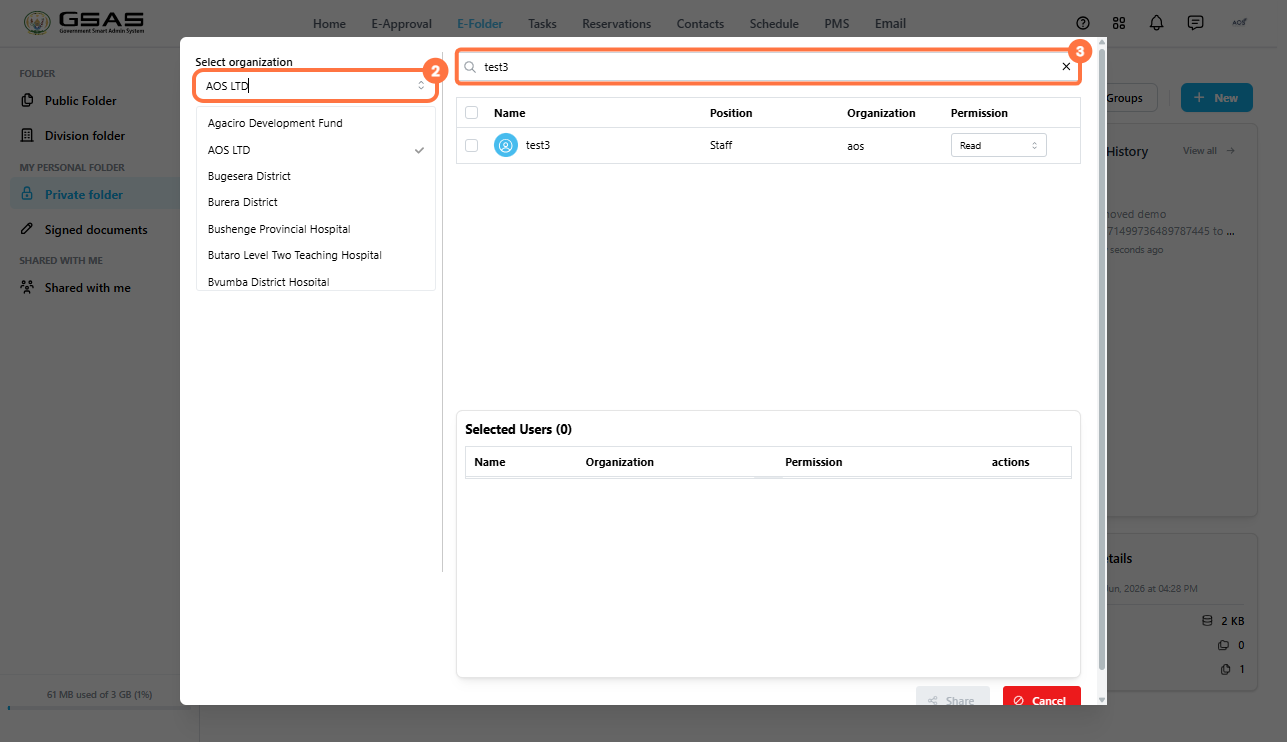
- Tick the checkbox next to the user to add them to the Selected Users list. You can add as many users as needed.
- Choose the permission for each user — Read or Write. The default permission is Read.
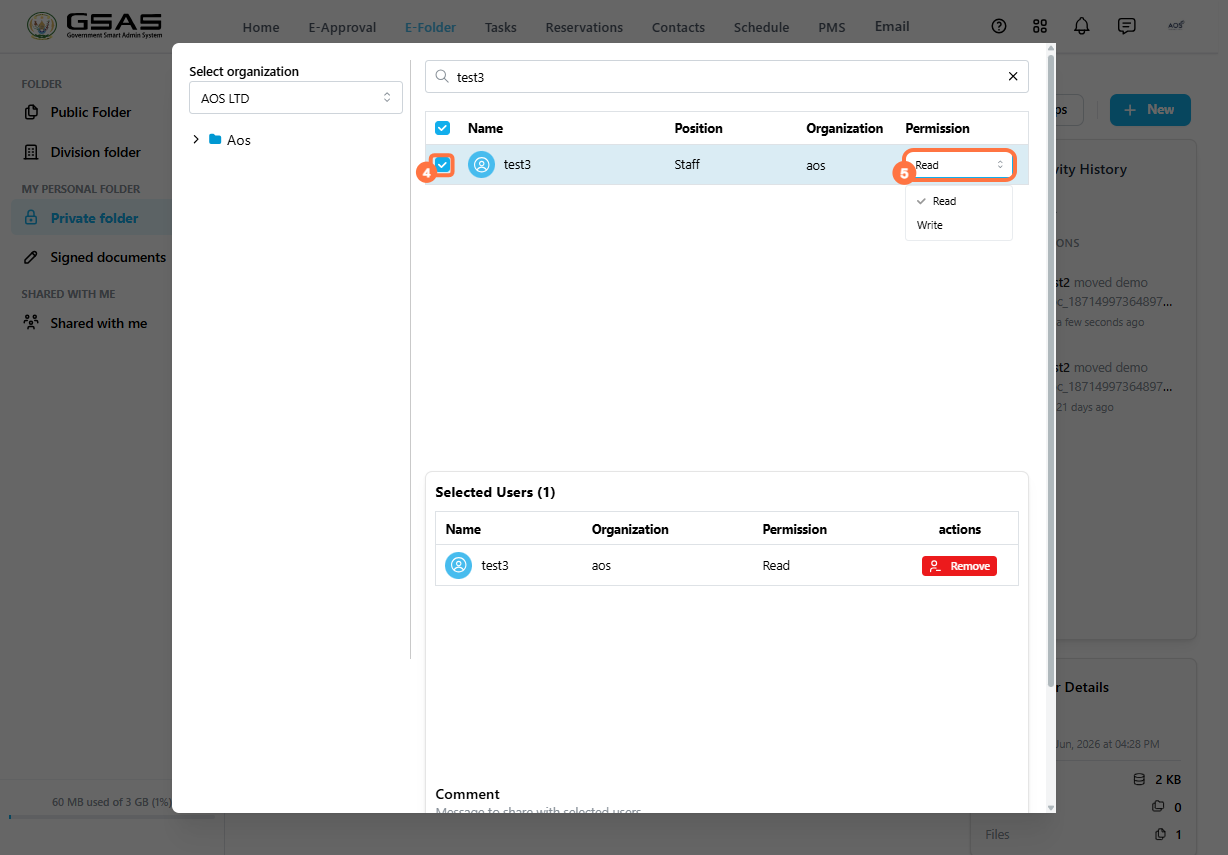
| Read | The user can open, view, and download the shared item. |
| Write | The user can edit editable files, export to PDF, and re-share. |
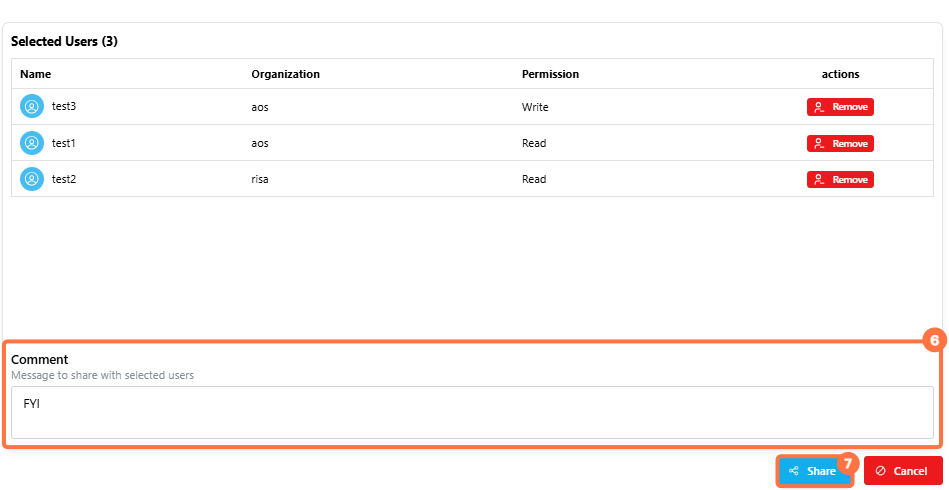
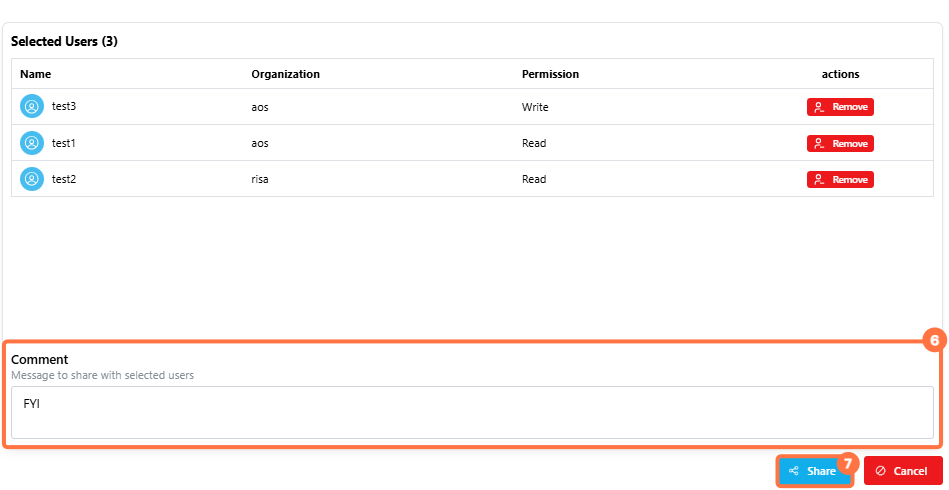
Review the users in the Selected Users list.
- Enter a comment if needed.
- Click Share.
Copy External Link (files only)
This generates a link that anyone can open in a browser to download the file, no system account required.
- Click ··· on the file and select Share → Copy External Link.
- The link is copied to your clipboard. Paste it wherever you want to share it — an email, a message, or any other channel.
- The recipient opens the link in their browser and clicks Download to save the file.
Screenshot placeholder — external link view in browser (Shared file + Download button)
Private Entity
Use this option to share a folder with someone outside the system via their email address.
- Click ··· on the folder and select Share → Private Entity.
- Enter the recipient's email address in the Emails to share field and press Enter. You can add multiple addresses.
- Write a message in the Comment field.
- Click Share. The recipient will receive an email with access to the folder.
Screenshot placeholder — Private Entity sharing panel
| Note: The default permission for Private Entity shares is Write. |
Updating or revoking access
You can view and manage who a file or folder has been shared with at any time.
- Click ··· on the file or folder and select Shared Users.
- The Update Shared Users panel will open, listing everyone the item has been shared with, their organization, and their current permission. Use the search bar to find a specific user.
- To change a user's permission, update it from the dropdown next to their name. To remove their access, click Remove.
Screenshot placeholder — Update Shared Users panel