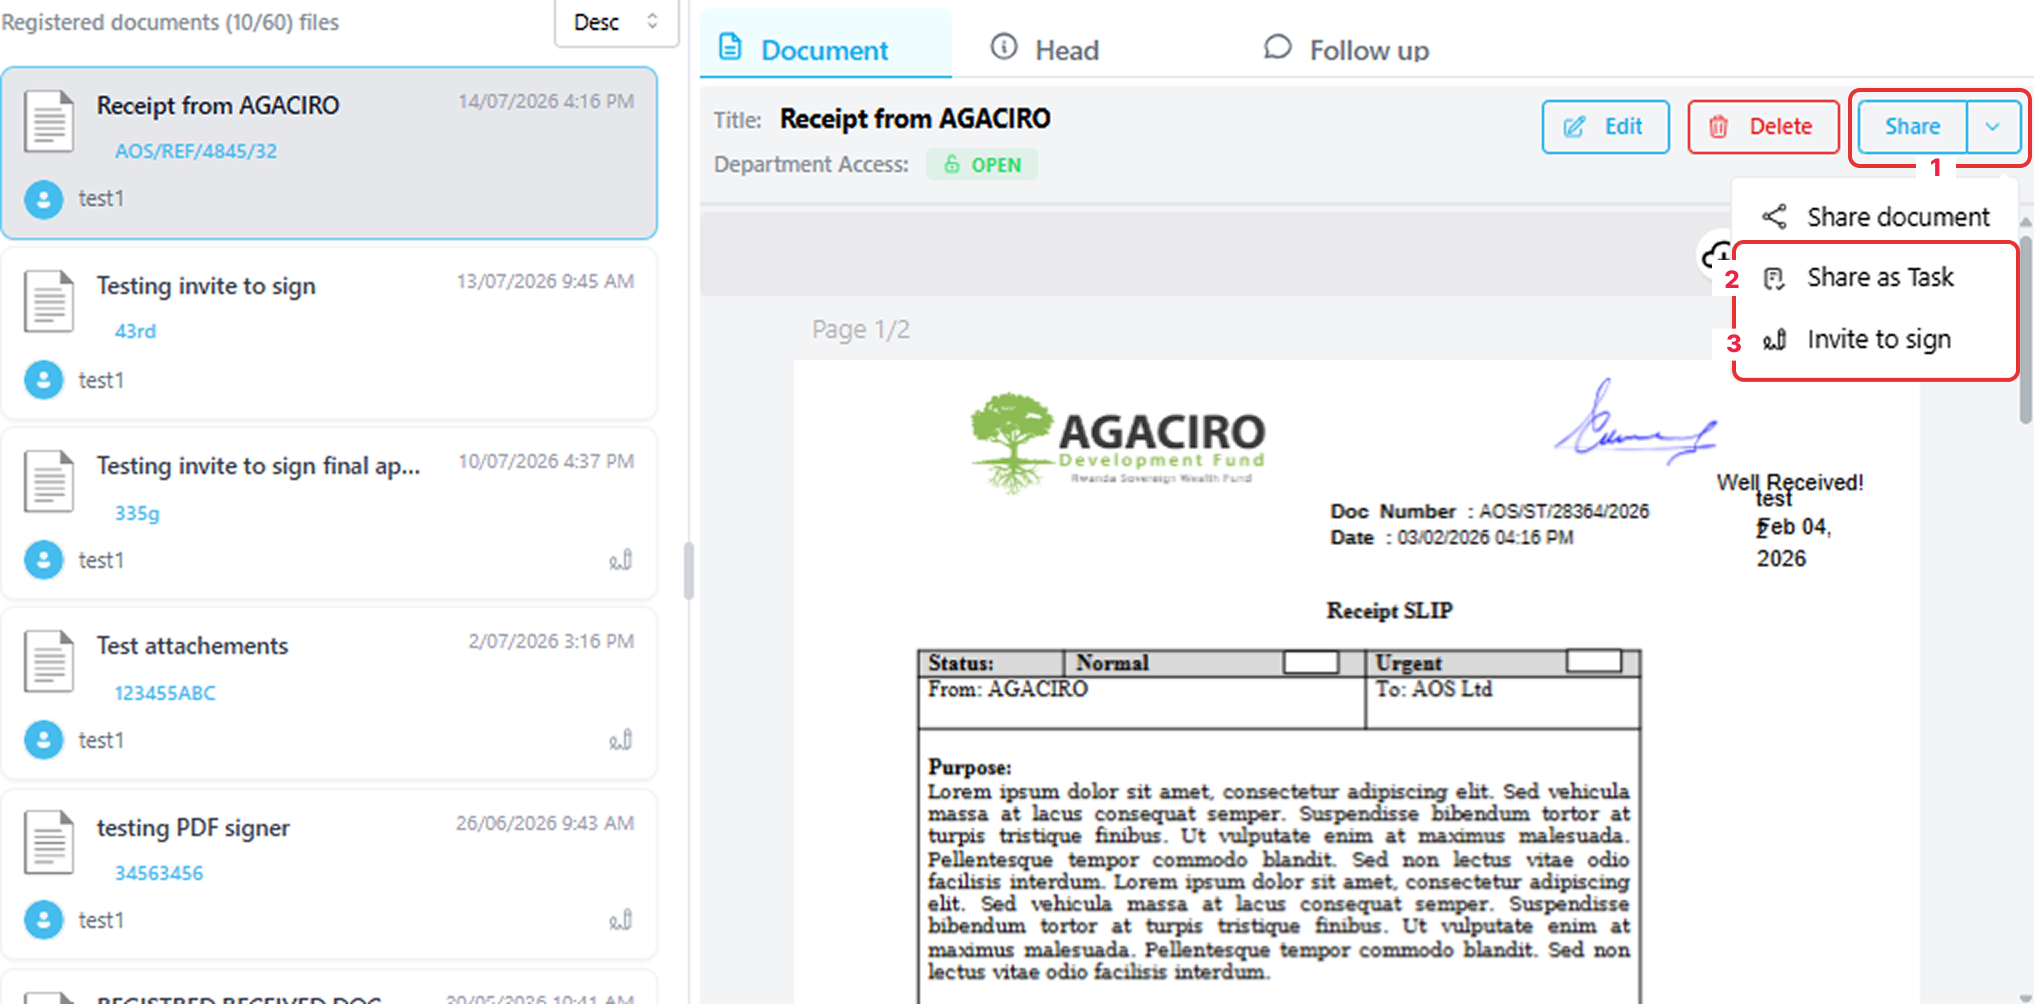
Registering documents
This section outlines the steps for users to register incoming documents that were not received or sent through the Government Smart Administration System for archiving and sharing.
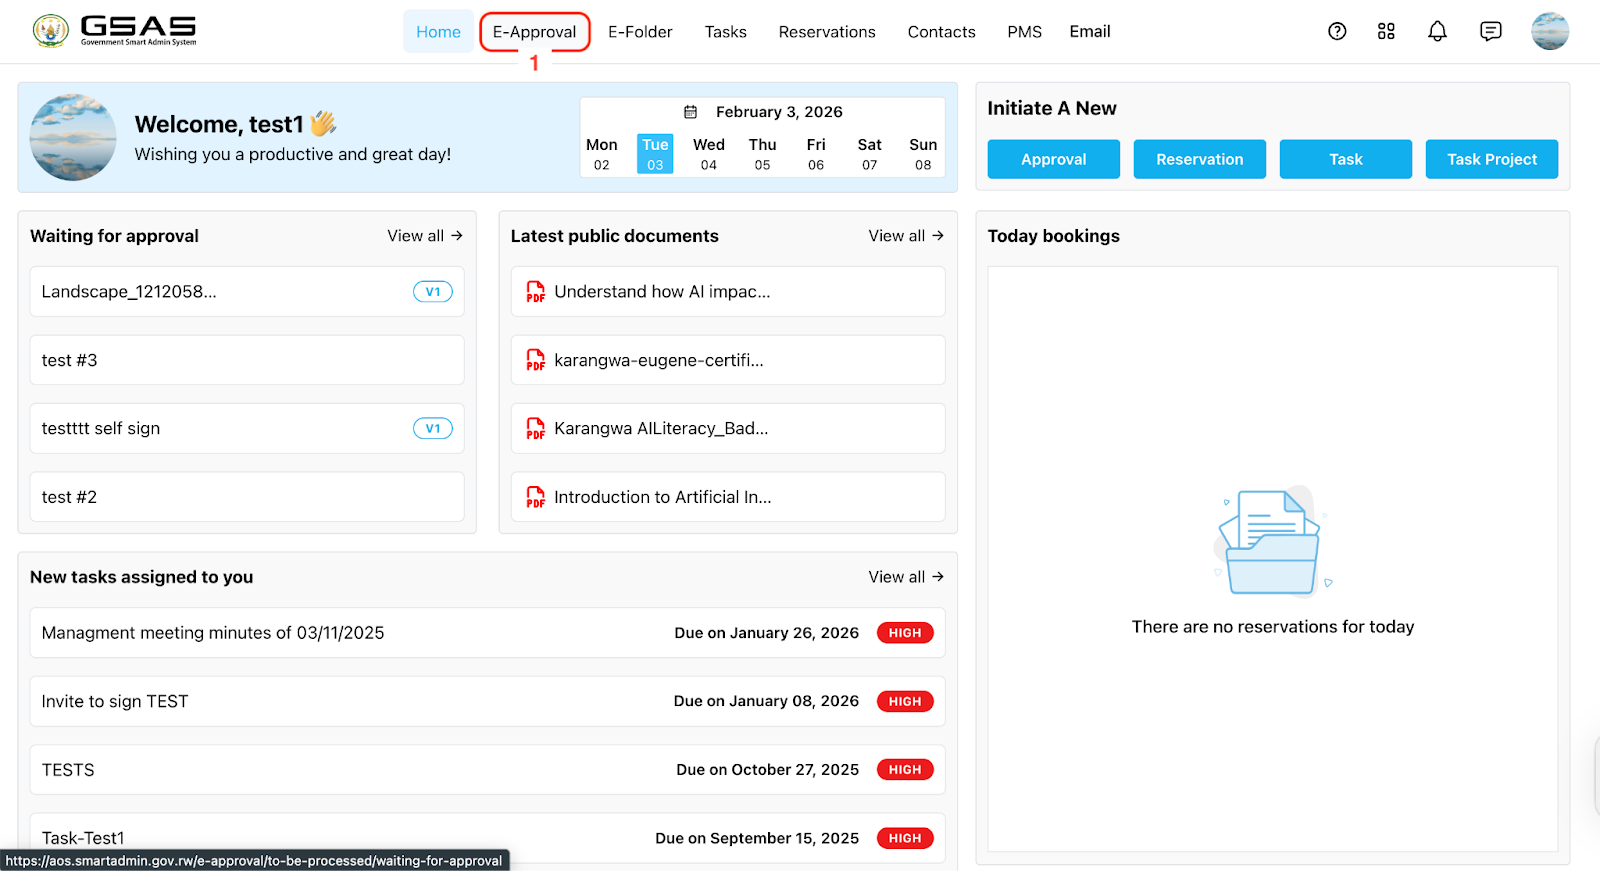
Step 1
Access eApproval
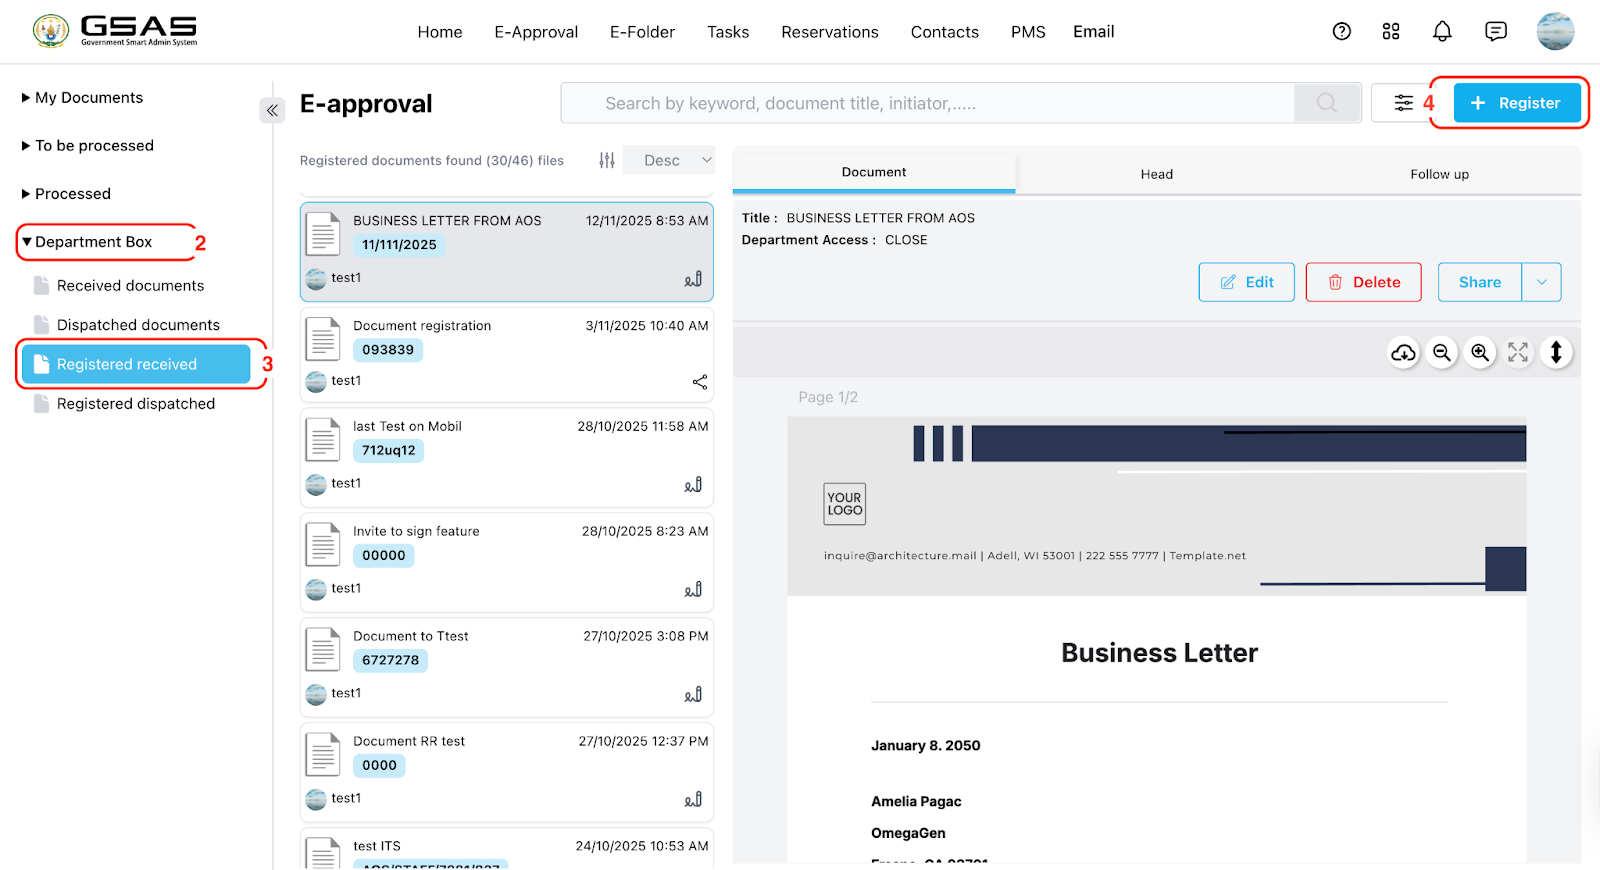
Step 2
Document Details Entry
-
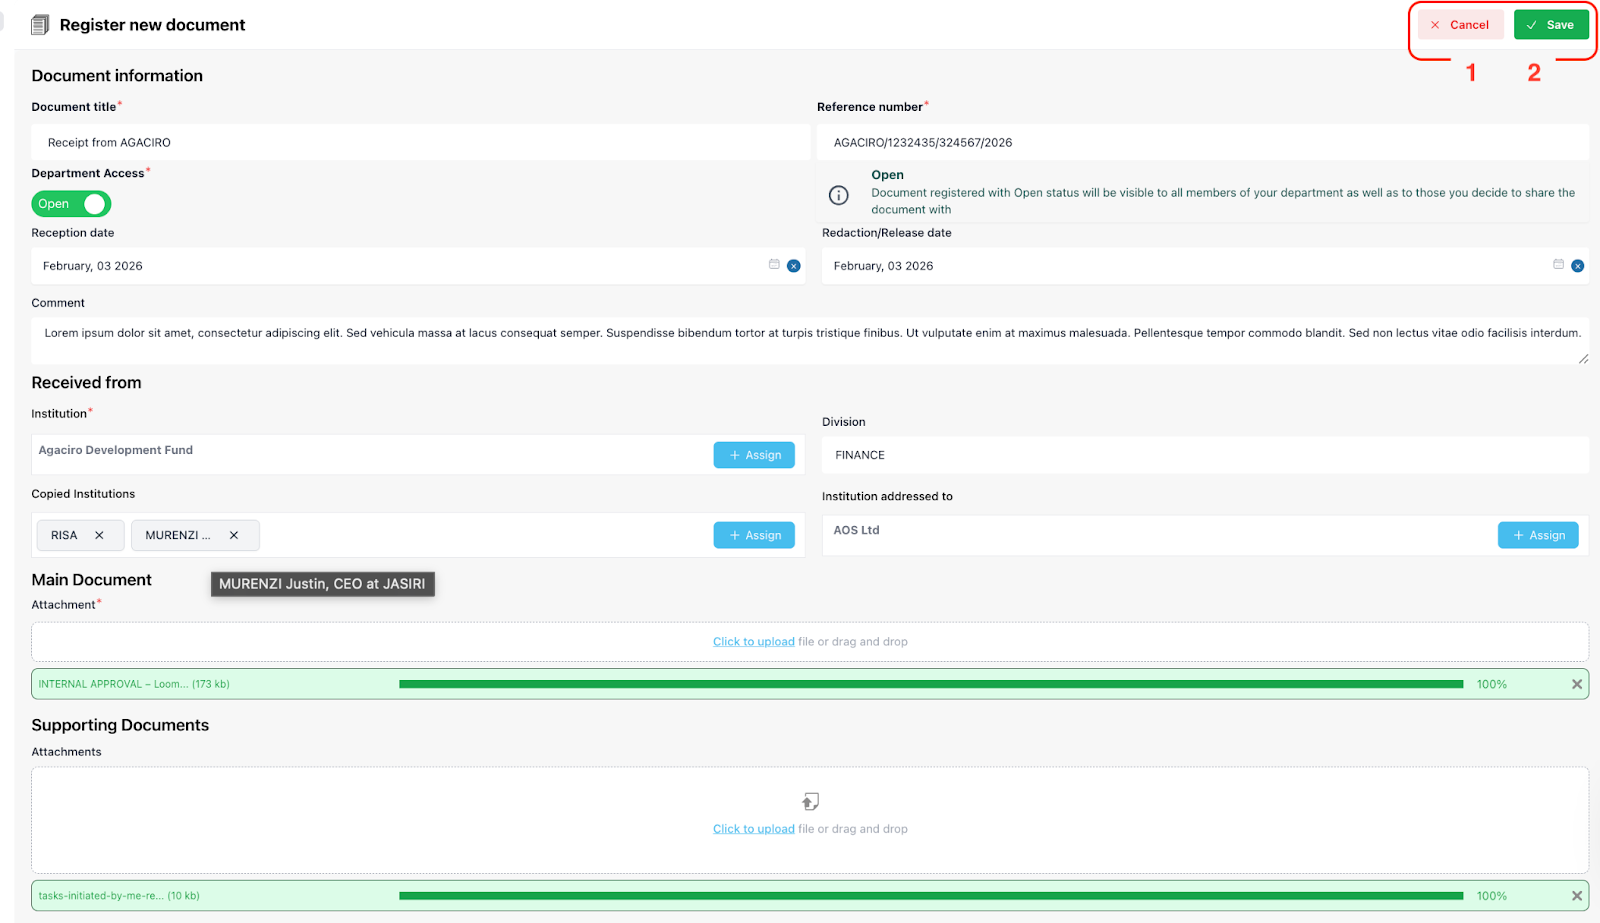
Input the title of your document.
-
Add the document’s reference number.
-
Determine access to the document for other team members in your department. (Refer to the cautious message on the side.)
-
Add reception date
-
Add redaction date (Date of when the document is/will be handled)
-
Optionally, add comments summarizing your document.
-
Enter the institution name (e.g., AOS).
-
Specify the division (e.g., HR) if necessary.
-
Select/Enter the copied institution or type it using the add (+) button.
-
Select/Enter the addressed institution or type it using the add (+) button.
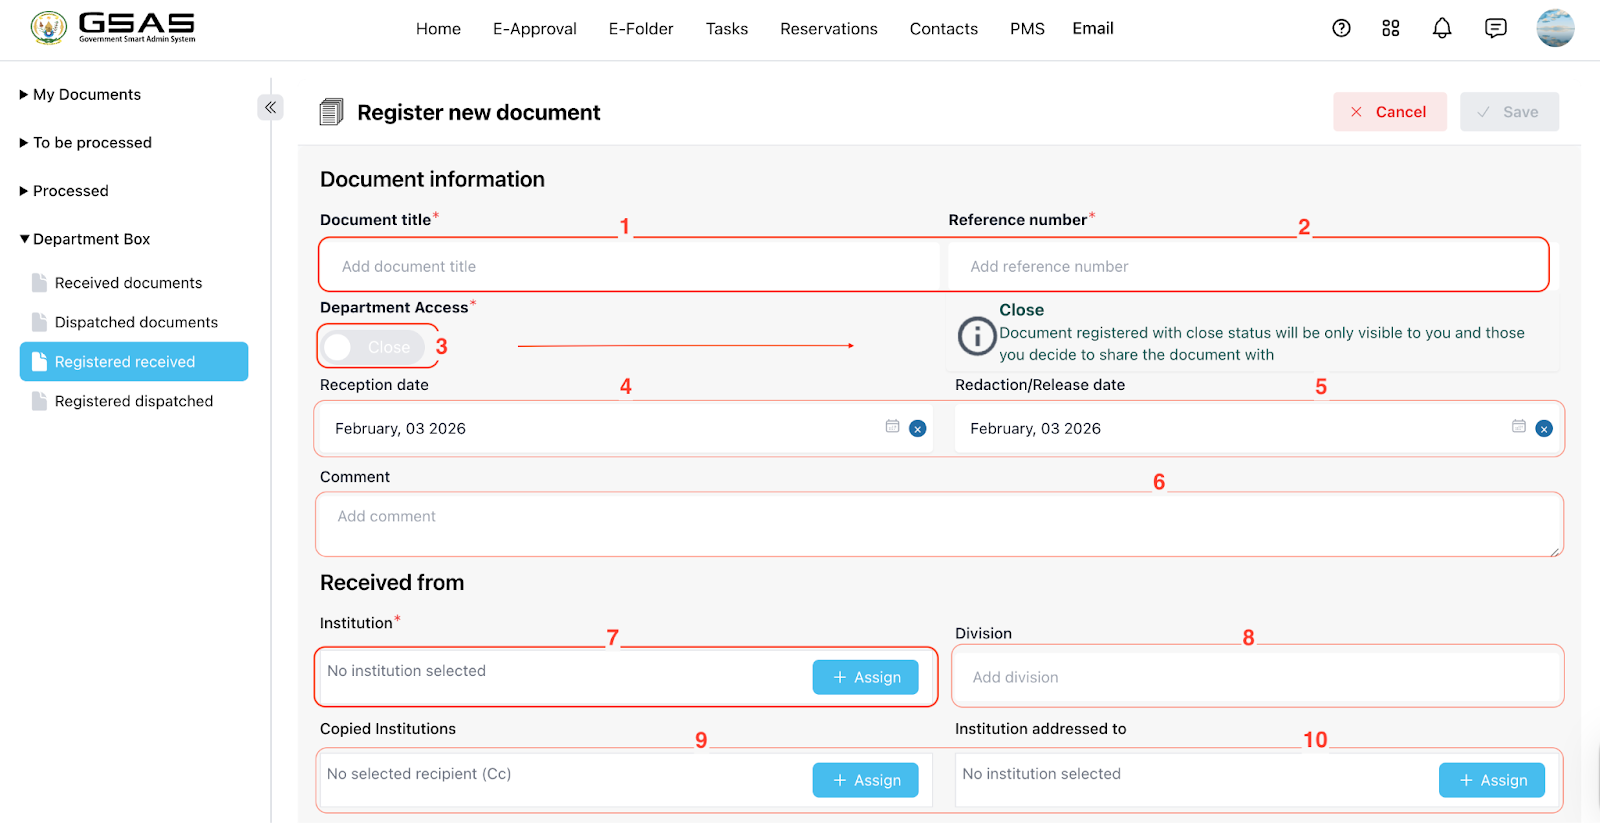
→ After clicking the “+ Assign” button, a new model will open.
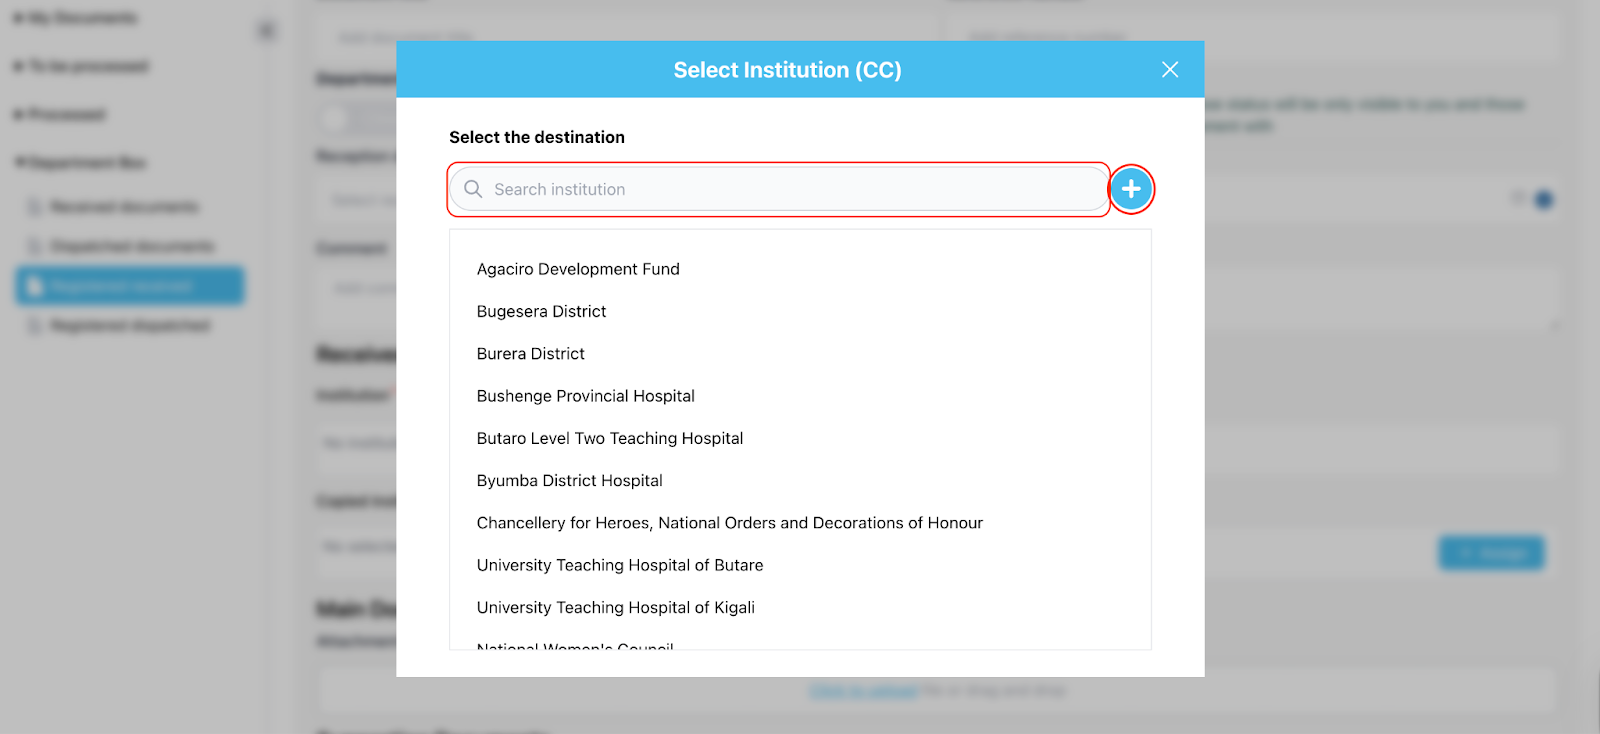
-
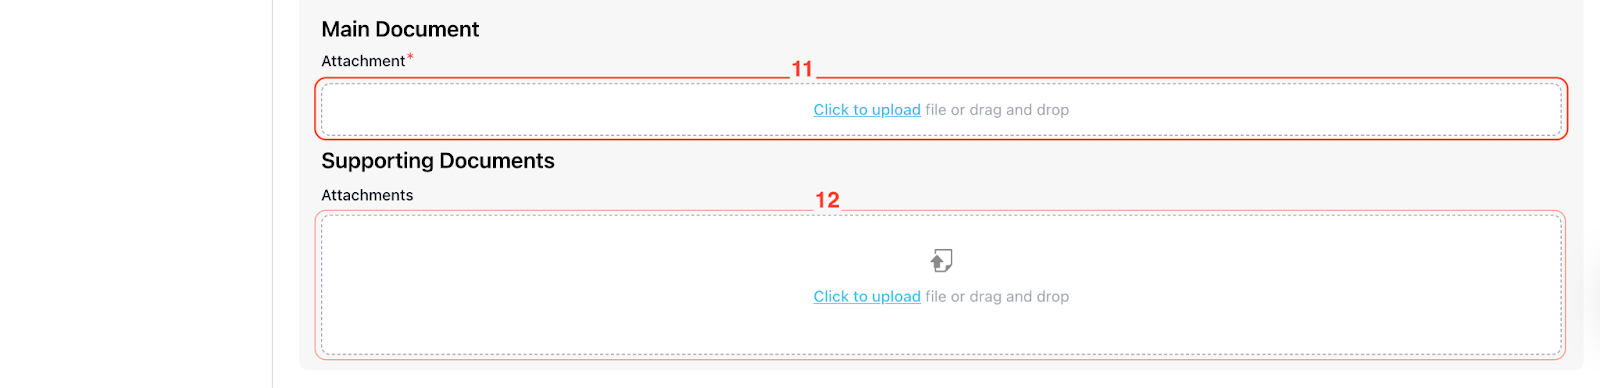
Attach the main PDF document.
-
If applicable, attach any supporting documents.
Step 4
Save the Document
-
Click ‘Cancel’ to stop the registration.
-
Click on 'save' to store the document in the system.
Once the document is saved, you will be able to find it in the folder. Members of your department will also be able to find it there if Department Access was set to open.