PMS Dashboard
Using the PMS Total Dashboard
Follow this guide to access and use the Project Management System (PMS) dashboard in GSAS. The dashboard helps you review project status, budgets, sectors, tasks, priority projects, development partner funding, approvals, programs, activity logs, timesheets, and employment reports.
| How it works: Open PMS from the GSAS menu, review the dashboard tabs, use filters to narrow project information, export reports when needed, and use the left-side menu to manage project-related work. |
StepGuideline 1
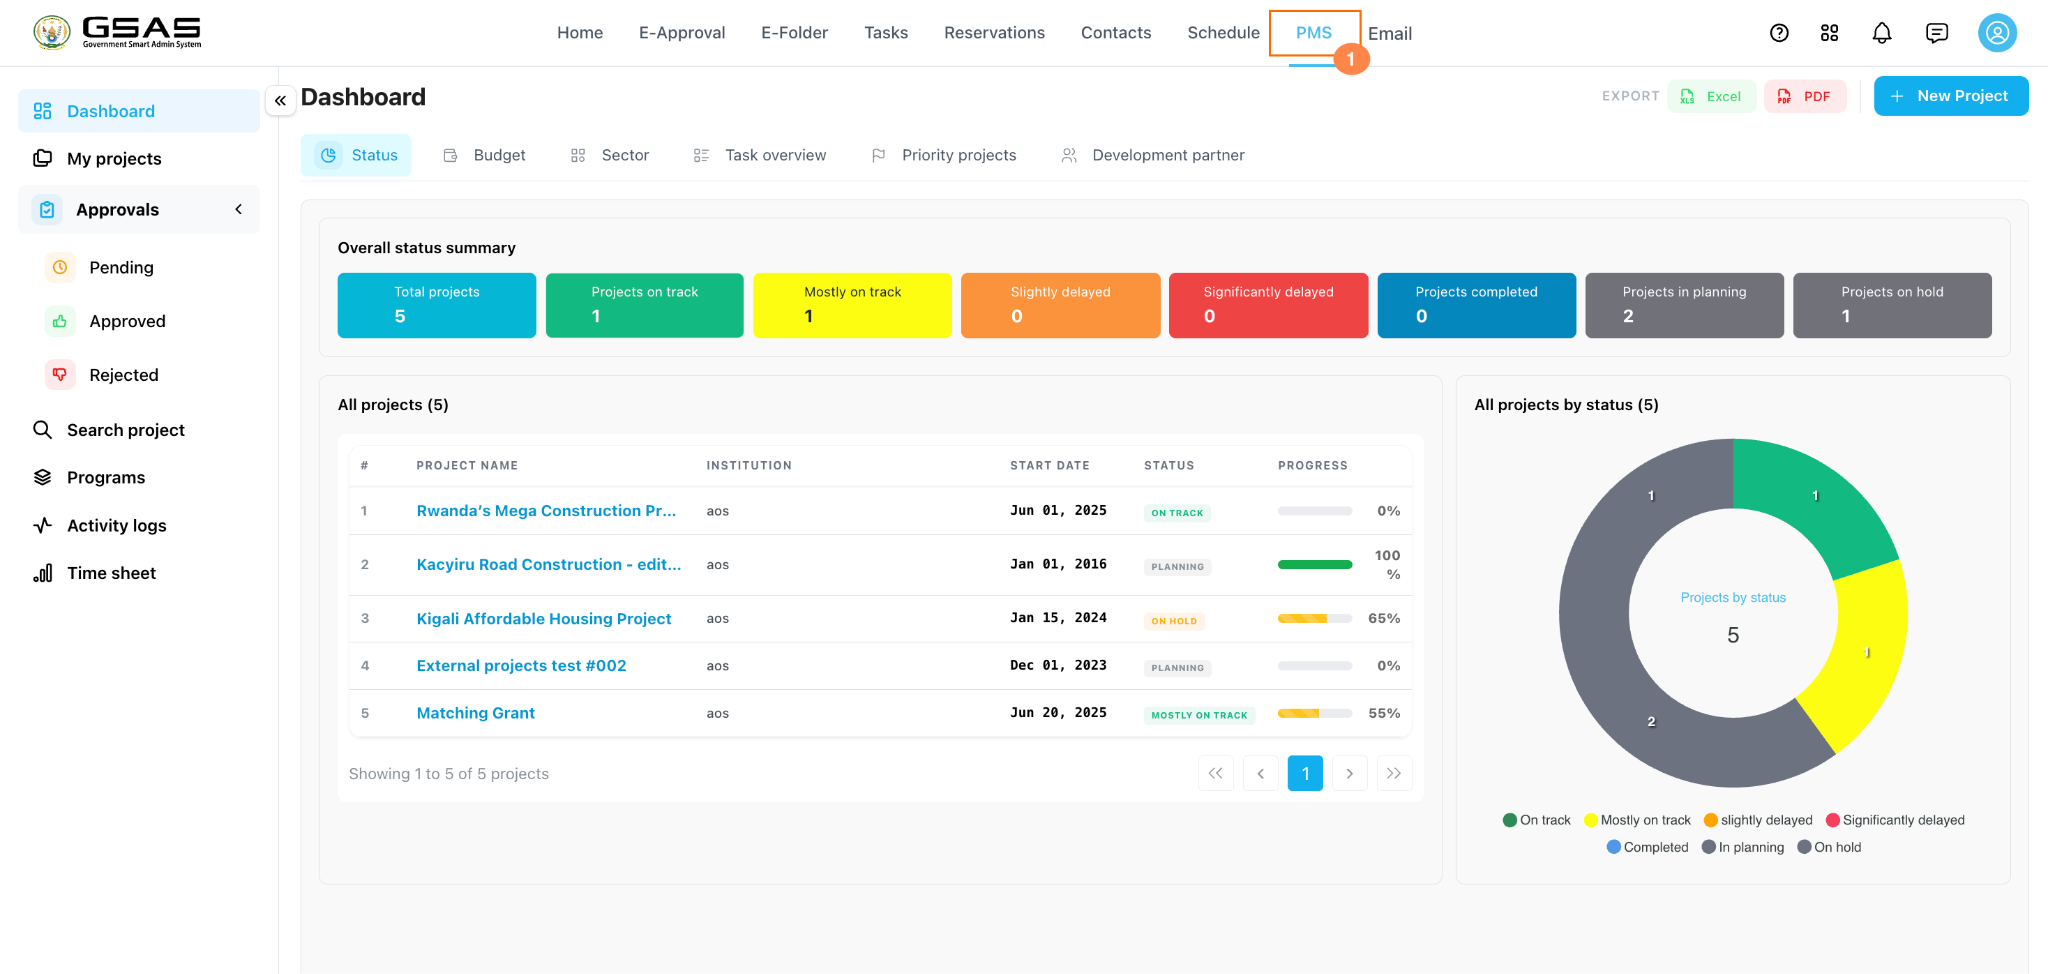
Open PMS
From the GSAS top menu, click PMS. Confirm that the Dashboard page opens and that you can see the dashboard tabs and project summary cards.

StepGuideline 2
Review the status summary
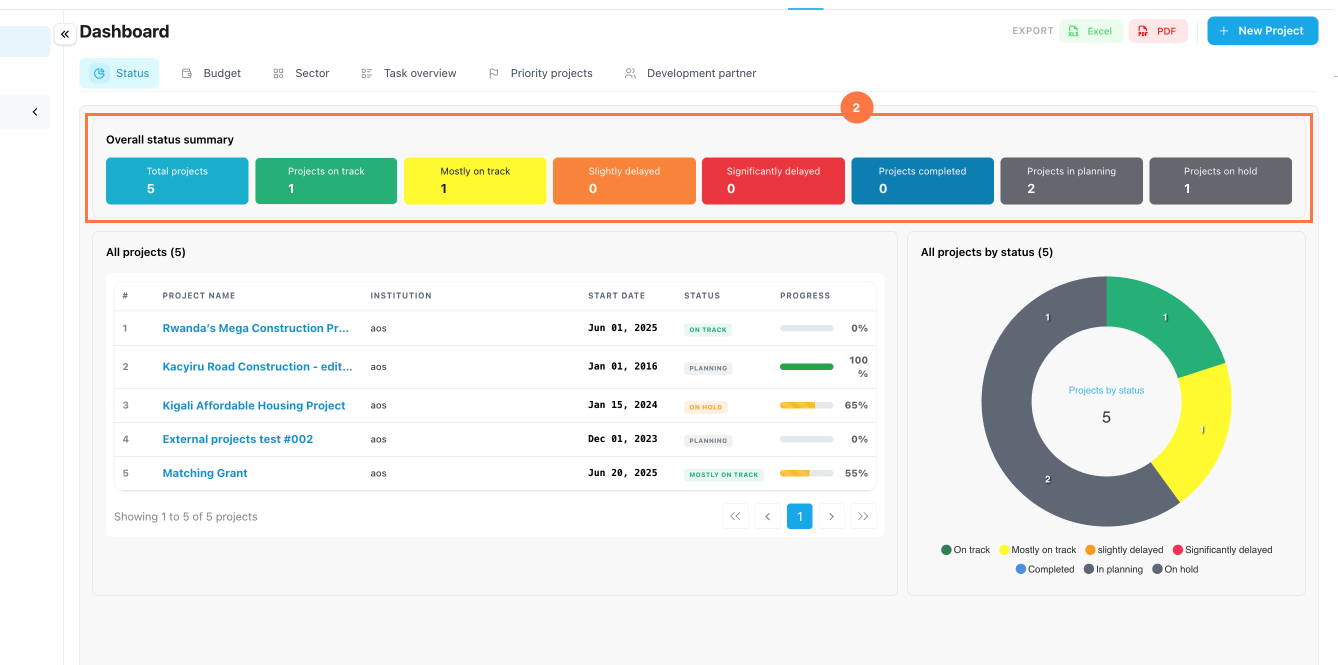
On the Status tab, review the colored cards in the Overall status summary.
These cards show the number of projects by status, including total projects, on track, mostly on track, delayed, completed, planning, and on hold.
Use the project table and chart below the cards to compare the status count with the project list and progress percentages.

| Tip: The dashboard only shows project information available to your user role and permissions. If a project is missing, confirm that you have been added as a creator, stakeholder, collaborator, developer, manager, or other authorized role. |
StepGuideline 3
Export dashboard data
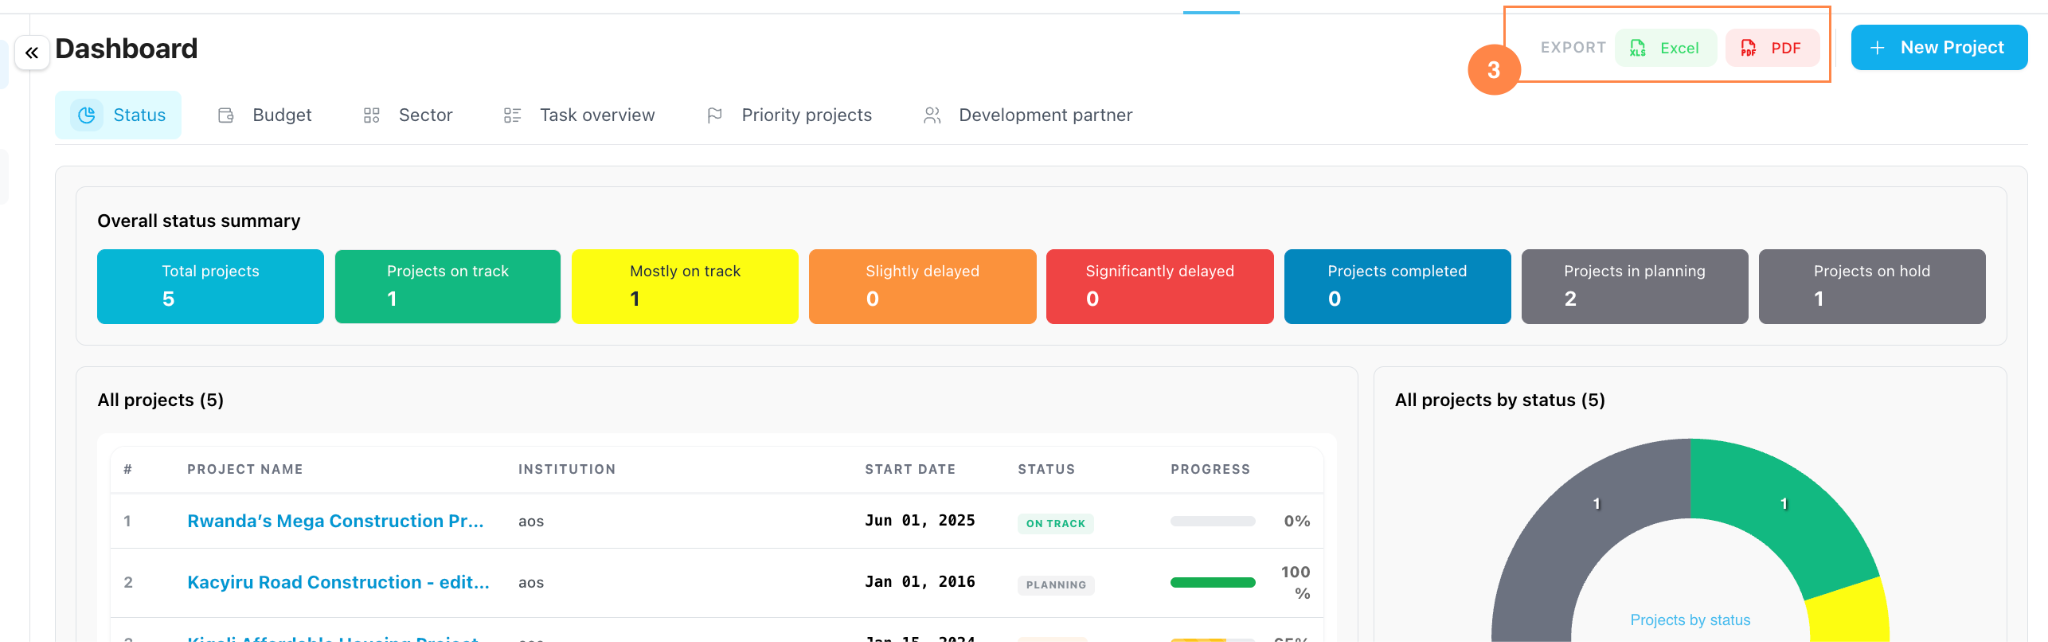
Use the Export areabuttons in the top right corner of the dashboard to download project information.
Click Excel when you need a spreadsheet for analysis, or click PDF when you need a fixed report for sharing or filing.

StepGuideline 4
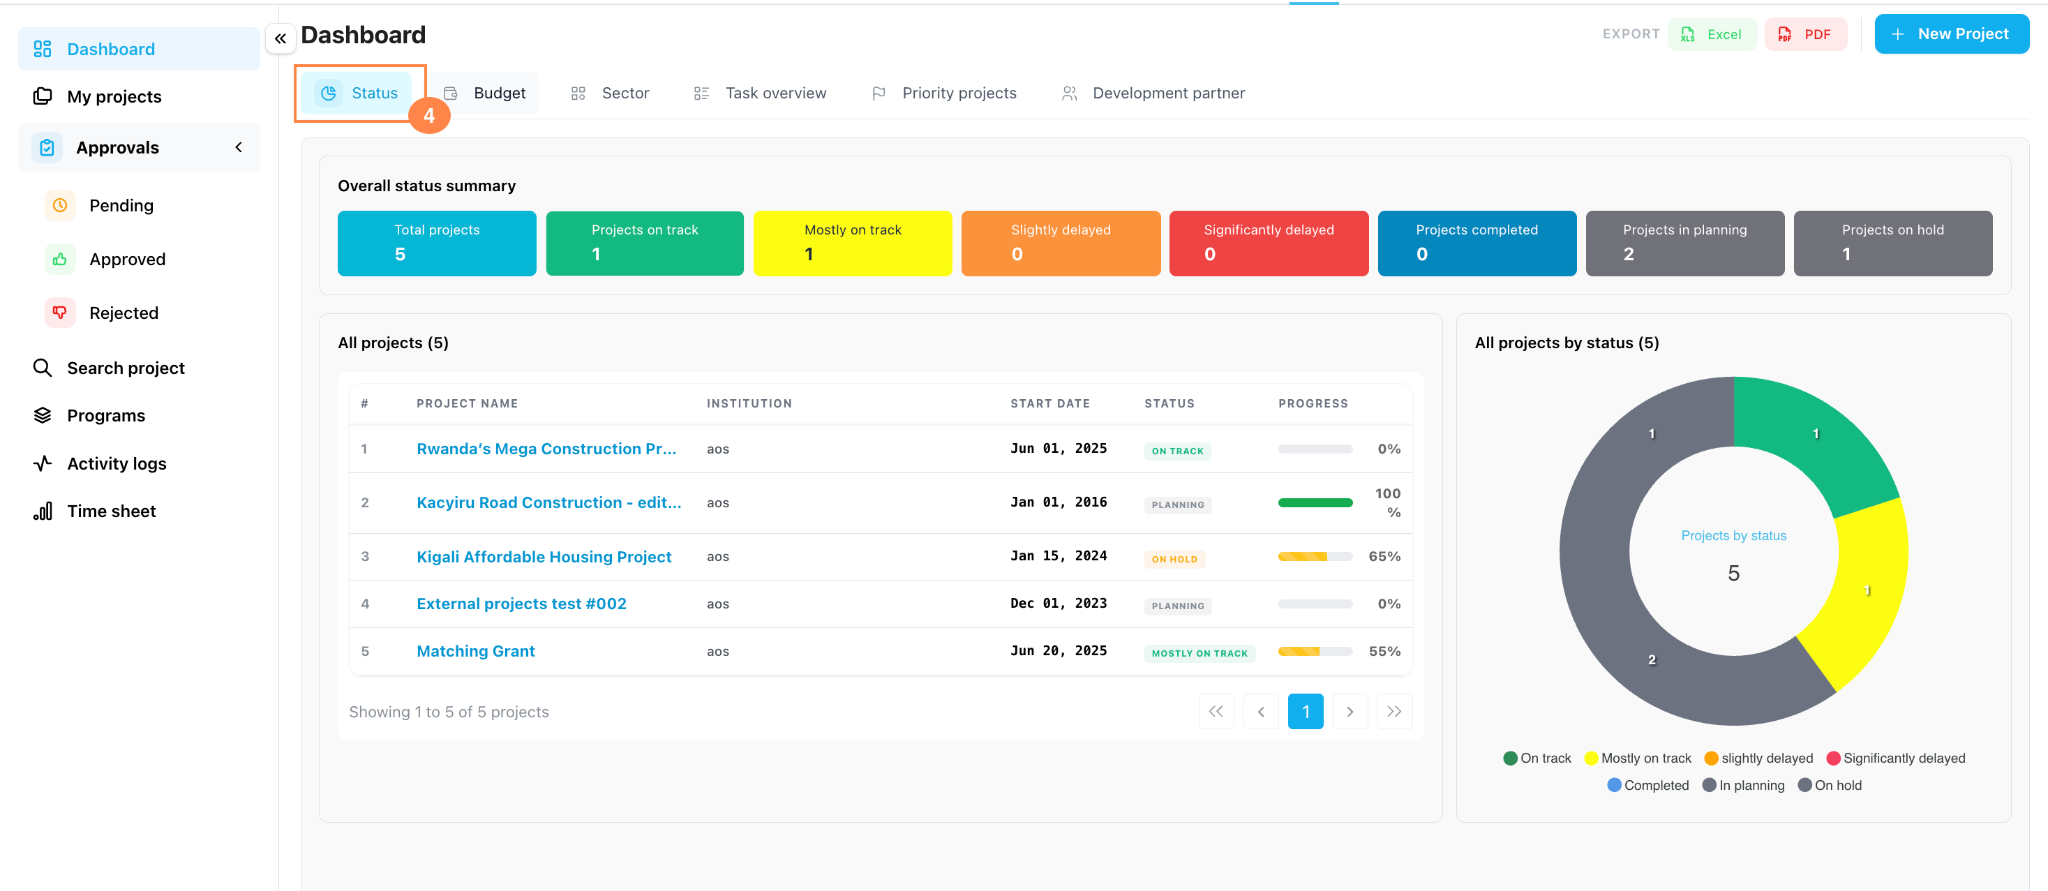
Use the Status tab
Click Status to return to the main project status view.
Use this tab when you needfor a quick progress check across multiple projects.

StepGuideline 5
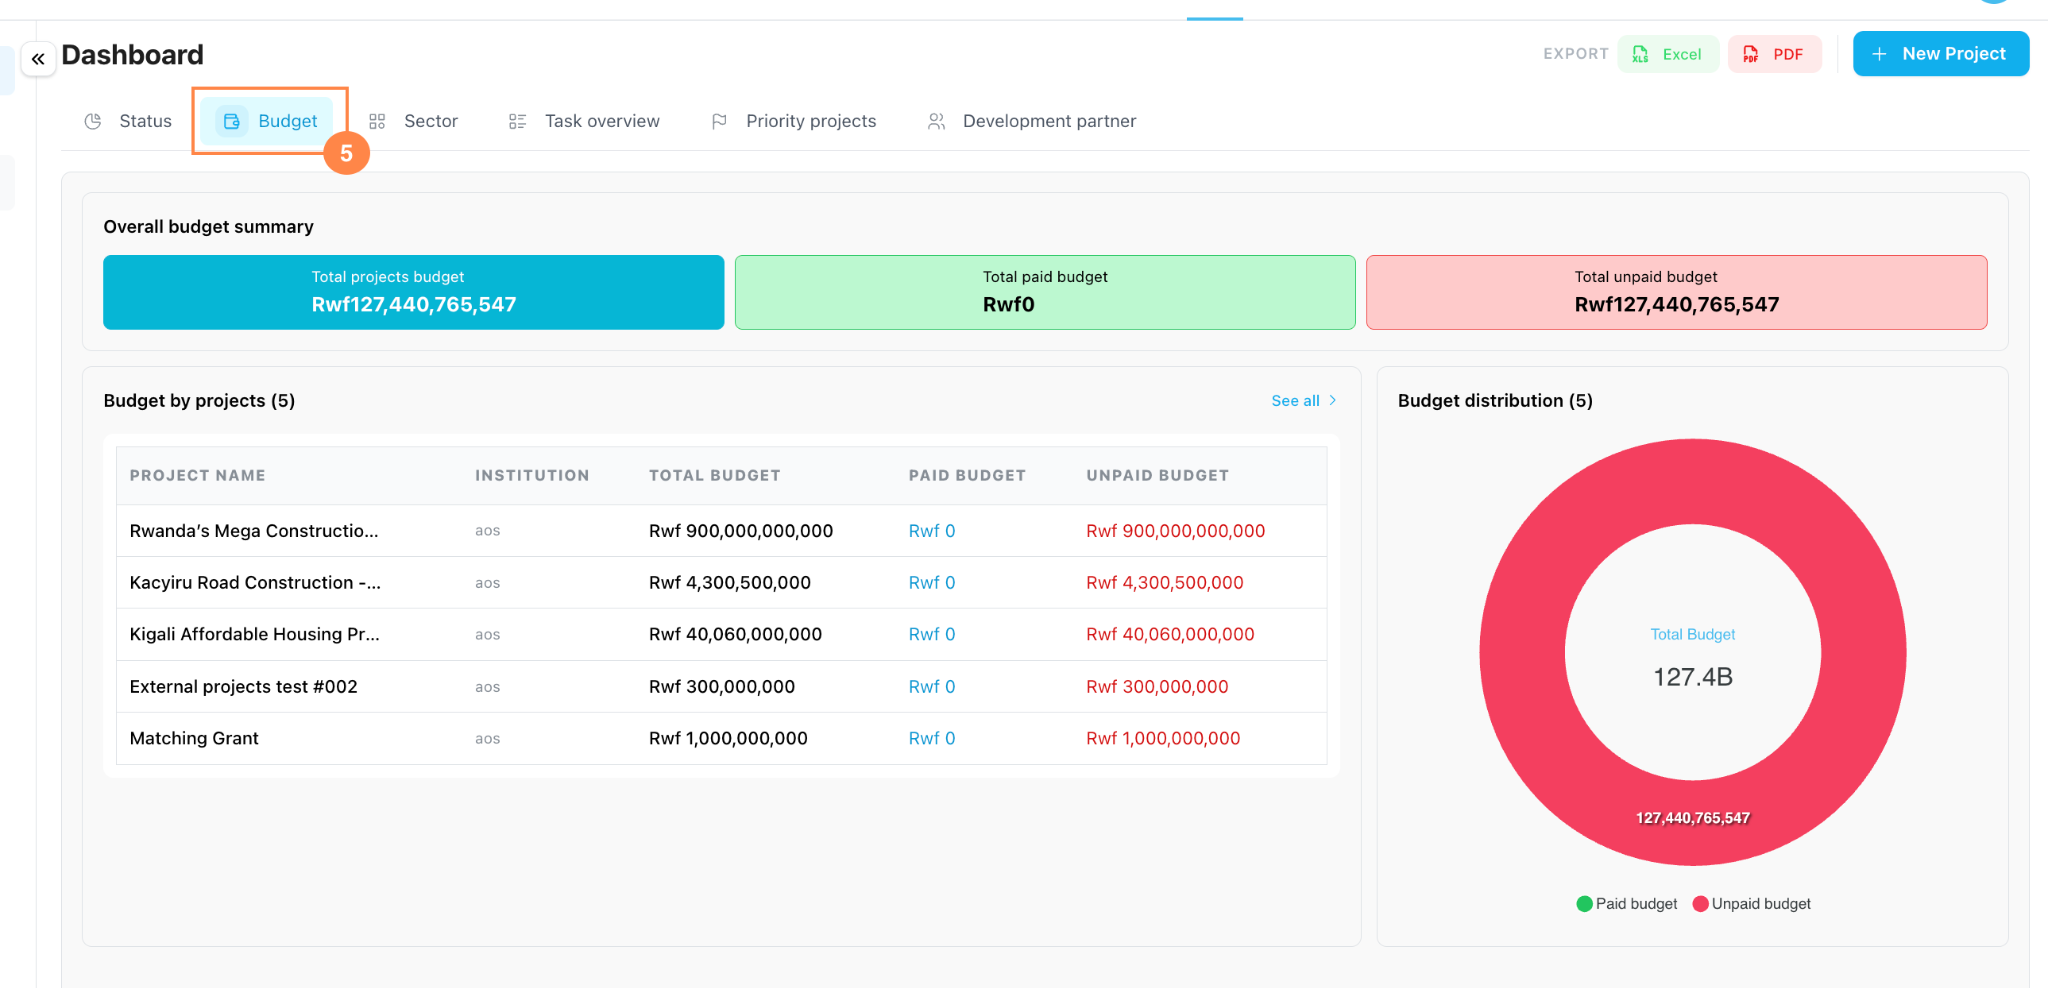
Review project budgets
Click Budget to review financial performance.
Use the summary cards to compare the totaltotal, project budget, paid budget,paid, and unpaid budget.project budgets. Review the project table to see budget details by project.

| Total |
: The full approved or recorded budget across the projects is displayed. |
| Total paid budget | : The amount already paid or marked as used. |
| Total unpaid budget | : The remaining amount that has not yet been paid. |
StepGuideline 6
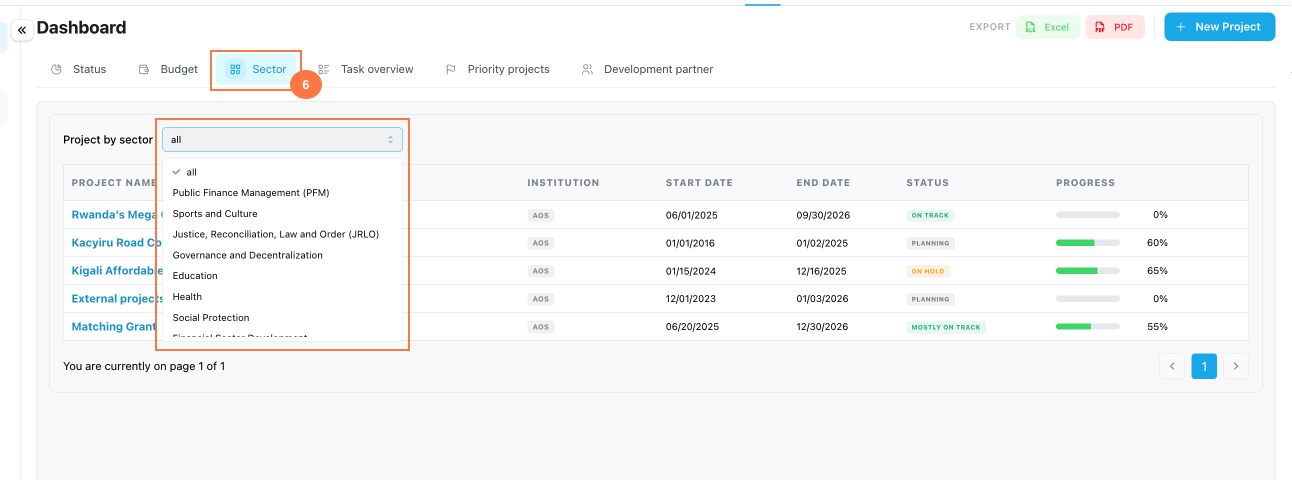
Filter projects by sector
Click Sector, then use the Project by sector dropdown to filter projects by sector.
Select all to return to the full list.

StepGuideline 7
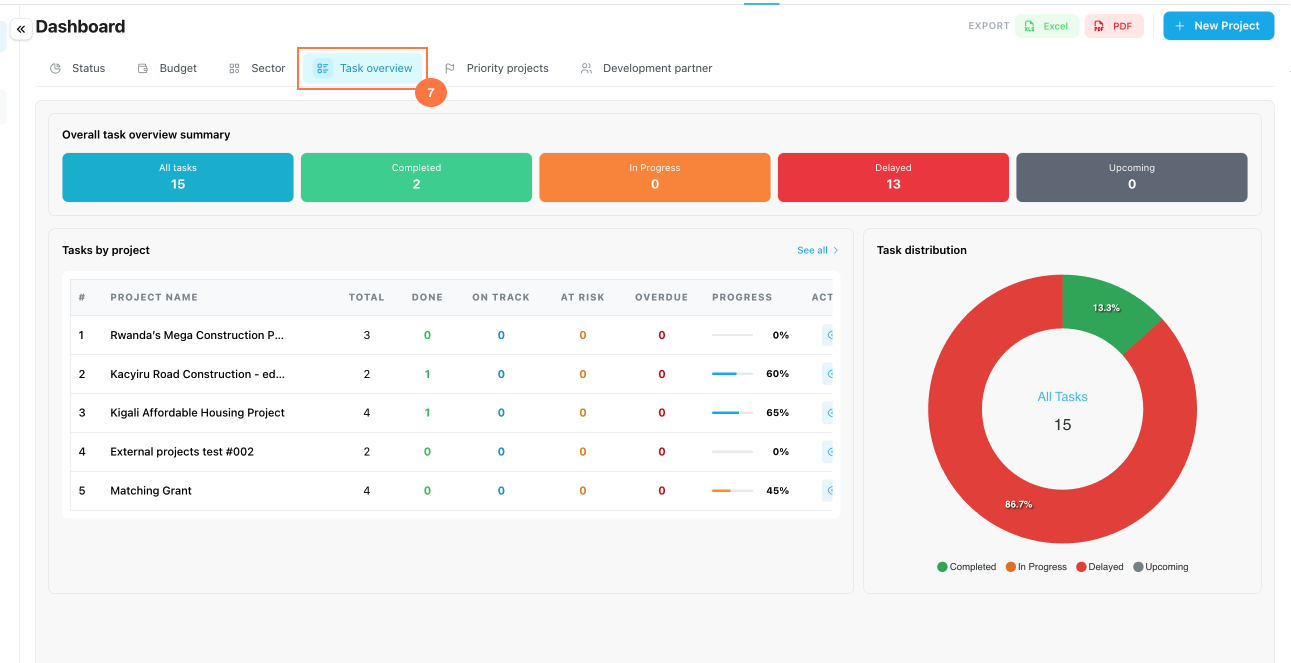
Review tasks and deliverables
Click Task overview to review the task and deliverable status for each project.
Use this view to identify work that is pending, in progress, delayed, or completed.

StepGuideline 8
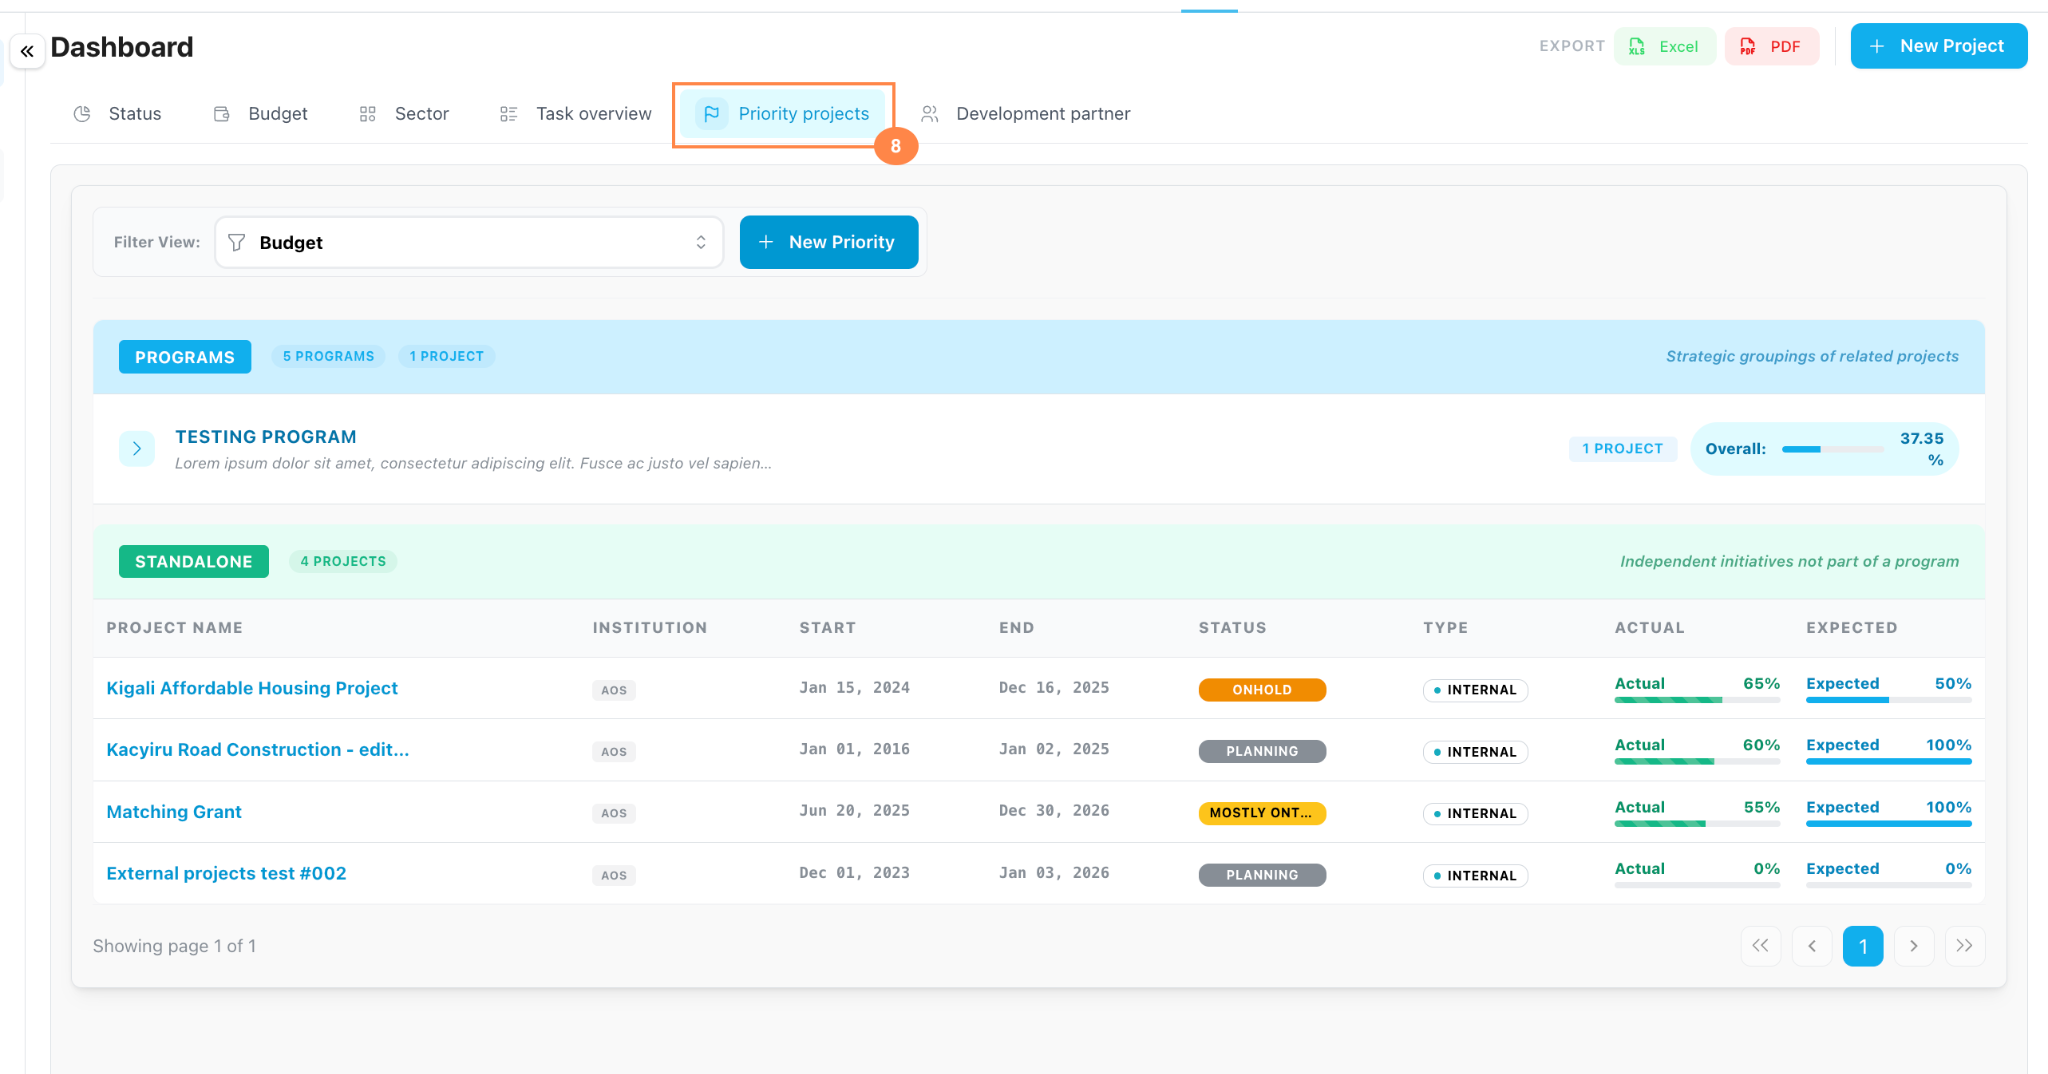
Open Priority projects
Click Priority projects to focus on projects that require closer attention. Use this area to organize projects by priority type, such as budget, risk, impact, or dependency.

StepGuideline 9
Review the priority matrix
In the Priority projects area, open the Filter View dropdown. Select the matrix view you want to review, such as Budget, Risk, Impact, or Dependency.

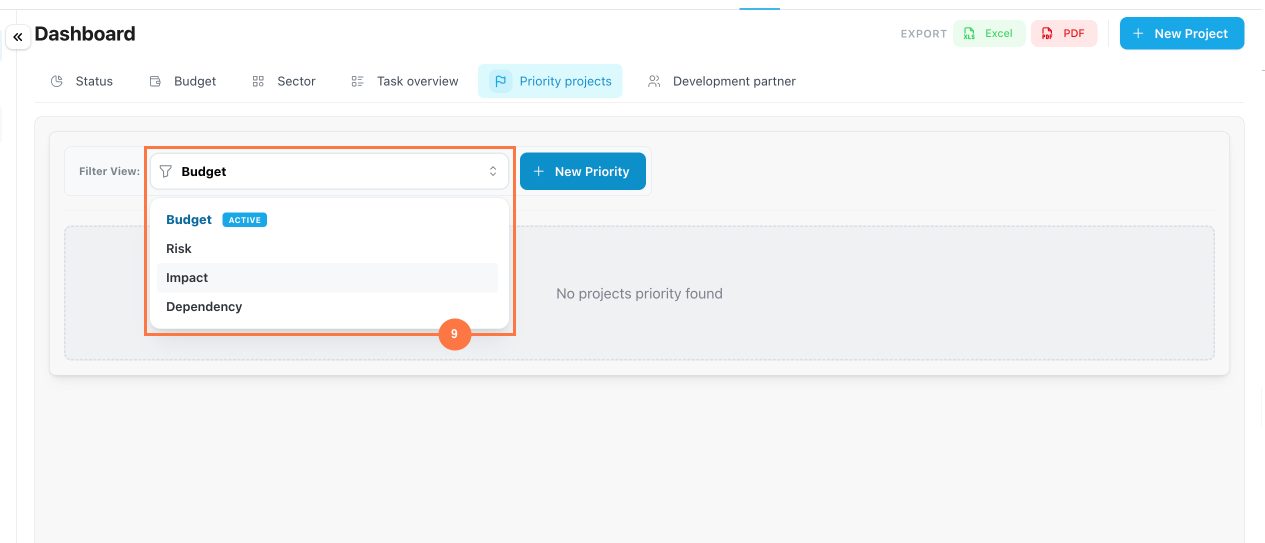
| Budget | : Use this view to focus on budget-related priority items. |
| Risk | : Use this view to identify projects that may need risk follow-up. |
| Impact | : Use this view to track projects with important expected outcomes. |
| Dependency | : Use this view to monitor projects that depend on other activities, teams, or programs. |
StepGuideline 10
Create a new priority list
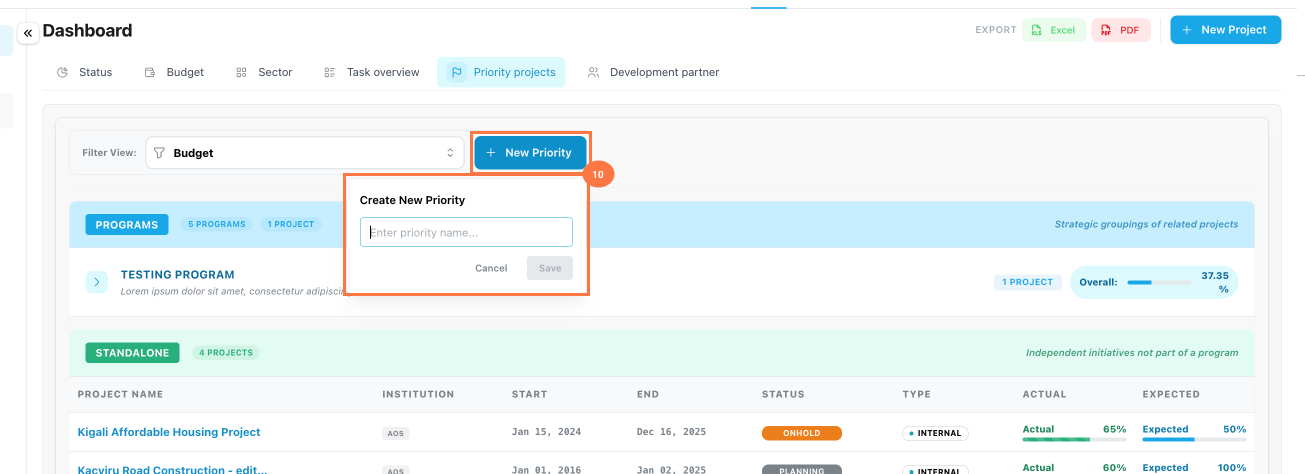
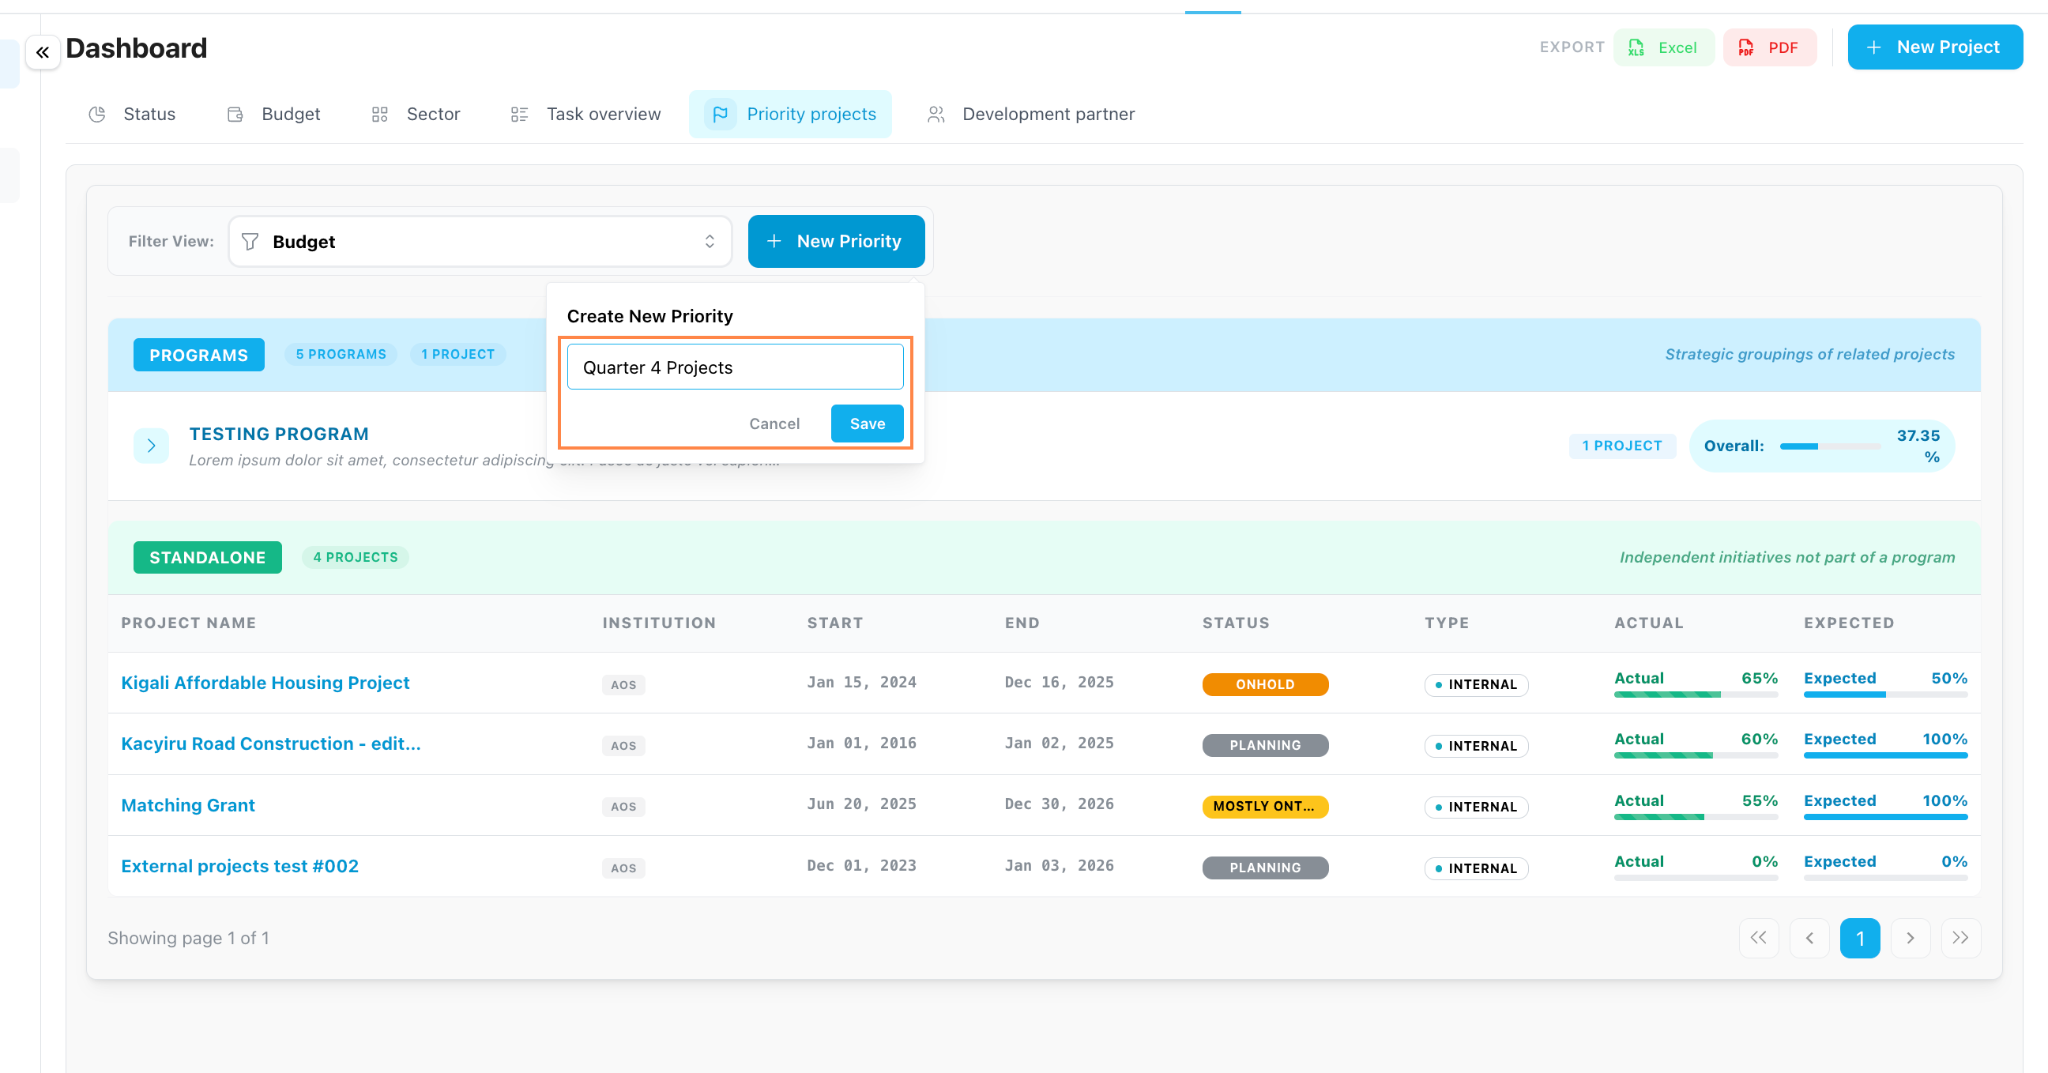
Click New Priority to create a custom priority list.
Enter a clear priority name, then click Save.


StepGuideline 11
Assign standalone projects to a priority
After creating or selecting a priority list, click Assign Projects. In the assignment window, keep the Projects tab selected, then tick the checkbox beside each project you want to add.

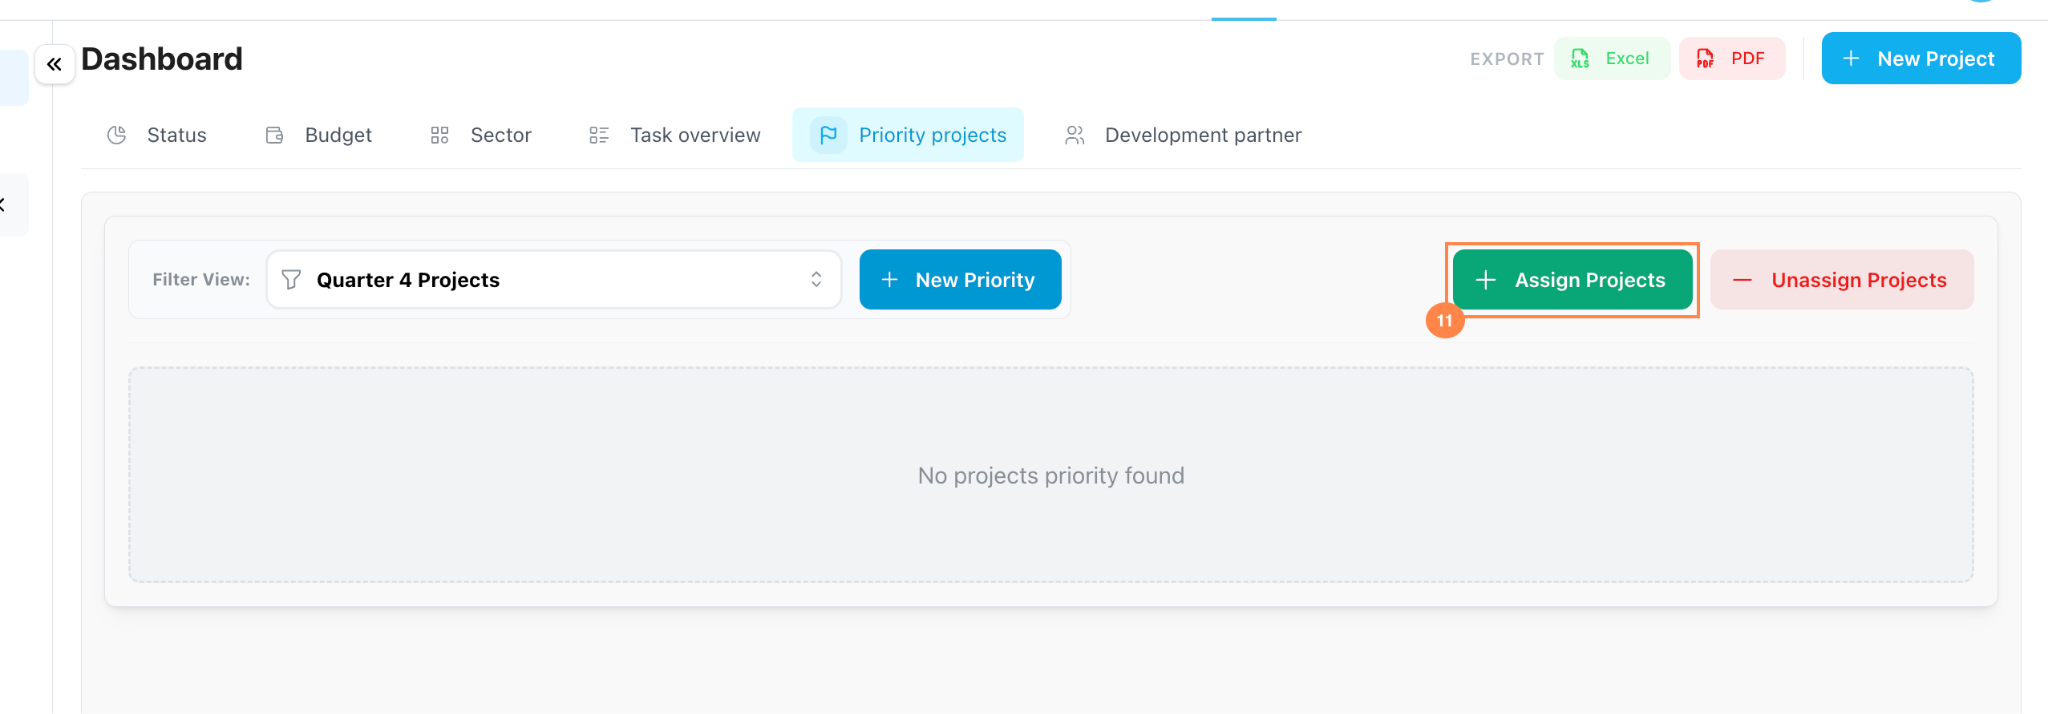

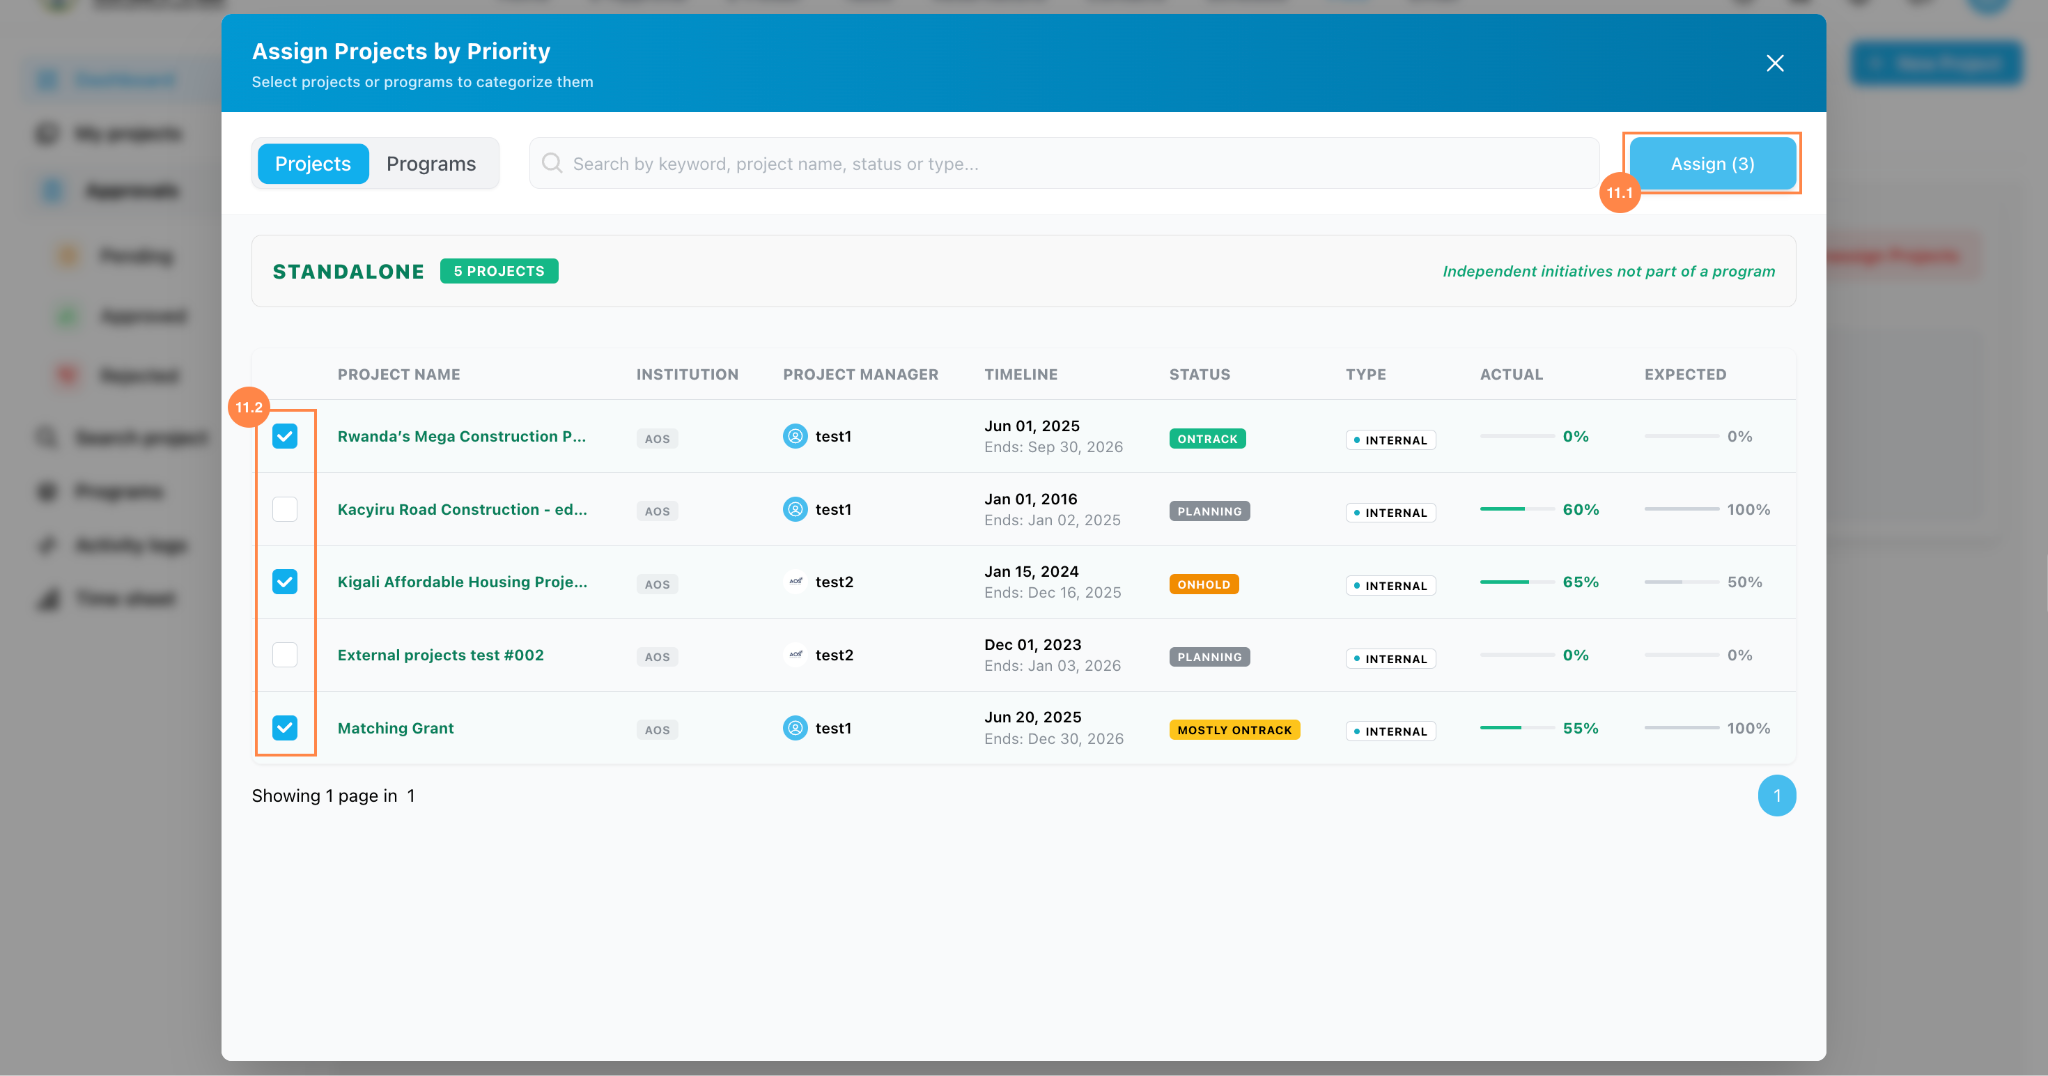
Click Assign to save the selected projects to the priority list.

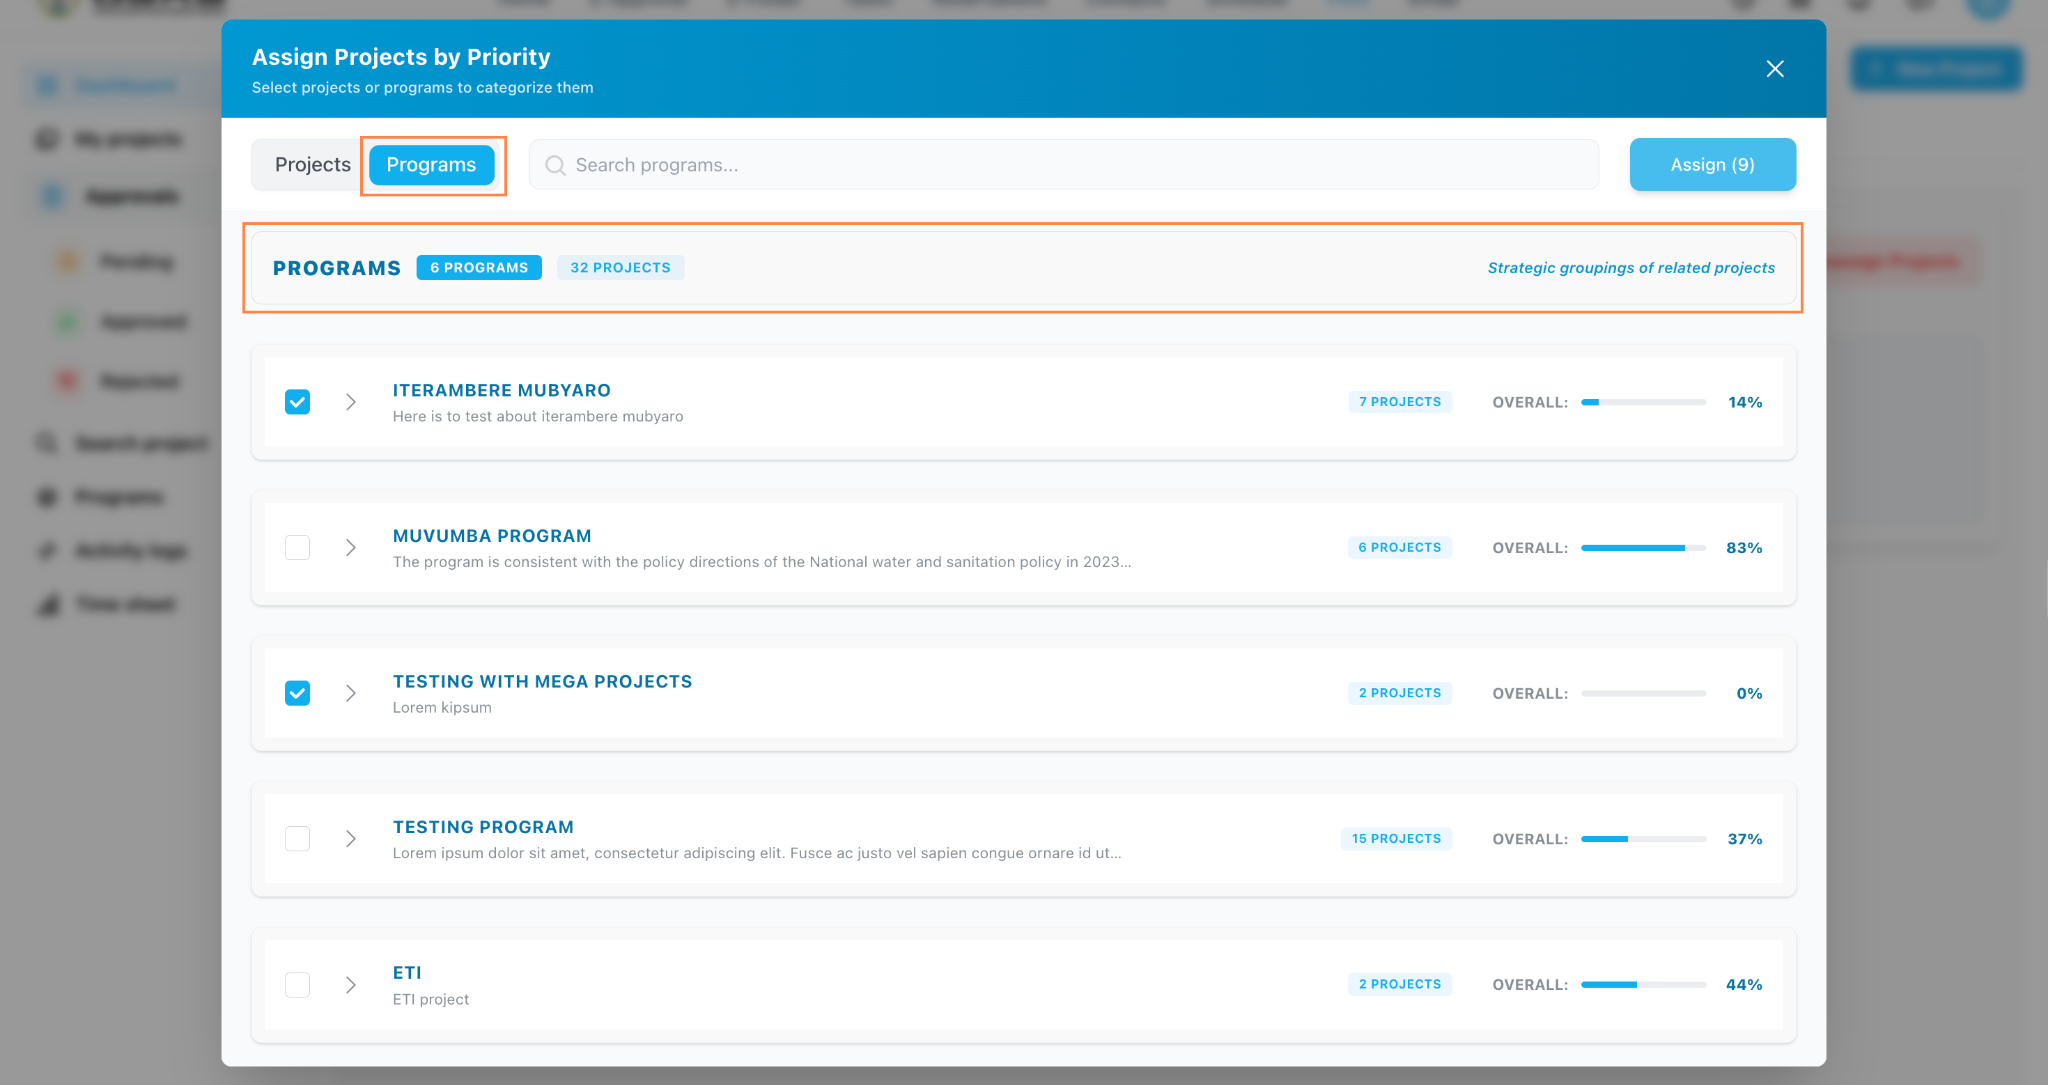
AssignUse this to assign a whole program insteadinstead.
If you want the priority list to track an entire program, open the Programs tab in the same assignment window, select the program, then click Assign.

StepGuideline 12
Review Development partner funding
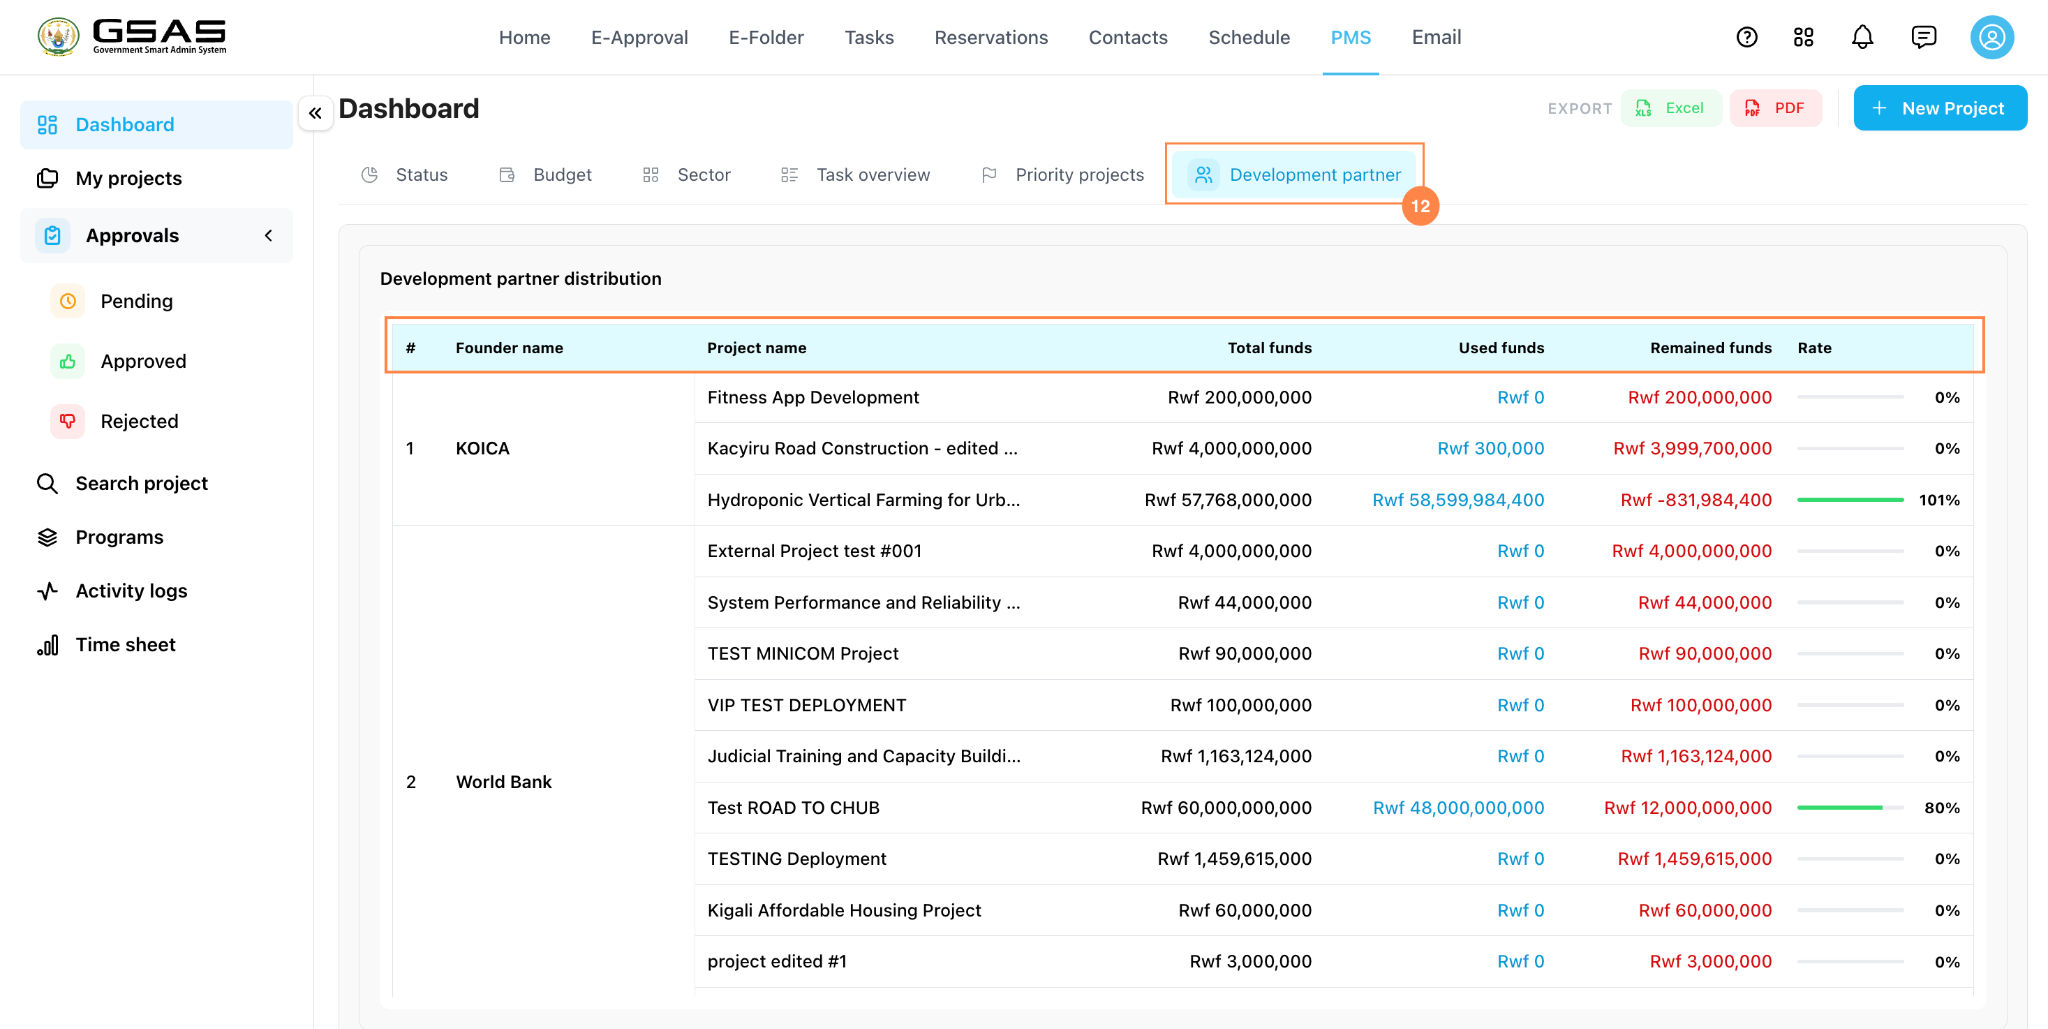
Click the Development partner to review the funding information by partner.
Use this section to check each partner, the projects they fund, the funds used, total funds, and fund utilization.

StepGuideline 13
Open My projects
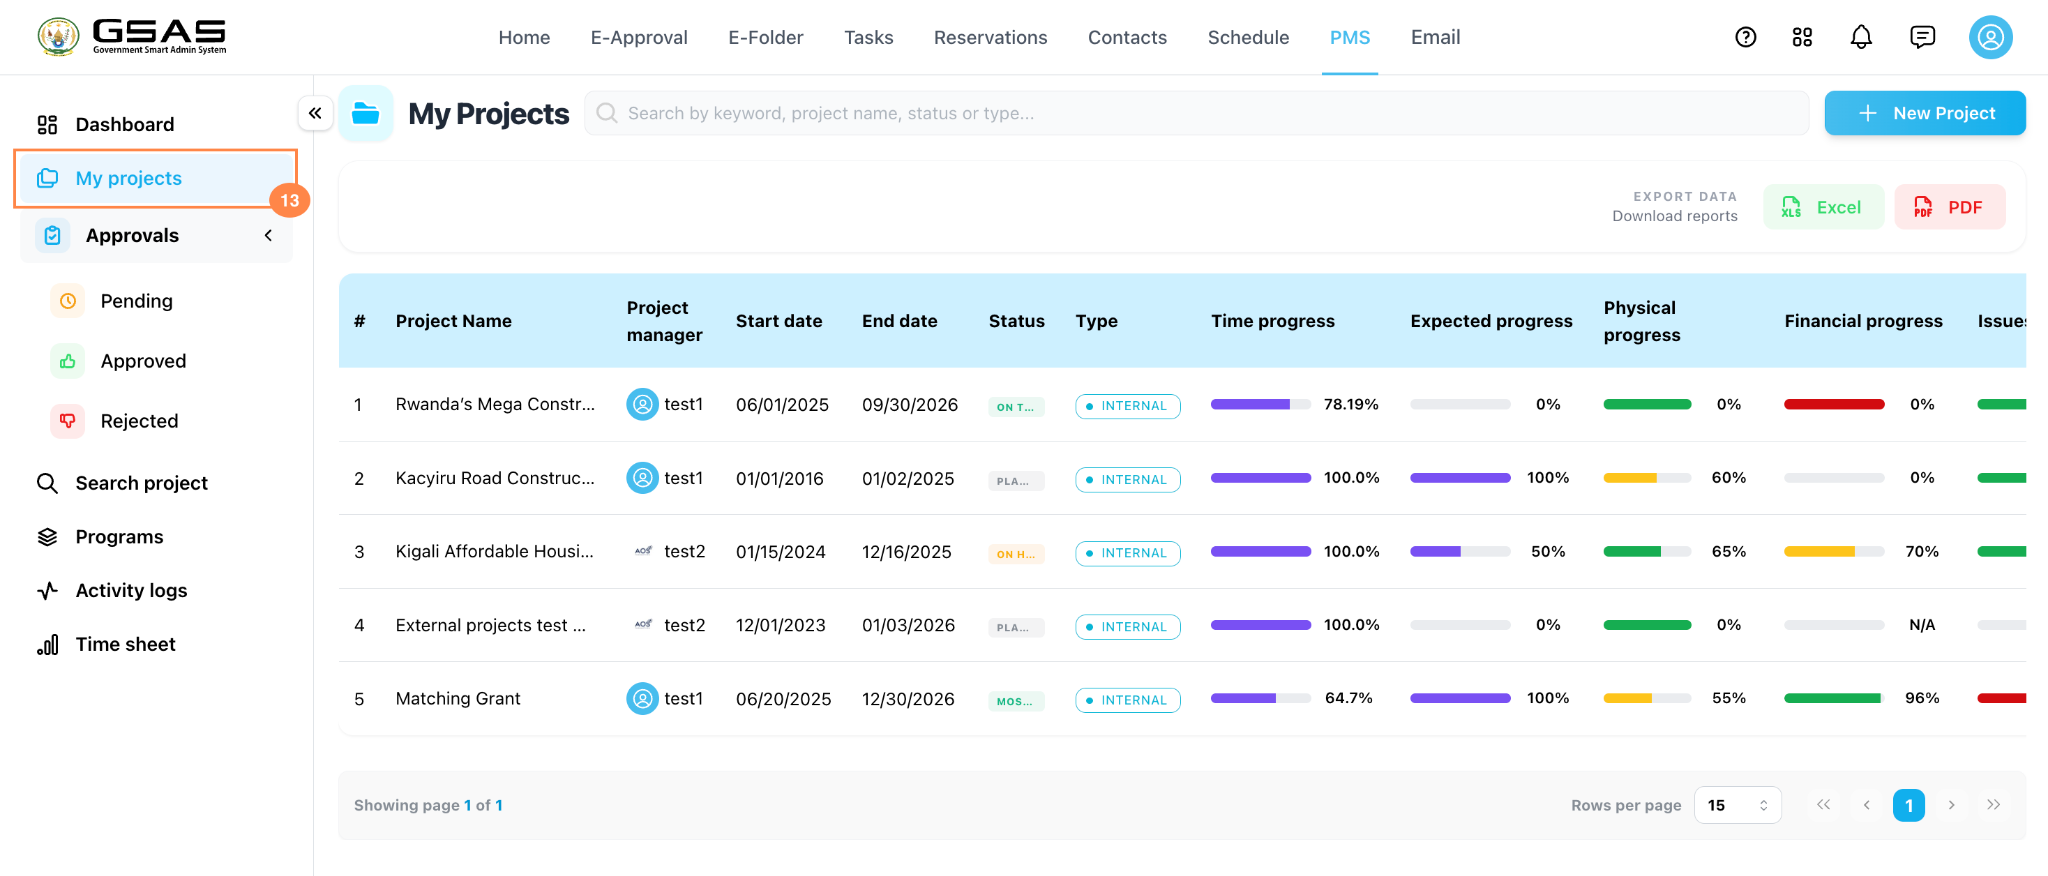
From the left-side menu, click My projects to findview projects connectedassociated towith your account.
Use this page when you want to view projects where you are the creator, stakeholder, collaborator, developer, project manager, or another assigned role.

StepGuideline 14
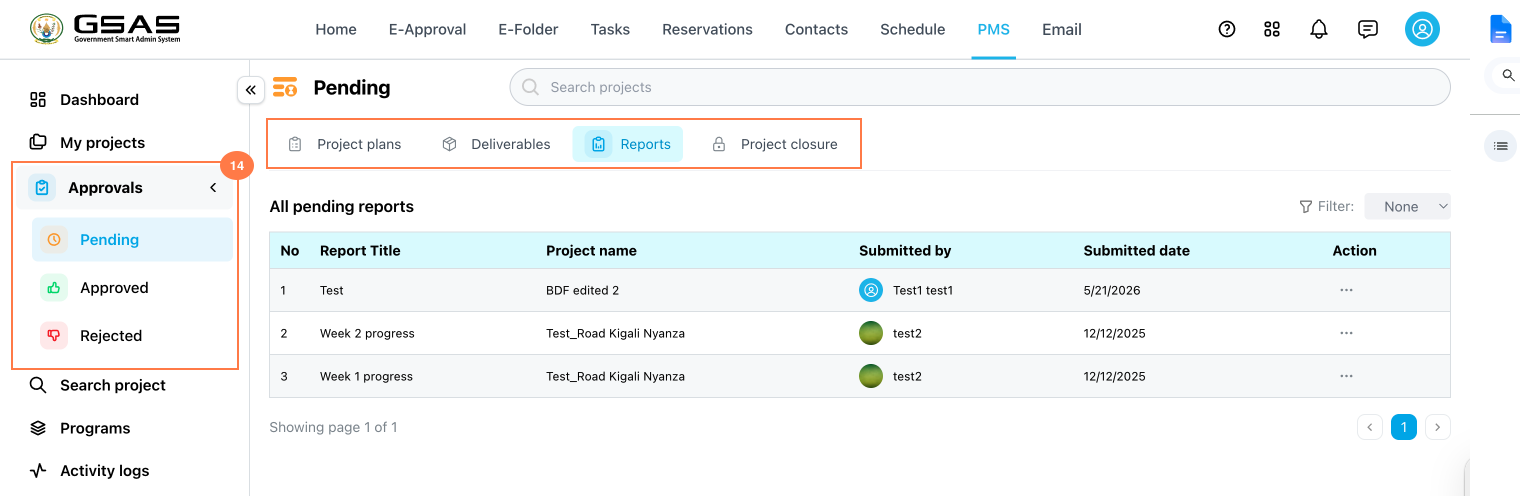
Manage project approvals
Open the Approvals menu to review pending approval items.
Depending on your role, this section may include project plans, deliverables, reports, or projects awaiting your decision.

StepGuideline 15
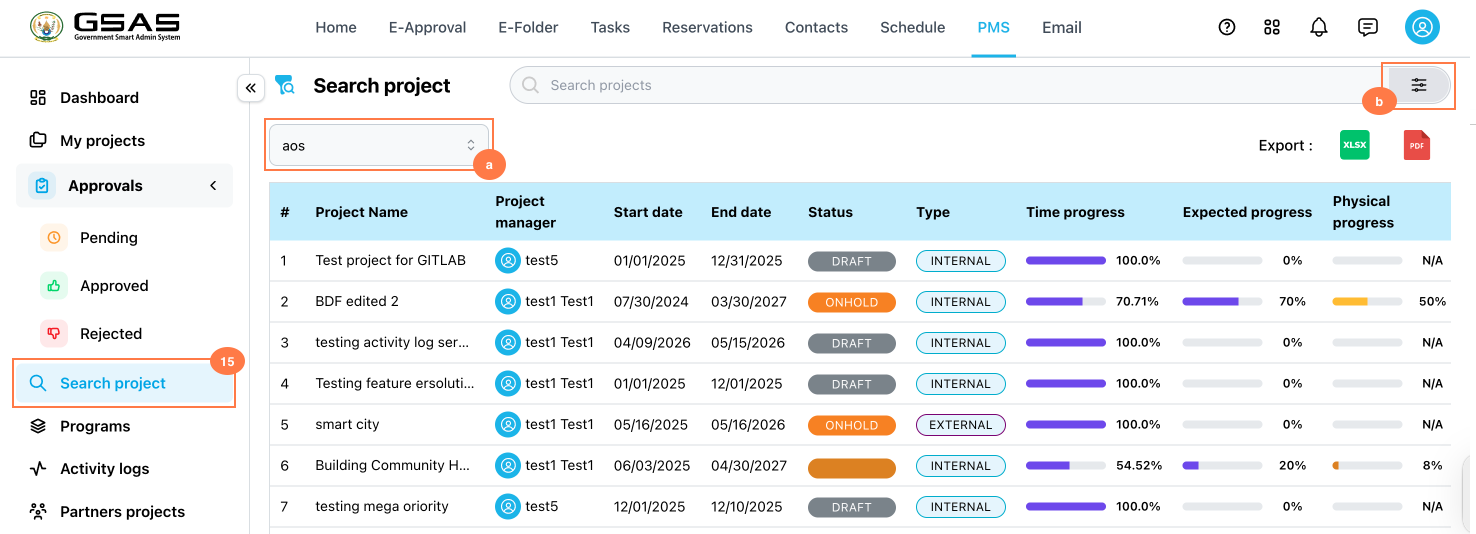
Search for projects
Click Search project in the left-side menu.menu (b).
In case you have a project from different institutions, narrow down by selecting the institution you want to see (a).
Use the search box to enter a keyword, project name, status, or other available project information.

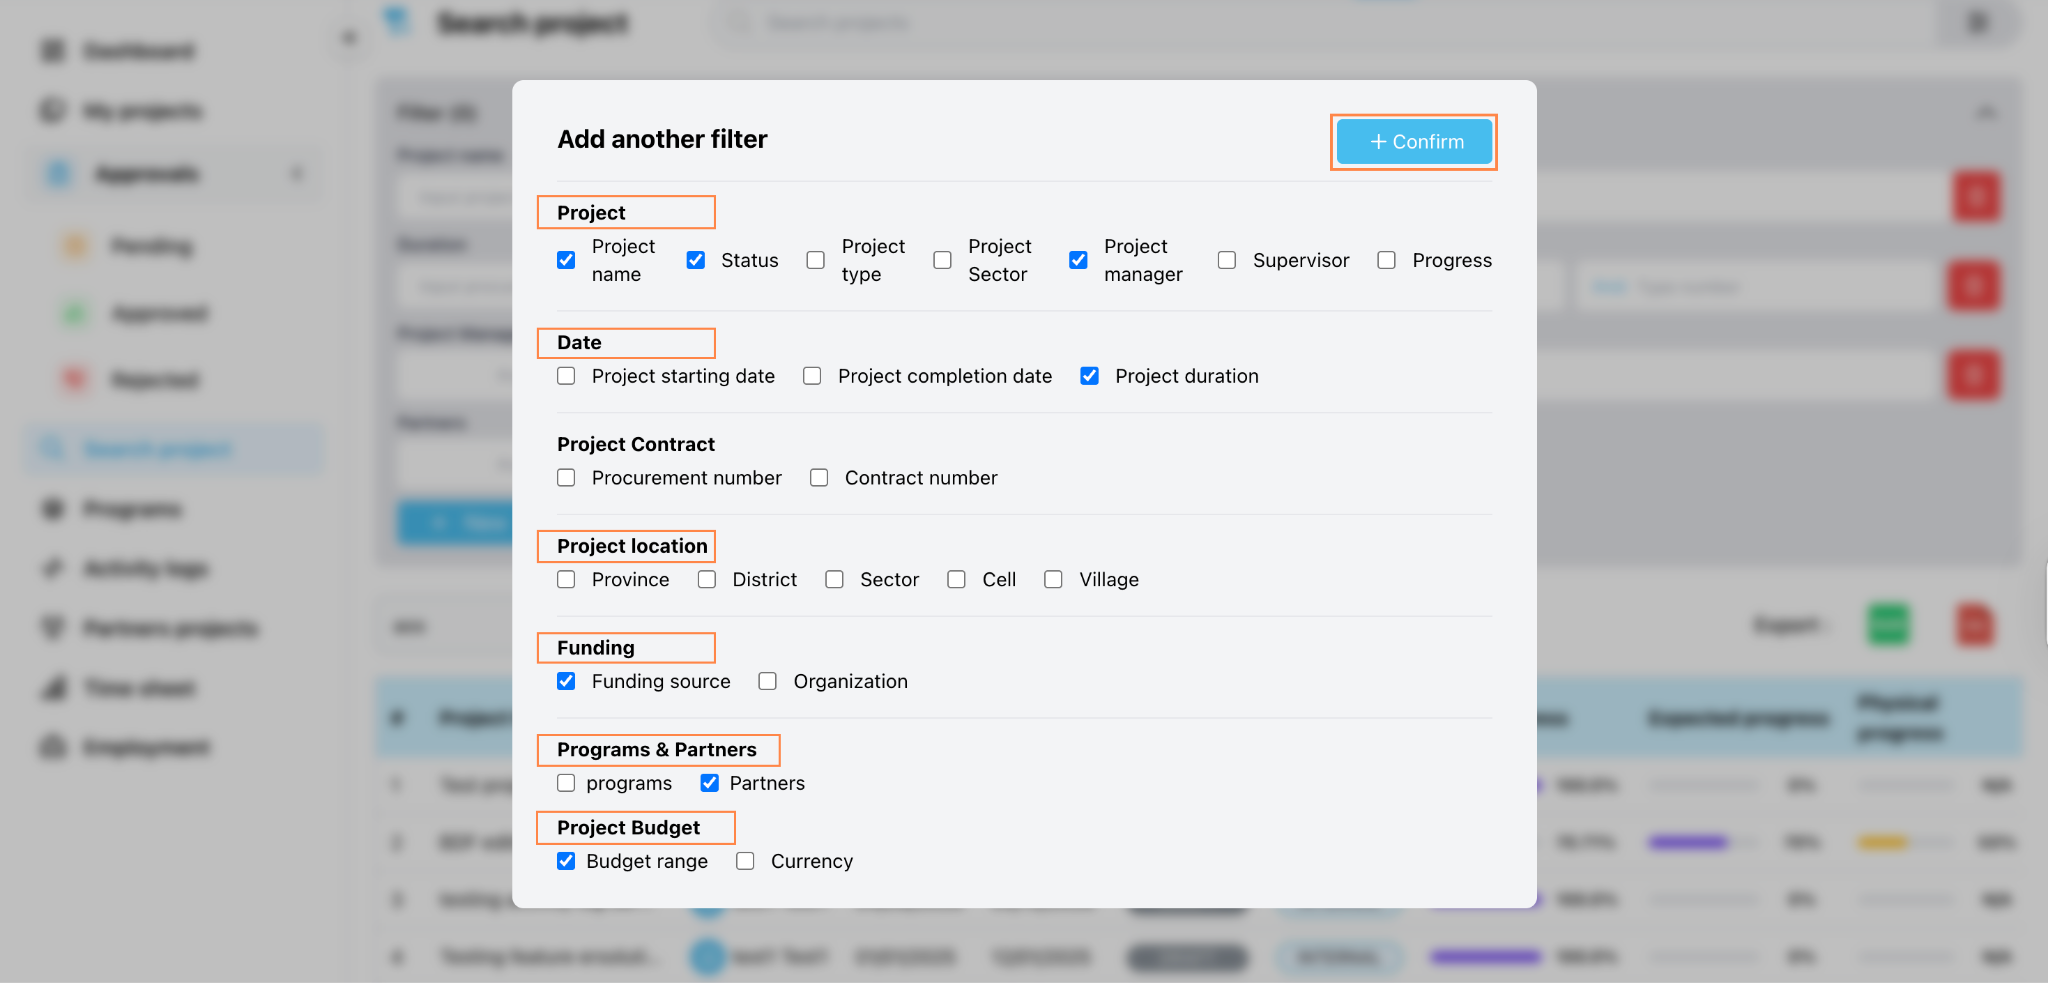
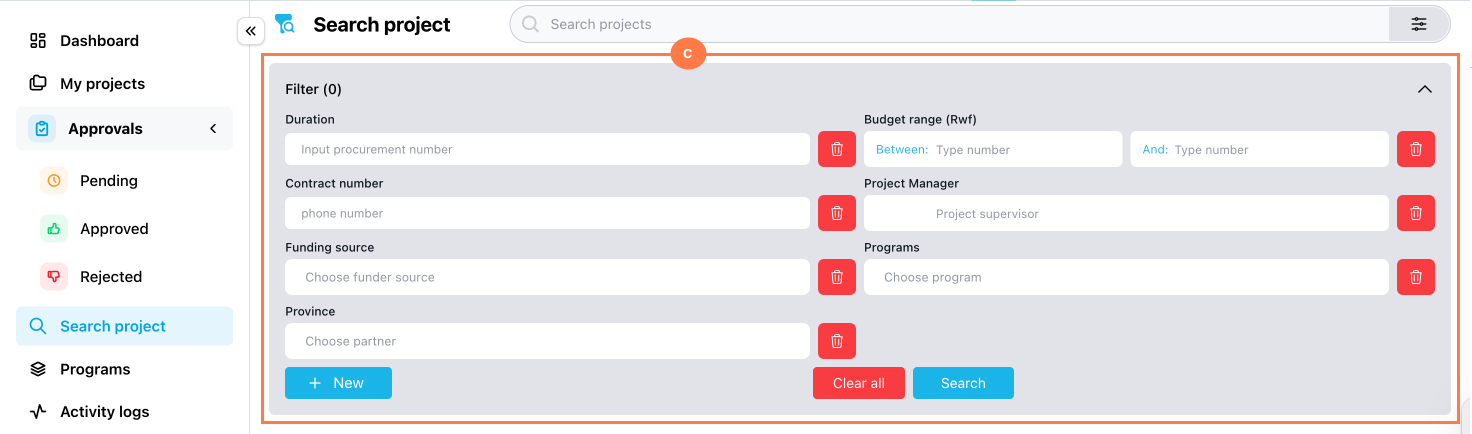
To narrow your search, click the filter option and select the parameters you want to use.
After choosing the filters, click Confirm.


| Search tip: Start with the simplest information you have, such as the project name or status. Add more filters only when the results are too broad. |
StepGuideline 16
Review programs
Click Programs in the left-side menu to view programs and the projects grouped under them.
Use this page when projects share the same objective, sector, or category and need to be followed together.

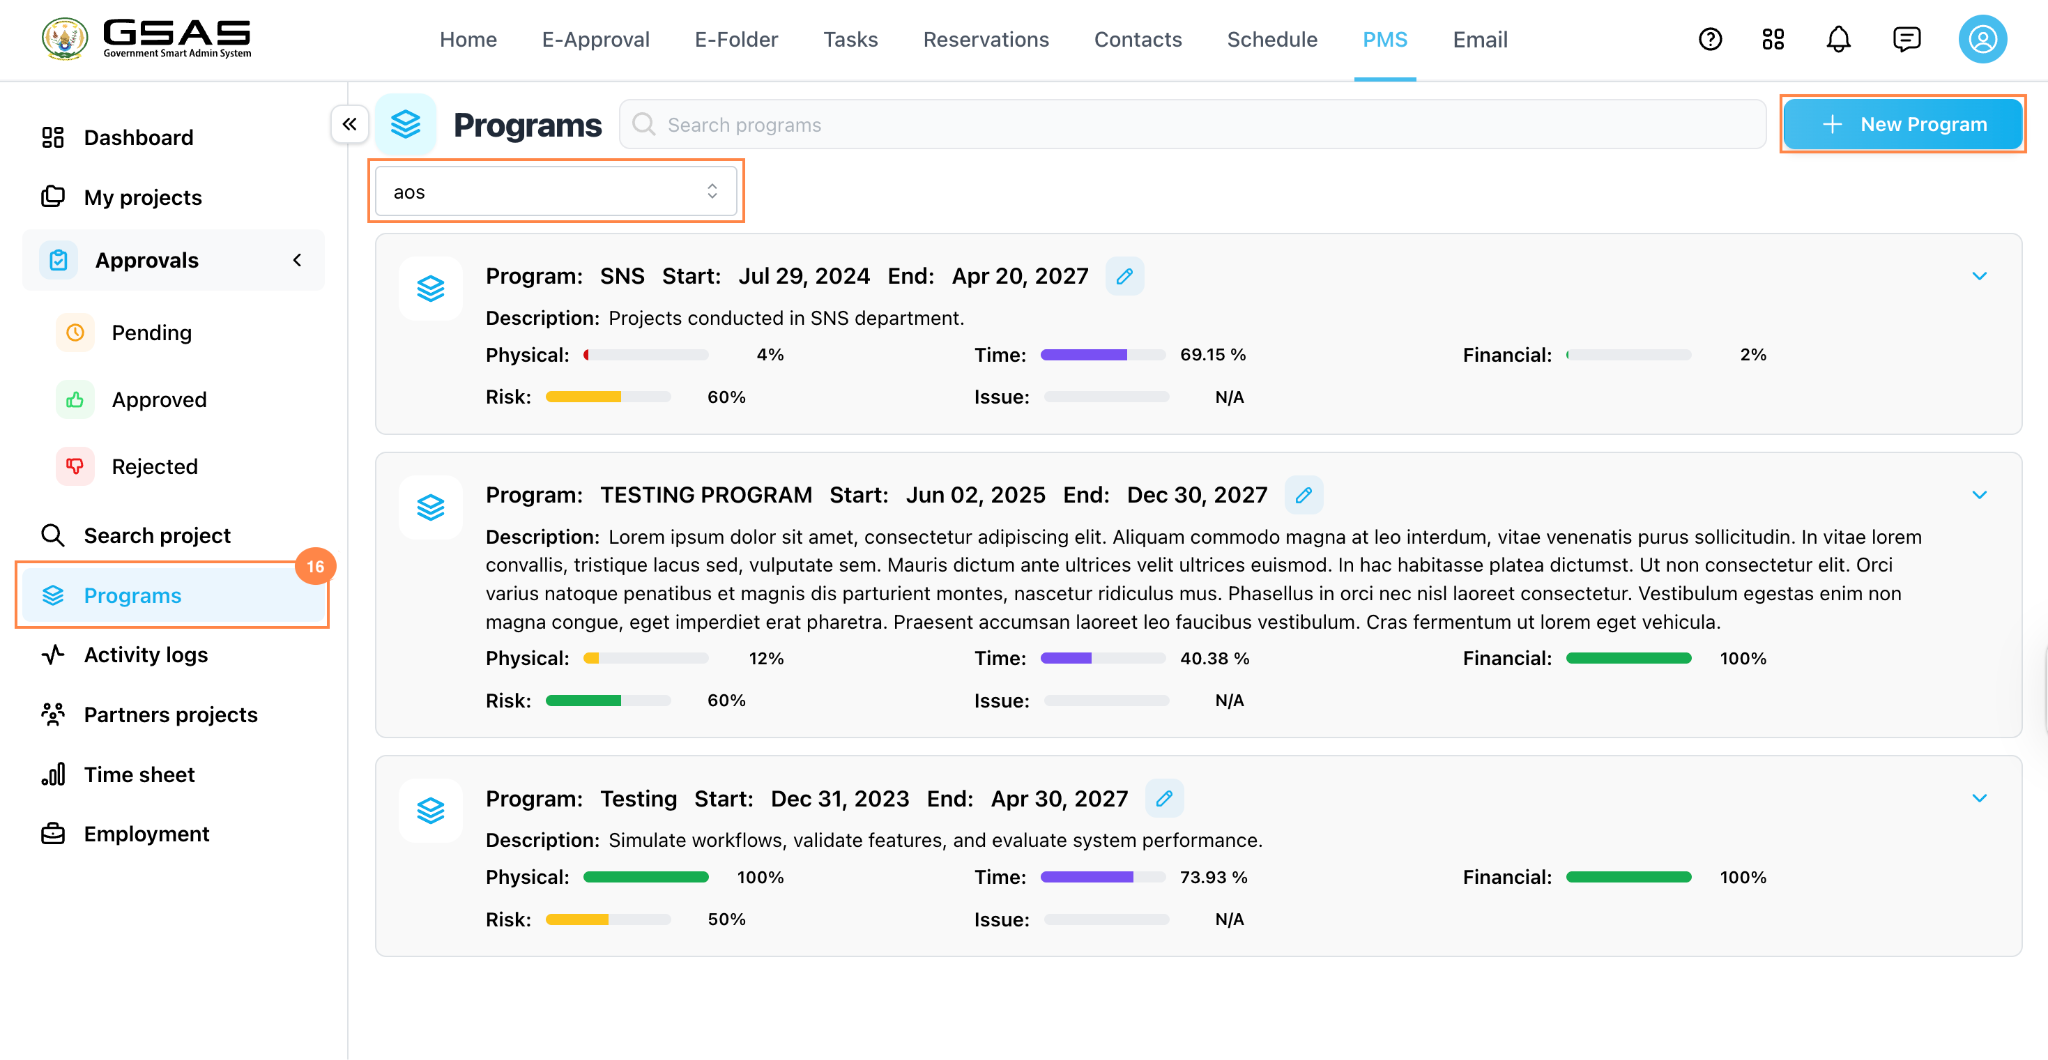
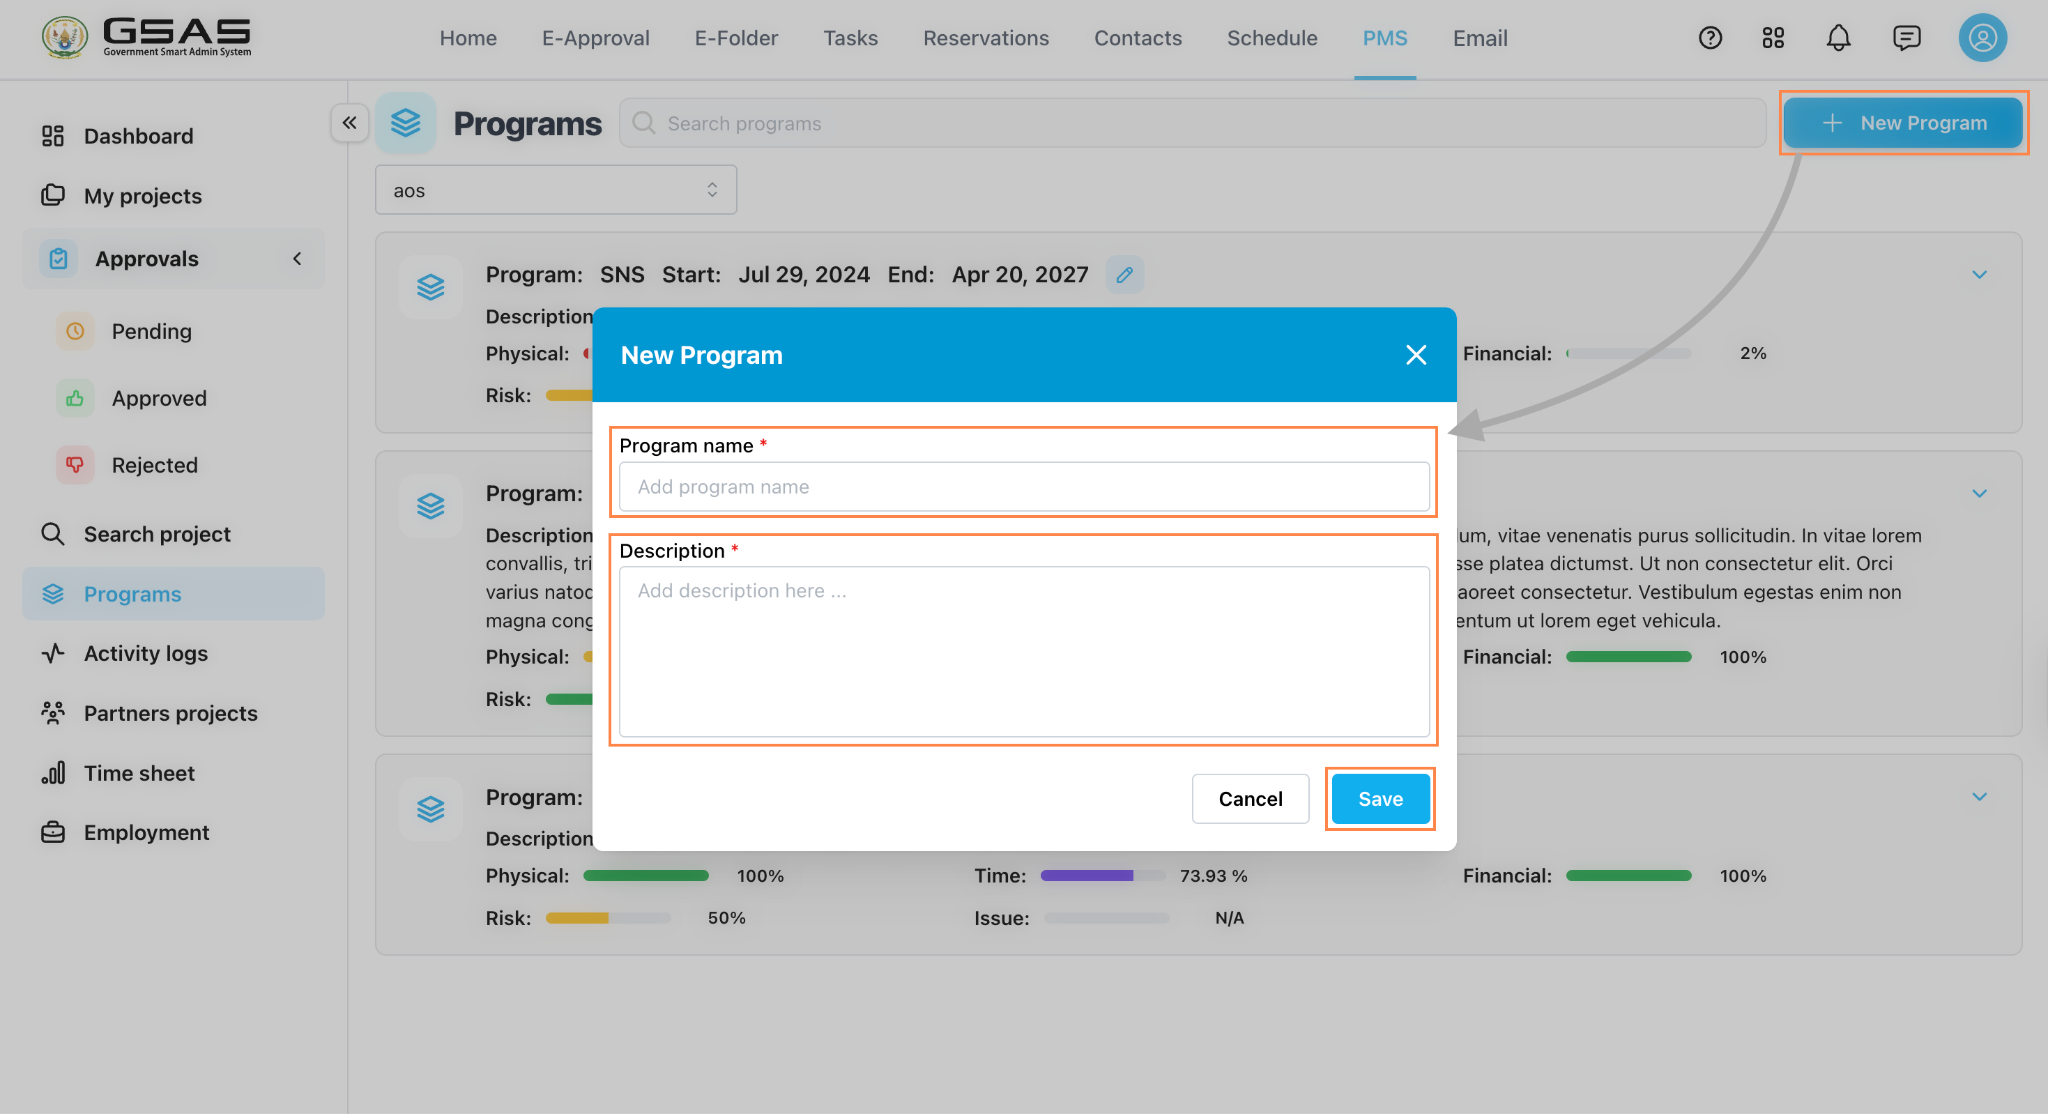
To create a new program, click New Program, enter the program name and description, then click Save.

StepGuideline 17
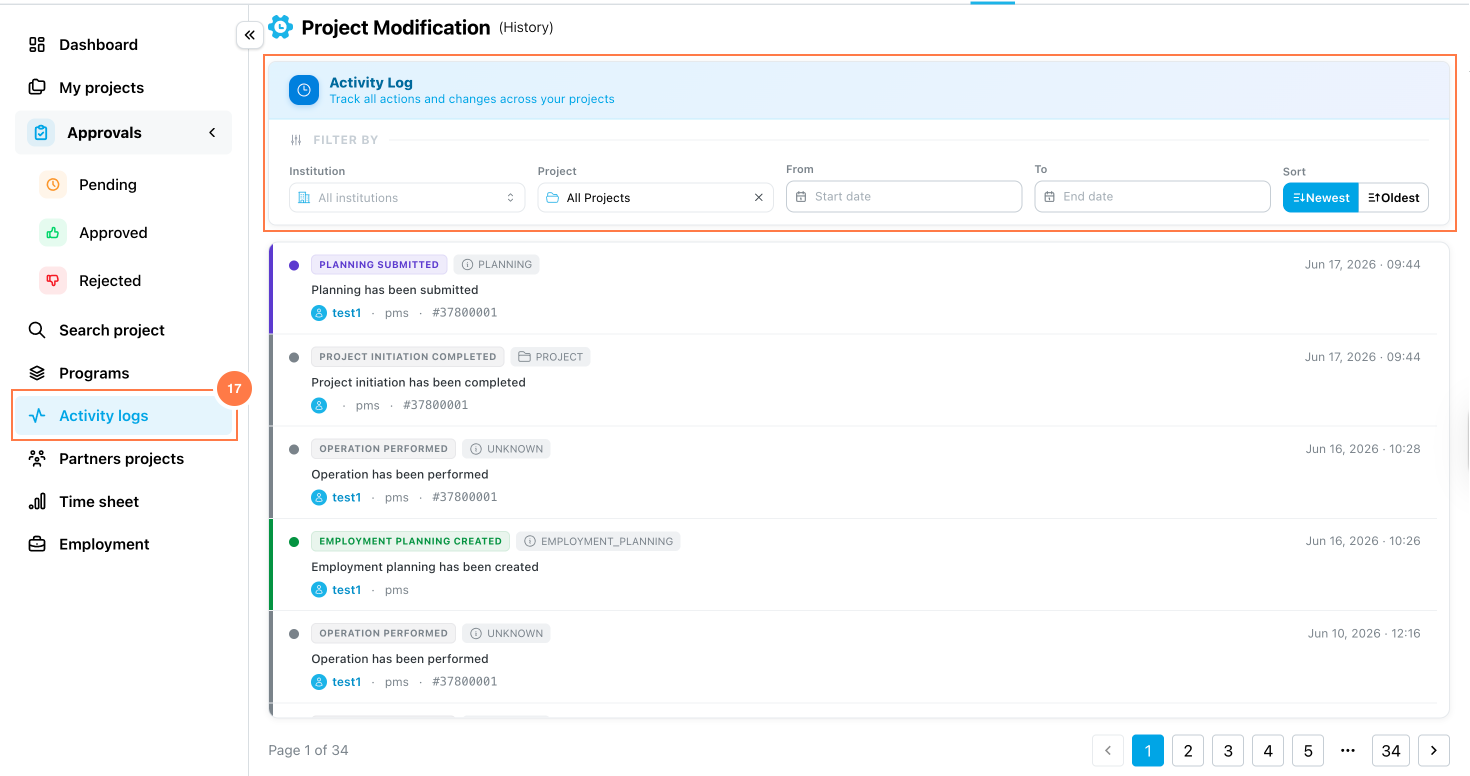
Track project activity
Click Activity logs to review project actions and changes.
Use the available institution and date filters to narrow the activity history when auditing updates.

StepGuideline 18
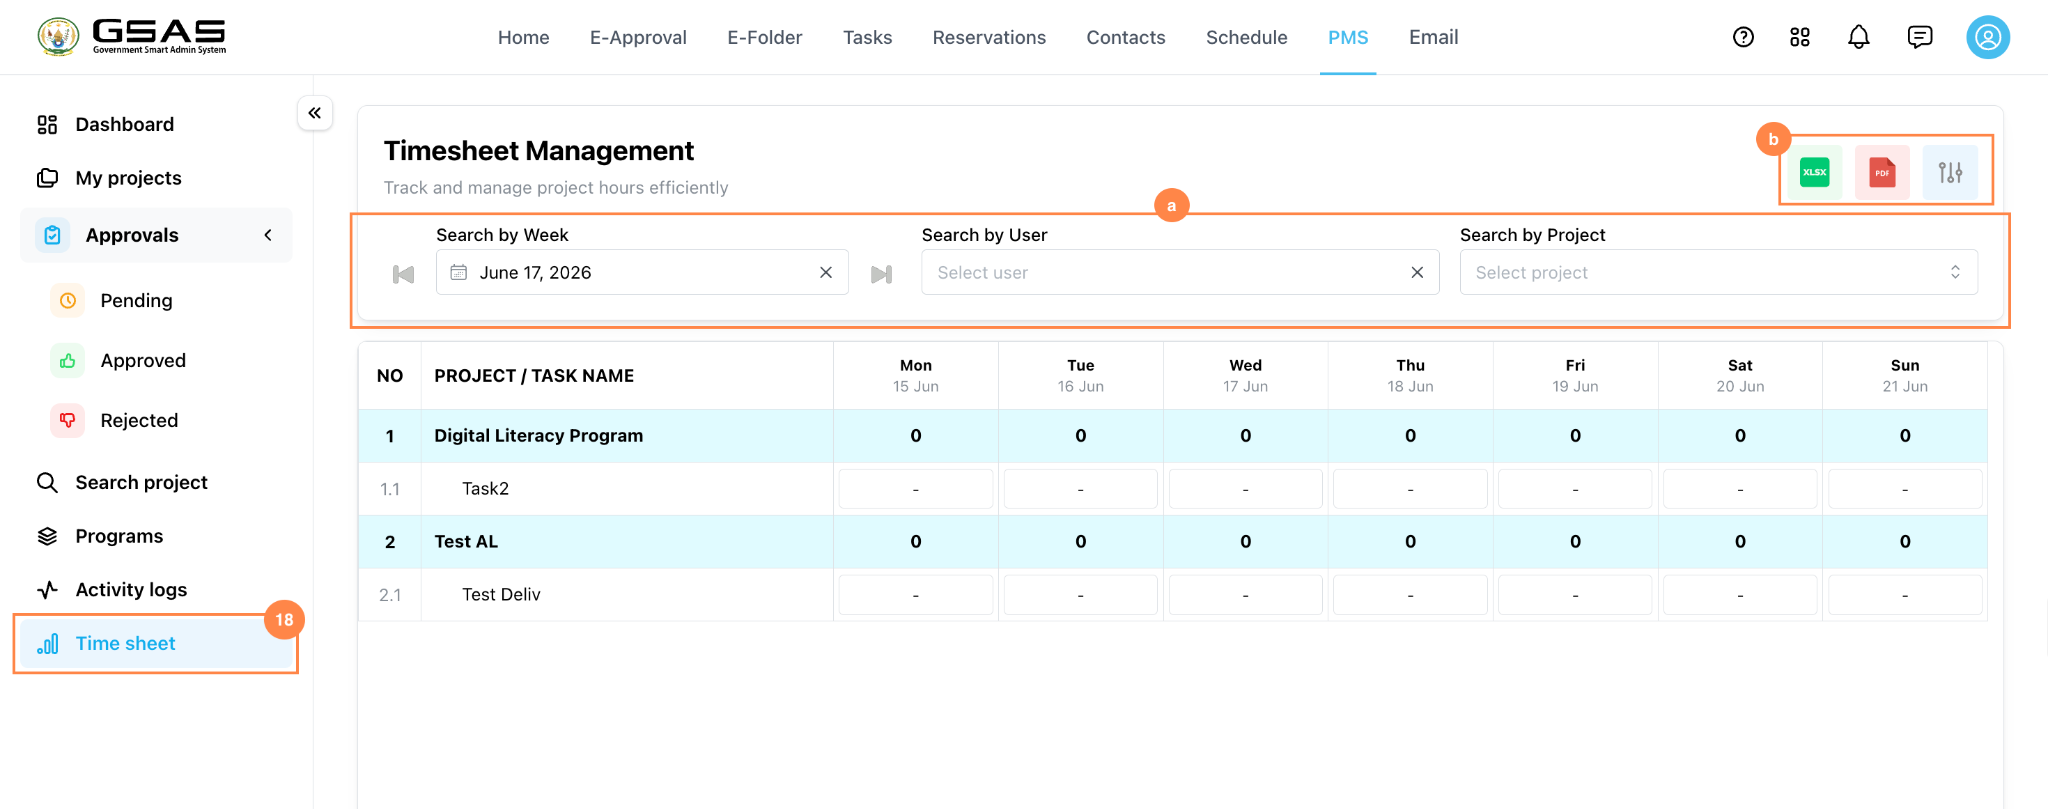
Record work time
Click the Time sheetSheet to record project hours. Enter the date, worked hours, supporting document if required, and notes describing the work completed.
Search by Week, User, or project to select which one you want to report to (a).
Export (b) a report as PDF or Excel when needed.
Save the entry so it can be reported to the project manager.

| Reminder: Record time consistently so project work records remain accurate and easy for managers to review. |
StepGuideline 19
Review employment reports
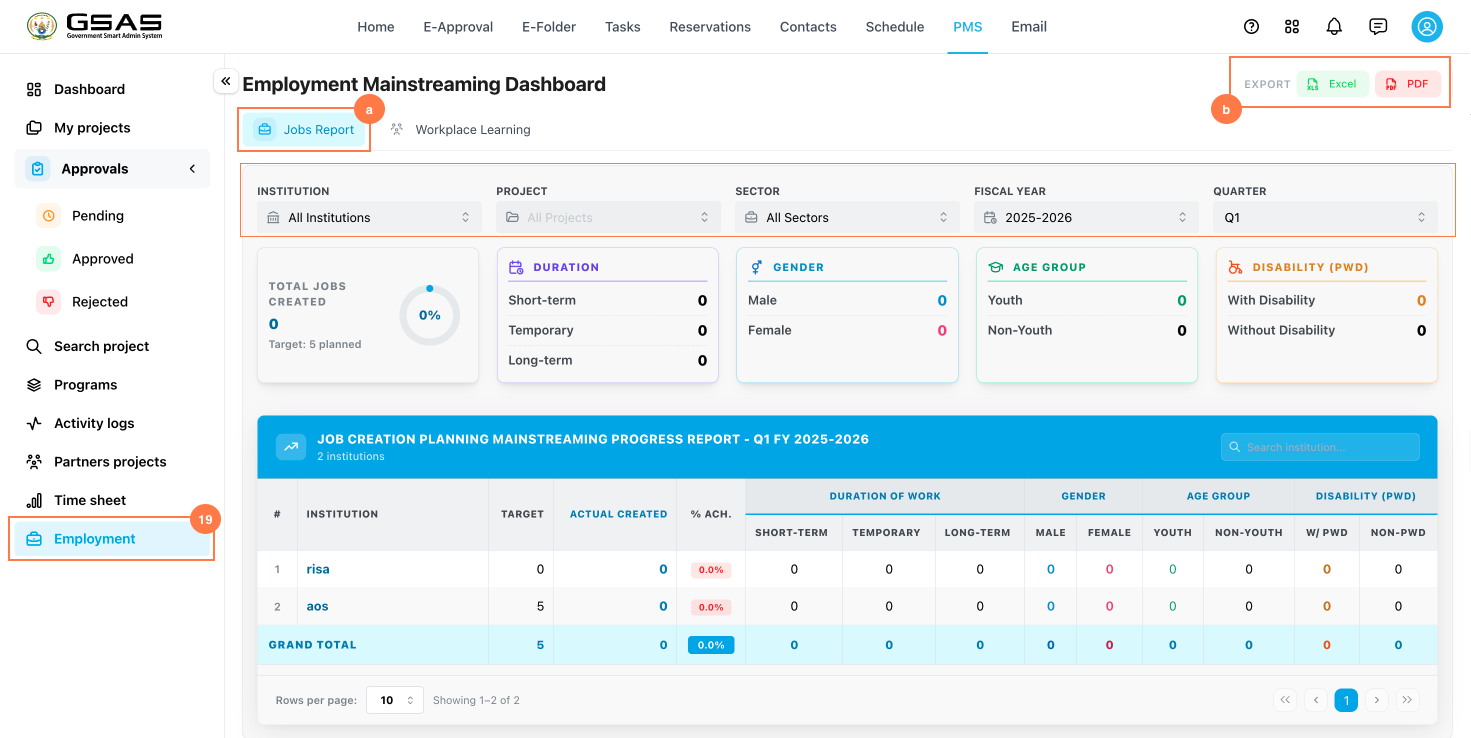
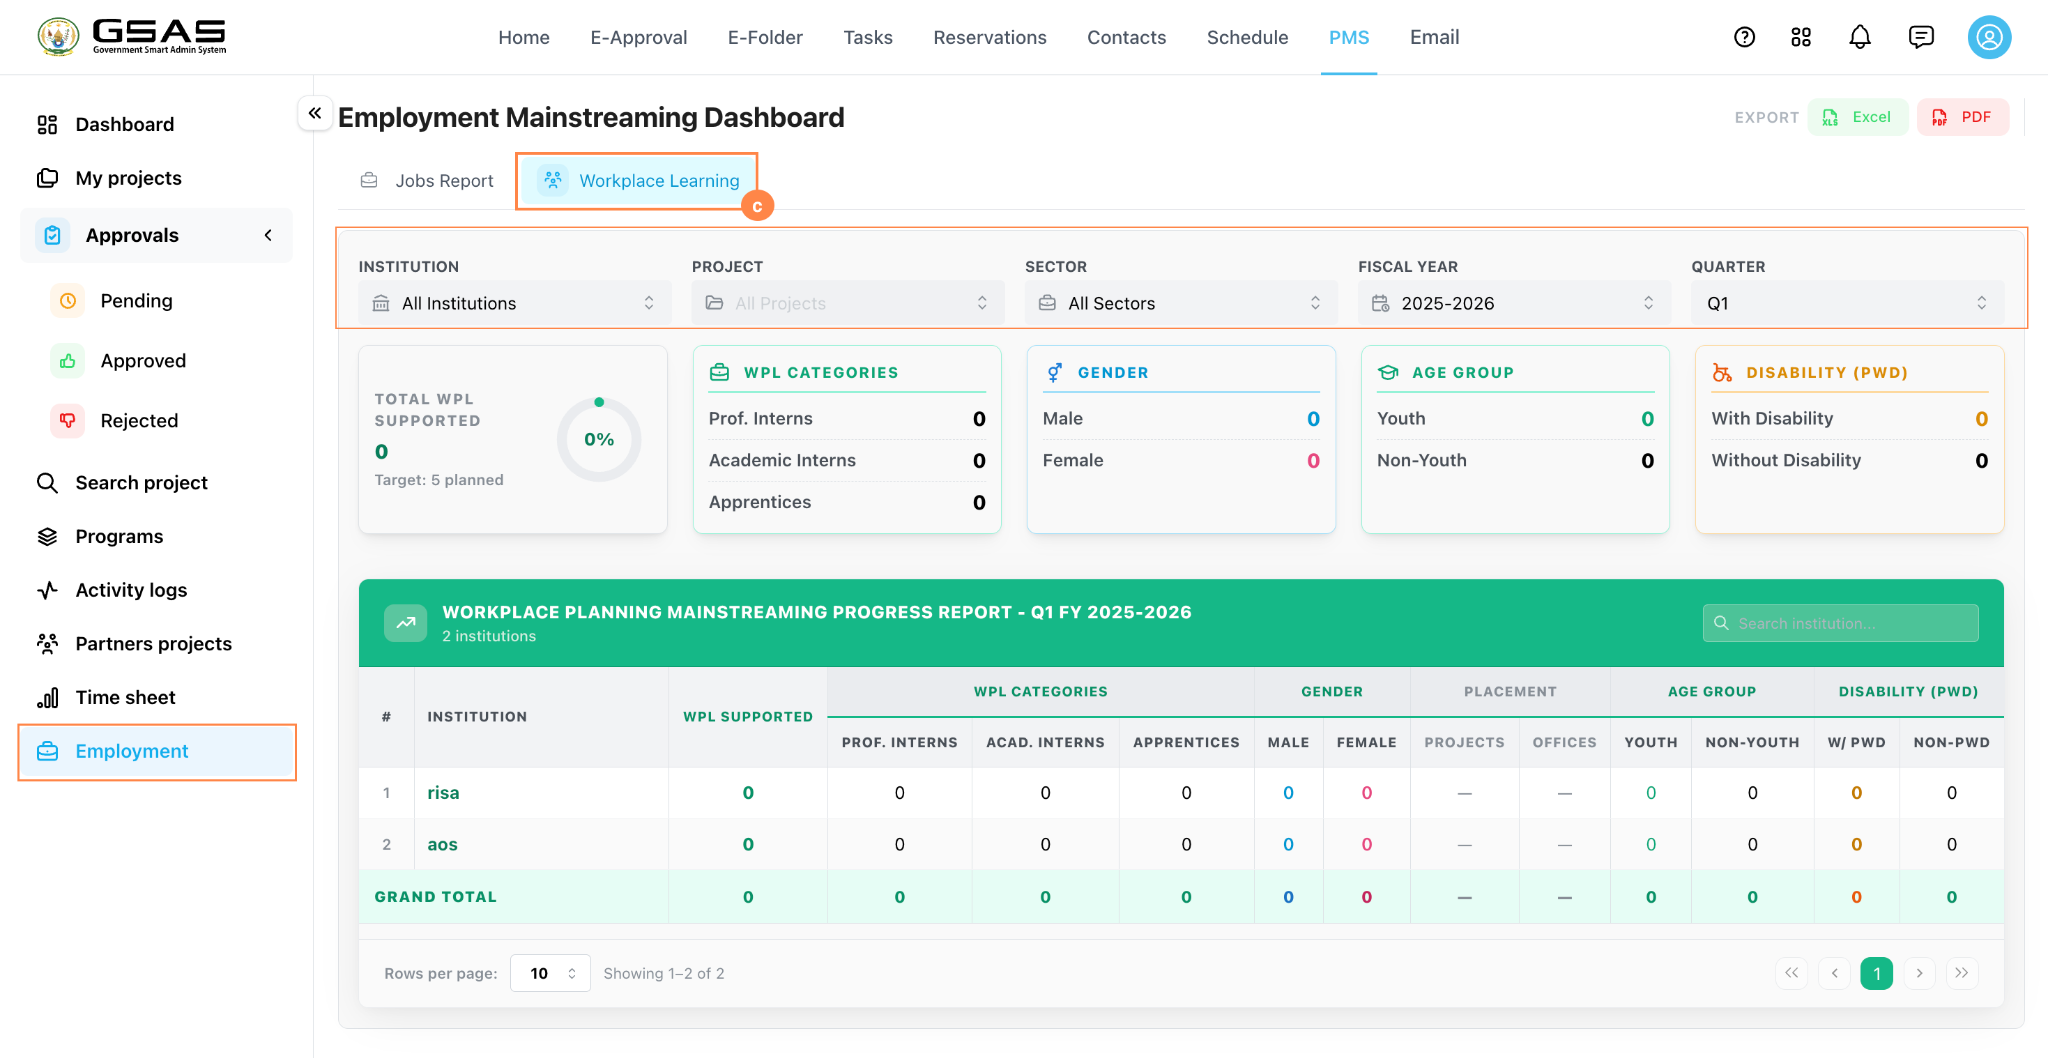
Click Employment to access employment monitoring information linked to your projects.
Review the dashboard by Job Reported (a) or Workplace Learning (c), then export (b) a report as PDF or Excel when needed.


Use the PMS dashboard regularly to keep project information, approvals, reports, and activity records up to date.