Invite to sign on Received PDF documents
This section outlines the steps to invite internal users to sign PDF documents using the Invite-to-Sign feature in the Government Smart Administration System.
Key Steps
Step 1: Access eApproval
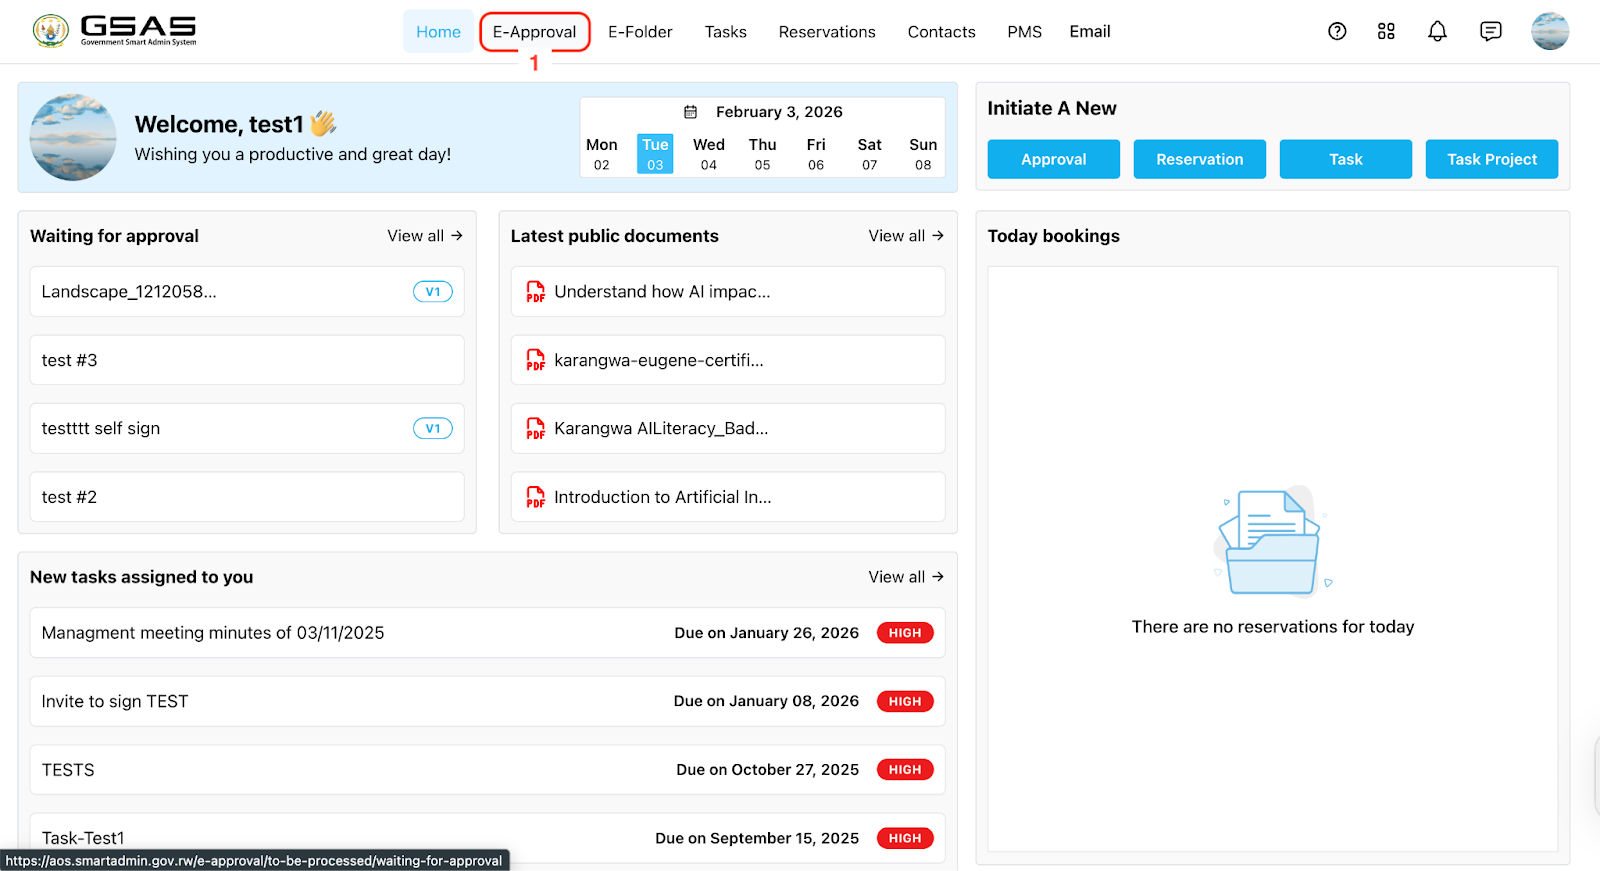
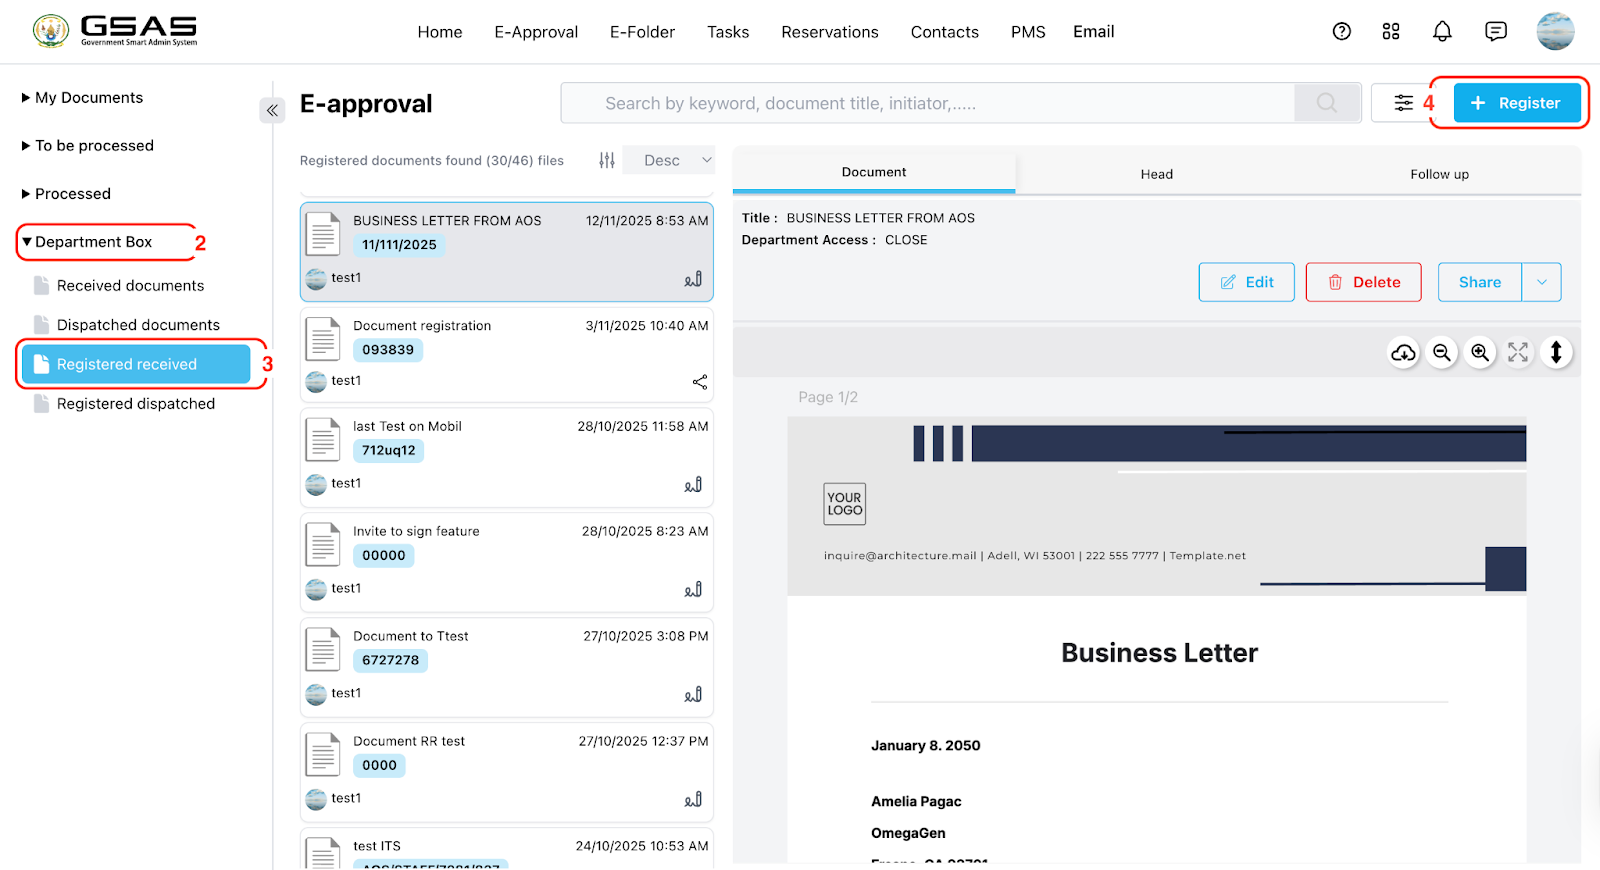
Step 2: Document Details Entry
-
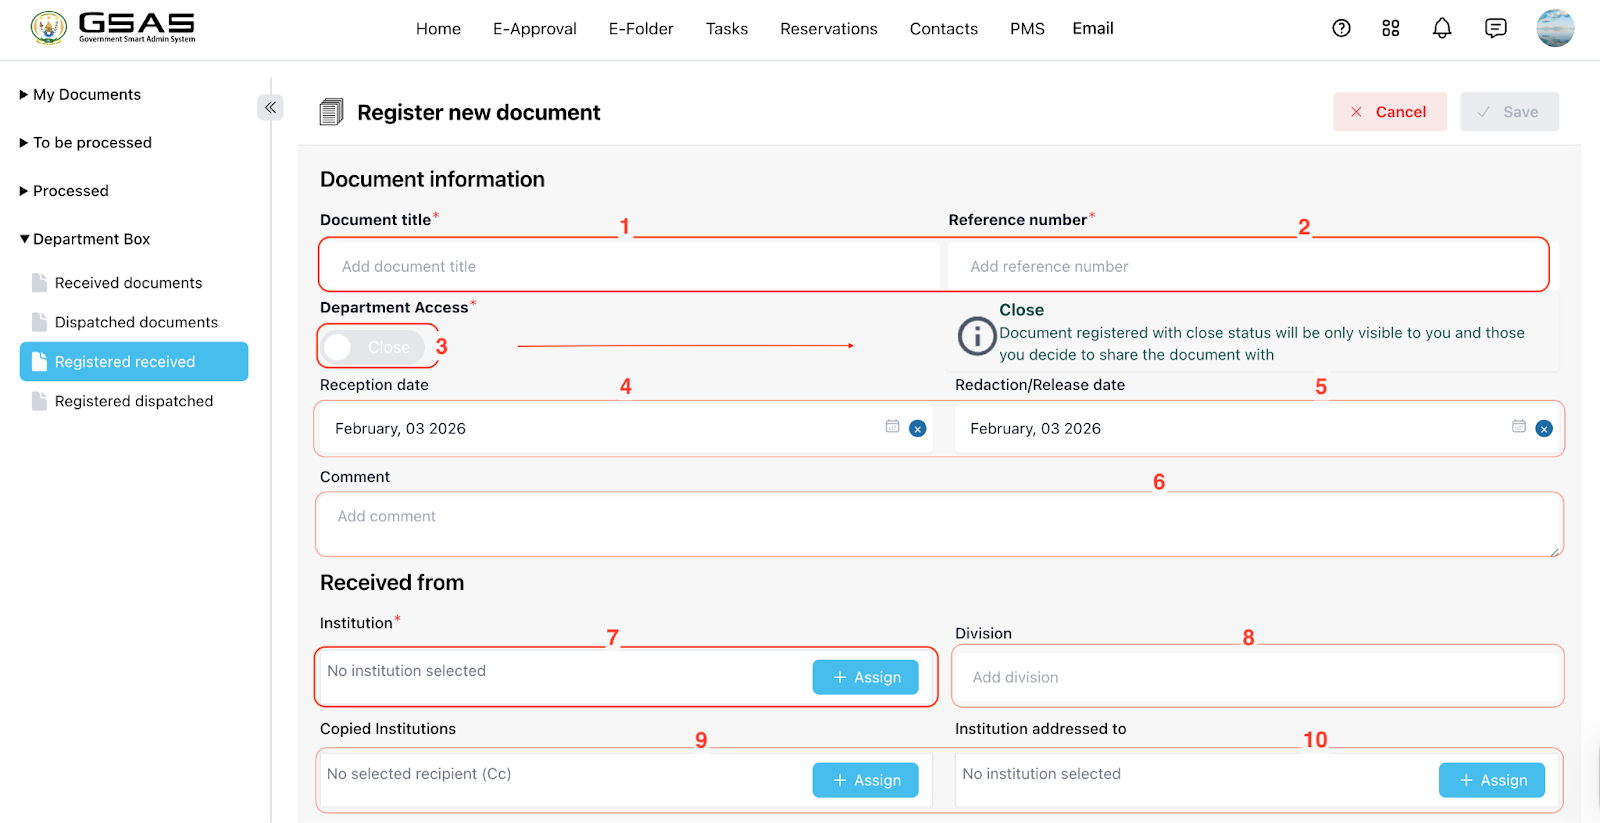
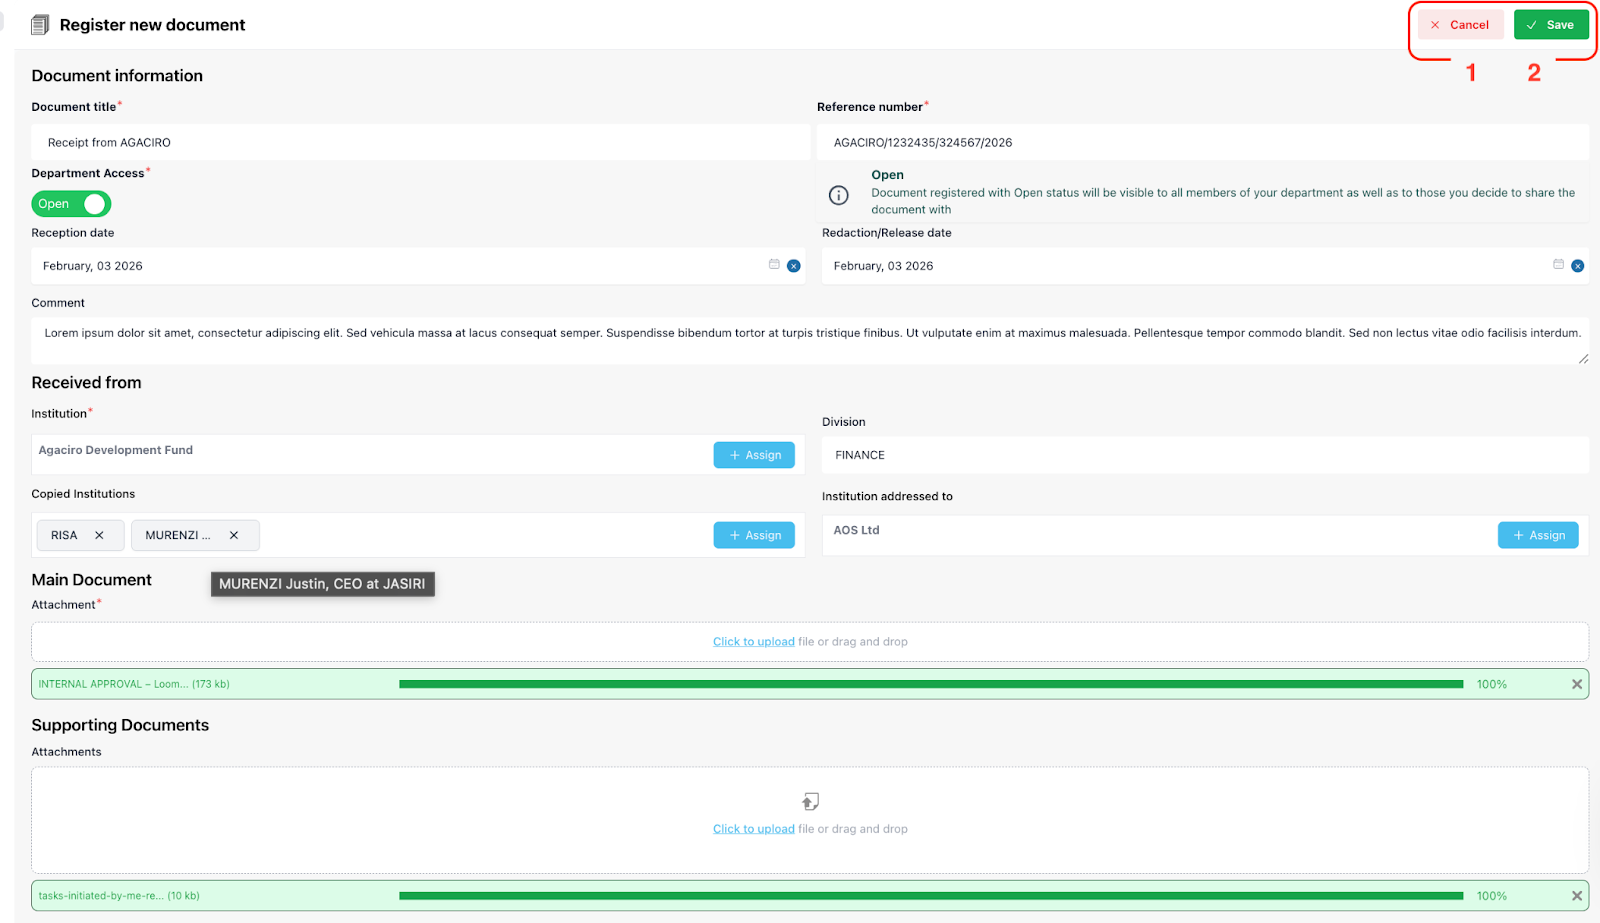
Input the title of your document
-
Add the document’s reference number (if applicable)
-
Determine access to the document for other team members in your department. (Refer to the cautious message on the side)
-
Add reception date
-
Add redaction date (Date of when the document is/will be handled)
-
Optionally, add comments summarizing your document.
-
Enter the institution name (e.g., AOS).
-
Specify the division (e.g., HR) if necessary.
-
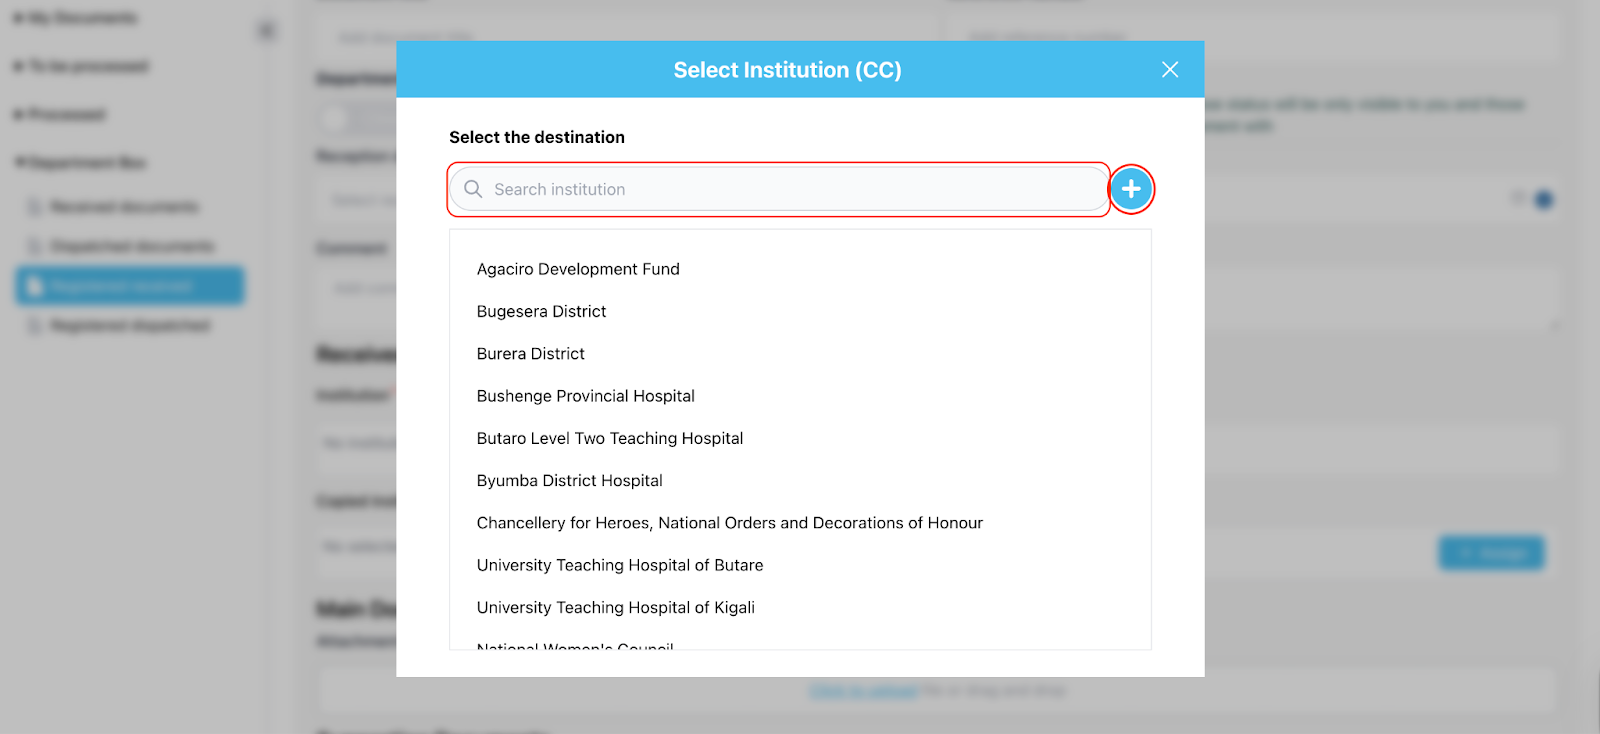
Select/Enter the copied institution or type it using the add (+) button.
-
Select/Enter the addressed institution or type it using the add (+) button.
→ After clicking the “+ Assign” button, a new model will open.
-
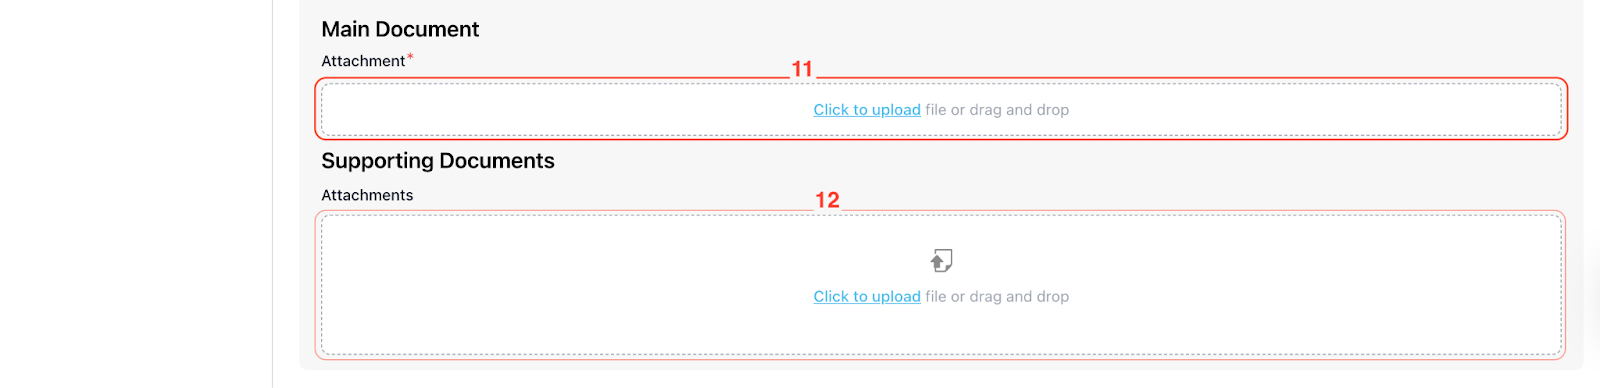
Attach the main PDF document.
-
If applicable, attach any supporting documents.
Step 3: Save the Document
-
Click ‘Cancel’ to stop the registration.
-
Click on 'save' to store the document in the system.
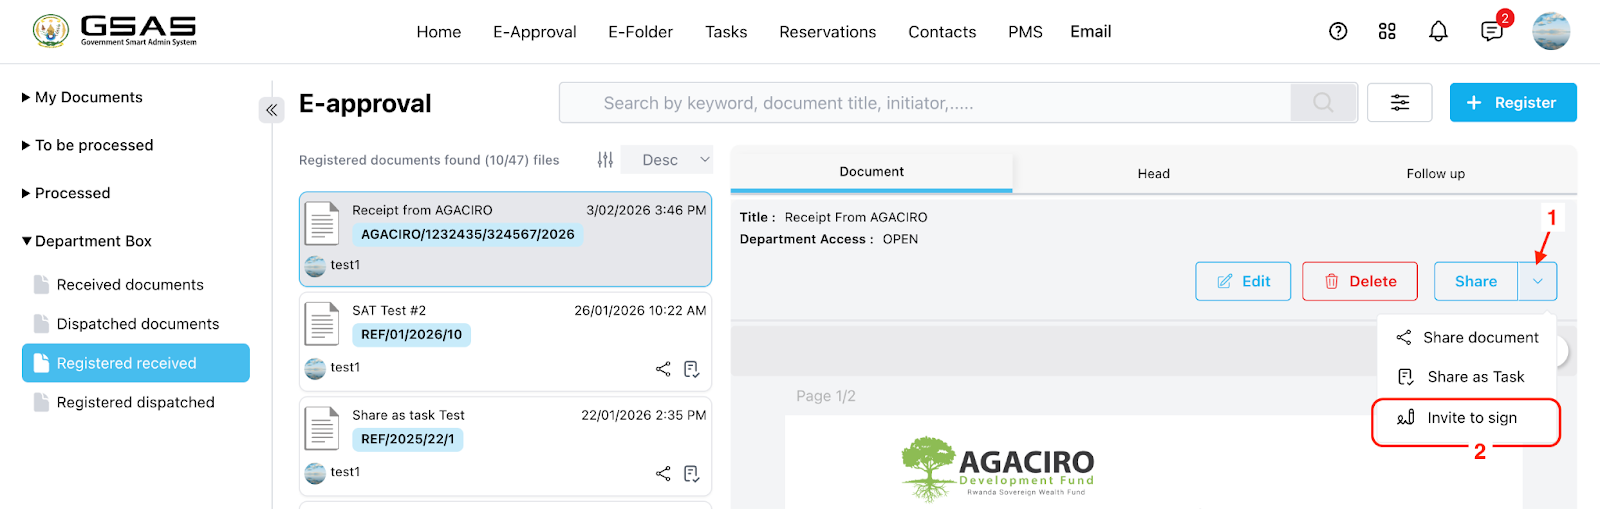
Step 5: Assigning Signers/Approvers
-
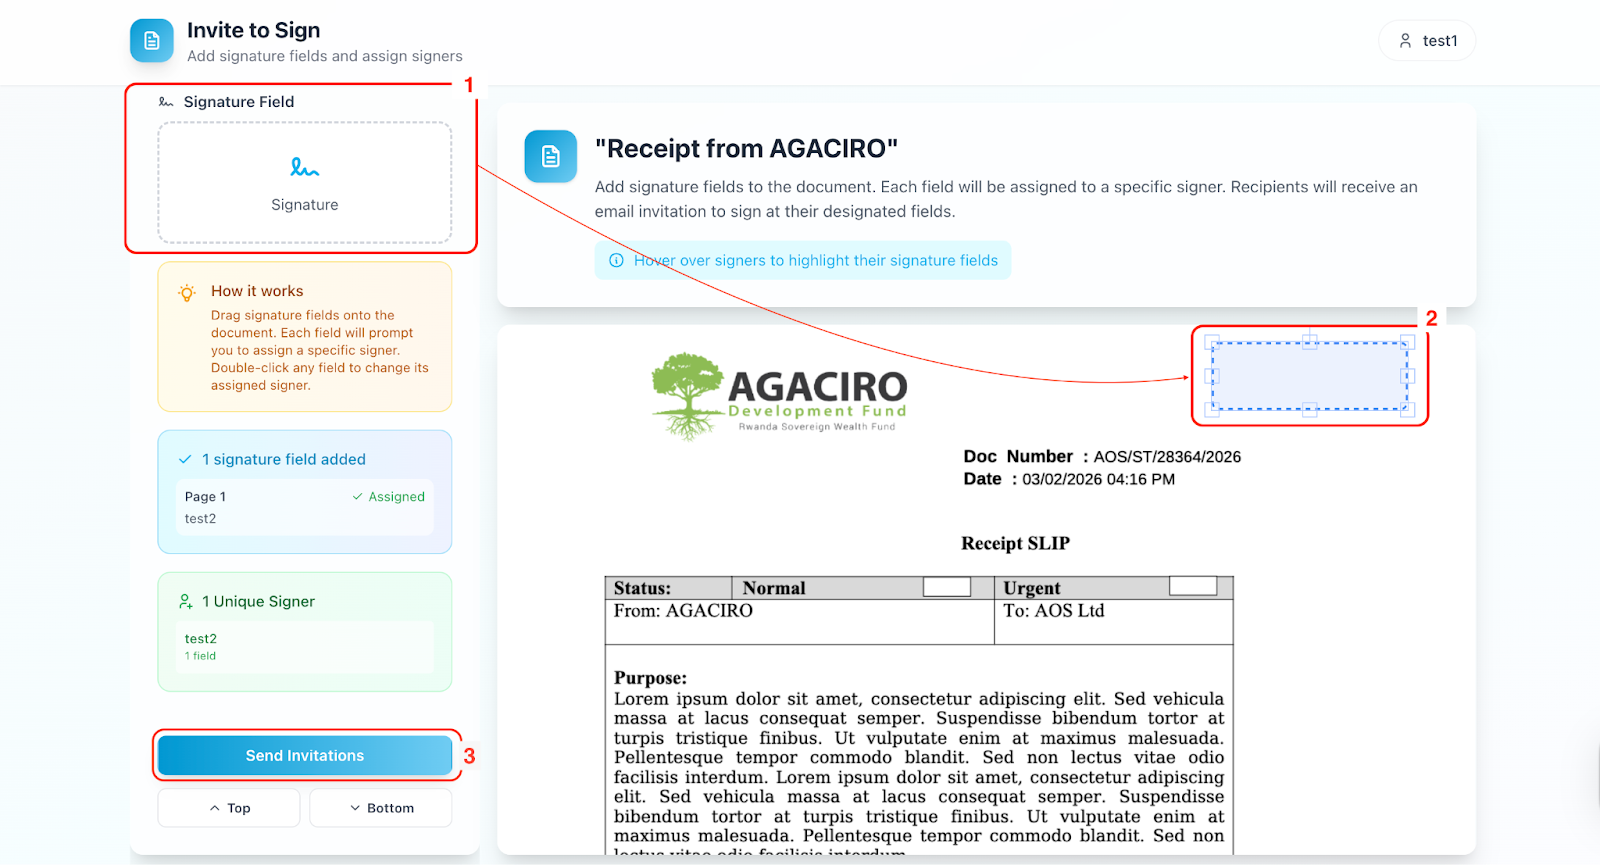
Drag and drop the signature field to the desired location in the document to select the user(s) who need to sign it (e.g., by searching for the user's name).
-
Adjust the signature fields as necessary.
-
Click on 'send invitation' to notify the selected users.
Step 6: Signing the Document
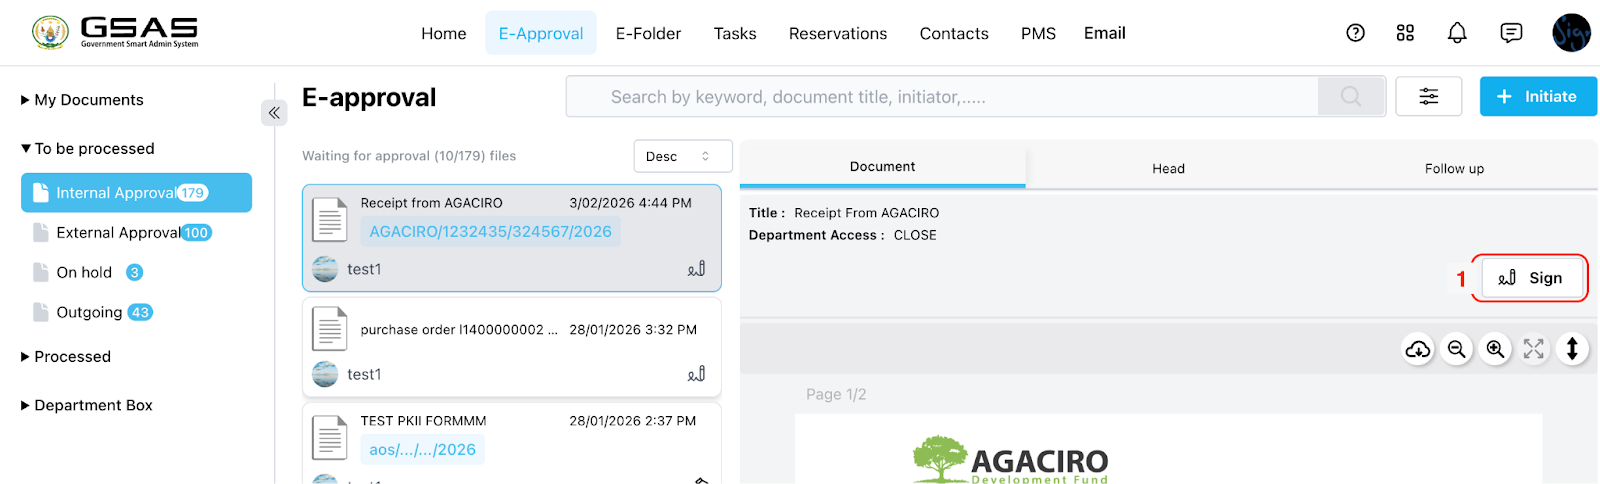
The approver will go to their account → go to eApproval → Go to the ‘To be processed’ folder → Check for the pending document in ‘Internal Approval.’
-
Select the document to be signed, then click ‘Sign.’
-
Newly opened tab, ‘Drag & Drop’ your signature to the highlighted field.
-
The user can also drag & drop other fields, such as date, name, or custom text.
-
-
Click 'complete' after signing.

Step 7: Access Completed Document
-
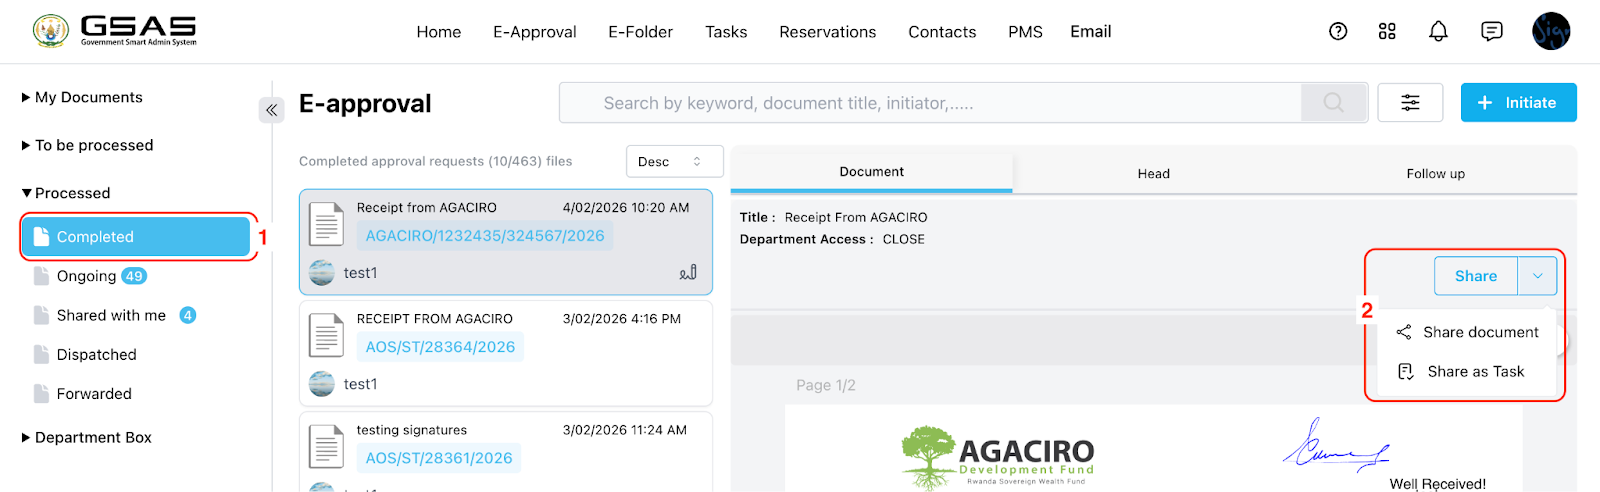
Once all signatures are collected, the document is marked as complete.
-
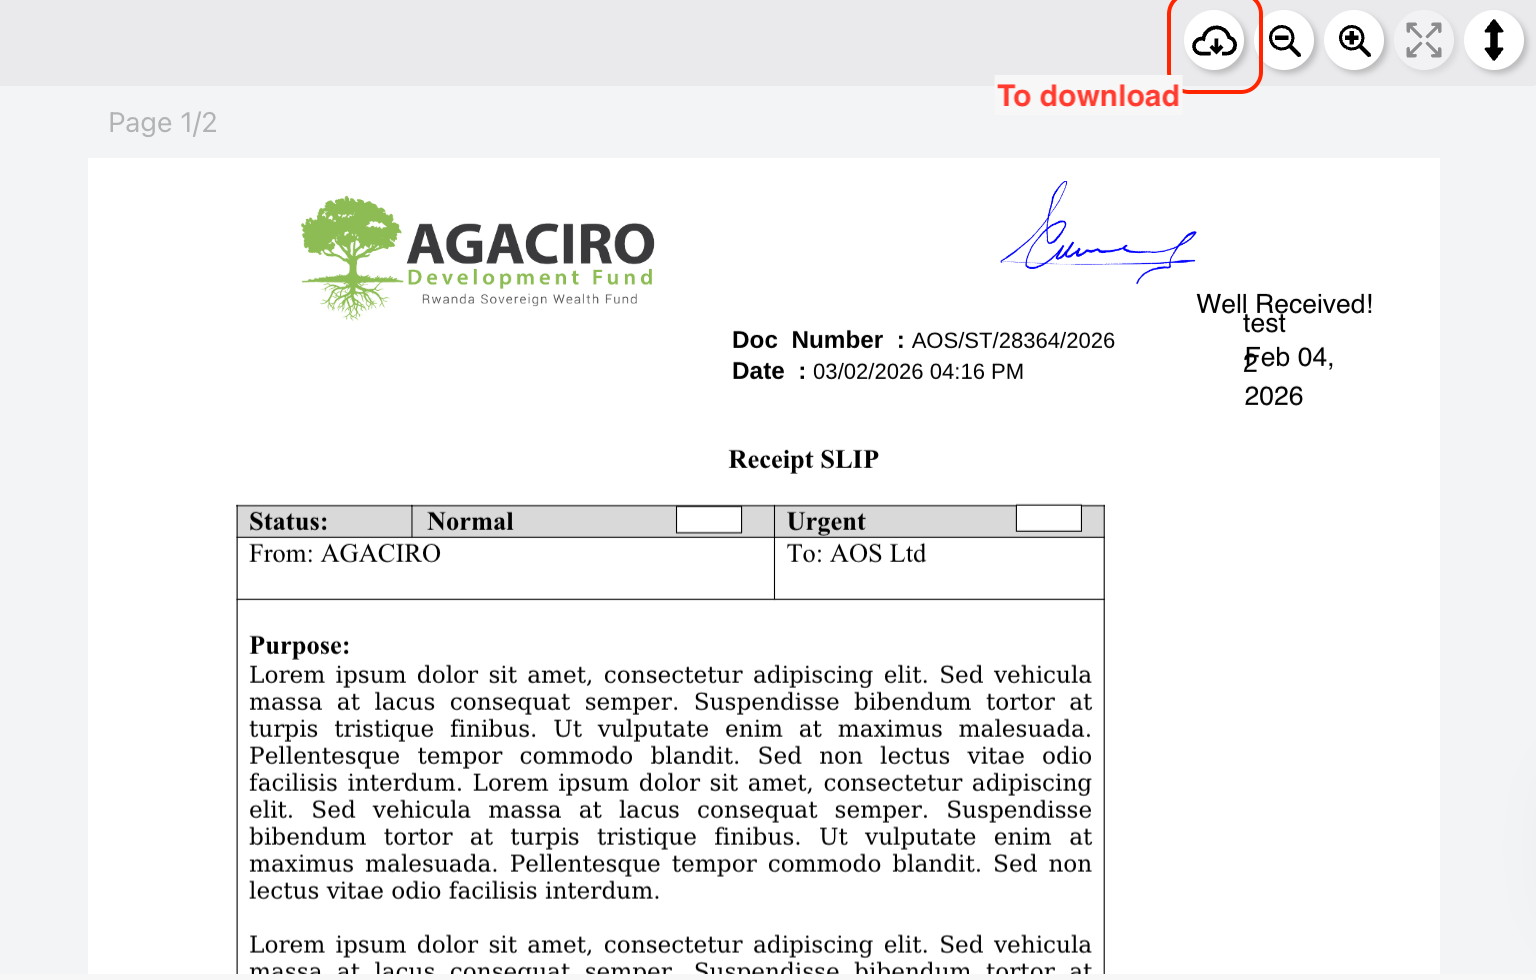
The drafter or approvers can now download, share, or view the completed document.
Notes
-
Ensure all required fields are filled out before saving the document.
-
Double-check the email addresses of the users you are inviting to sign up to avoid sending invitations to the wrong individuals.