Internal Approval Requests
Submitting an Internal Approval Request
Follow this guide to create and submit an internal approval request.
| How it works: You create a request using a form template, assign approvers, fill in the document content, and submit. |
Step 1
Click Initiate
Click the Initiate button in the top right corner of the E-Approval page.


Step 2
Choose a form template
A dialog will appear listing available templates. Select the one that matches your request type and click it to proceed.
Templates are organized into two tabs: Documents for forms created by your institution's administrator, and Forms for common templates shared across all institutions.

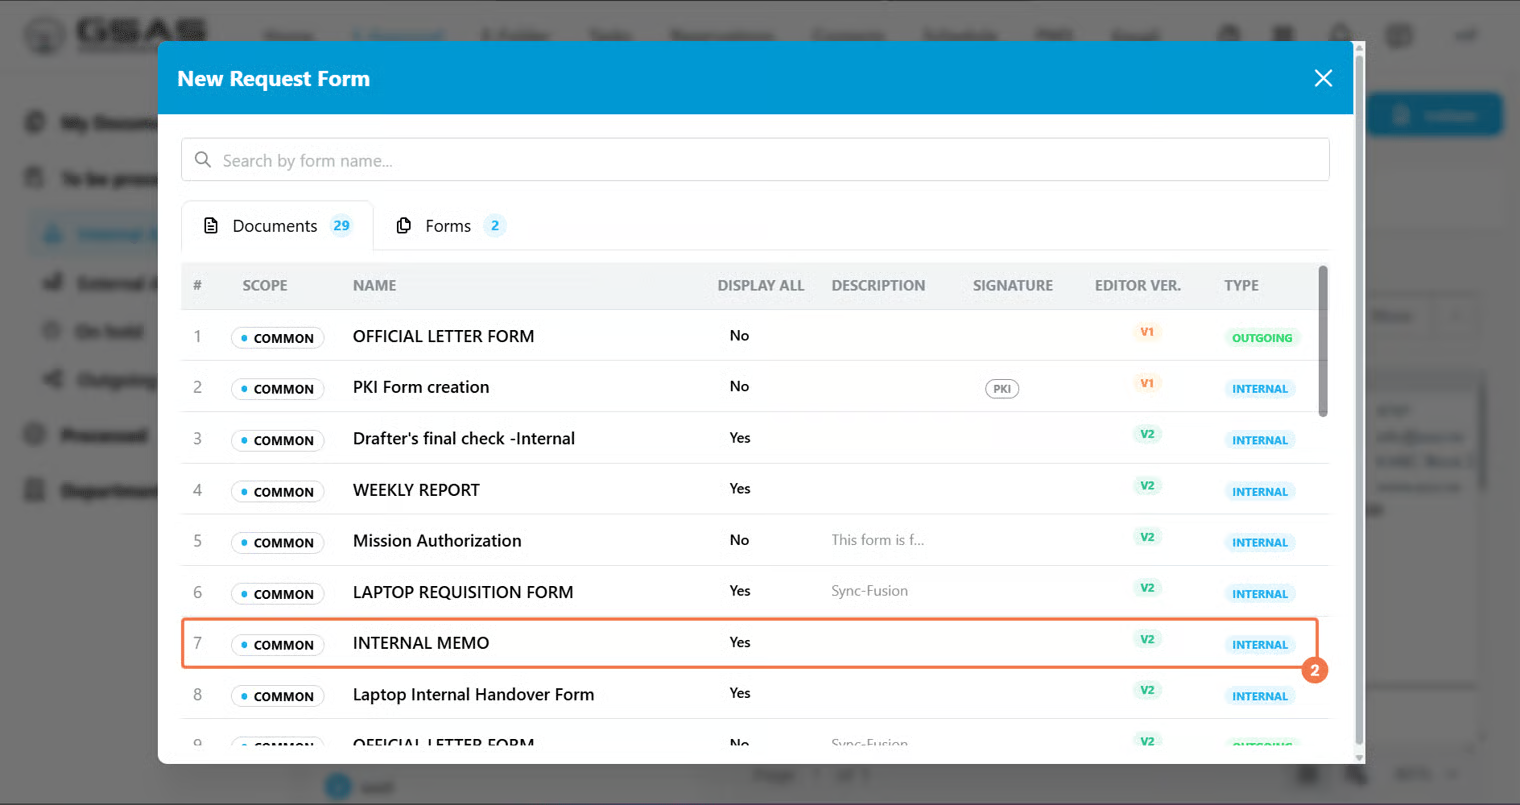
Not sure which template to pick? Use the columns in the list to guide you.
Step 3
Fill in the Head tab

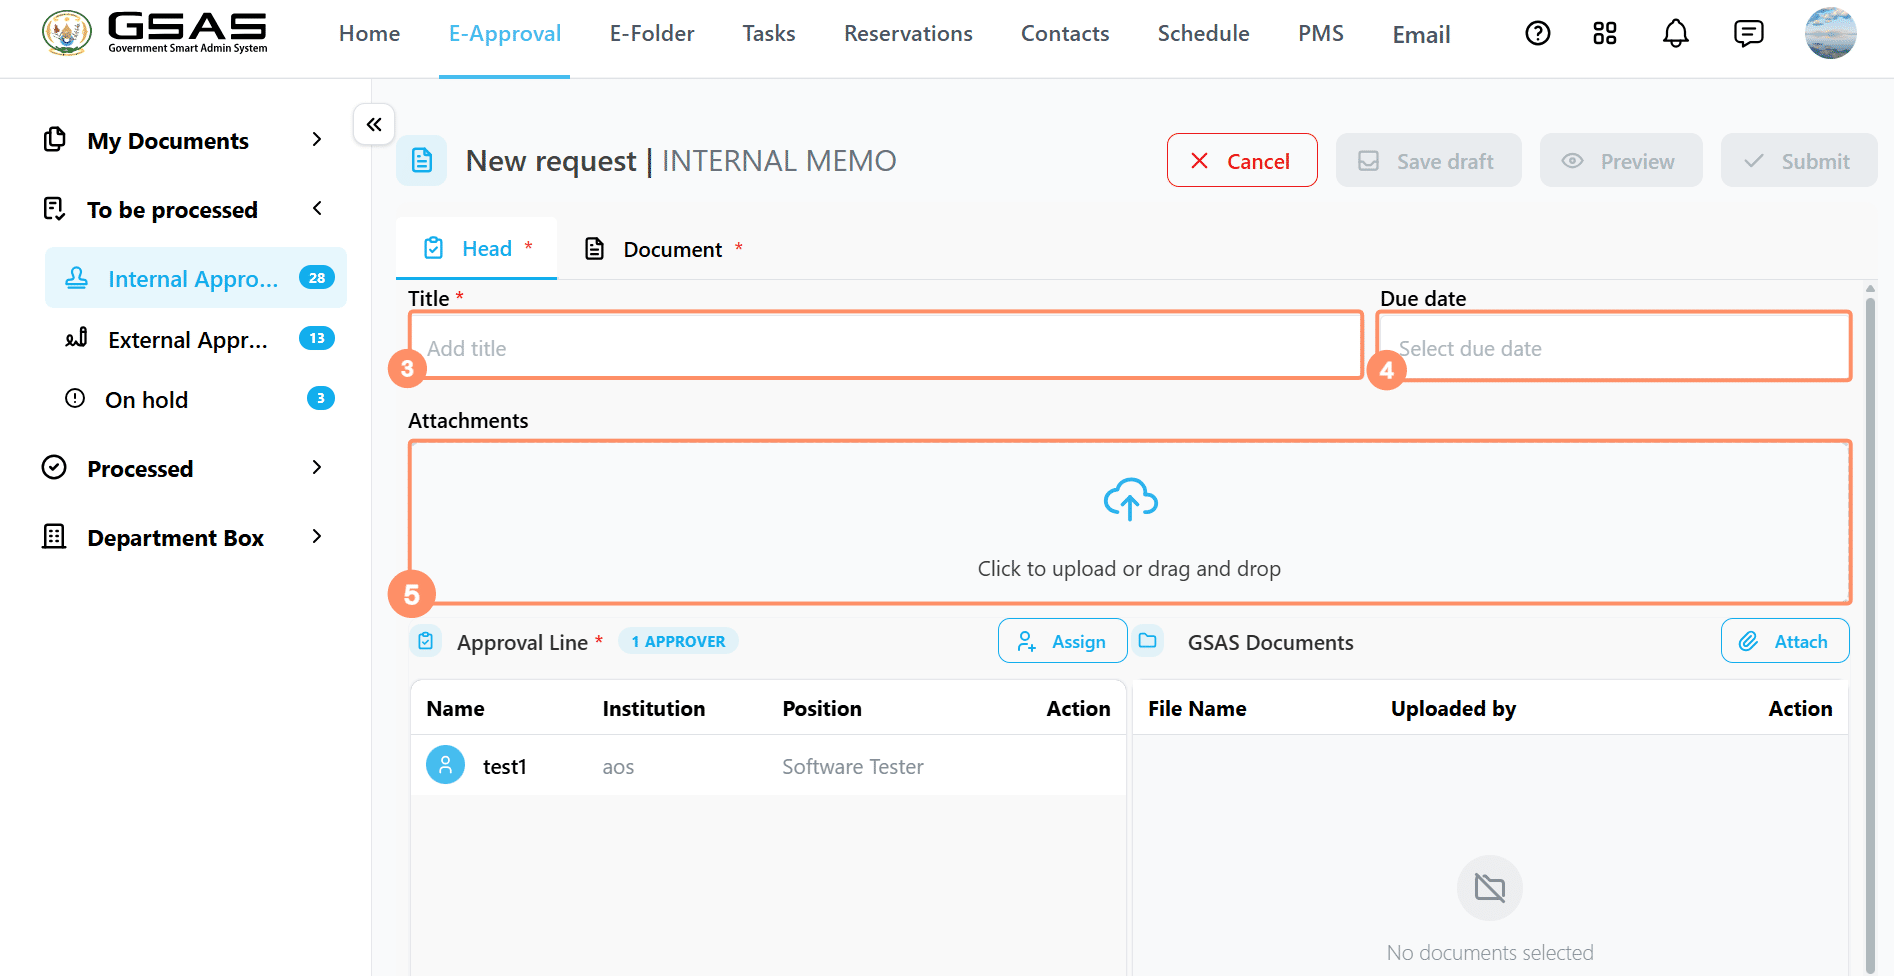
Approval Line
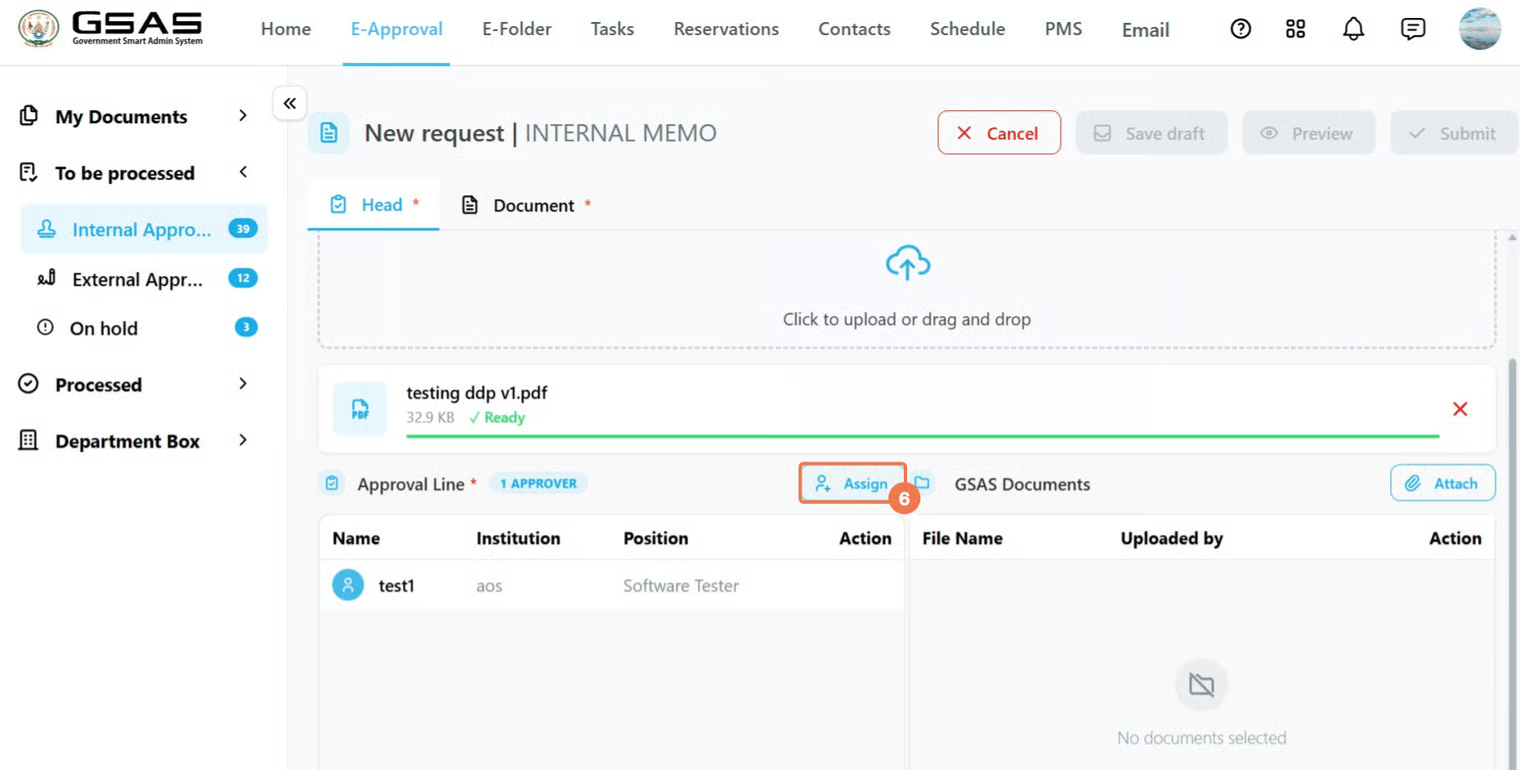
Click Assign to add approvers to the approval line.
Search for approvers to assign the request to and select them.
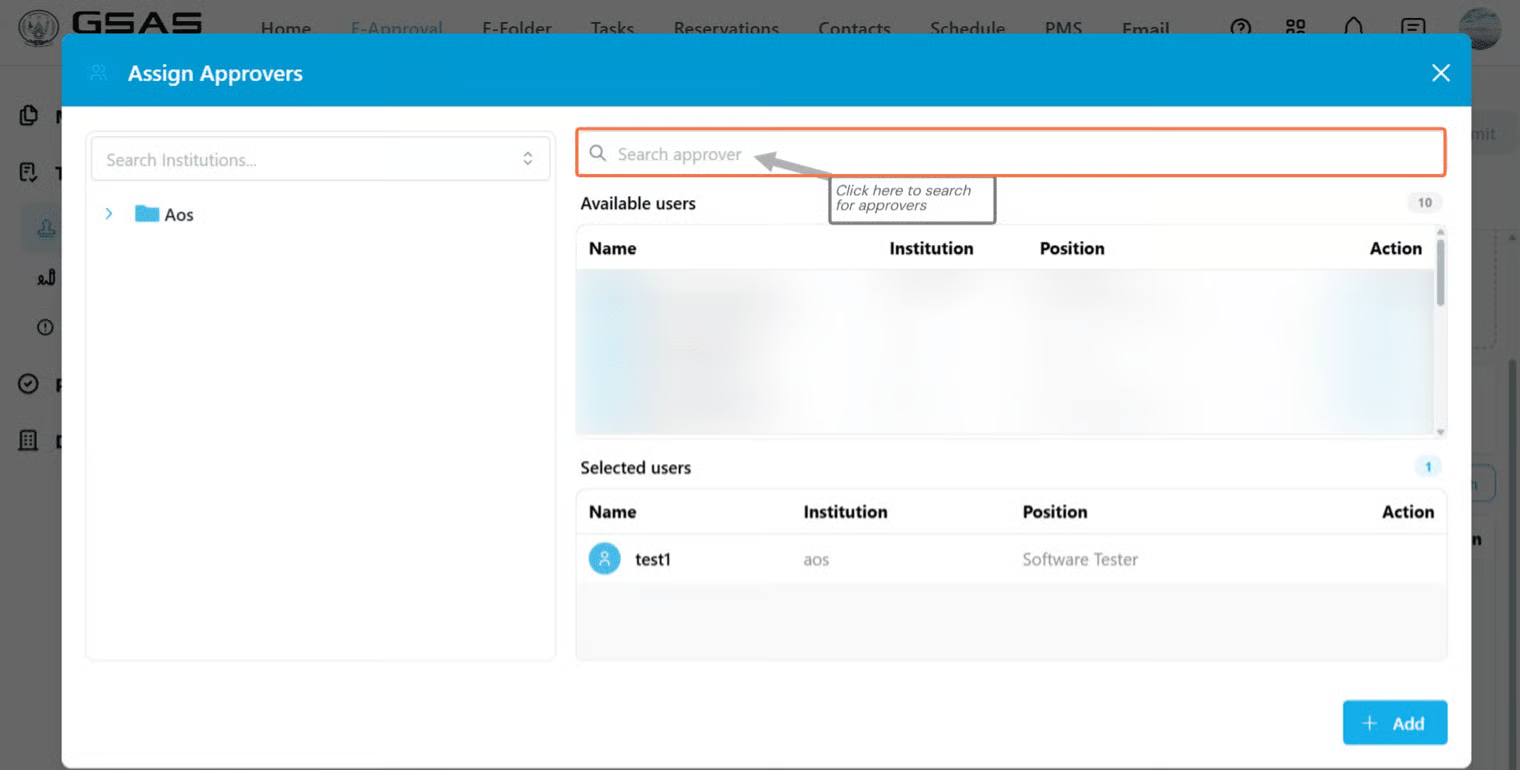
You can assign people from within your institution or from other institutions that use the system. The request will move through them in order —order, the next approver can only see it once the previous one has approved. You must have at least one approver before submitting.
Signatures
Each approver has a signature toggle next to their name. The last approver's and your own signature are on by default. You can toggle others on or off as needed. Note that some forms are configured by your administrator to display only the final approver's signature, in which case this toggle will not appear.

Step 4
Fill in the Document tab
Click the Document tab to open the form editor. Fill in all the required fields — this is the actual content of your request.

Step 5
Submit your request
Once both tabs are filled in, click Submit in the top right corner.

A confirmation dialog will appear — review your request and click Submit again to confirm.

Your request will be submitted successfully and sent directly to the first approver in the line. It will appear under My Documents → Submitted on your side.
