Groups in e-Folder
Groups are collaborative workspaces where users from one or more institutions can store, organize, and share files together. Each group has its own folder space, separate from your personal folders. You can be a member of multiple groups at the same time.
Accessing your groups
Click the Groups button at the top right of E-Folder, or on the View All Groups button.

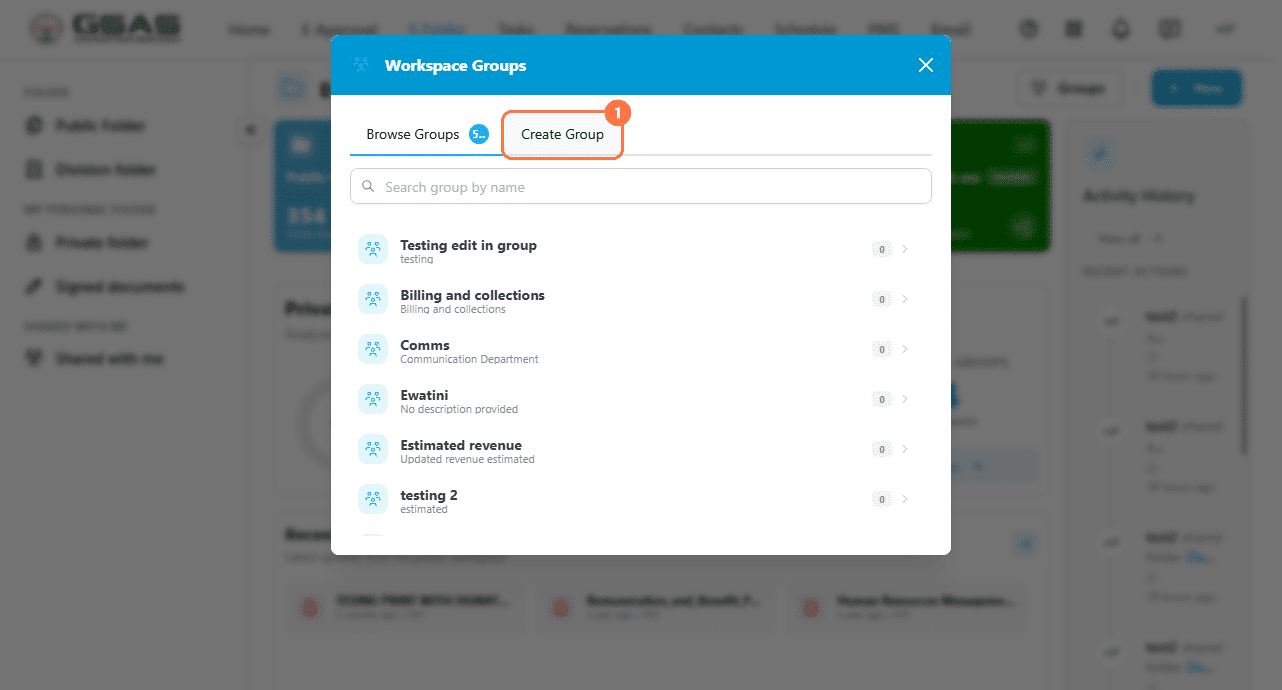
The Workspace Groups panel will open with two tabs: Browse Groups shows all the groups you belong to, and Create Group lets you set up a new one. Use the search bar to find a group by name. Click on a group to open it.
Creating a group
- Click Groups and select the Create Group tab.

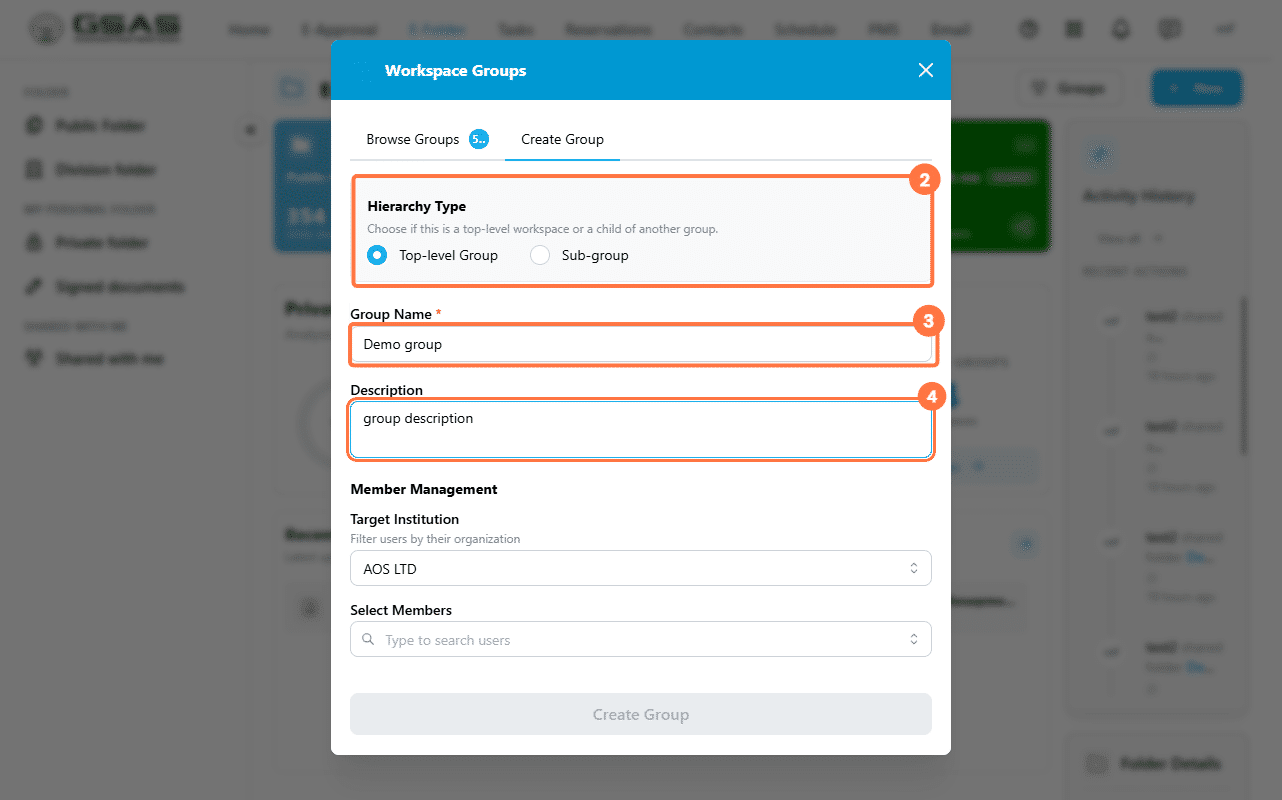
- Choose the Hierarchy Type:
— Select Top-level Group to create a standalone group.
— Select Sub-group if this group sits under an existing one. You will be asked to search for and select the parent group. - Enter a Group Name and an optional Description.
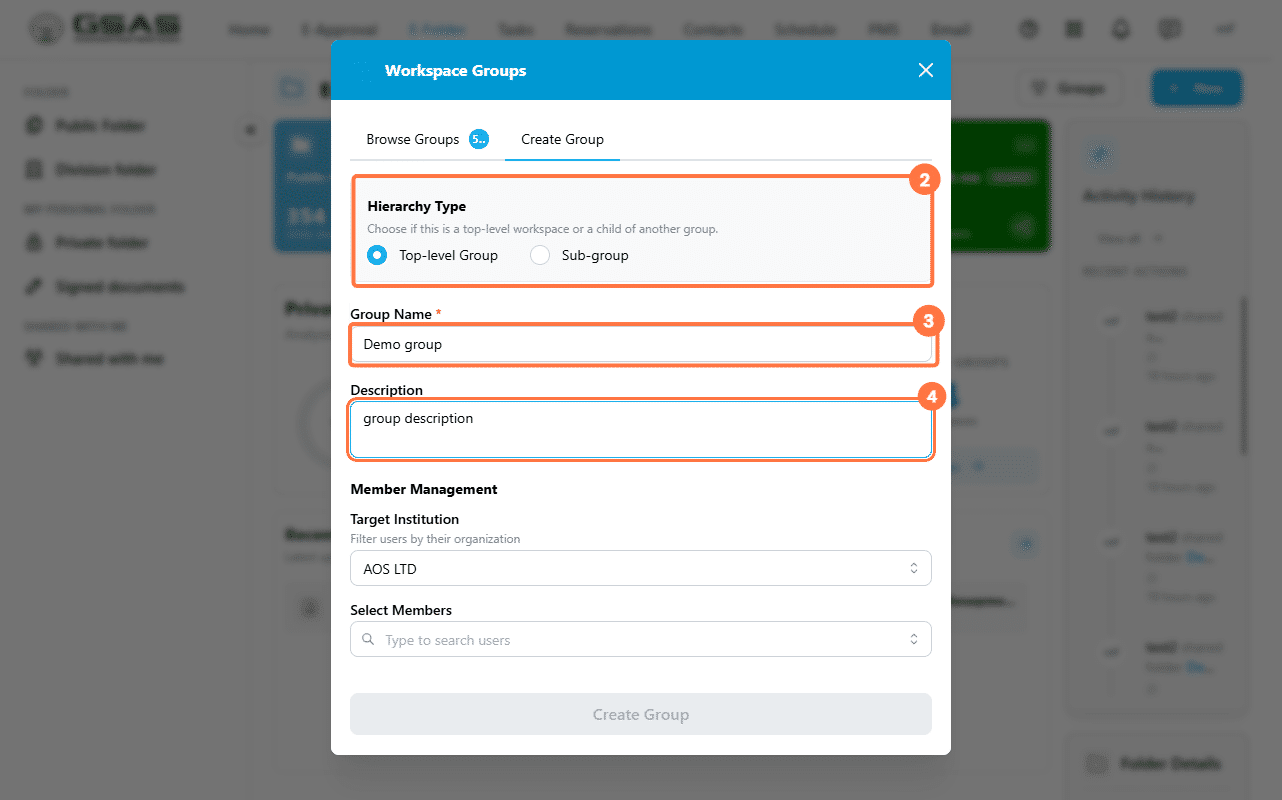
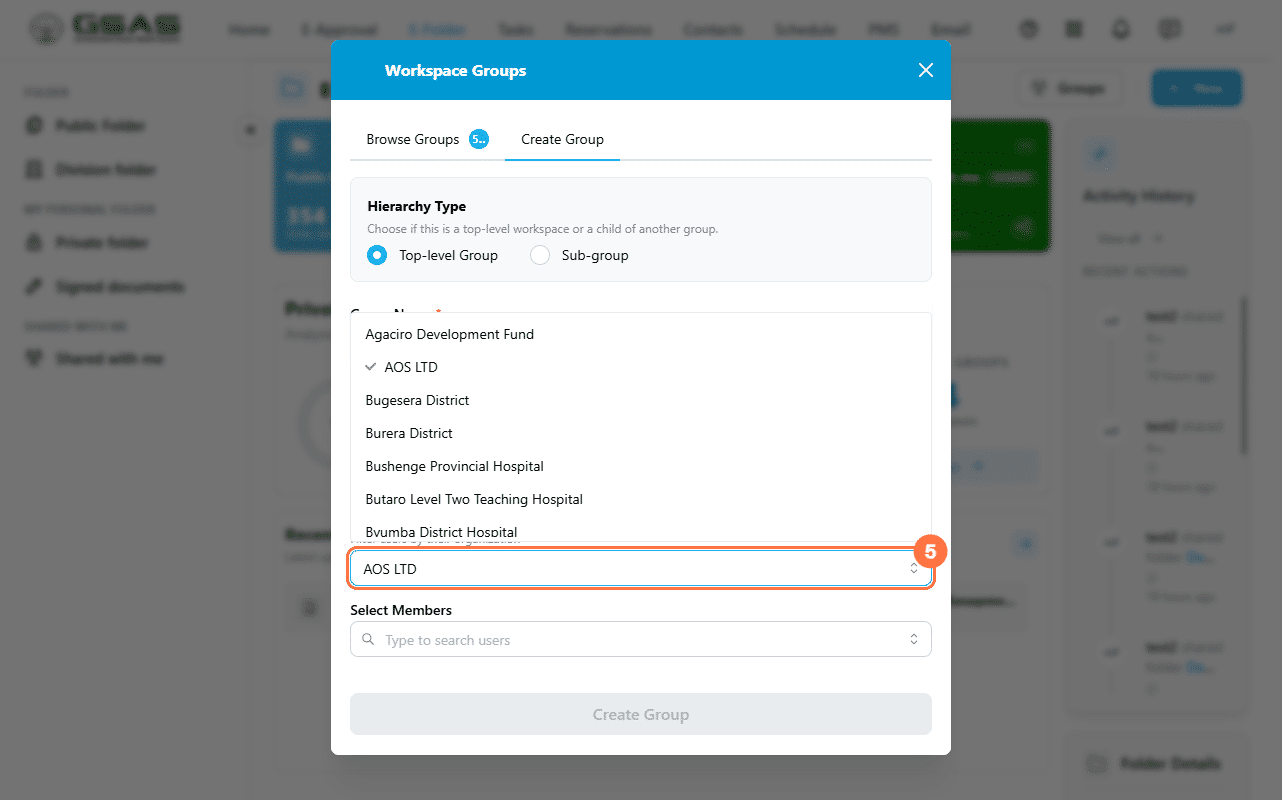
- Under Member Management, select the Target Institution to filter users by organization,
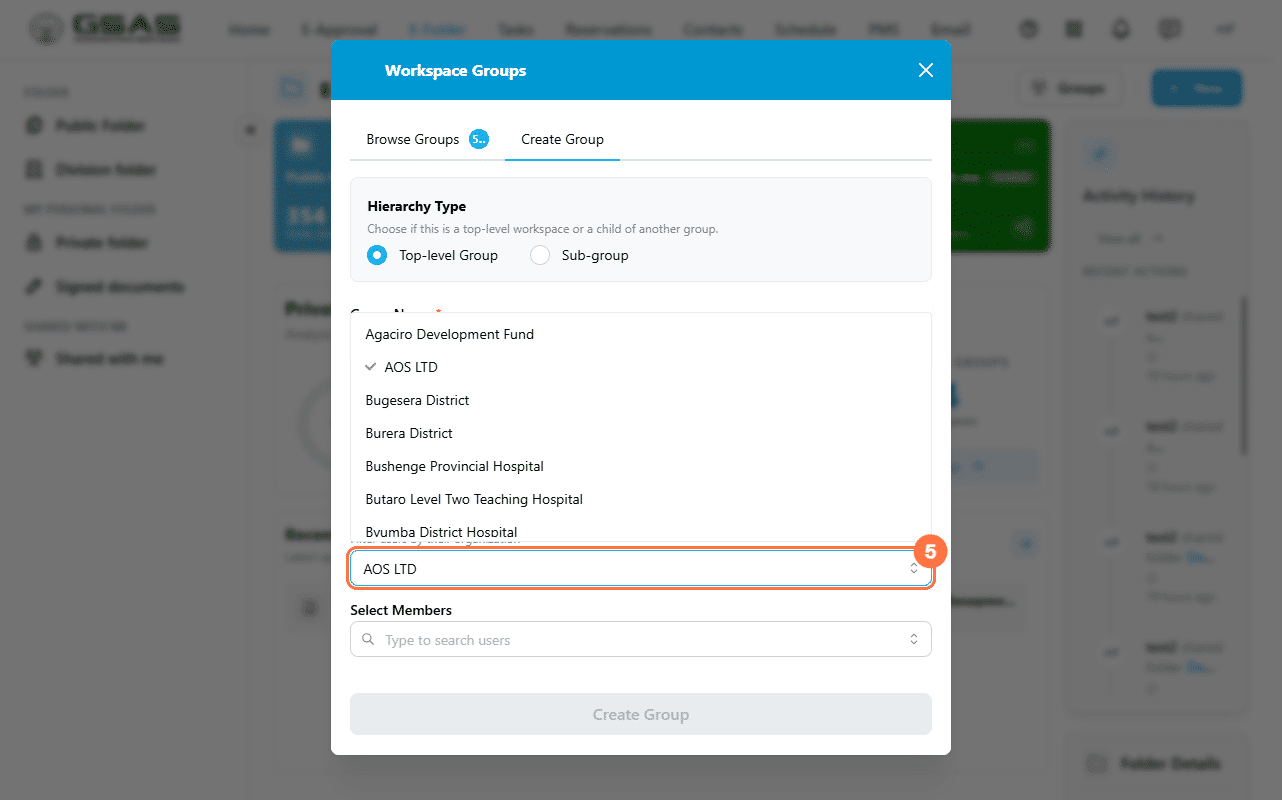
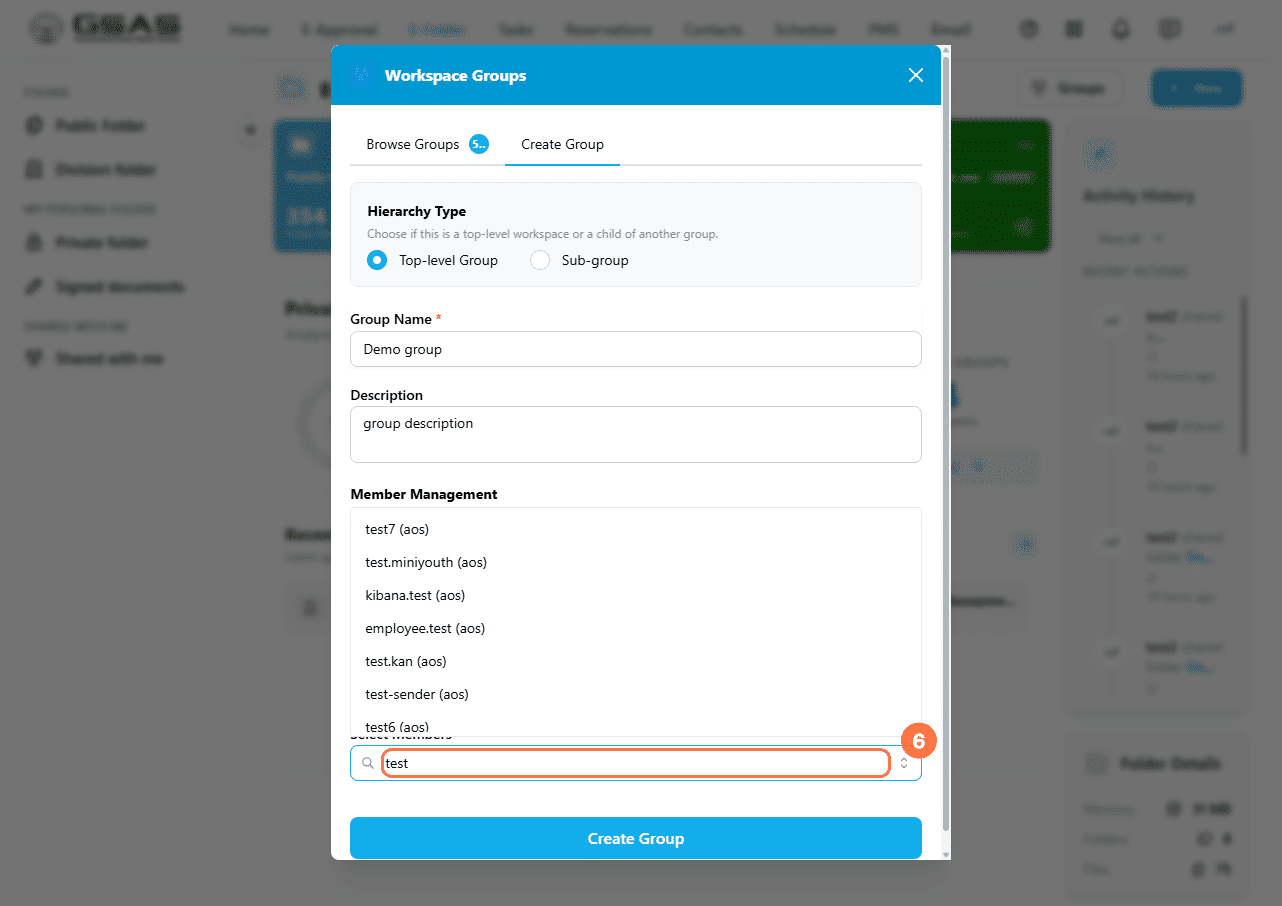
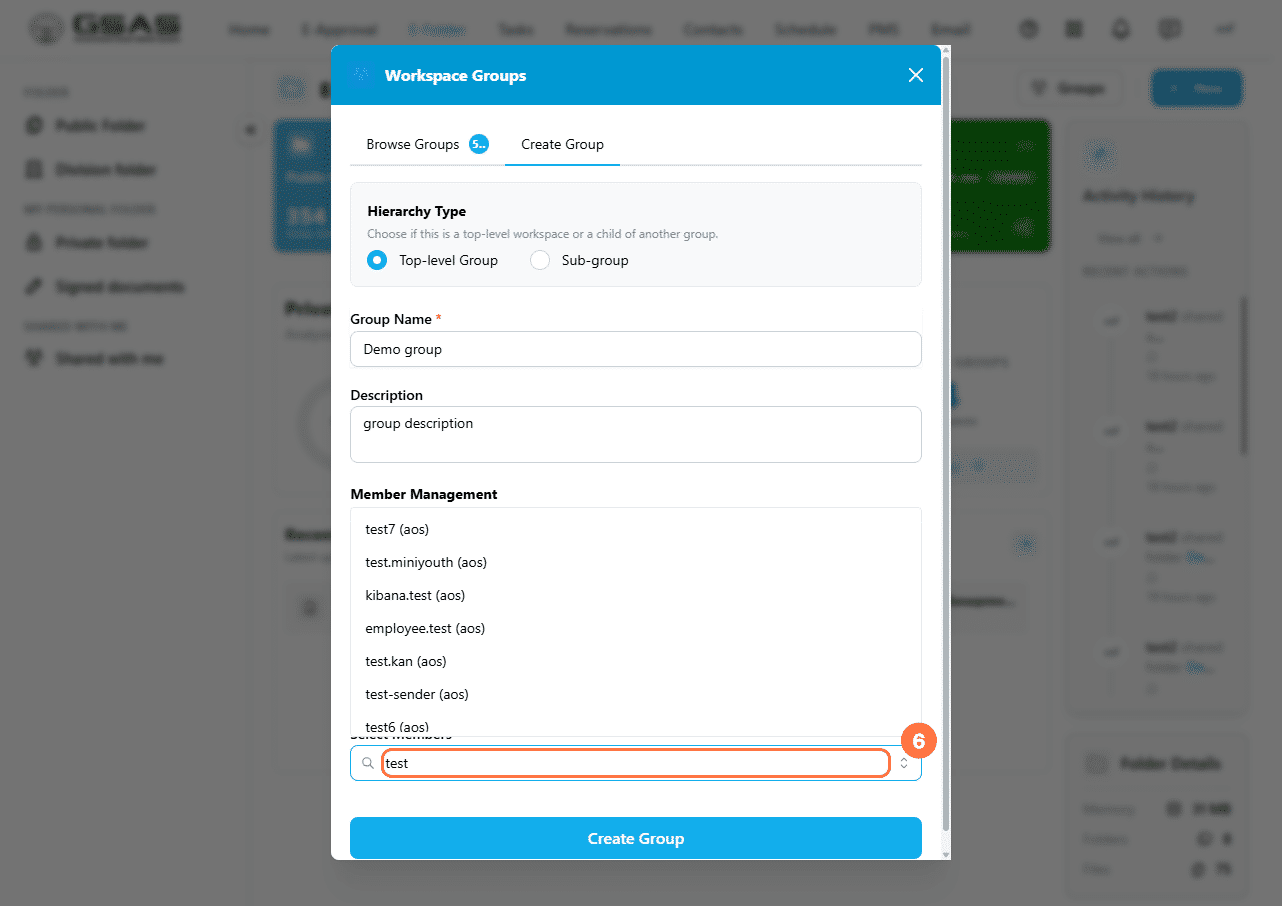
- Then search for members by name and add them.
- Click Create Group.
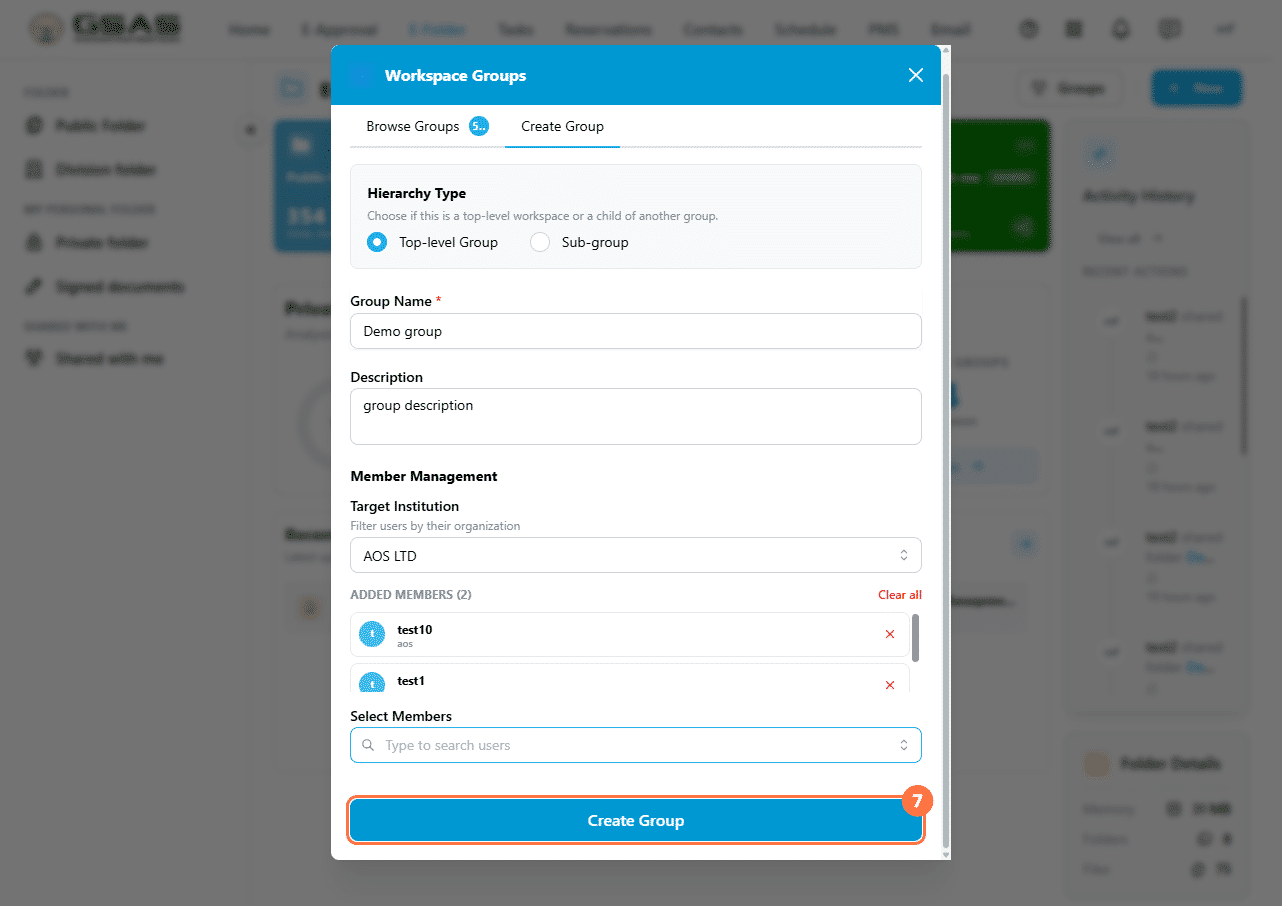
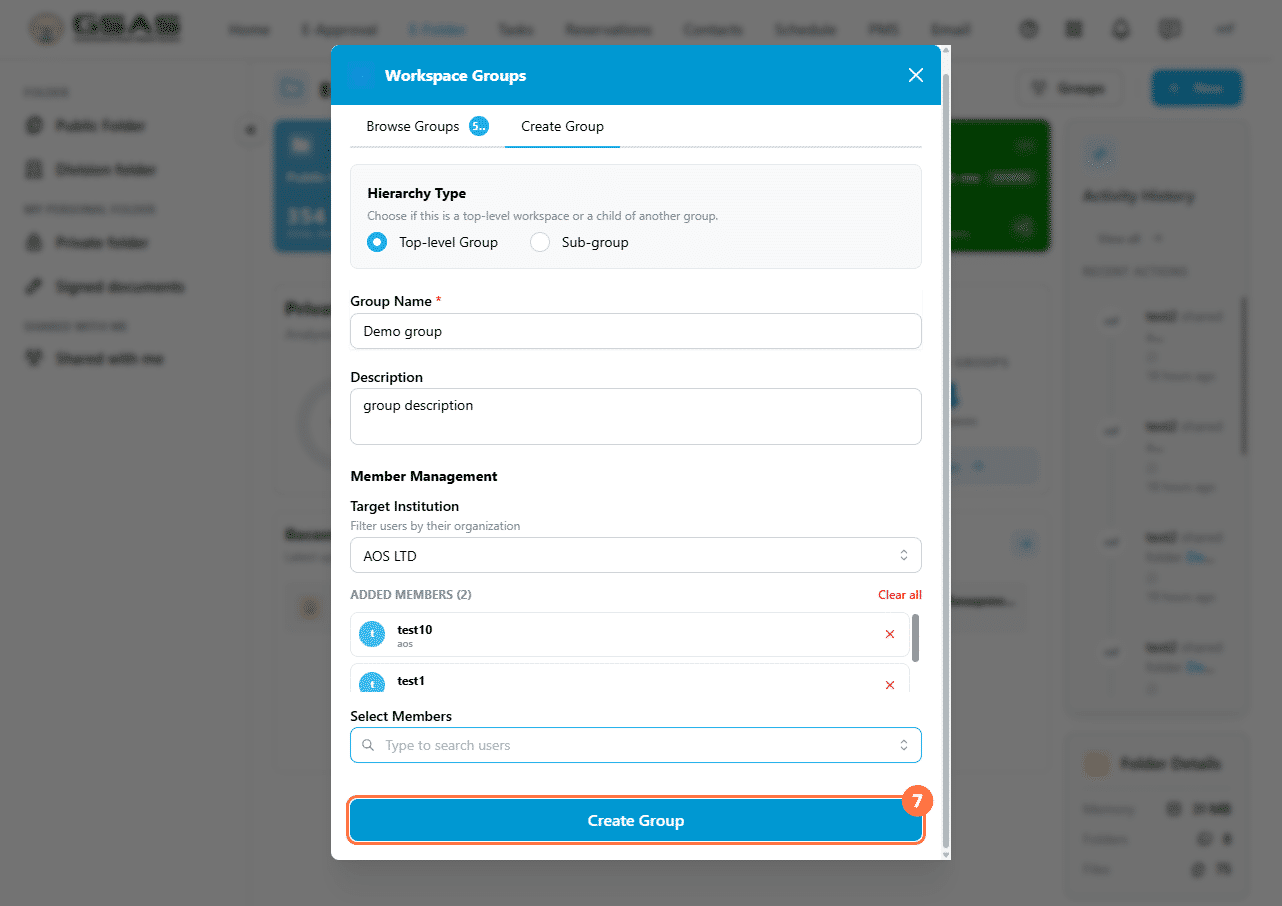
| Note: Added members will see the group appear in their Browse Groups list. New members are assigned Read access by default you can update this after the group is created. |
Working inside a group
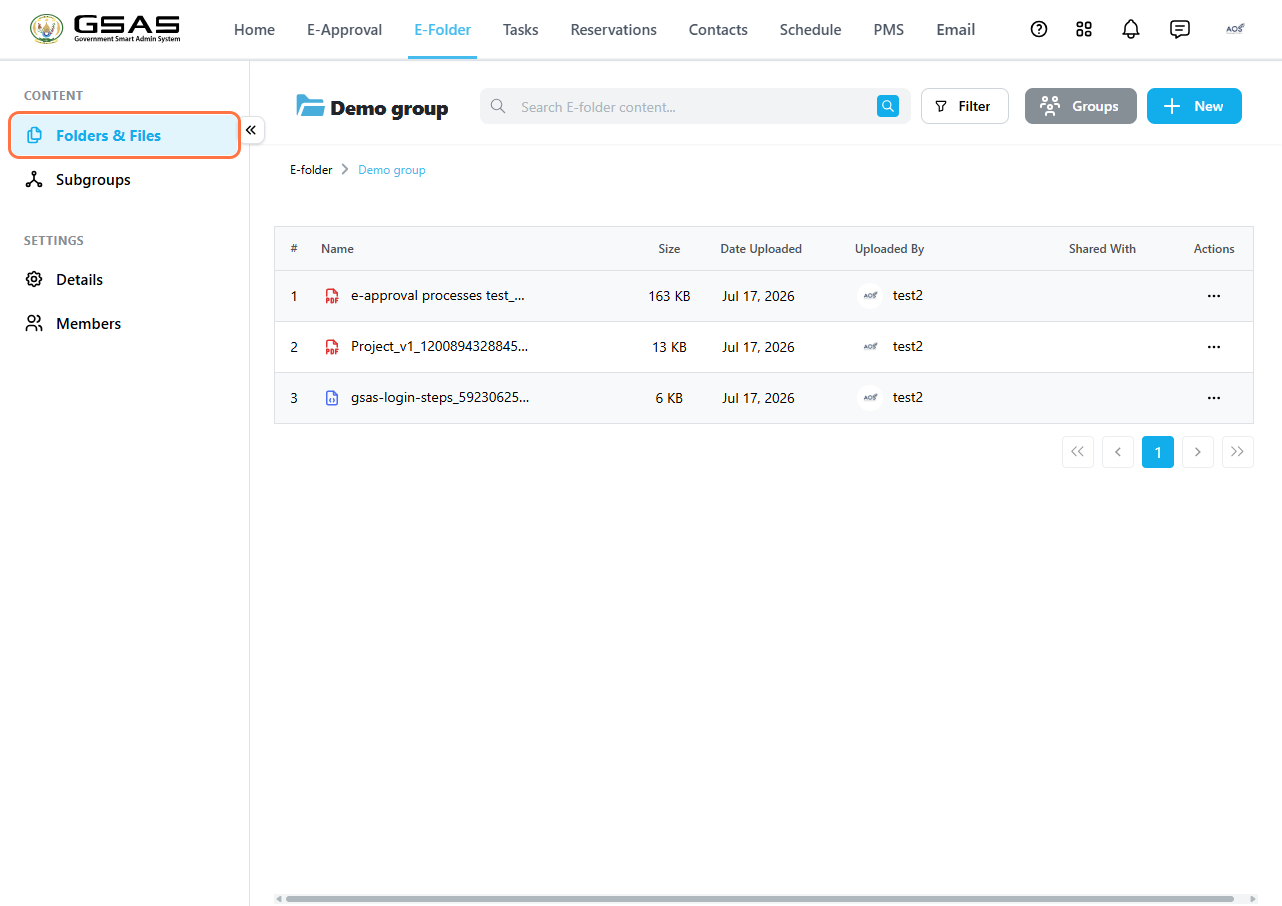
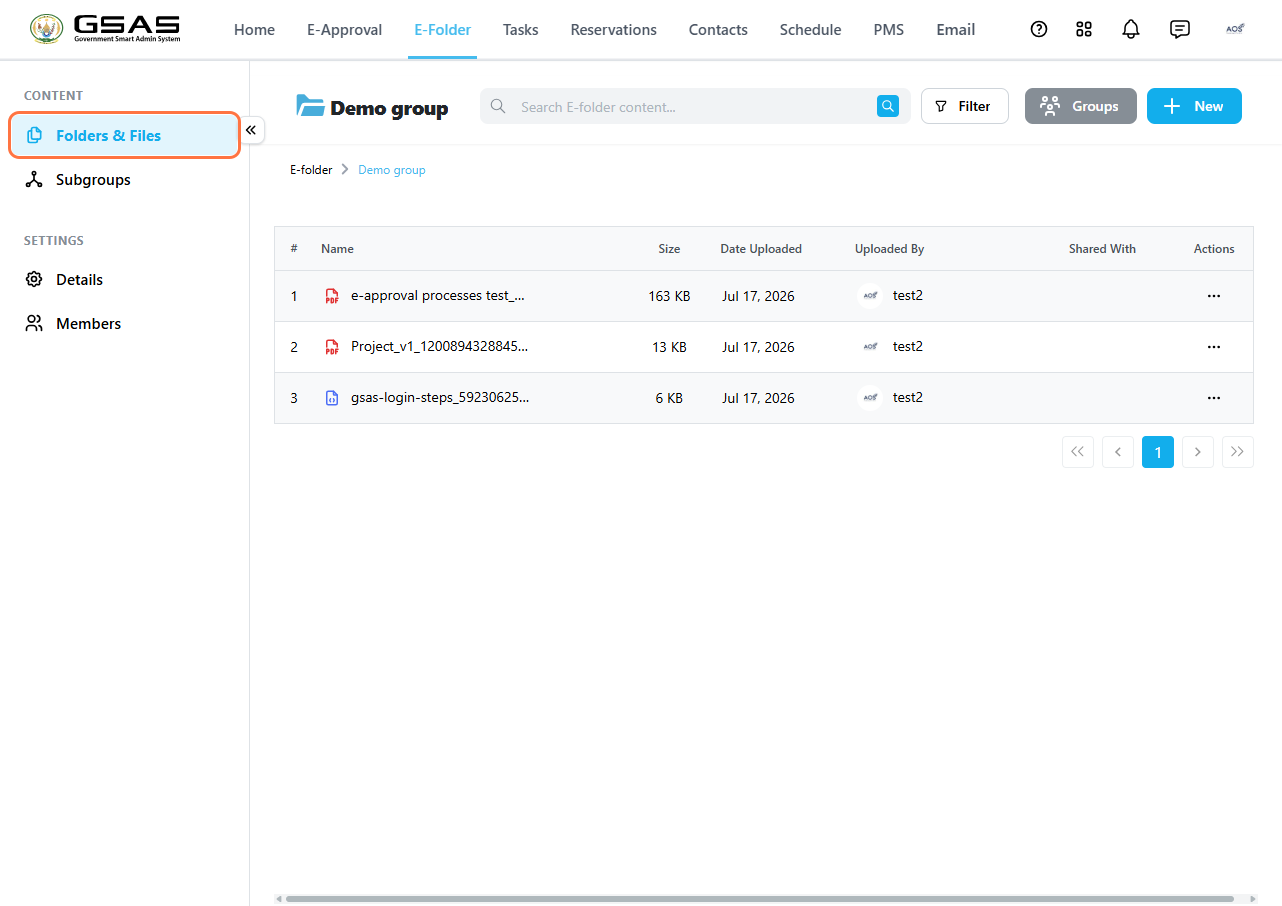
Once you open a group (from the browse groups tab), you will find the same tools available as in your regular folders; a search bar, Filter, and + New to add files and folders. The sidebar gives you access to:
- Folders & Files — the group's shared file space.
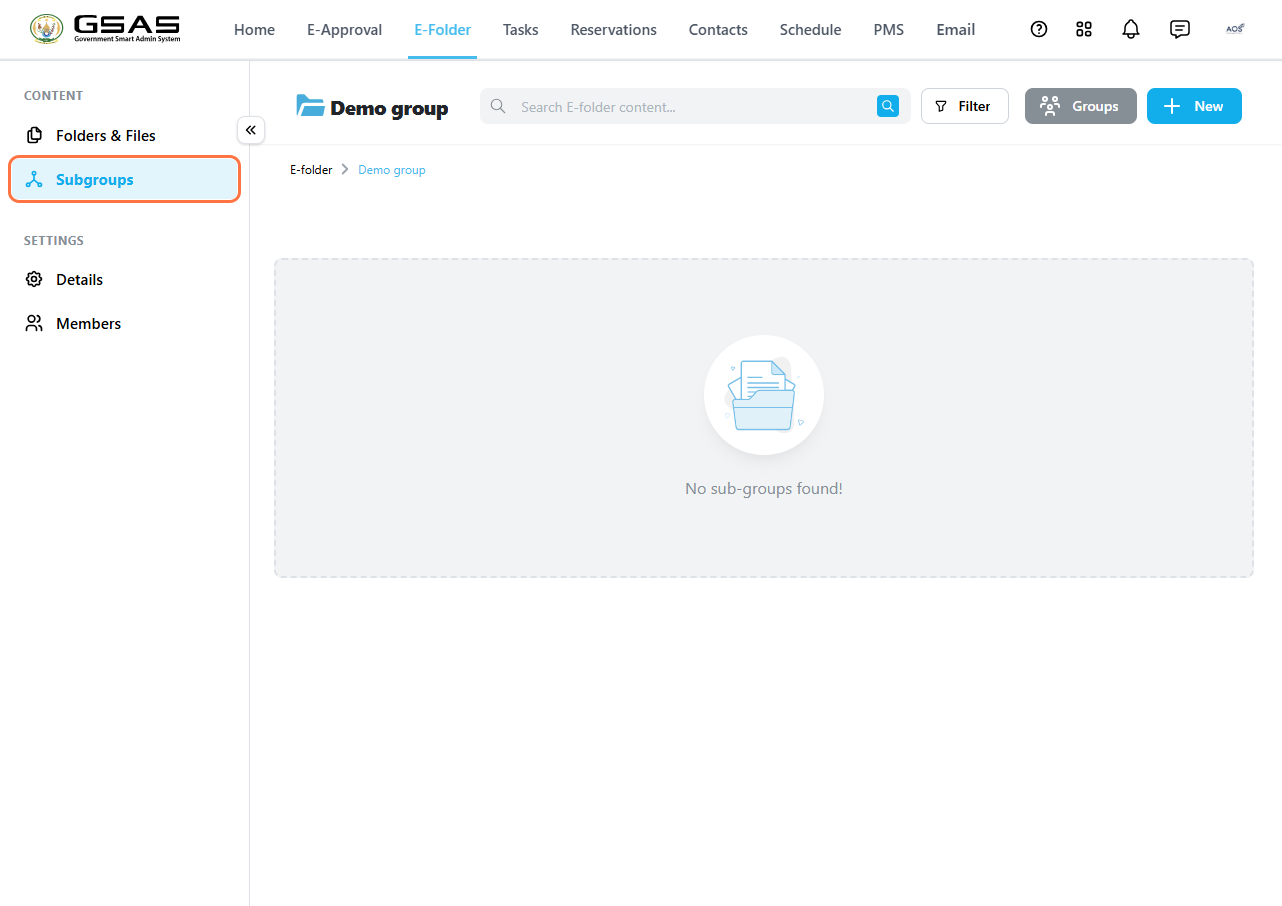
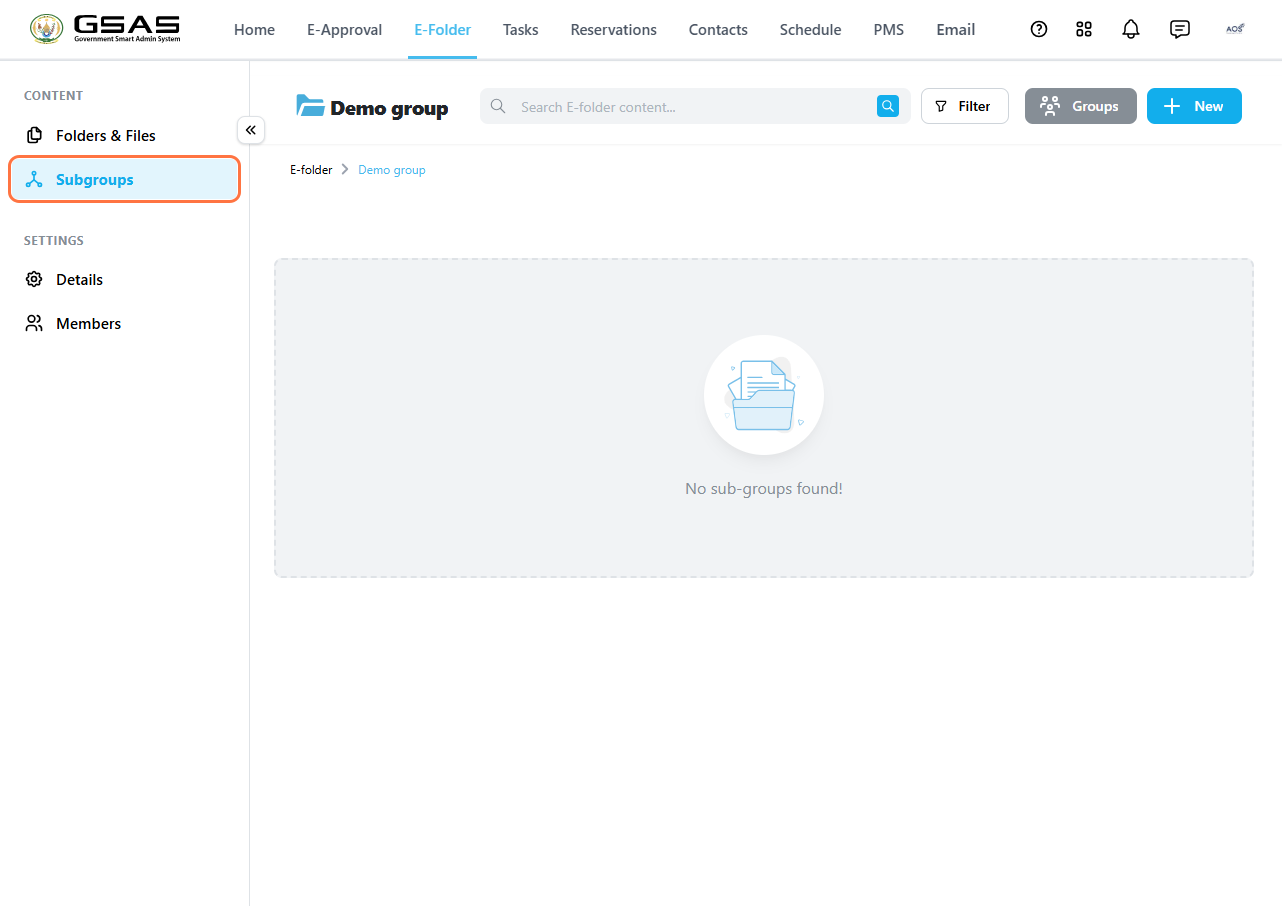
- Subgroups — any subgroups nested under this group.
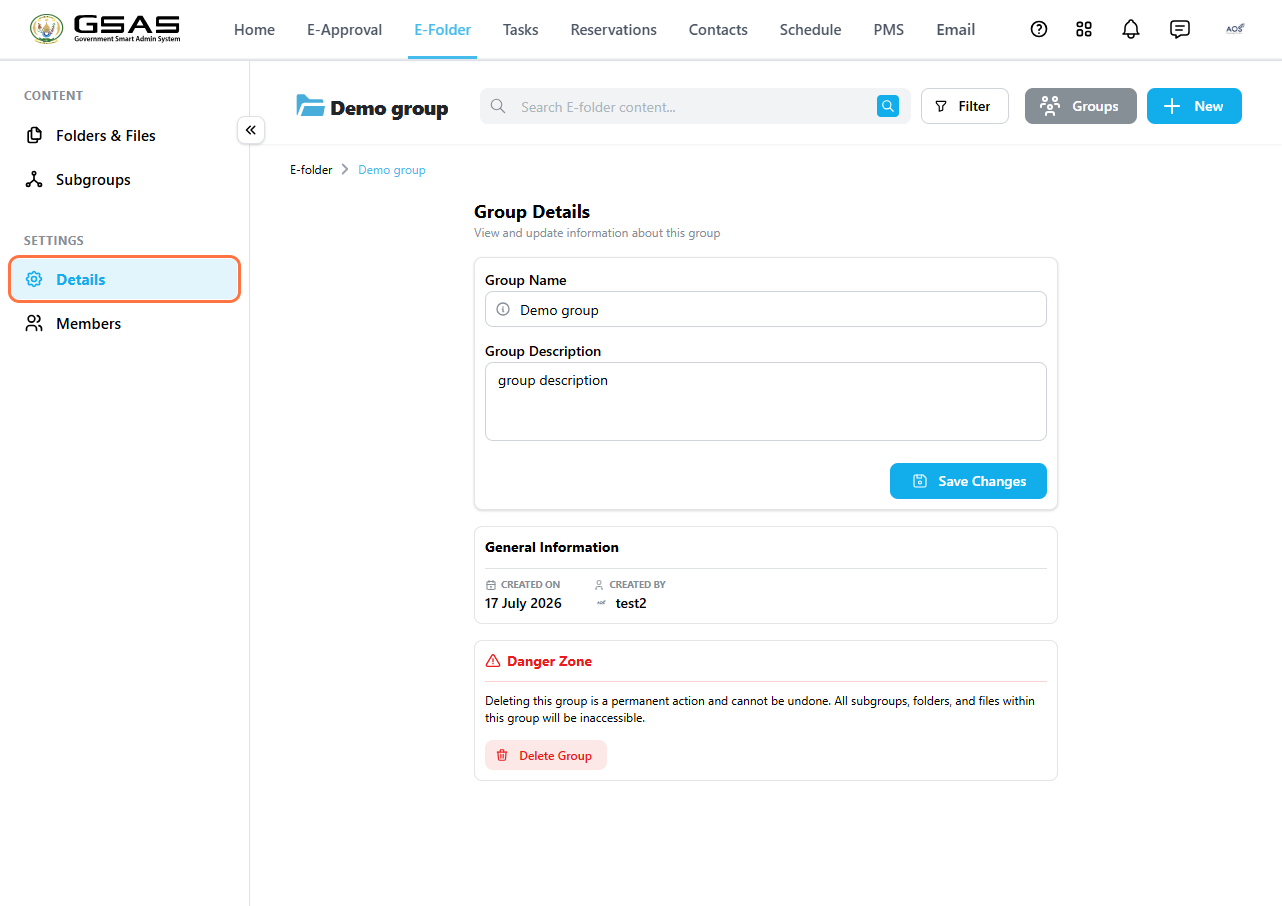
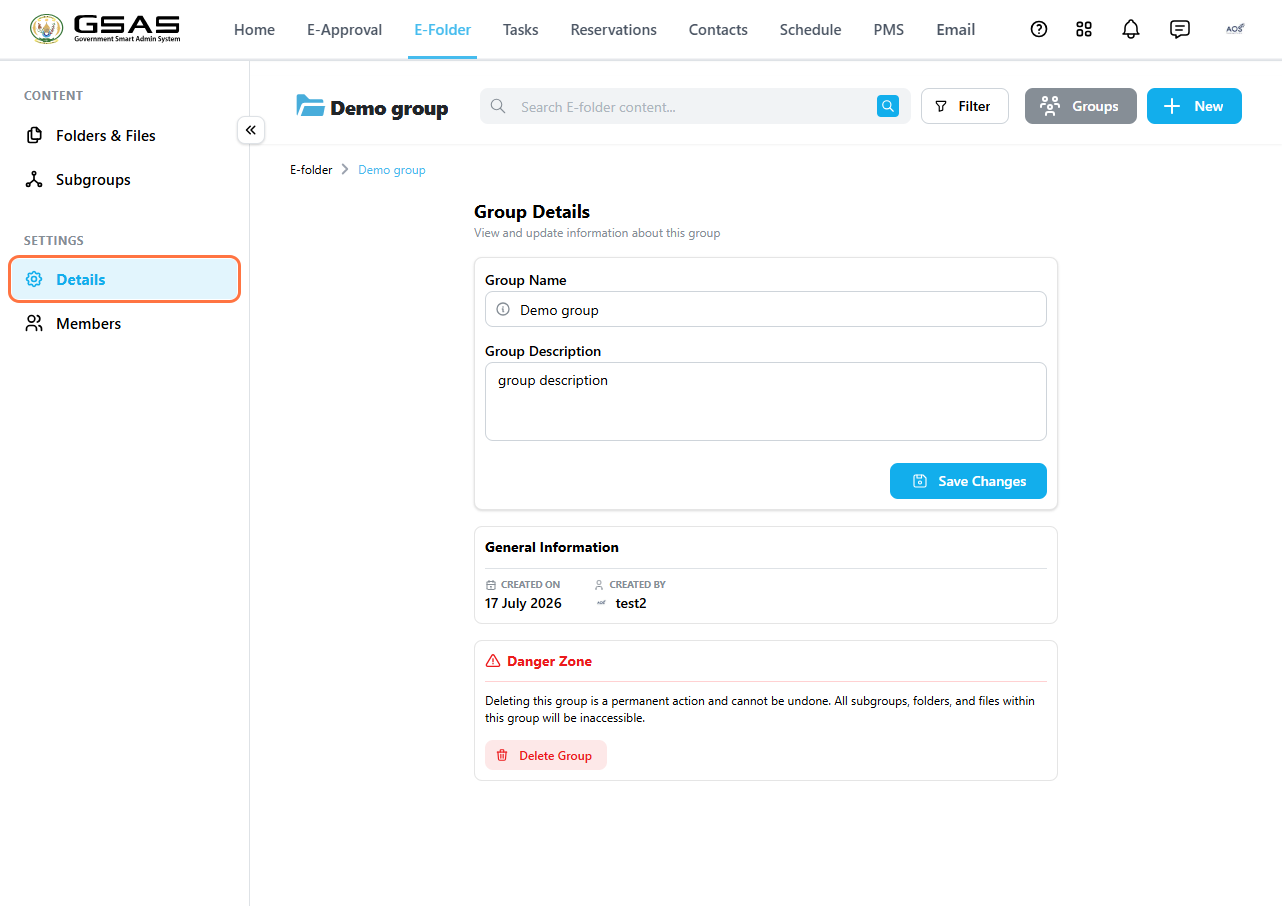
- Details — edit the group name and description, or delete the group.
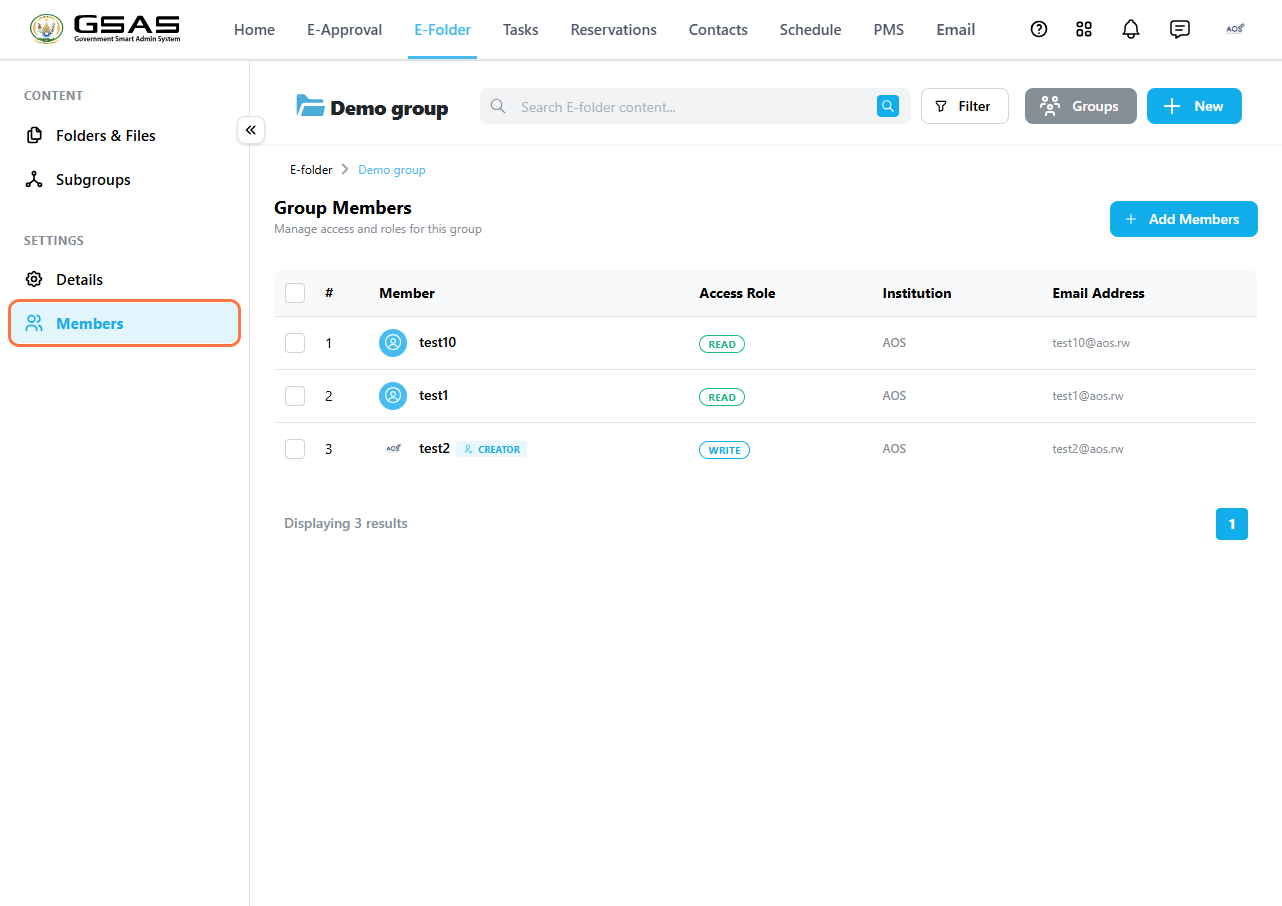
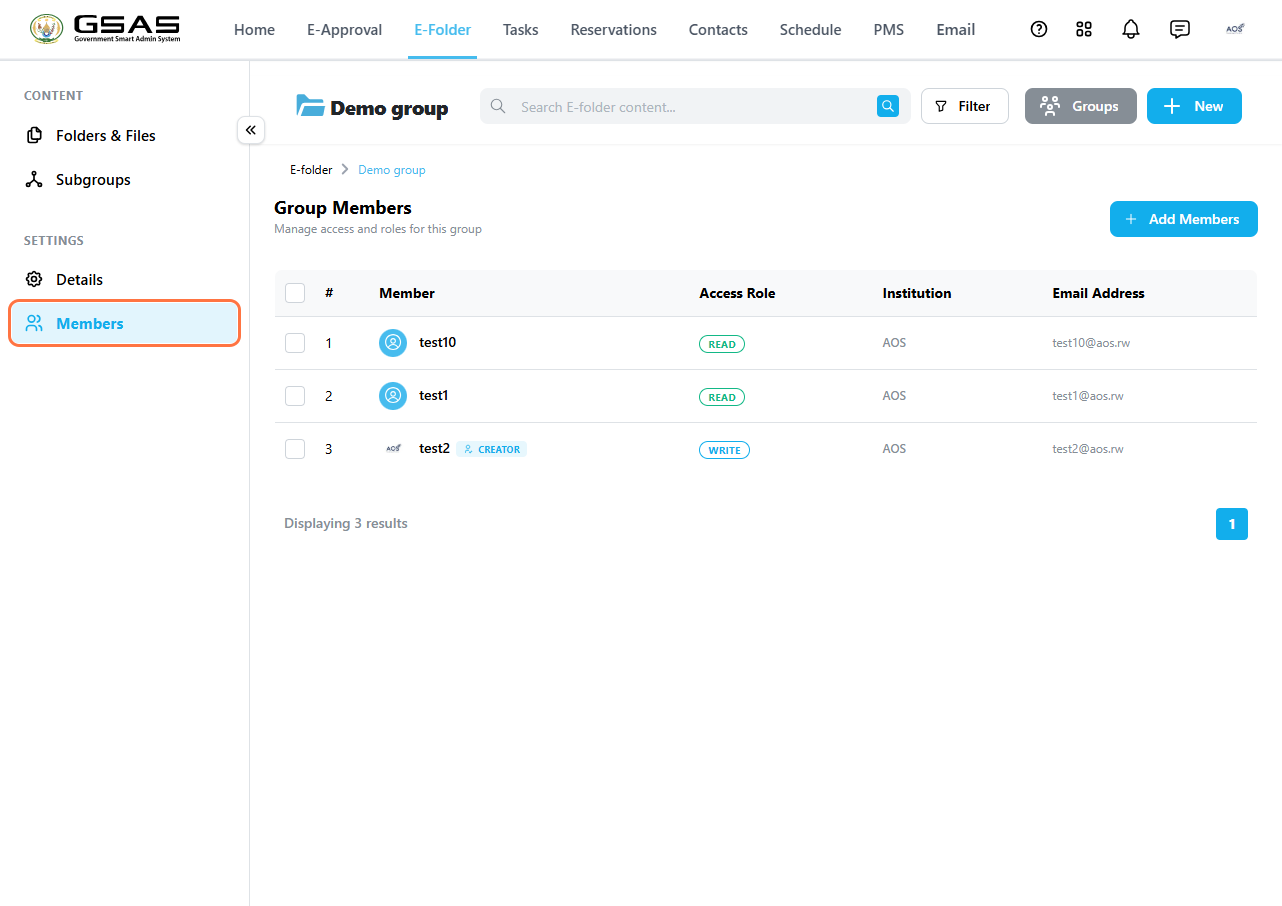
- Members — manage who is in the group and what they can do.
Managing members
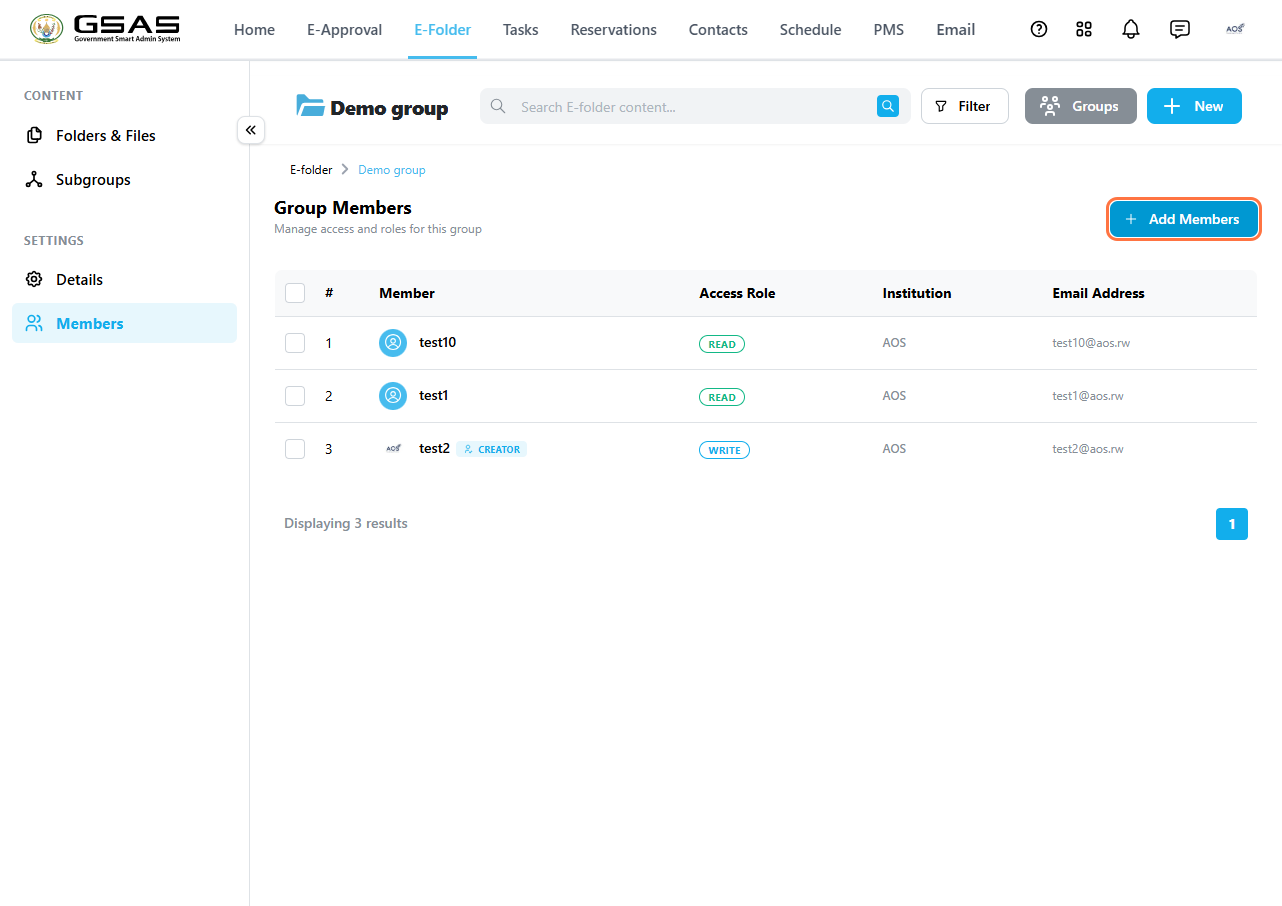
Click Members in the sidebar to see a list of all group members, their access role, institution, and email address.
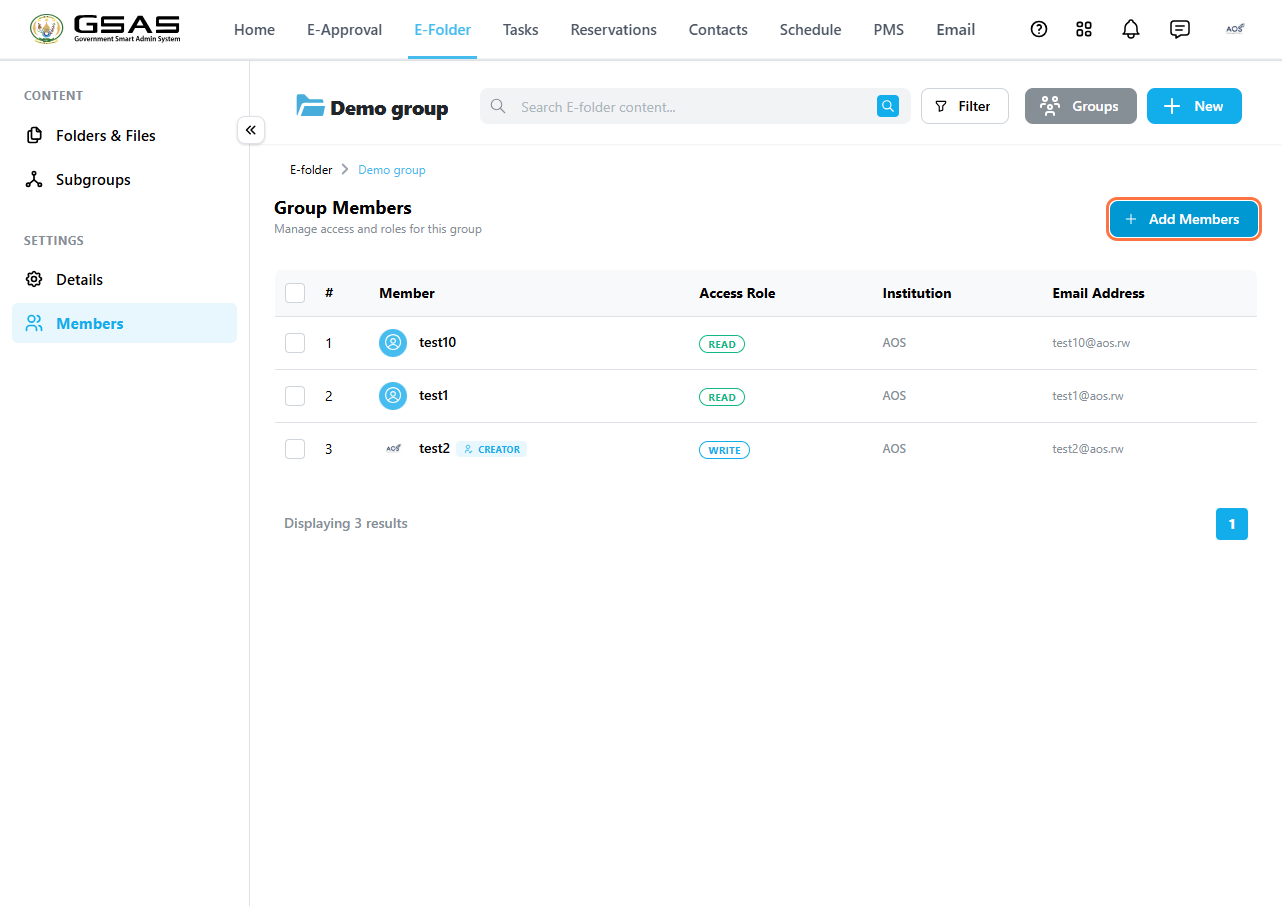
- To add members, click + Add Members at the top right and search for users by name.
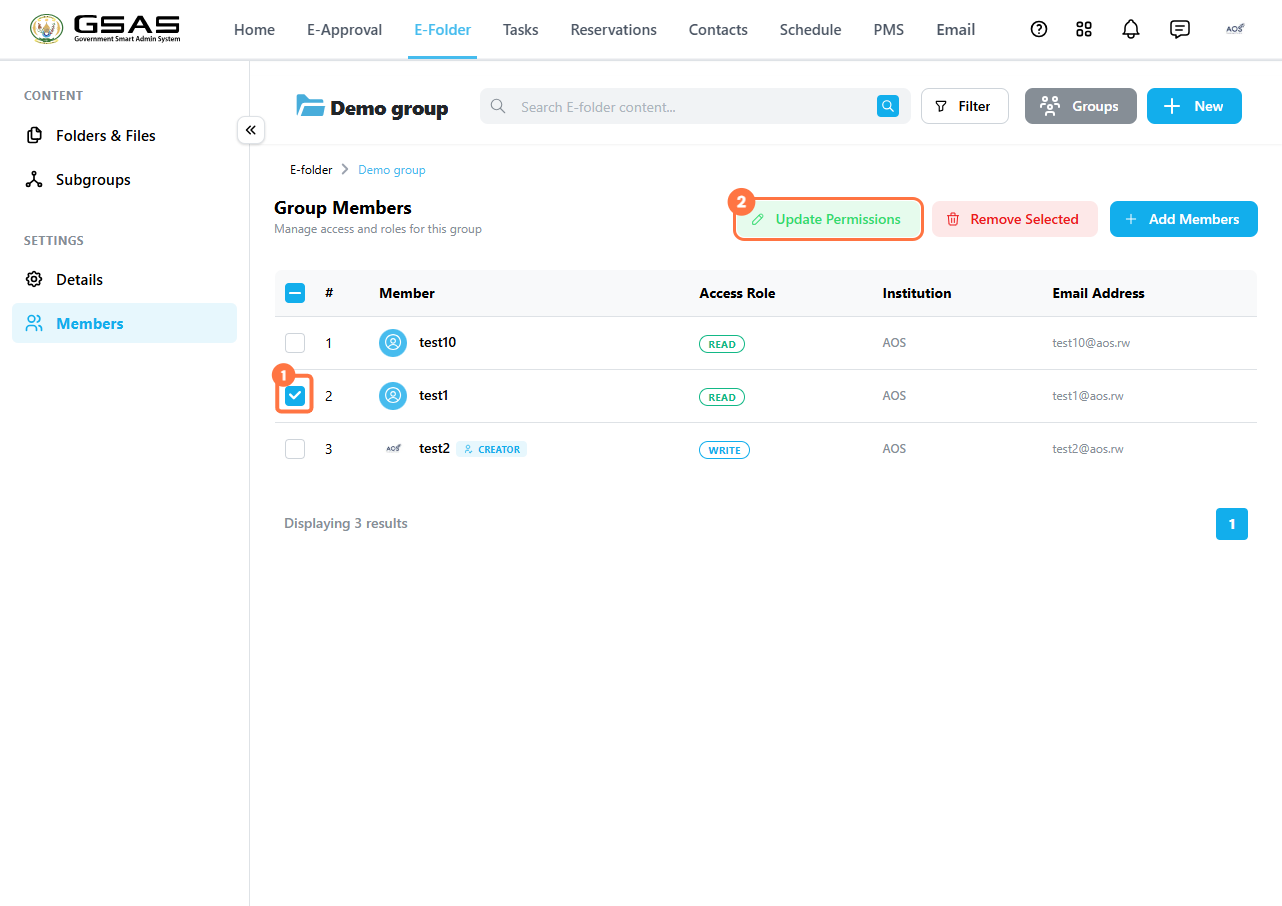
- To update permissions, tick the checkbox next to one or more members and click Update Permissions.
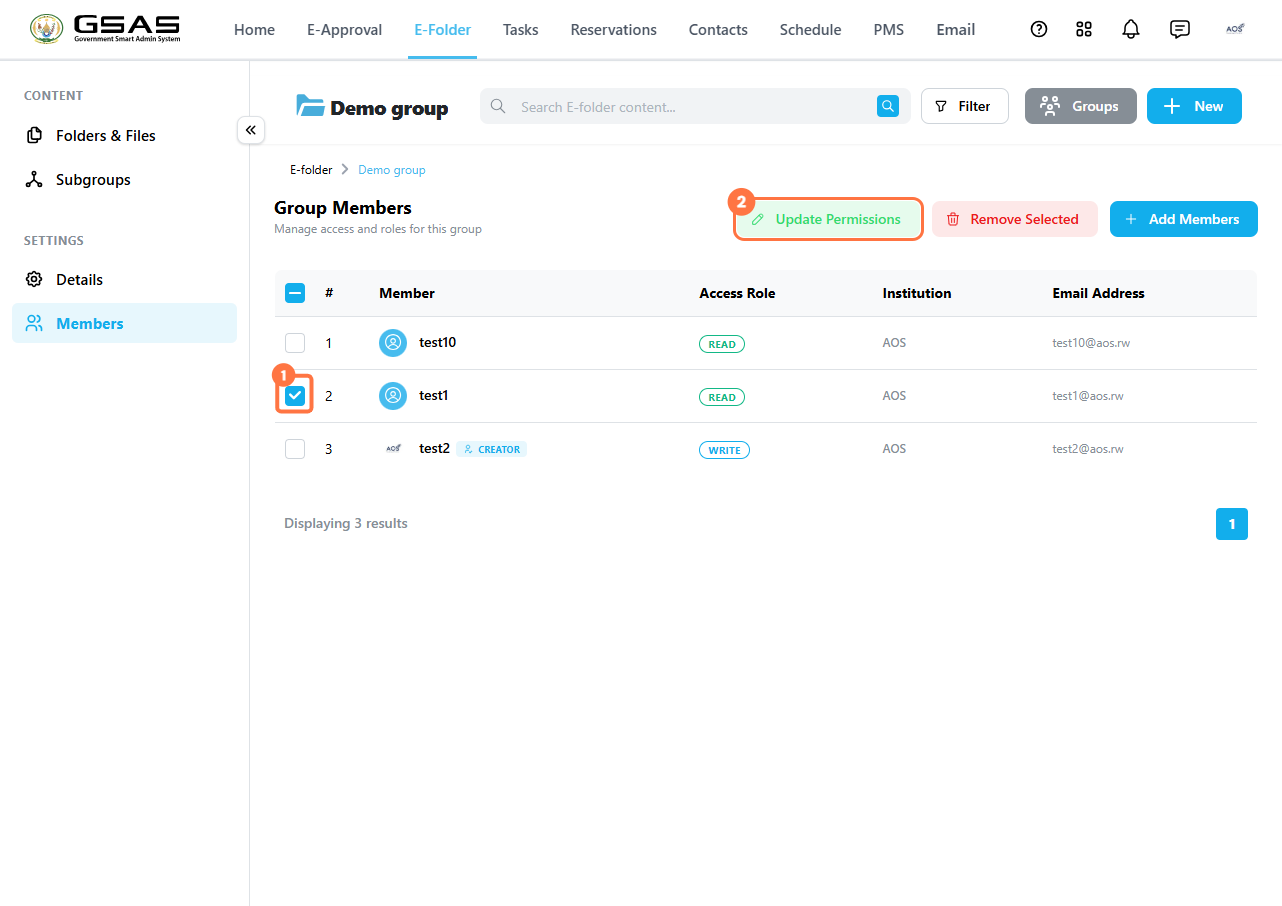
Note: Members with Read access cannot modify files uploaded by others. To grant full access, update their permission to Full Access. - To remove members, tick the checkbox next to the member and click Remove Selected.
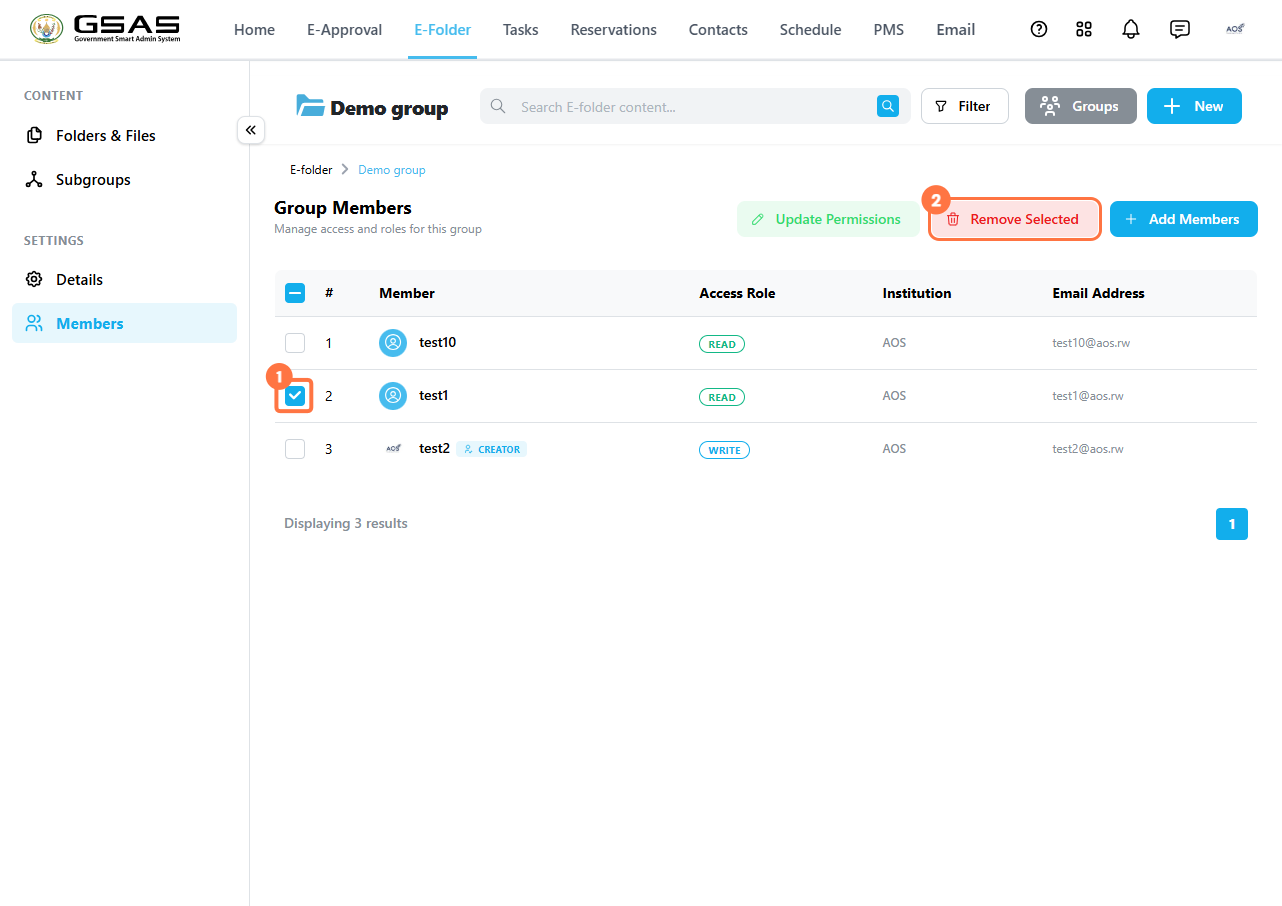
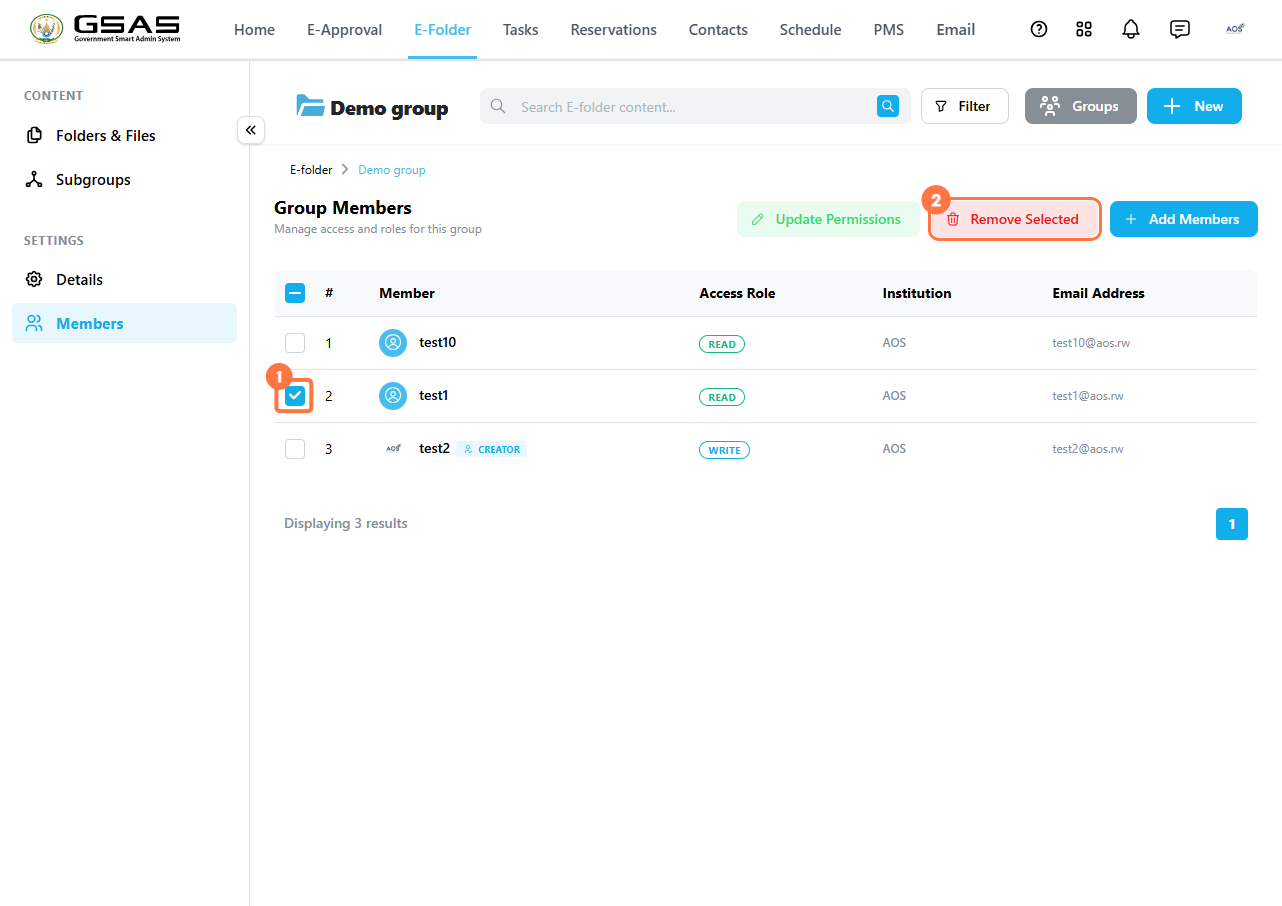
Removed members immediately lose access to the group and all its contents.