Creating and Assigning Tasks
Use Initiated By Me to create task projects, add tasks, assign users, and organize work with due dates, priorities, labels, and subtasks.
| Before you begin: A task must belong to a task project. If the project does not already exist, create the project first. |
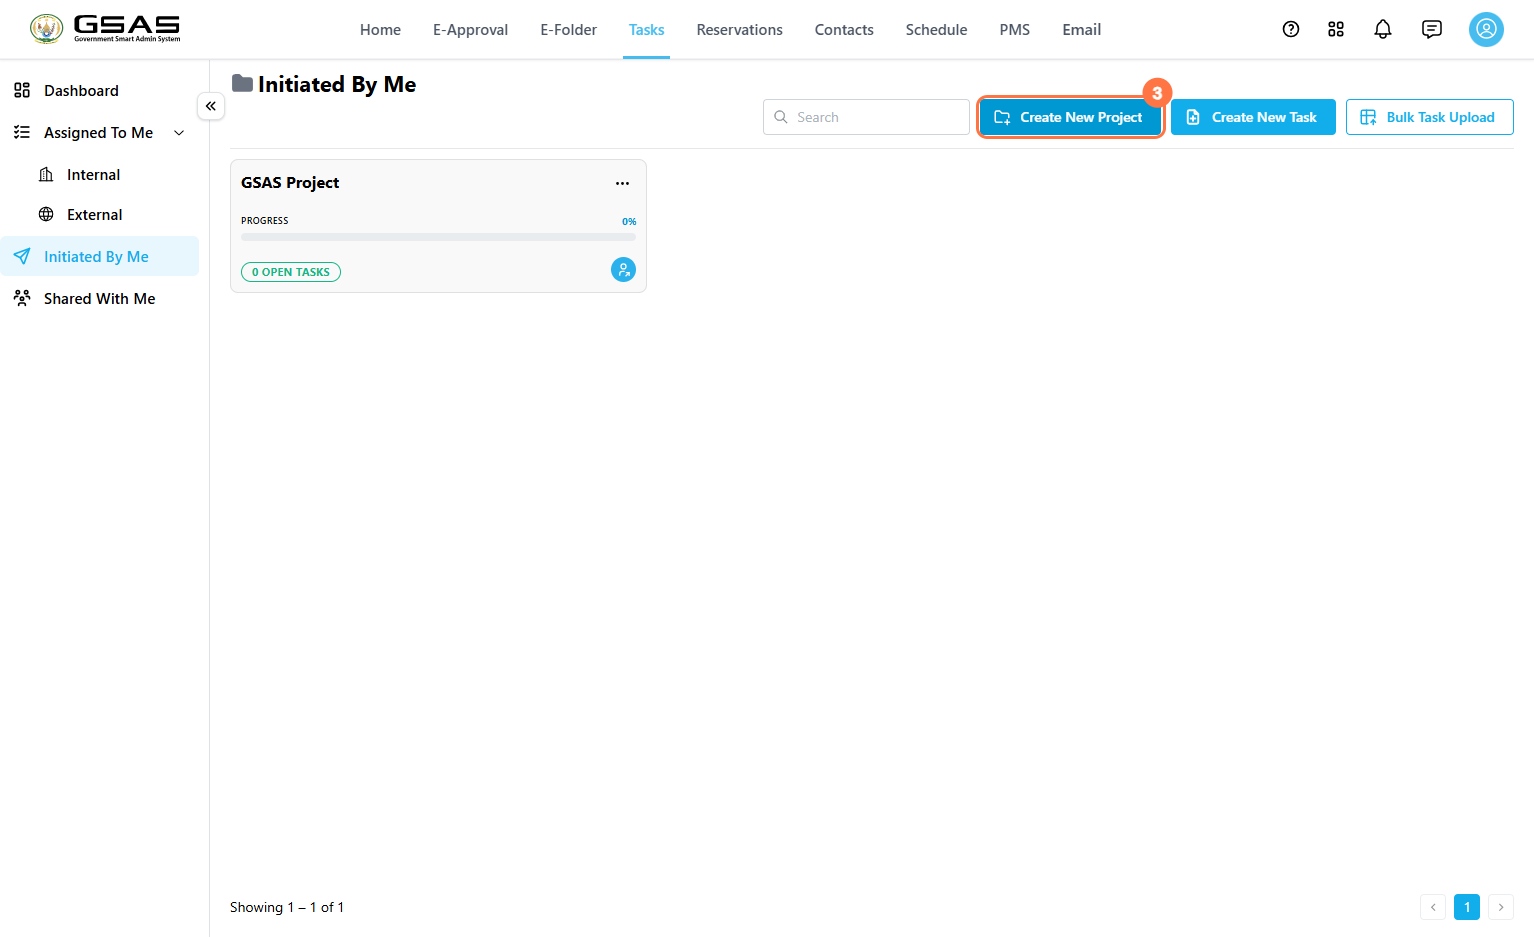
Create a Task Project
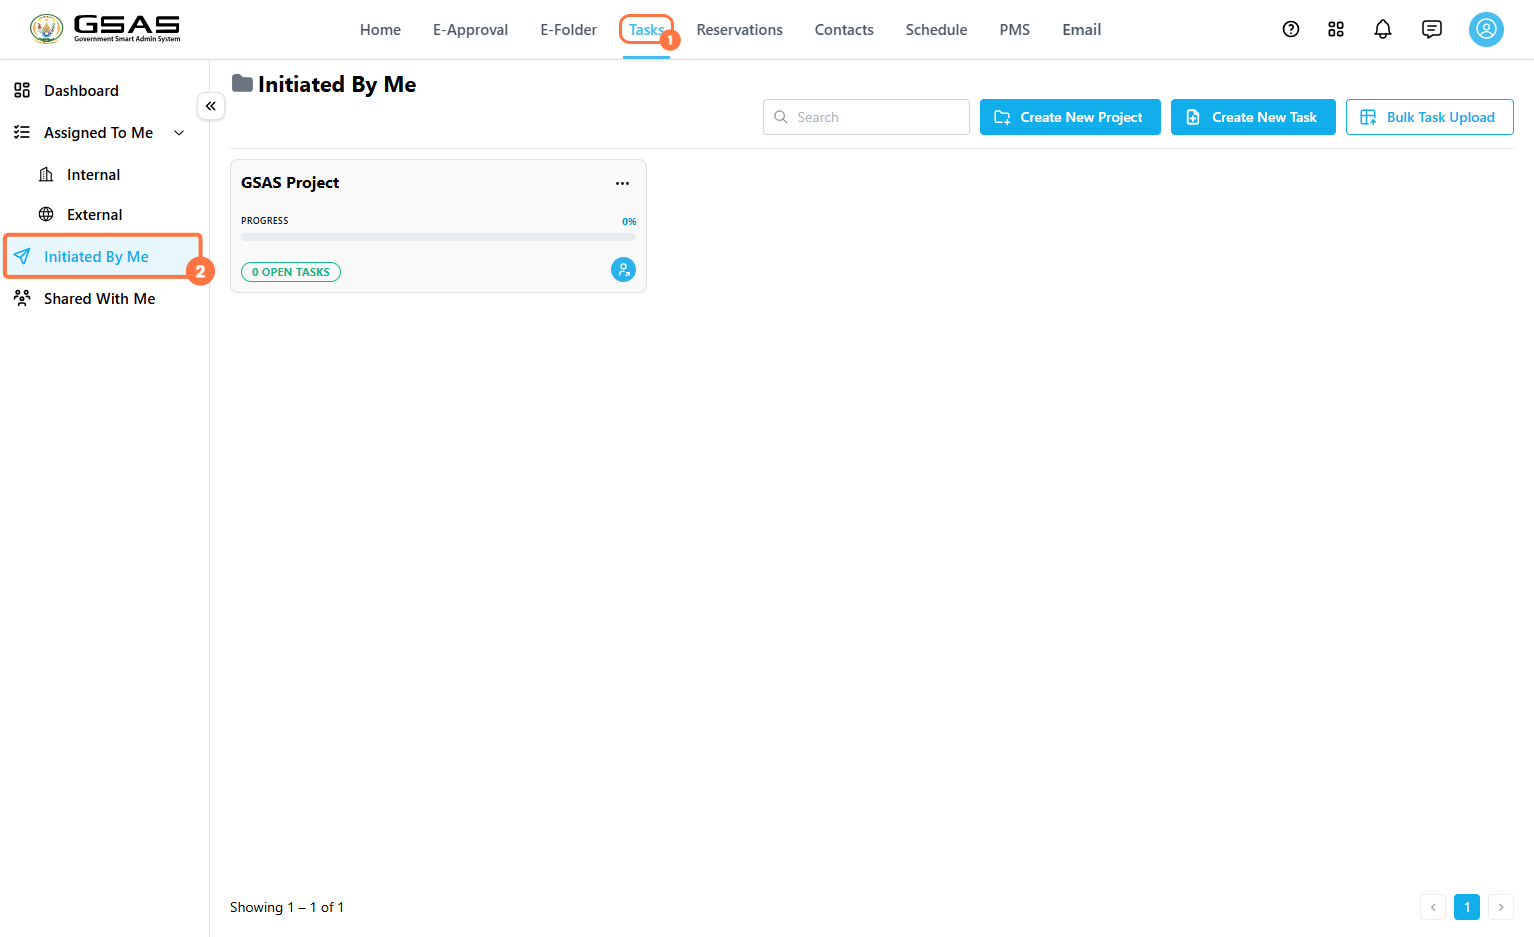
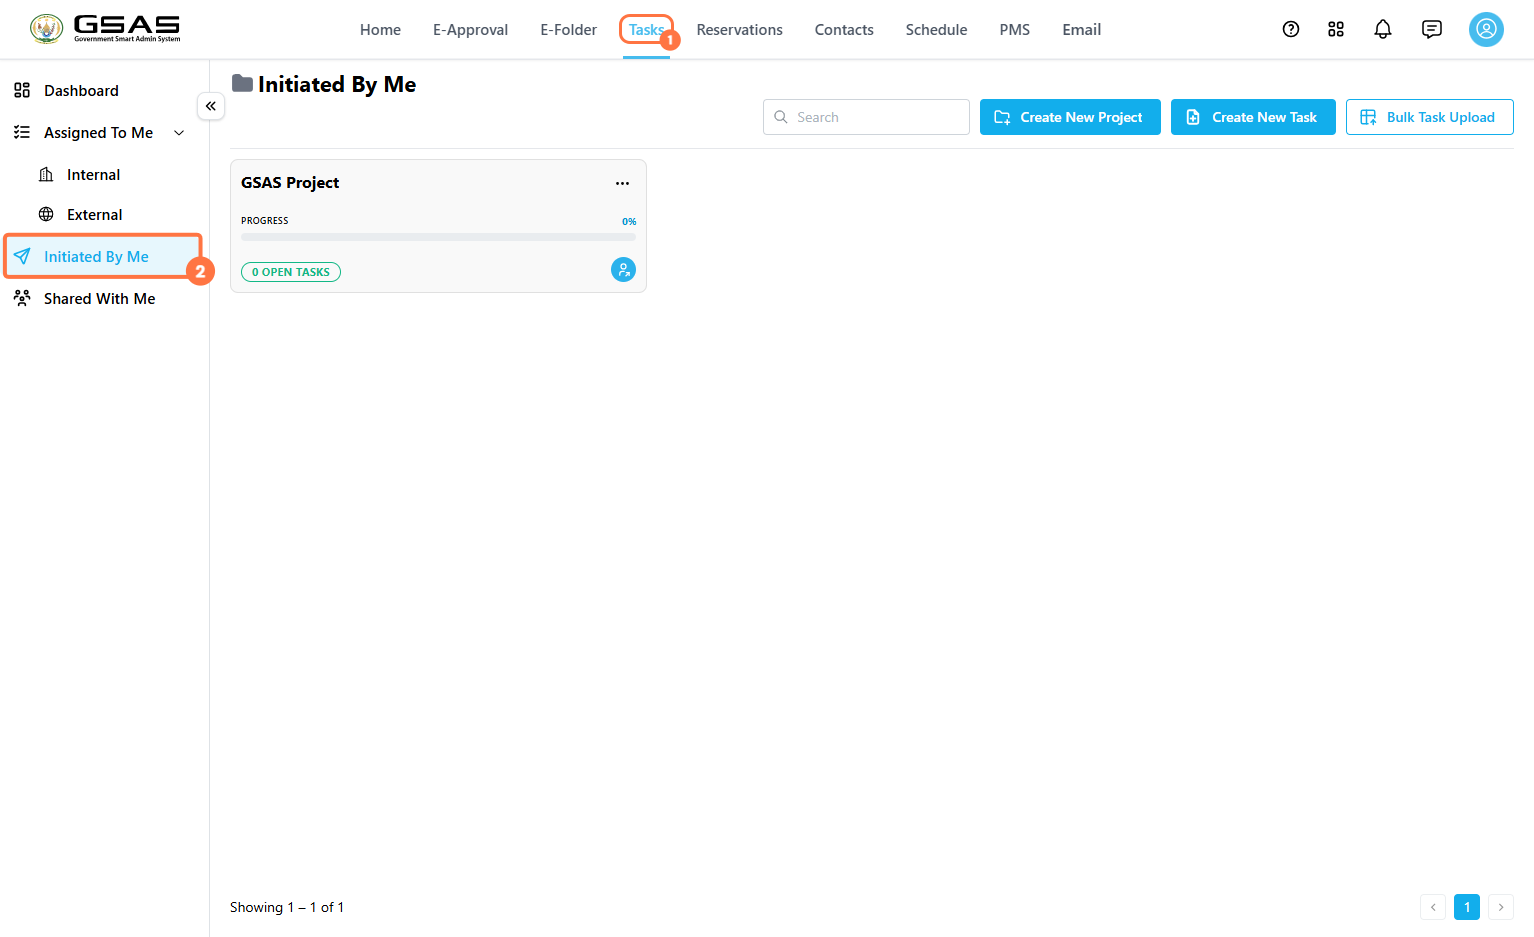
- Go to Tasks.
- Click Initiated By Me.
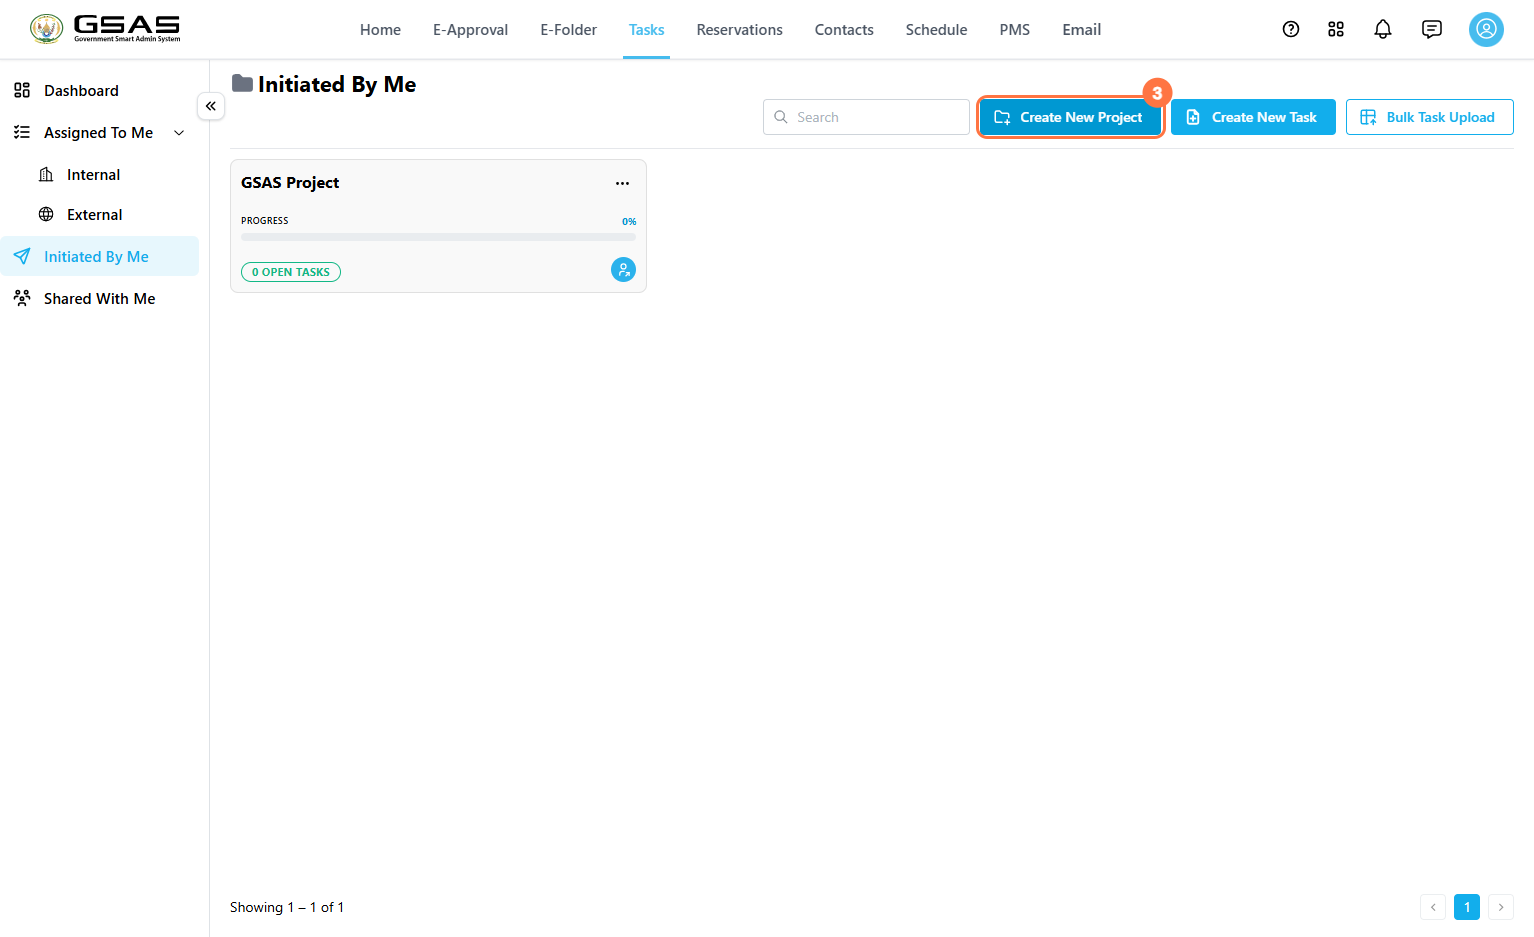
- Click Create New Project.
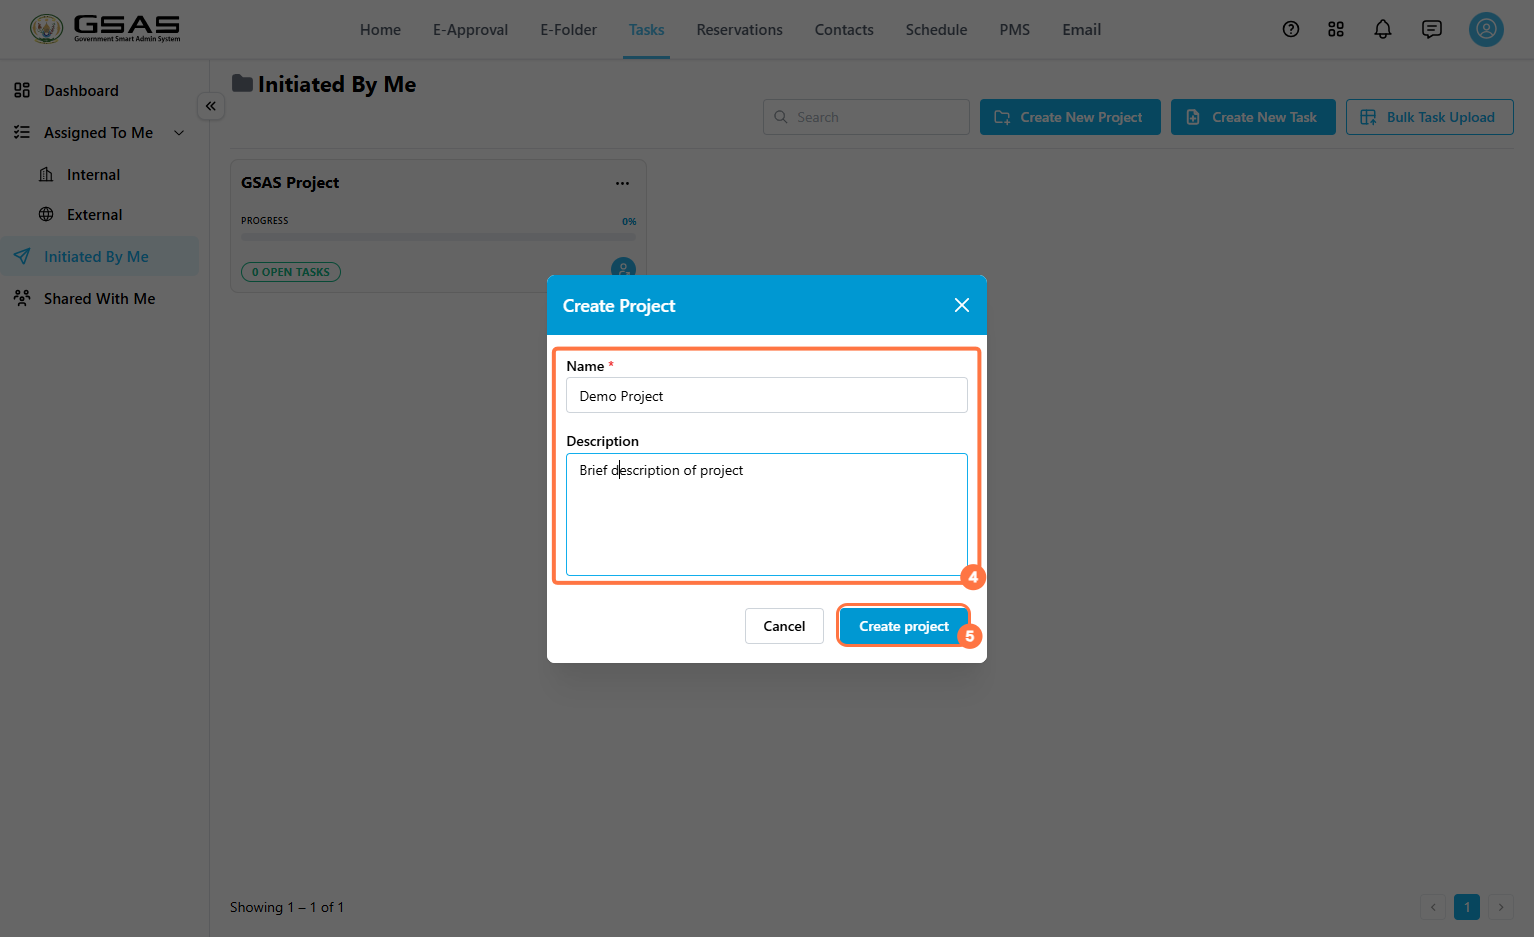
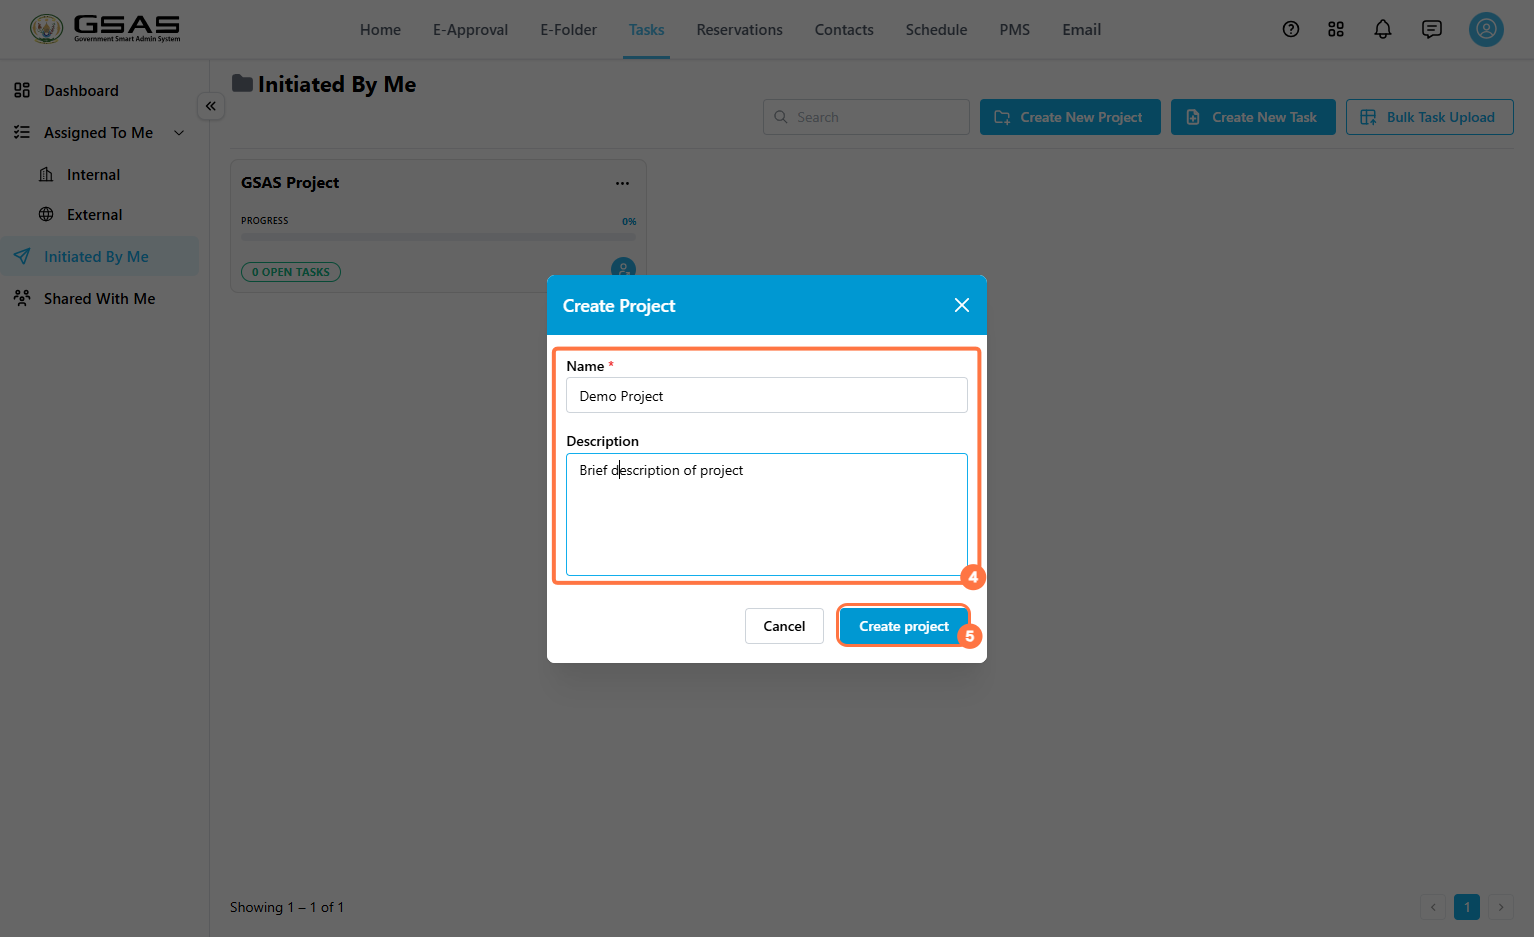
- Enter the project Name and an optional Description.
- Click Create project.
Create a Task
- Click the project title to open its workspace.
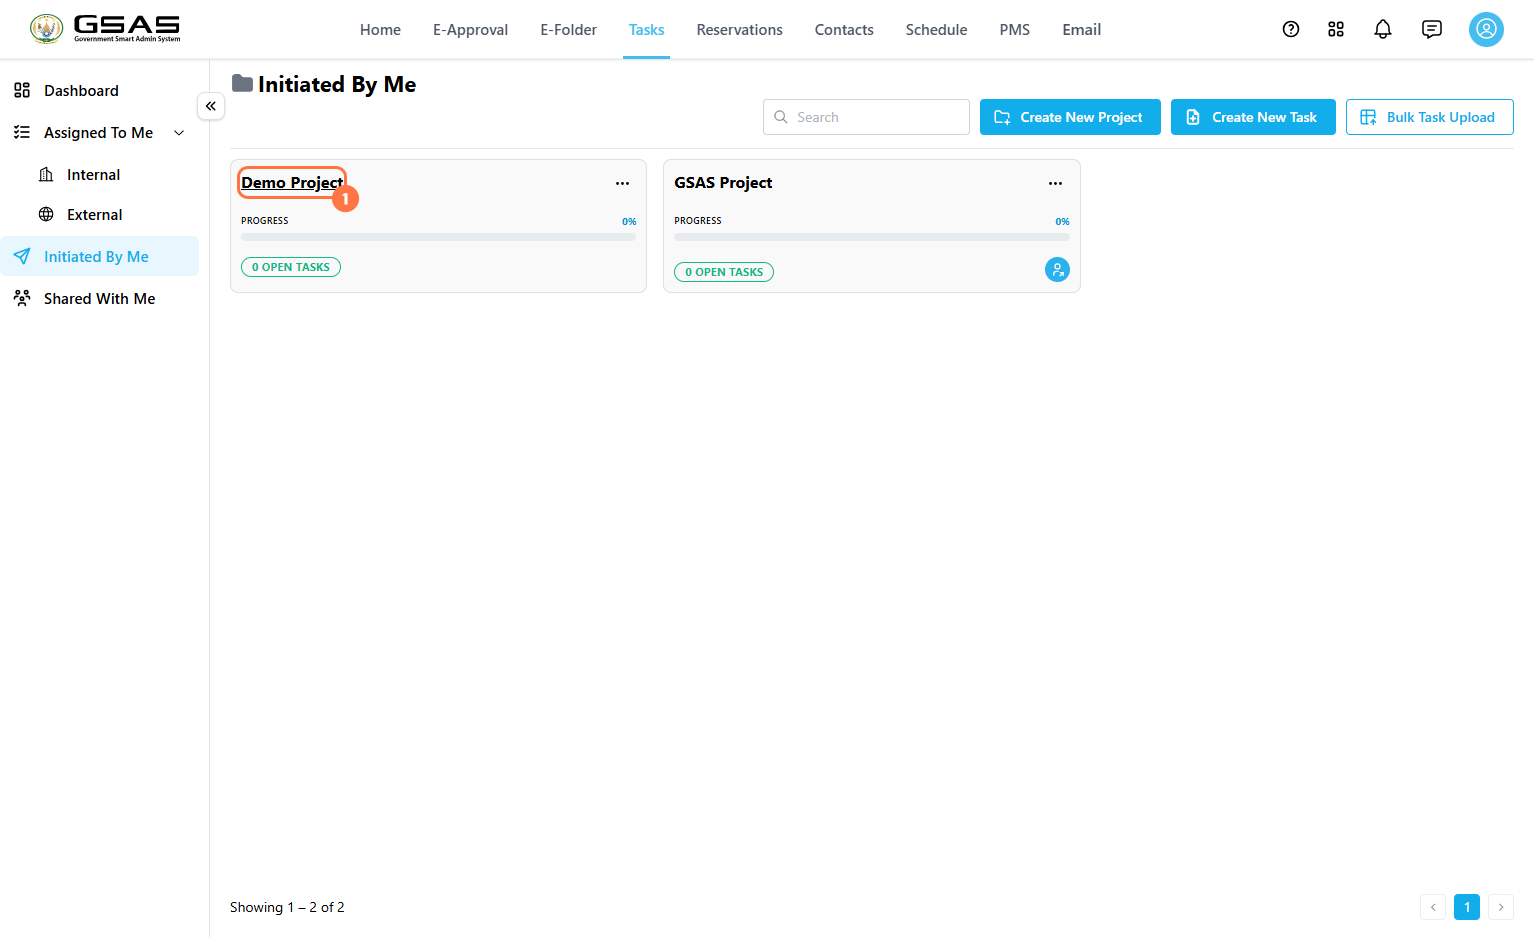
- Click Create New Task.
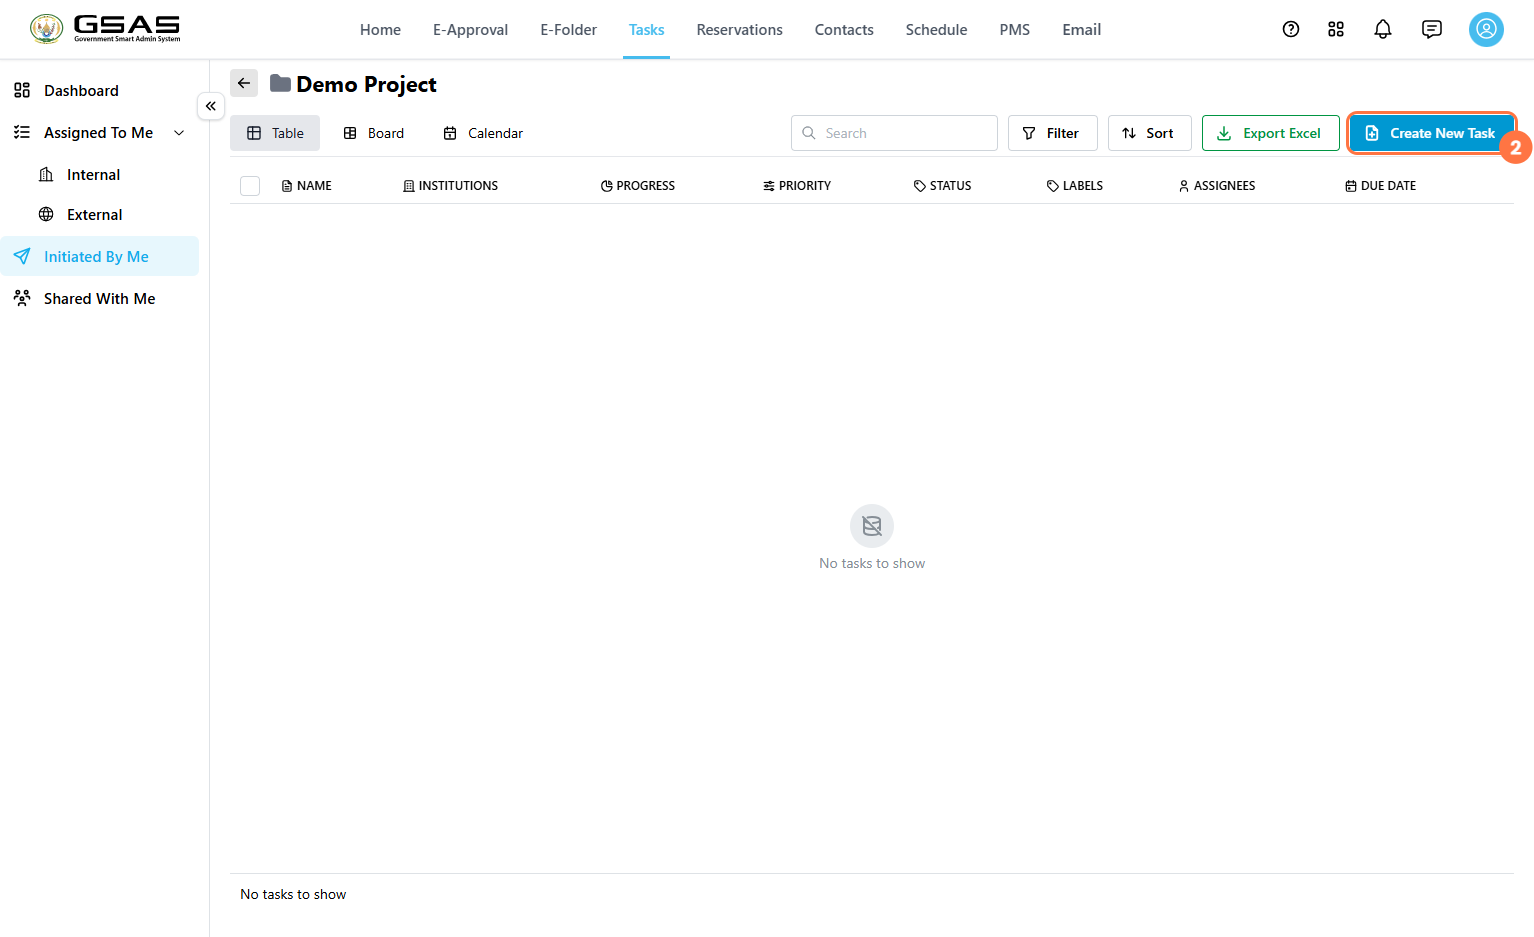
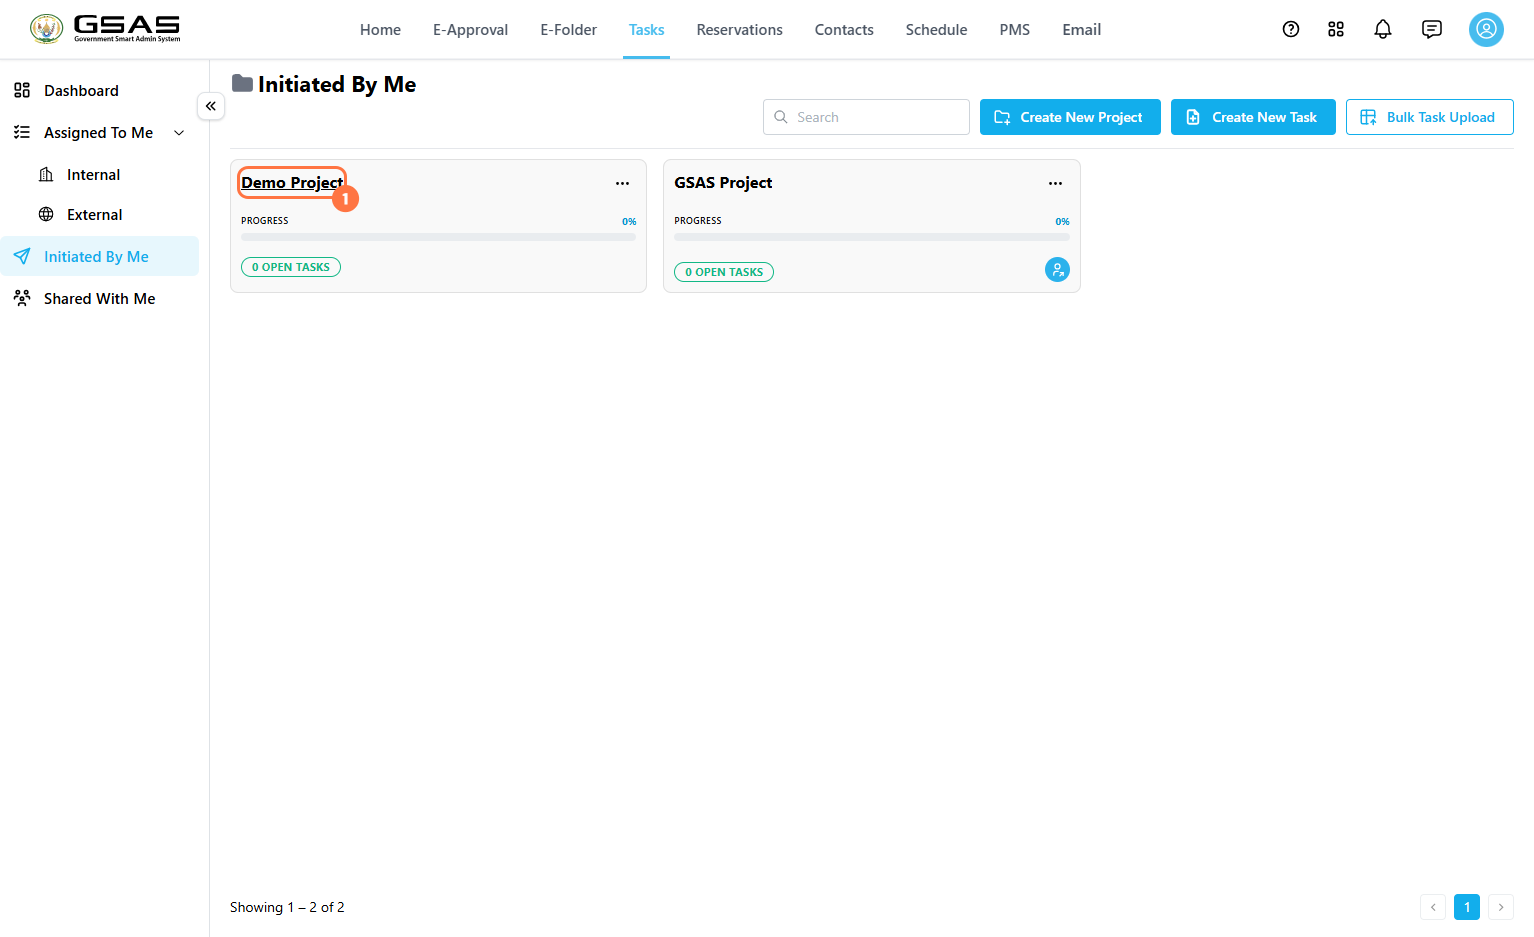
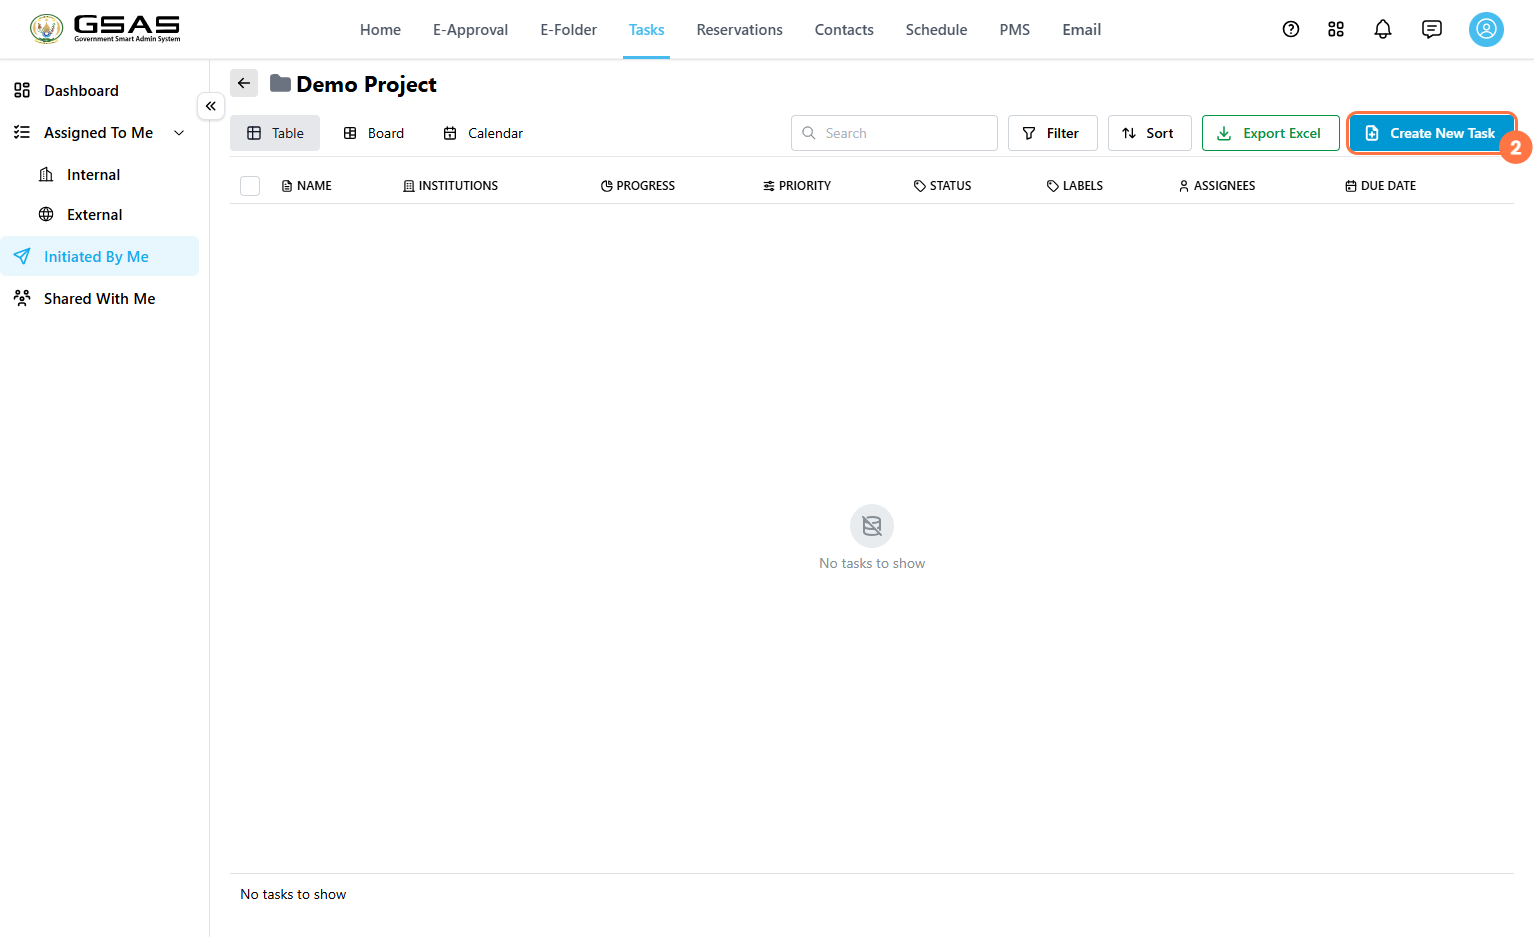
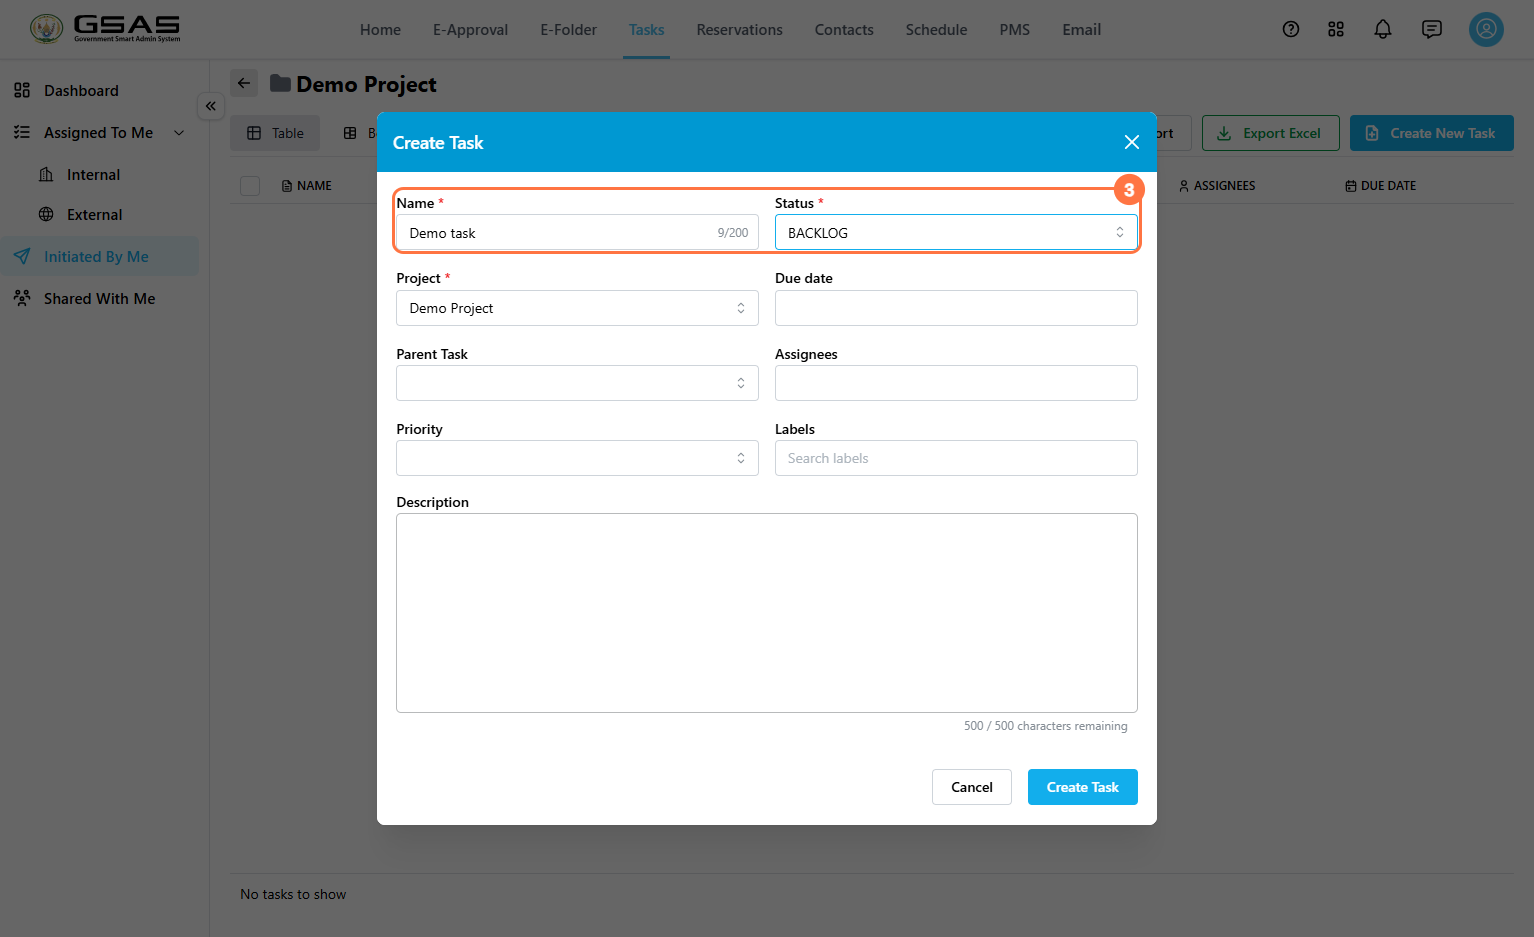
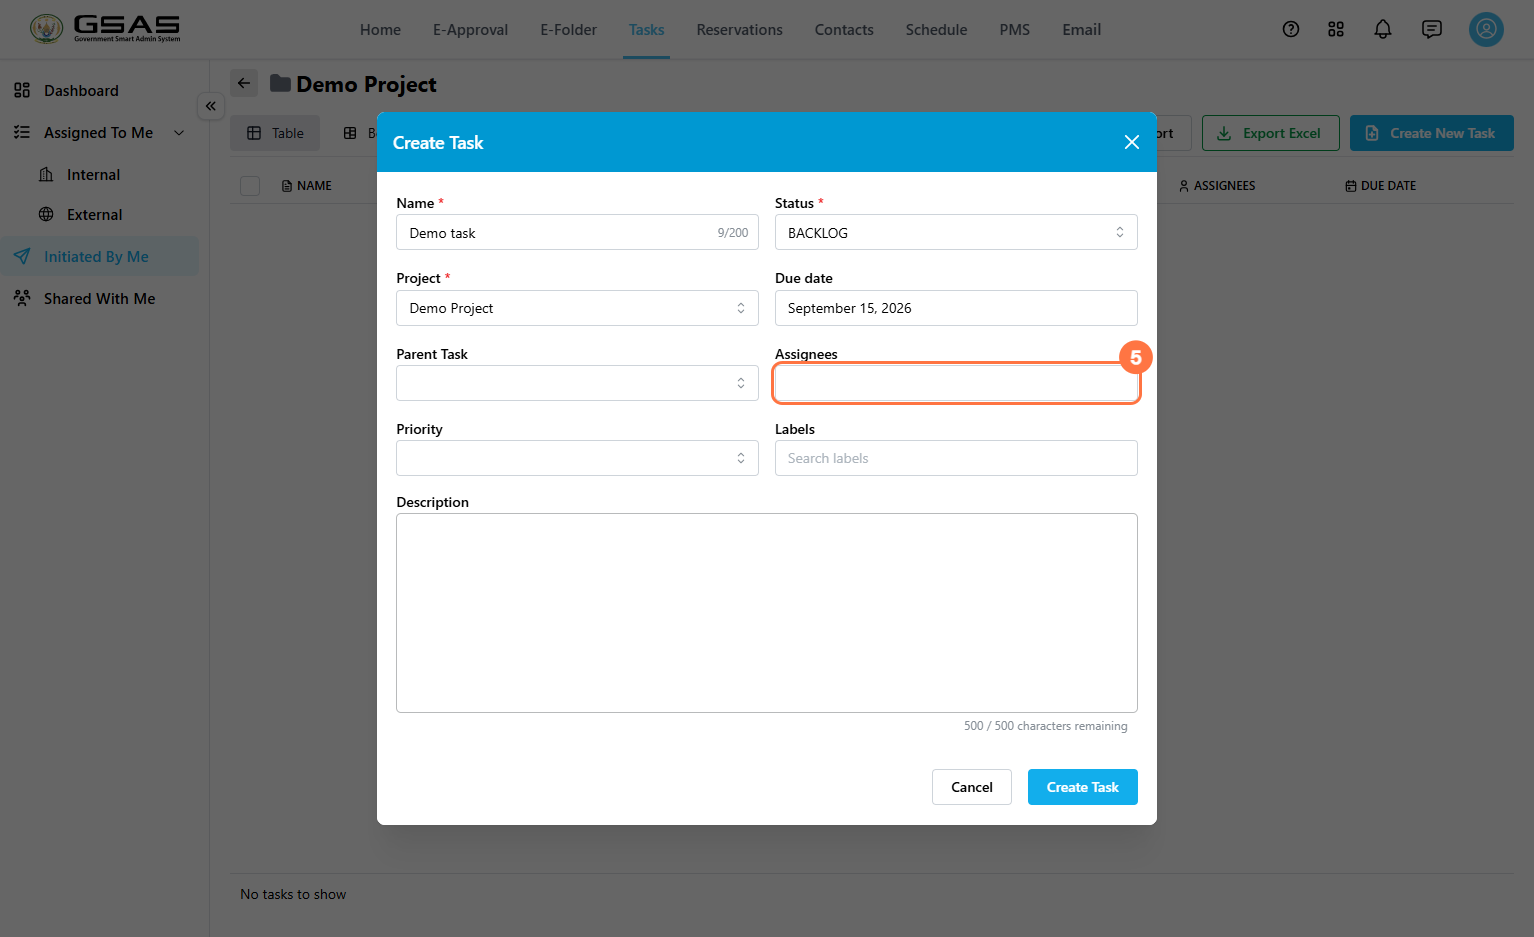
3. Name and Status — enter the task name, and set its Status (such as Backlog, Doing, Review, or Done) to reflect where it stands in the workflow.
4. Project and Due date — the Project field auto-fills based on where you created the task; change it if needed. Click the Due date field to select a deadline from the calendar.
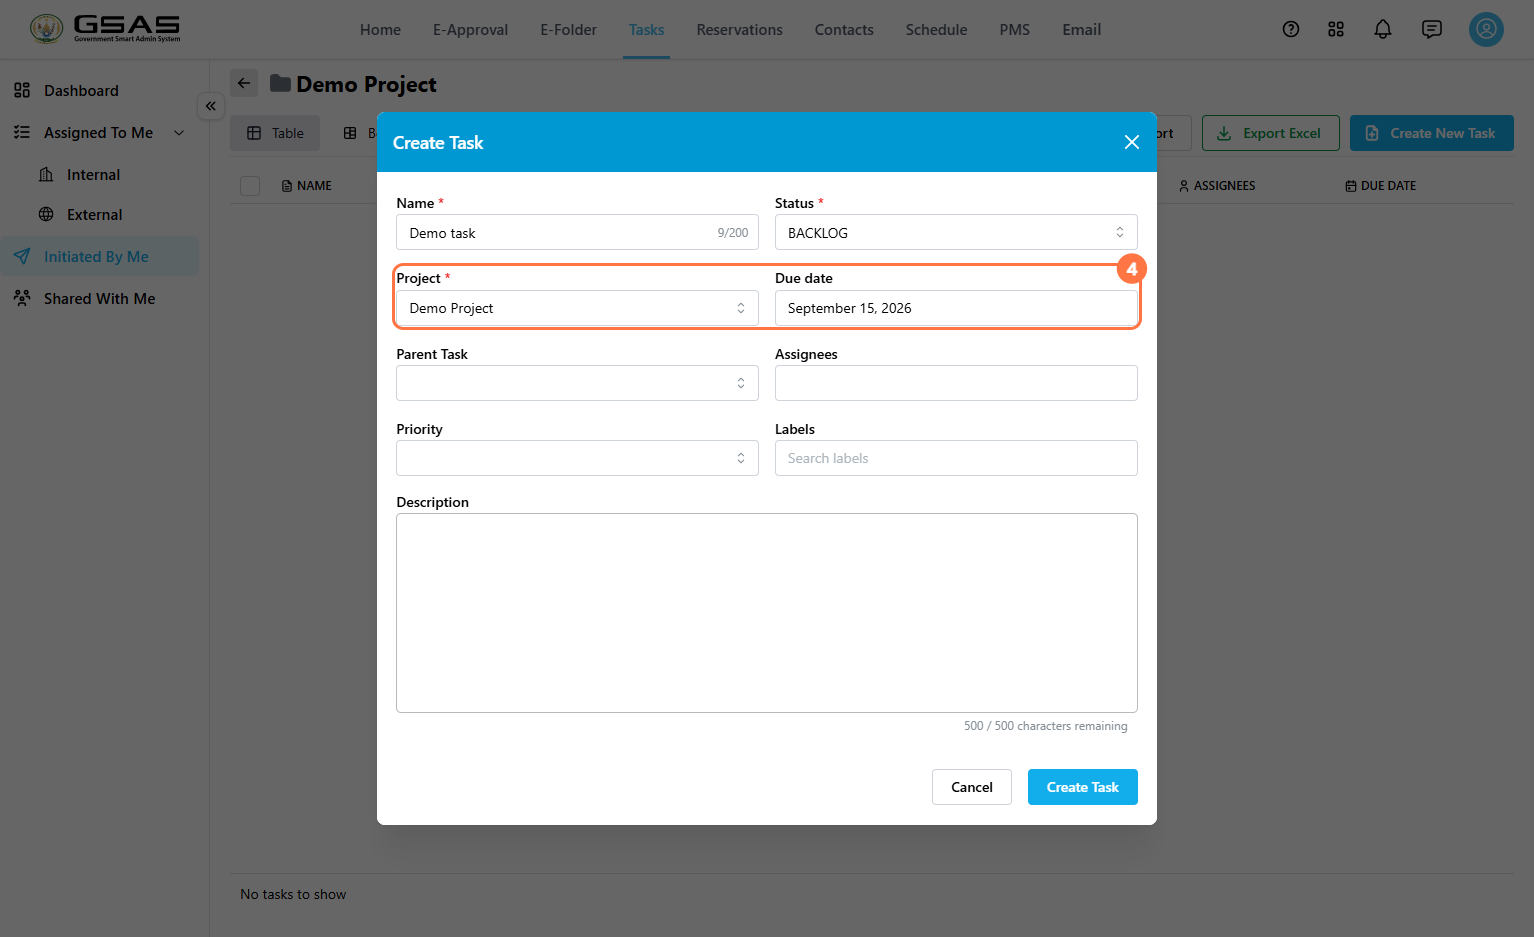
Only fields with the red asterisk beside their name are mandatory. This means all fields after project are optional.
Parent Task is available in the same form, but only needs to be set when the task you're creating is a subtask of an existing one. Leave this field blank otherwise.
5. Assignees — click the Assignees field to open the Add Assignees window.
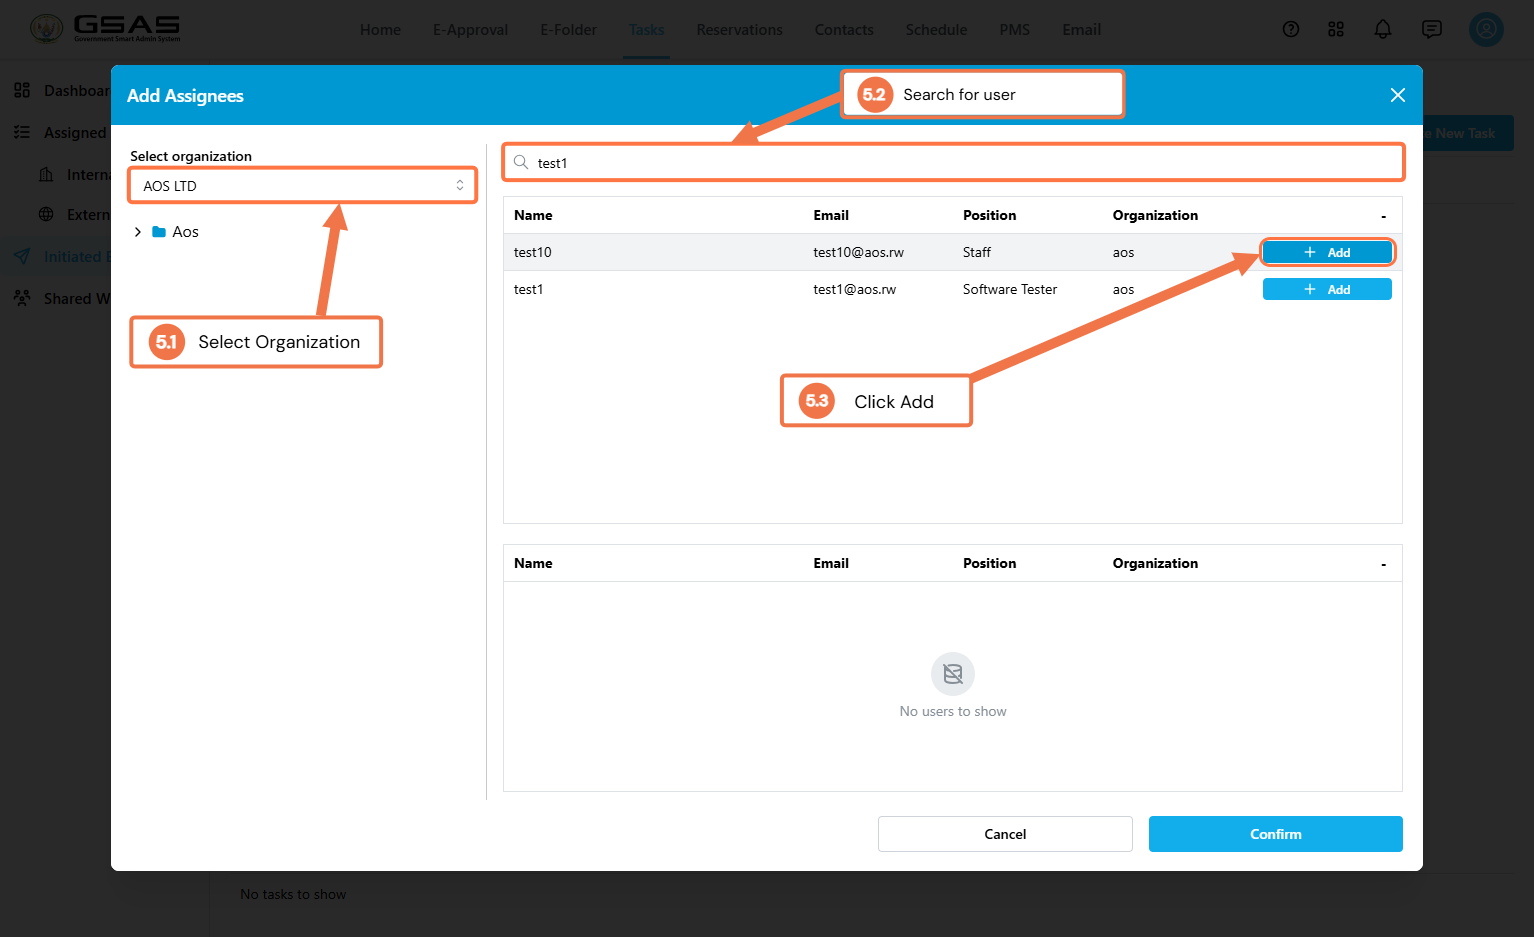
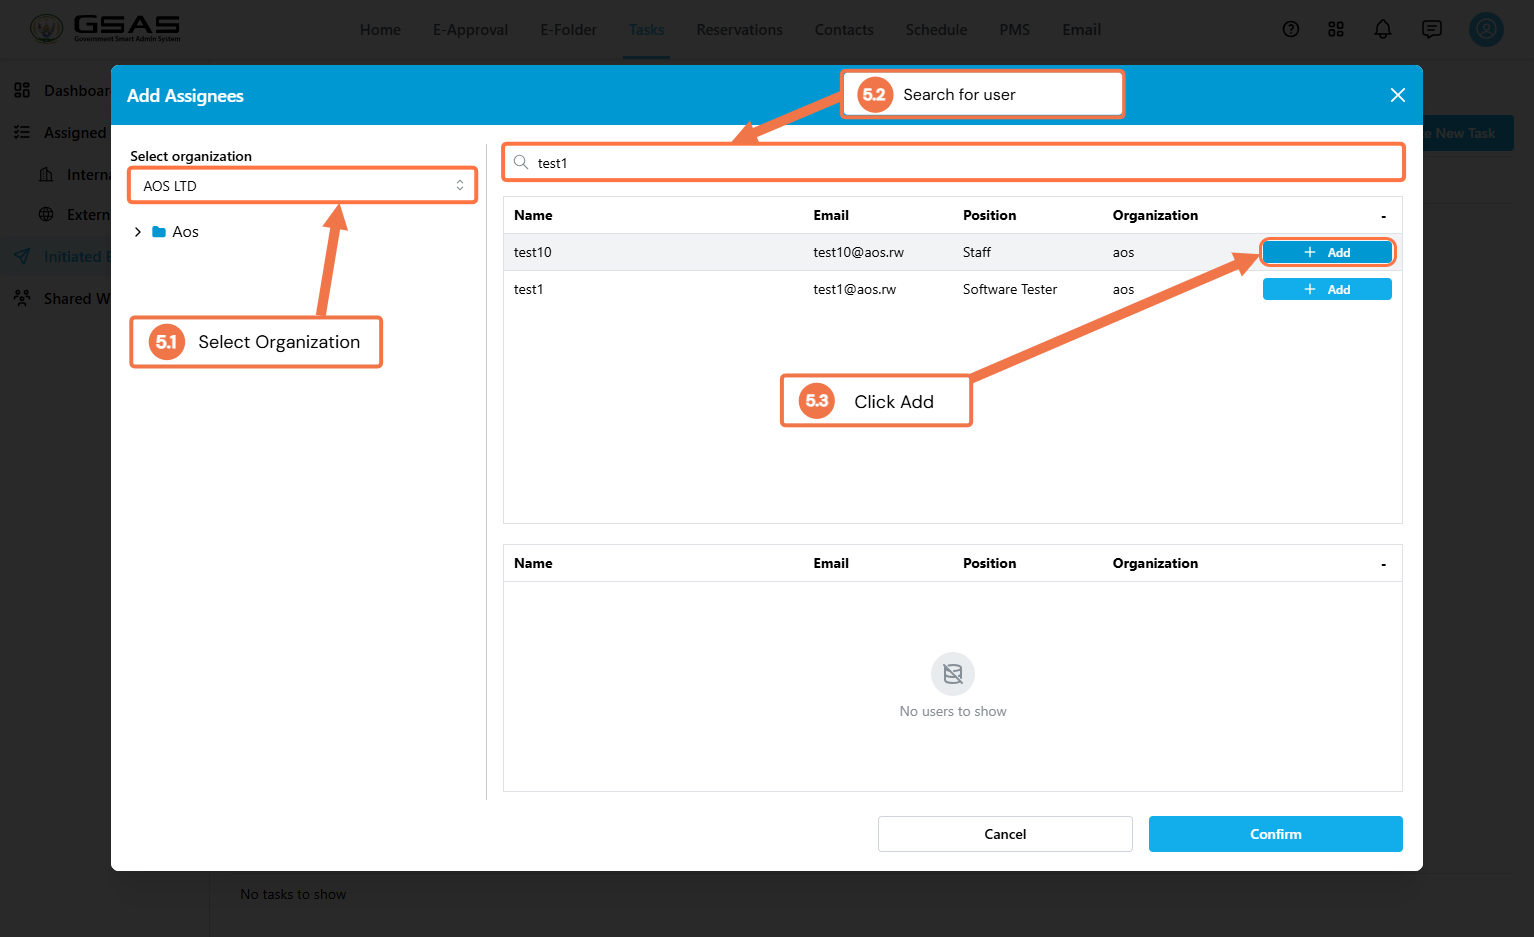
- 5.1 Select the organization.
- 5.2 Search for the user.
- 5.3 Click Add next to their name.
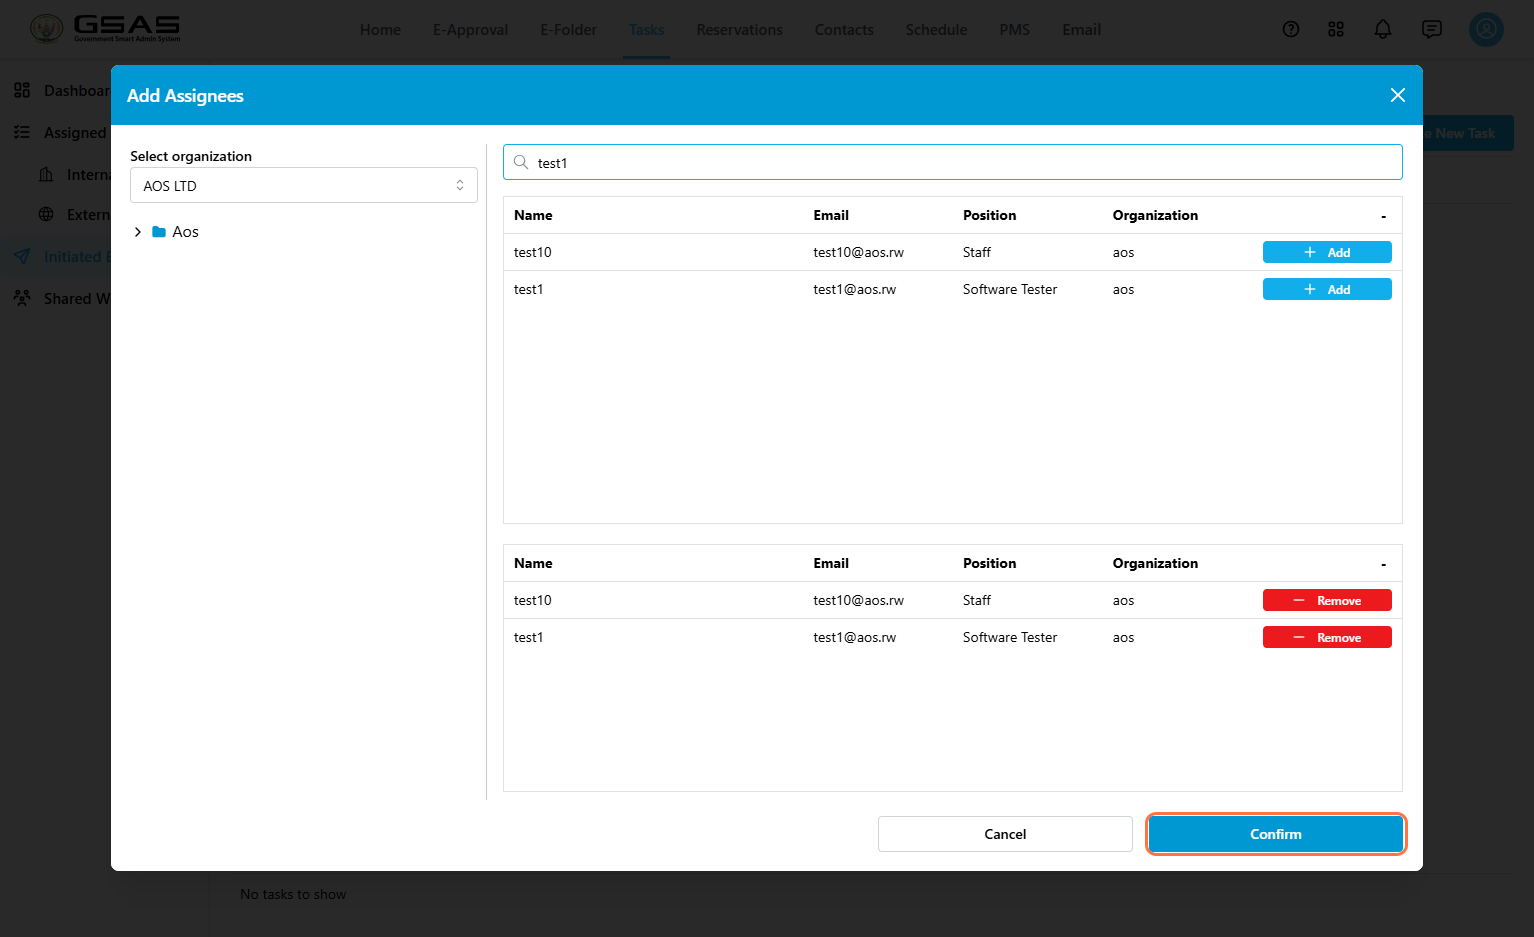
Review the selected users, then click Confirm.
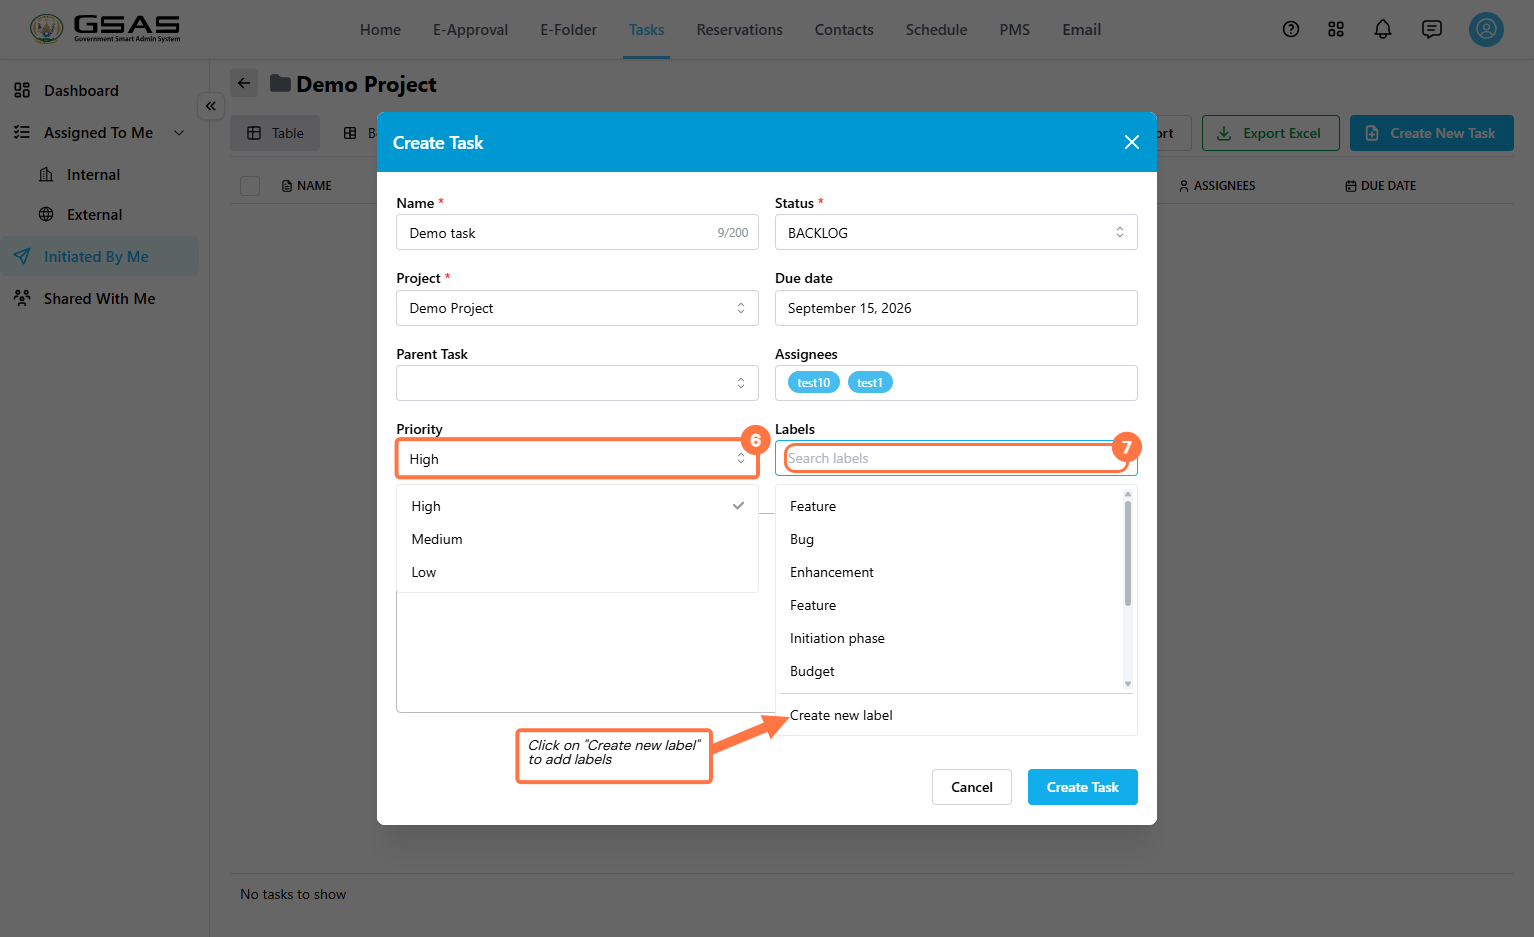
6. Priority sets how urgent the task is: High, Medium, or Low. It feeds into the Priority Breakdown chart on the dashboard.
7. Labels help you group related tasks and find them later through filtering. Select an existing label or click Create new label to add one.
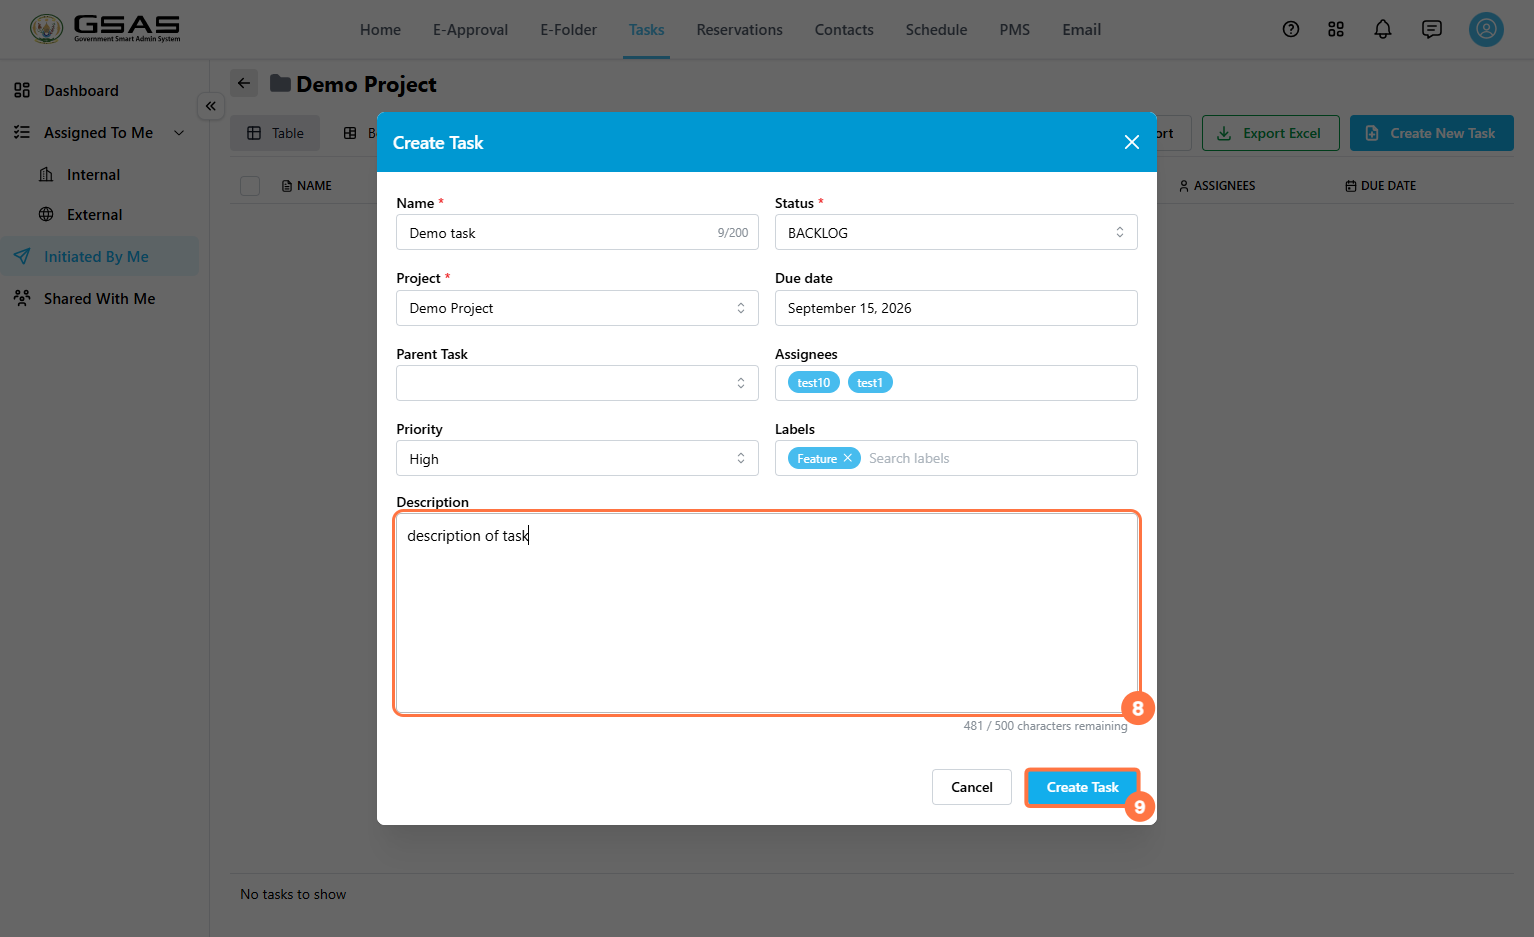
8. Description — enter an optional description explaining what needs to be done.
Once finished, click Create Task (9).
Open, Edit, or Delete a Task
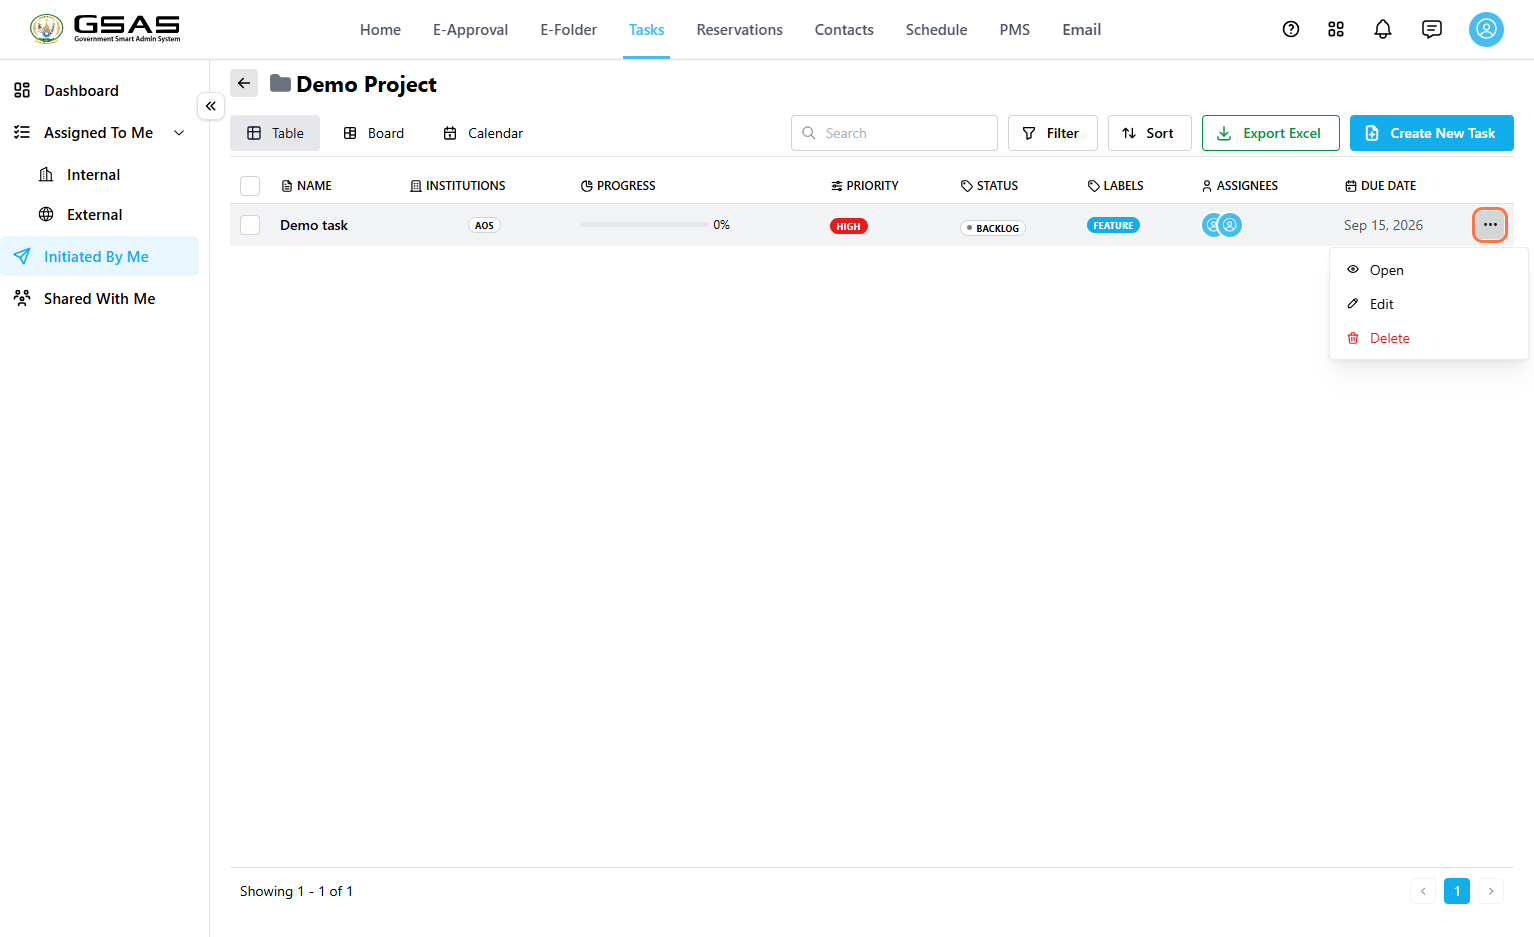
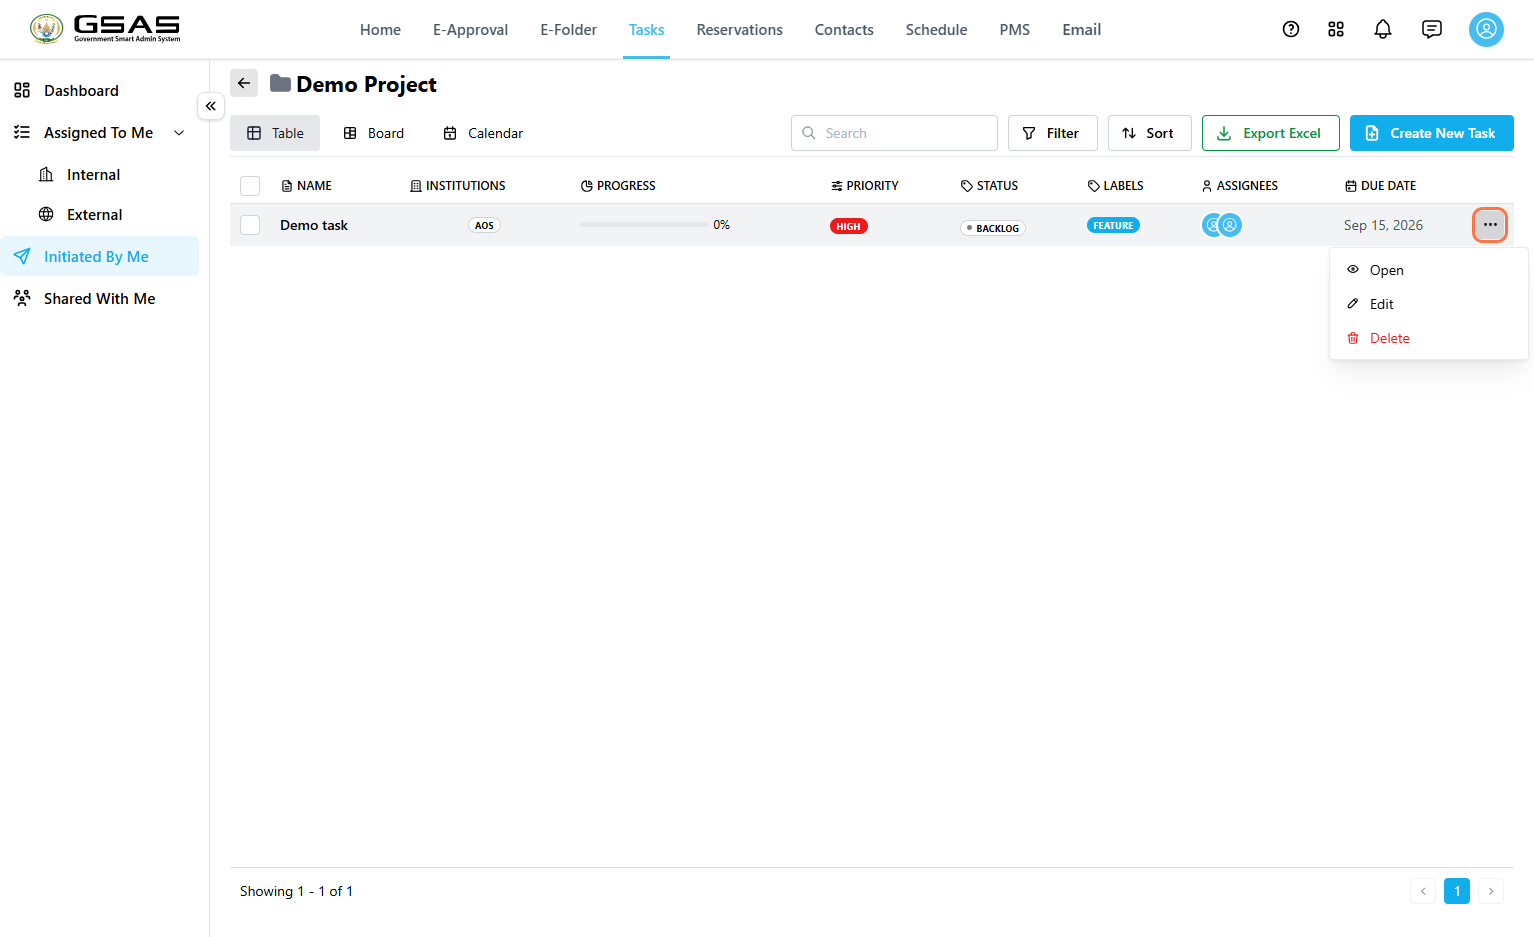
- Click the … icon on the task row to view additional options, such as editing or deleting the task, only visible to the task creator.
Importing Tasks in Bulk
Use Bulk Task Upload to create multiple tasks at once from an Excel file. This is useful when you already have a list of existing tasks and want to add them to GSAS without entering each one manually.
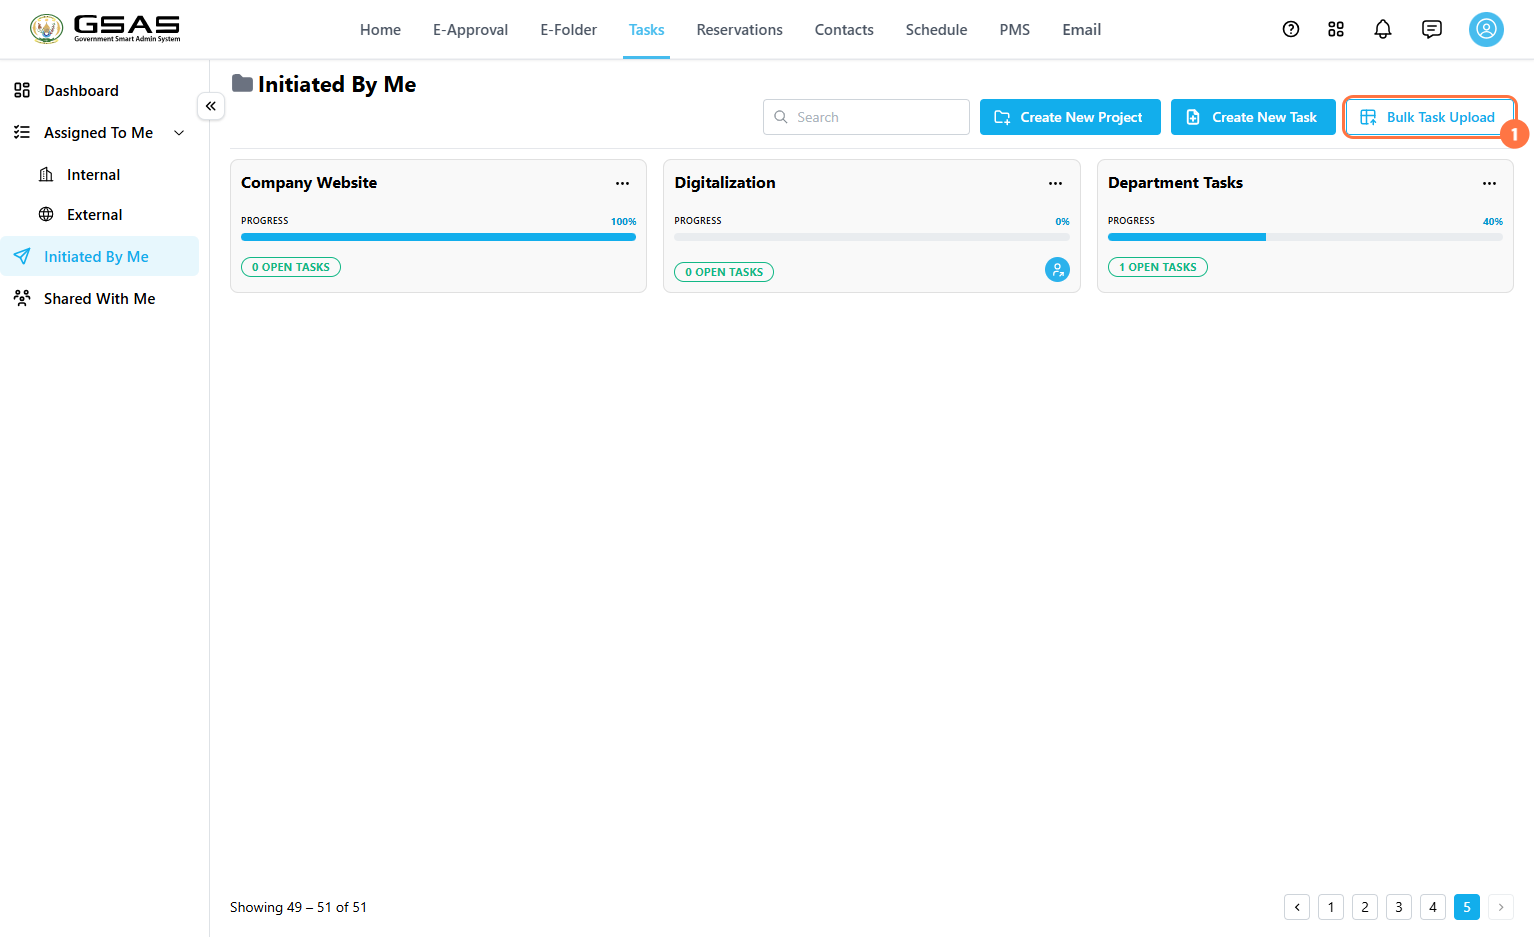
1. Open Bulk Task Upload
- Go to Tasks > Initiated By Me > Bulk Task Upload.
2. Import Excel File
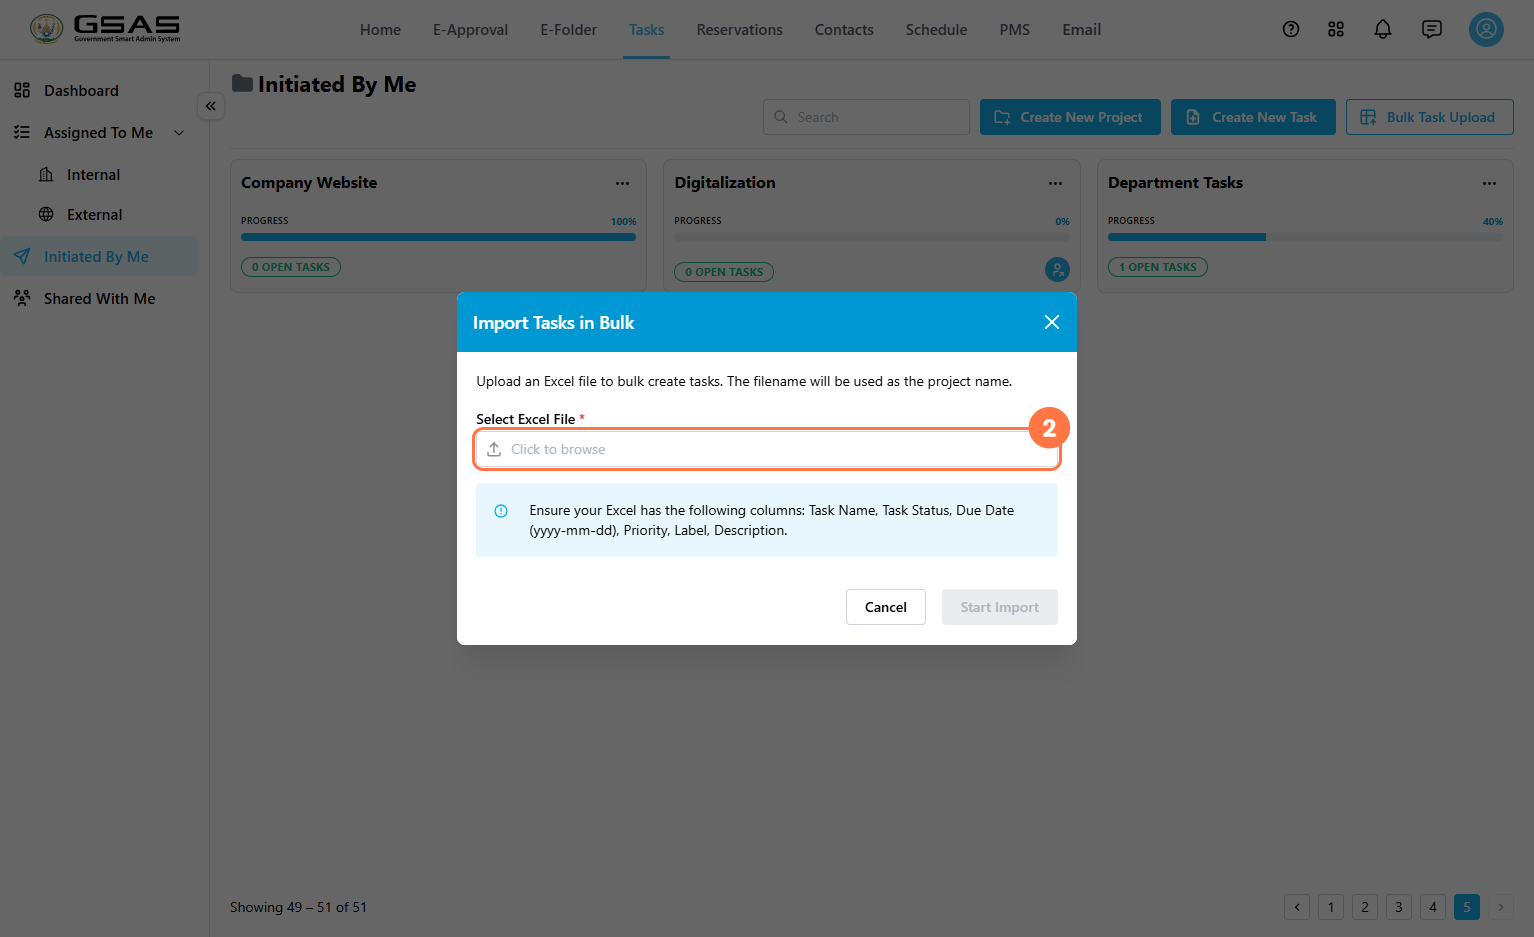
- In the Import Tasks in Bulk window, click Click to browse.
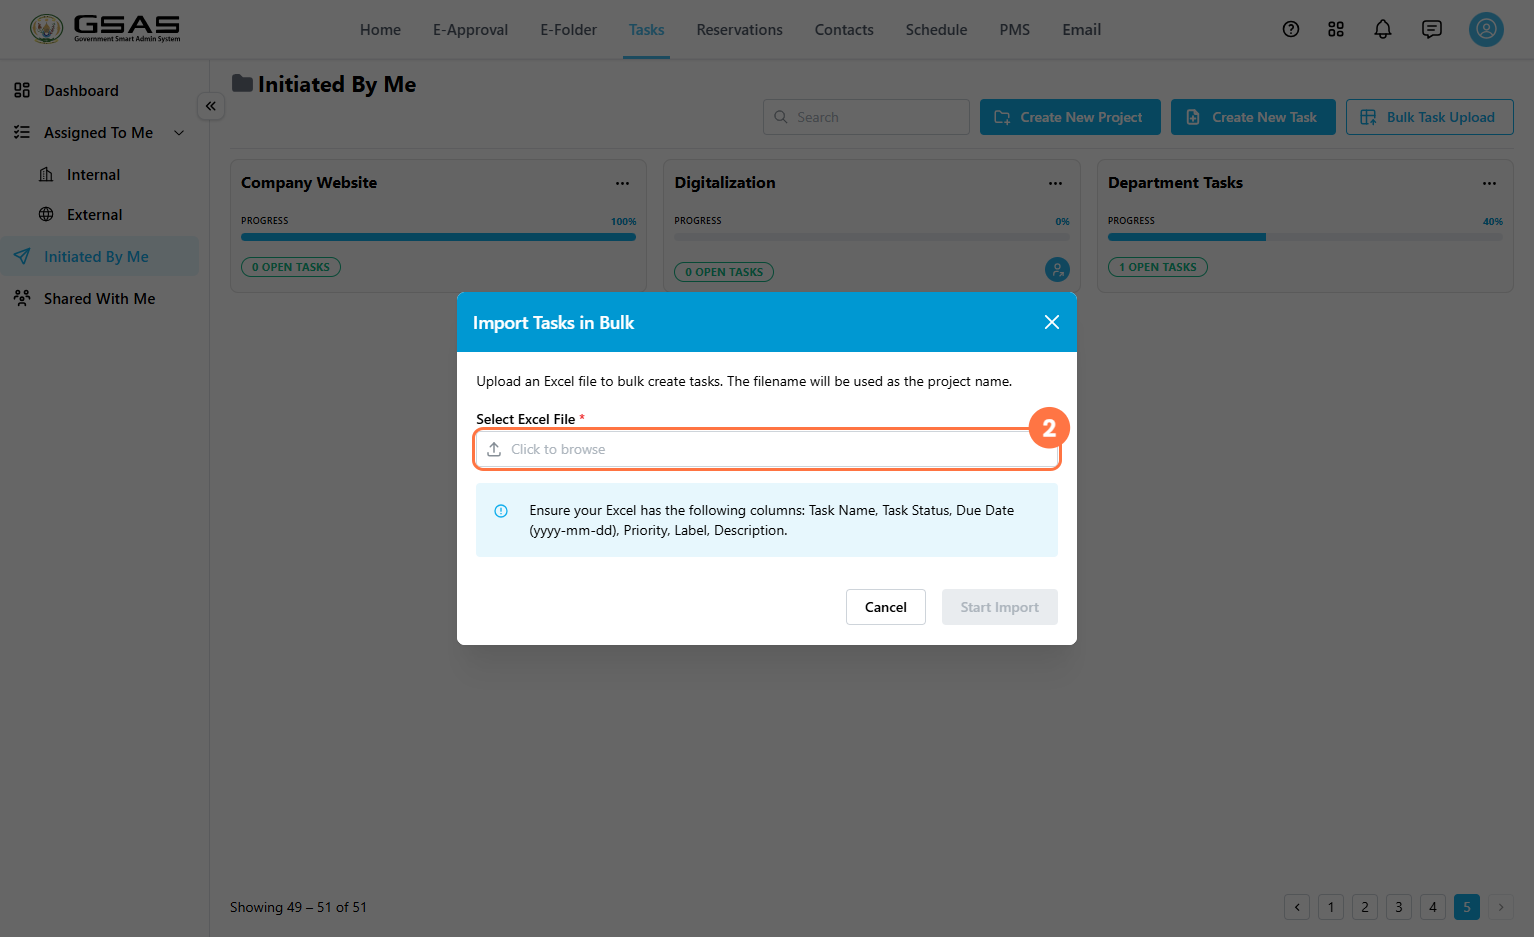
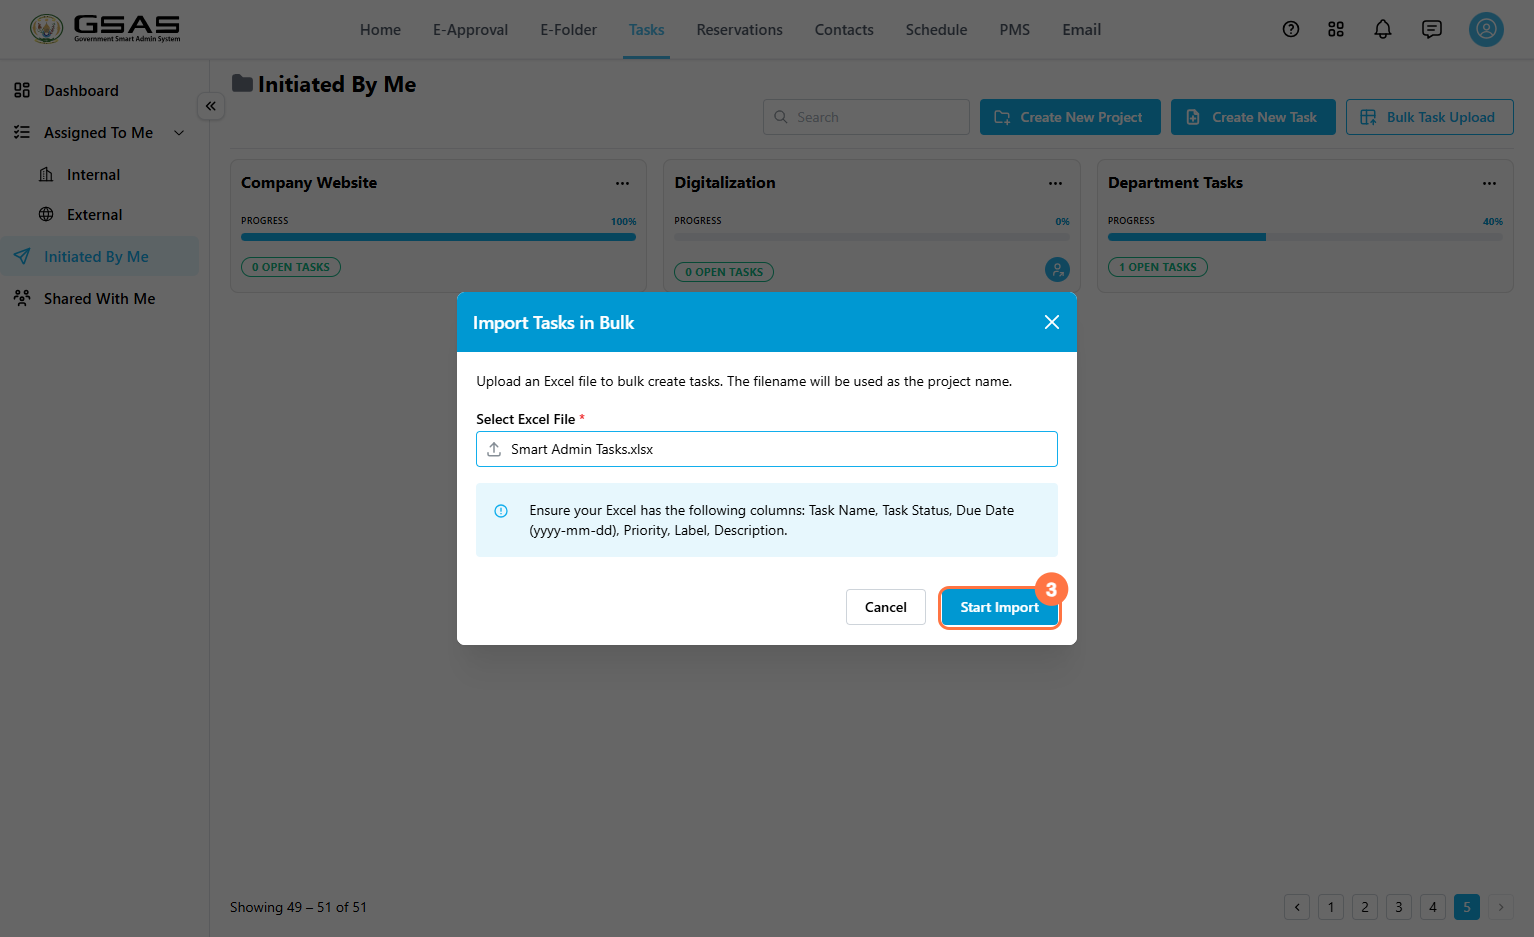
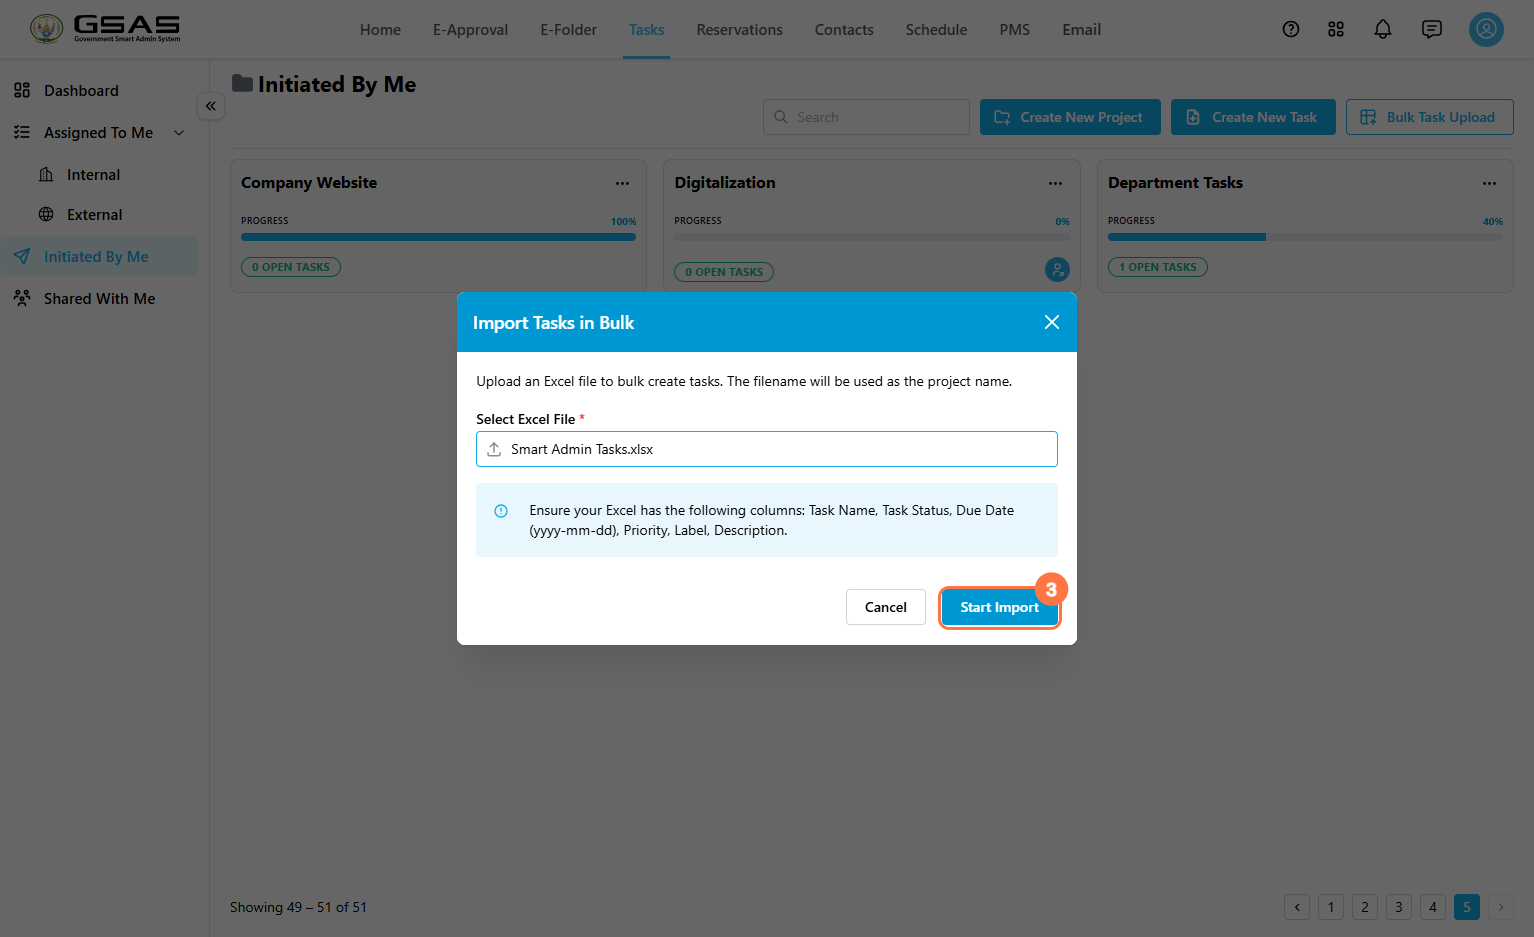
- Select the Excel file that contains the tasks you want to import and click Start Import. Ensure the file includes the required columns: Task Name, Task Status, Due Date (yyyy-mm-dd), Priority, Label, and Description.
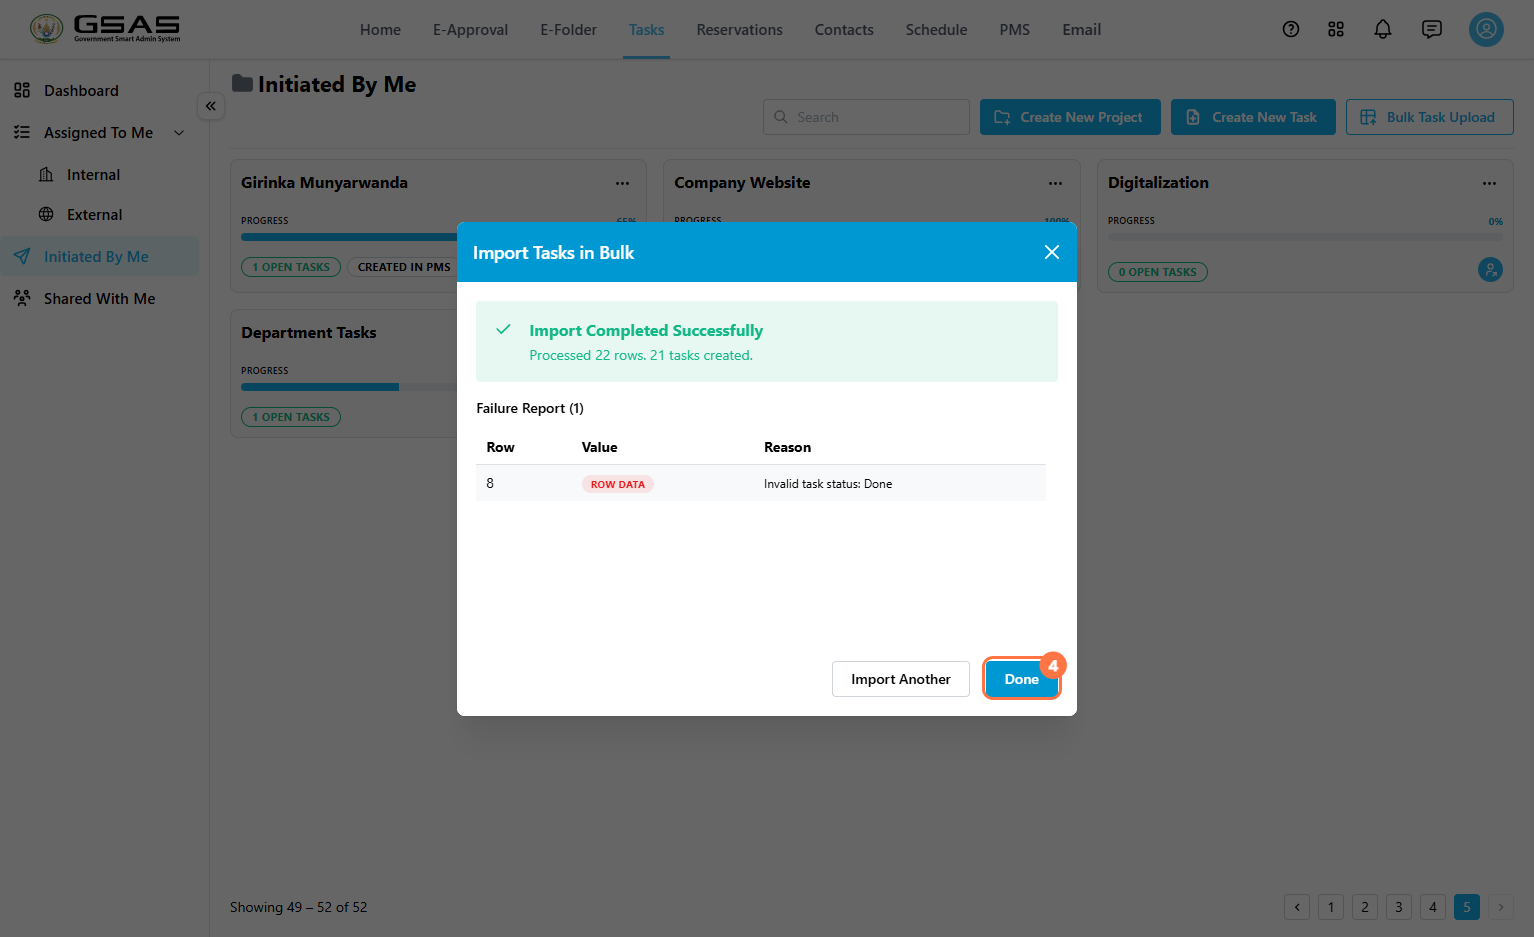
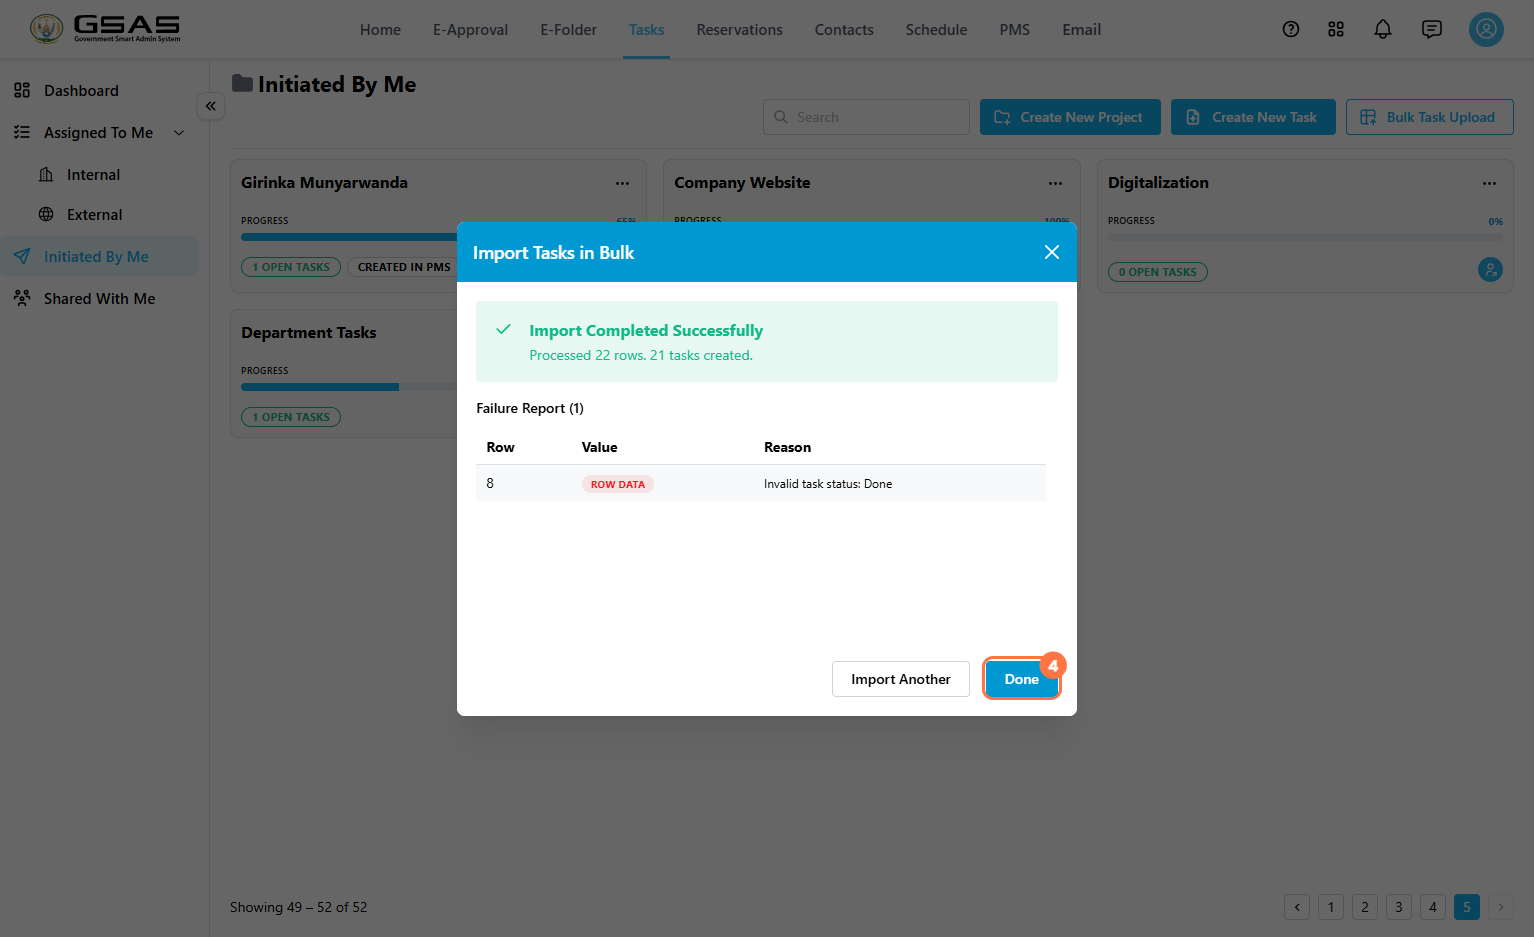
- Confirm that the tasks were imported successfully. The import summary displays the number of processed rows and successfully created tasks. If any tasks could not be imported, the Failure Report lists the affected row and the reason for the failure. Review the details, then click Done to complete the process or close the pop up and retry.
4. Review the imported tasks
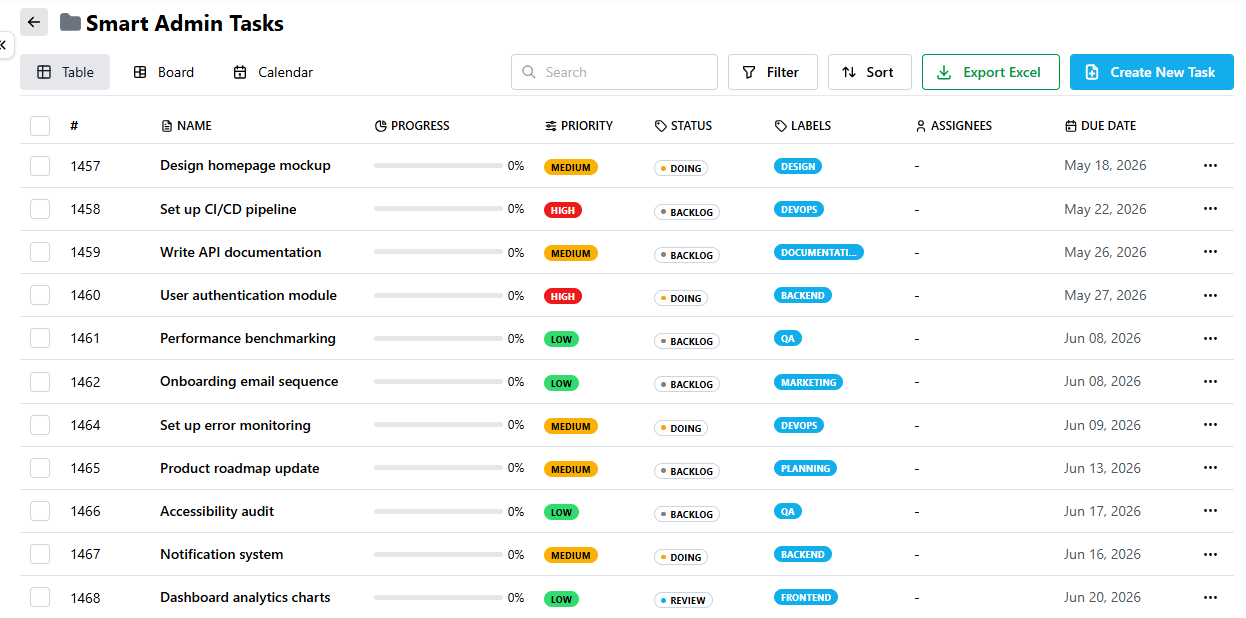
After the import is complete, GSAS creates a project using the Excel filename and lists the imported tasks inside it. Open the project to view the tasks.
5. Manage imported tasks
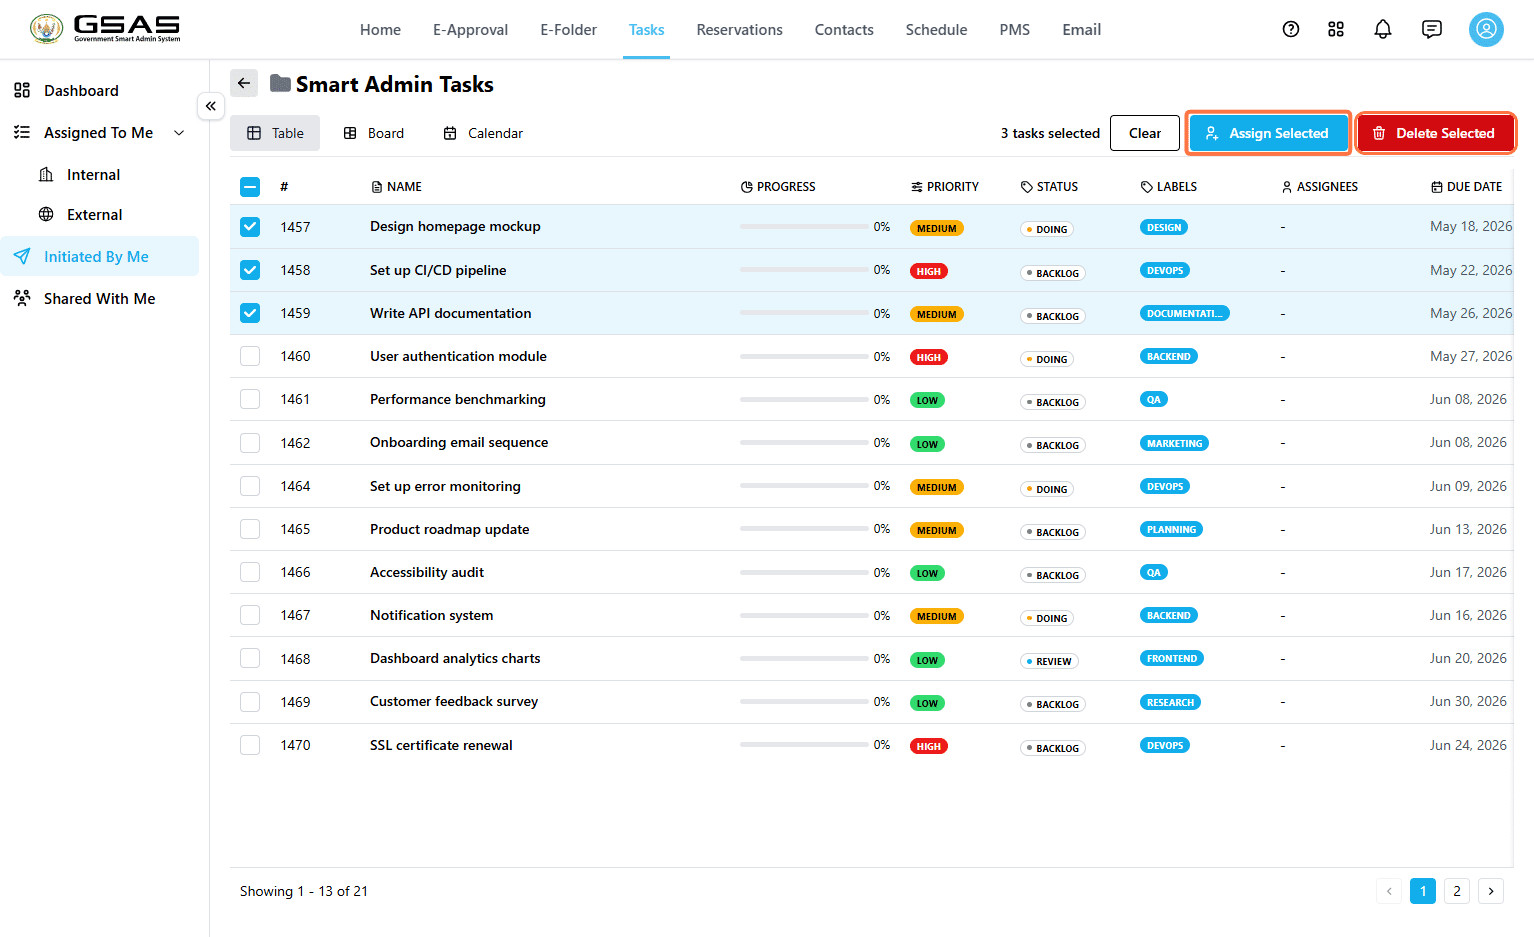
- Select one or more tasks using the checkboxes
- Click Assign Selected to assign multiple tasks to users at a time or Delete Selected to remove multiple tasks.
How Task Fields Affect Dashboard Stats
| Field or Action | Where it appears |
|---|---|
| Project | Contributes to Total Projects and groups related tasks together. |
| Task | Contributes to Total Tasks. |
| Status | Affects Ongoing Tasks, Completion Rate, and the Task Status Breakdown chart. |
| Due Date | Affects Overdue Tasks and the Tasks by Deadline chart. |
| Priority | Affects the Priority Breakdown chart. |
| Tip: To keep dashboard statistics useful, set the task status, due date and priority when creating the task. |