# Share document as Task
This page explains how to create a task directly from a registered document in **E-Approval**. The task is linked to the original document, assigned to selected users, and can be tracked from both the document view and the **Tasks** module.
| **Before you begin:** The document must already be registered under **Registered received** or **Registered dispatched**. See the [Registering documents](https://docs.smartadmin.rw/link/8#bkmrk-page-title) page to learn how to register documents. |
Step 1
### Open the registered document
- Go to **E-Approval**.
- Open **Department Box**.
- Click **Registered received** or **Registered dispatched**, depending on where the document was registered.
- Select the document you want to share as a task.
---
Step 2
### Share the document as a task
- Click the arrow next to the **Share** button.
- Select **Share as Task**. [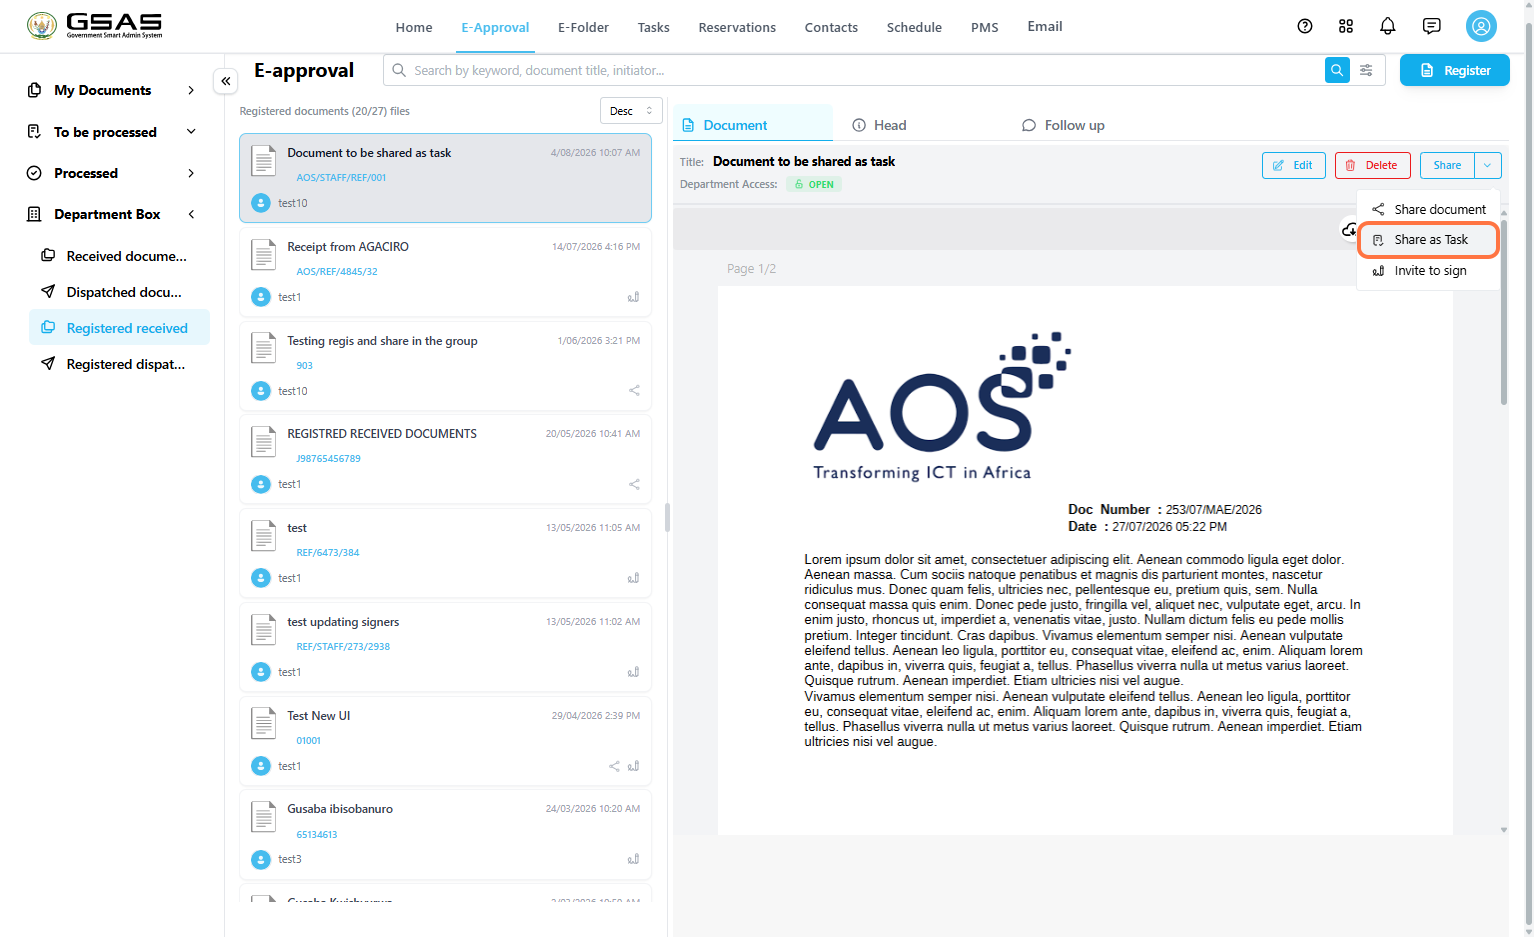](https://docs.smartadmin.rw/uploads/images/gallery/2026-08/82timage.png)
---
Step 3
### Fill in the task details
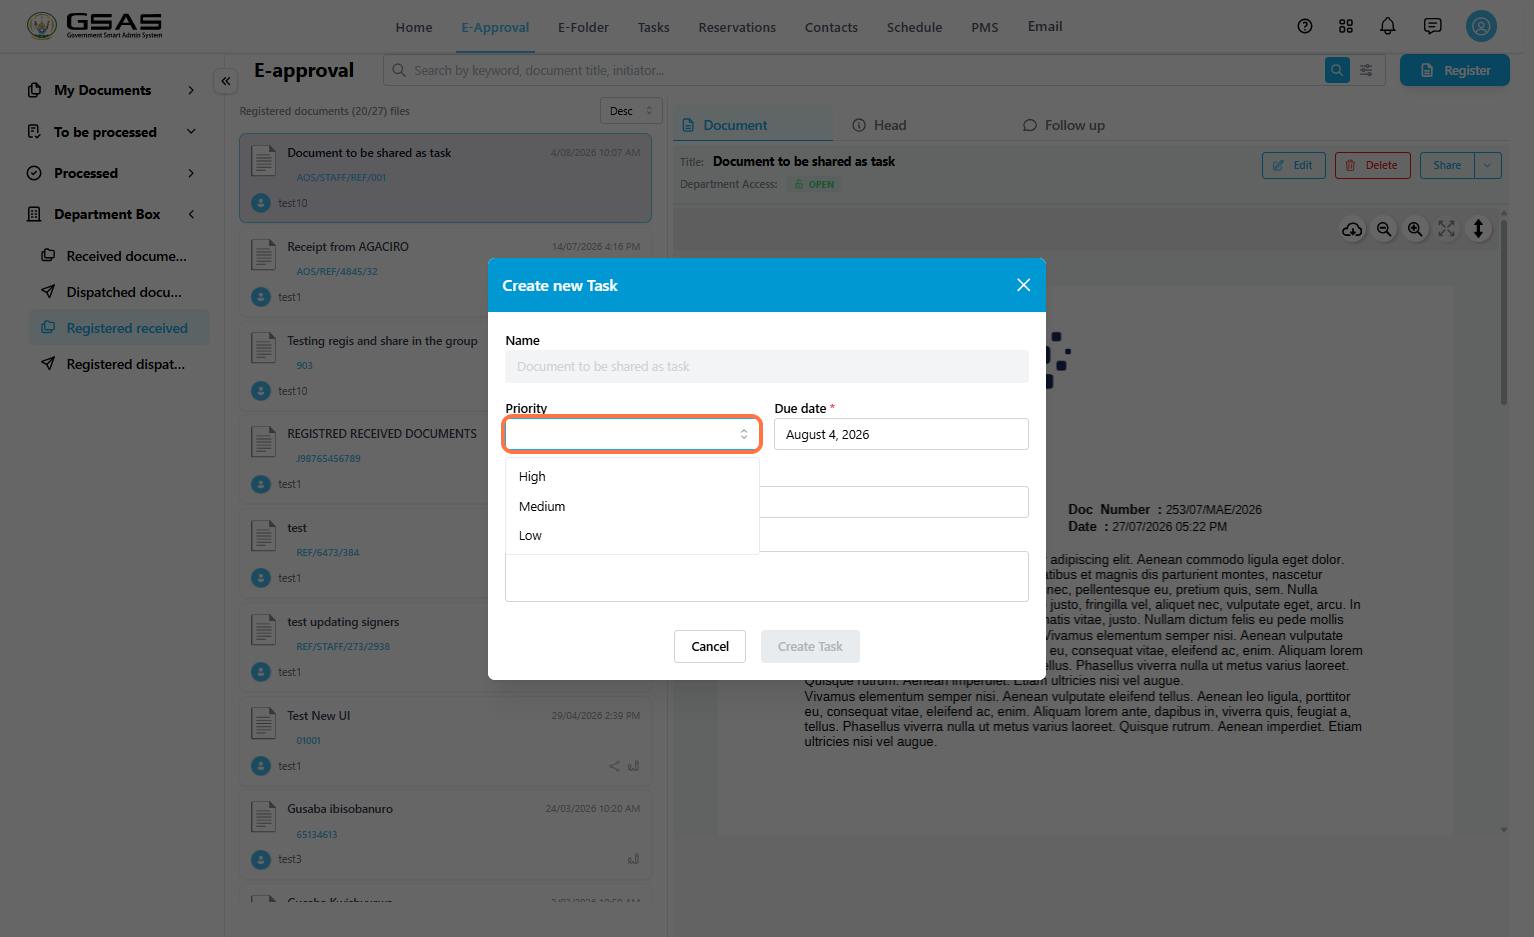
The **Create new Task** window opens. The task name is filled automatically as the document title.
1\. Select the task **Priority**.
[](https://docs.smartadmin.rw/uploads/images/gallery/2026-08/I6himage.png)
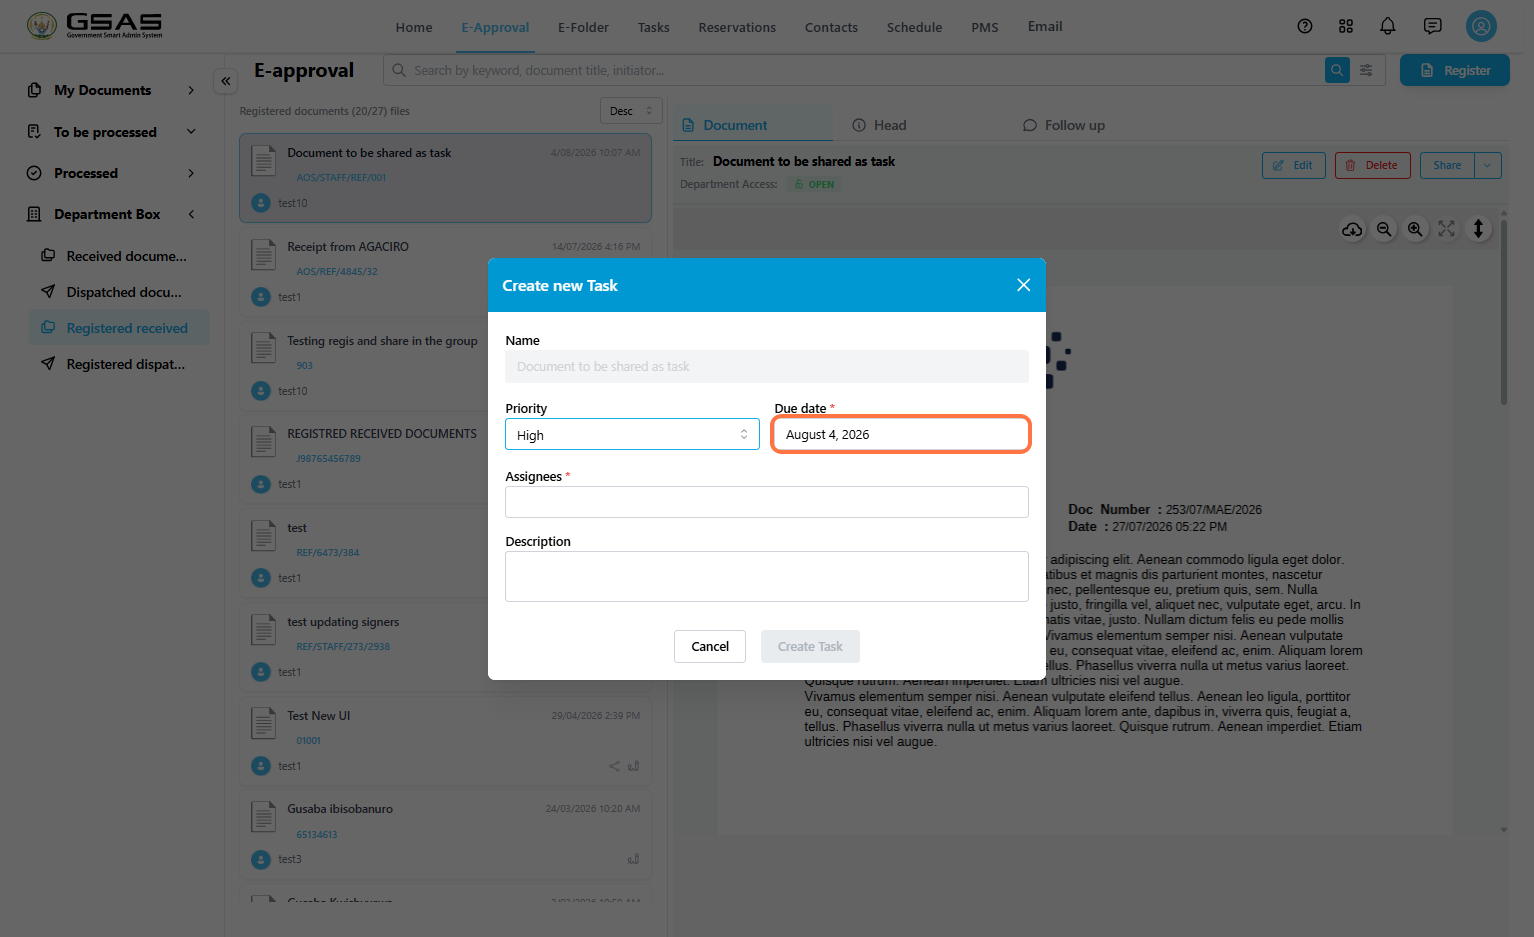
2\. Click the **Due date** field and choose the deadline.
[](https://docs.smartadmin.rw/uploads/images/gallery/2026-08/q9limage.png)
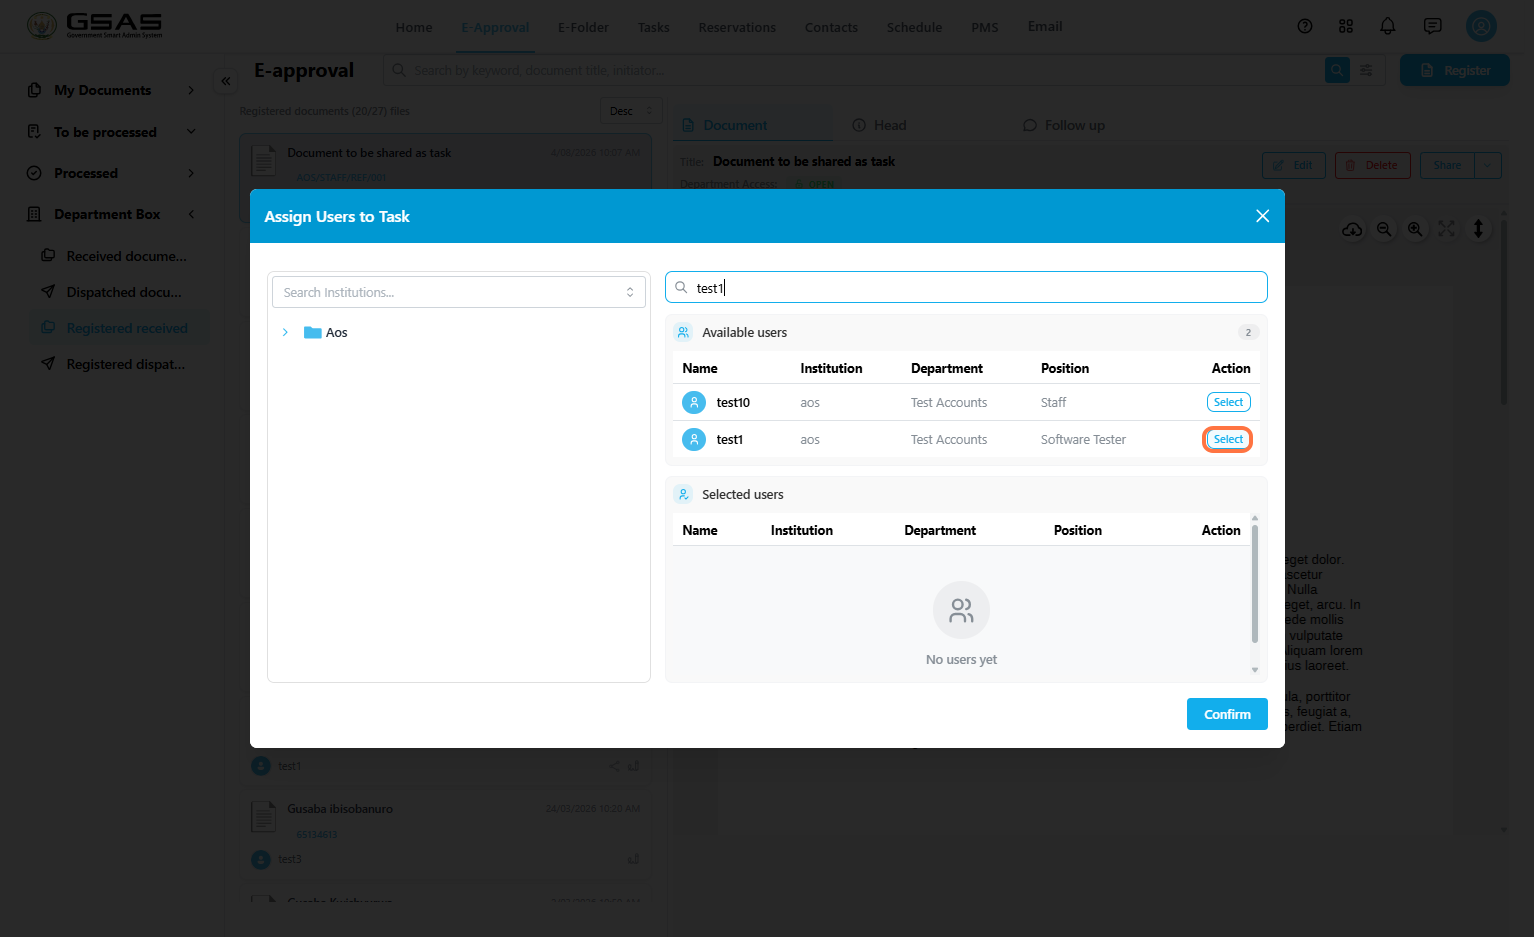
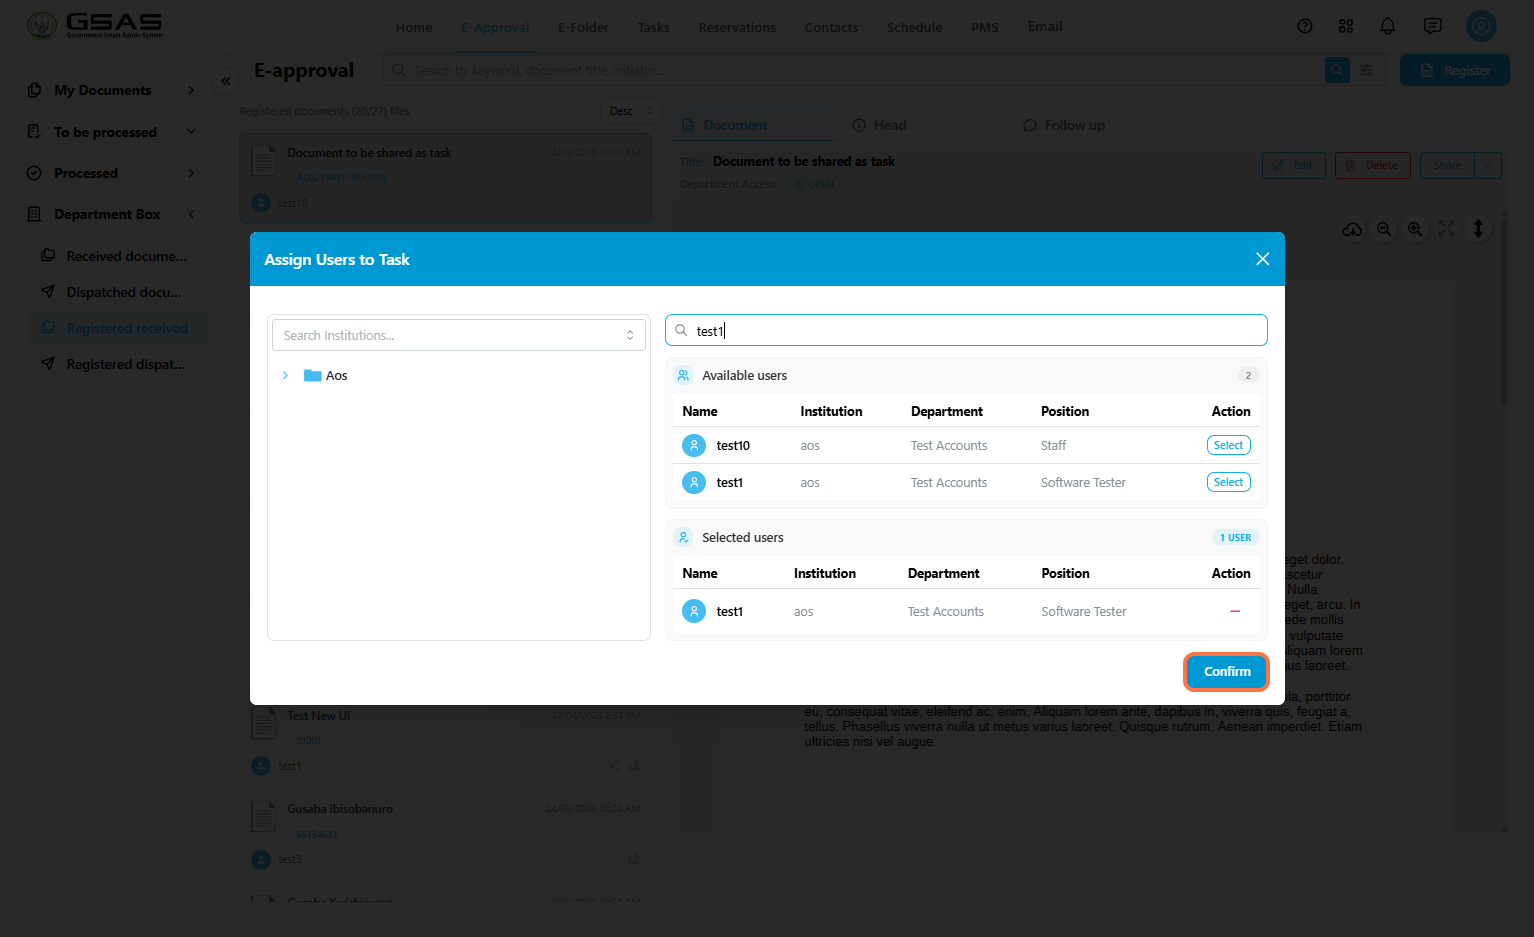
3\. Click the **Assignees** field to add users.
4\. Search for the users you want to assign. Click **Select** next to the correct user.
[](https://docs.smartadmin.rw/uploads/images/gallery/2026-08/bhOimage.png)
5\. Confirm that the user(s) appears under **Selected users**. And click **Confirm** once all assignees are selected.
[](https://docs.smartadmin.rw/uploads/images/gallery/2026-08/rooimage.png)
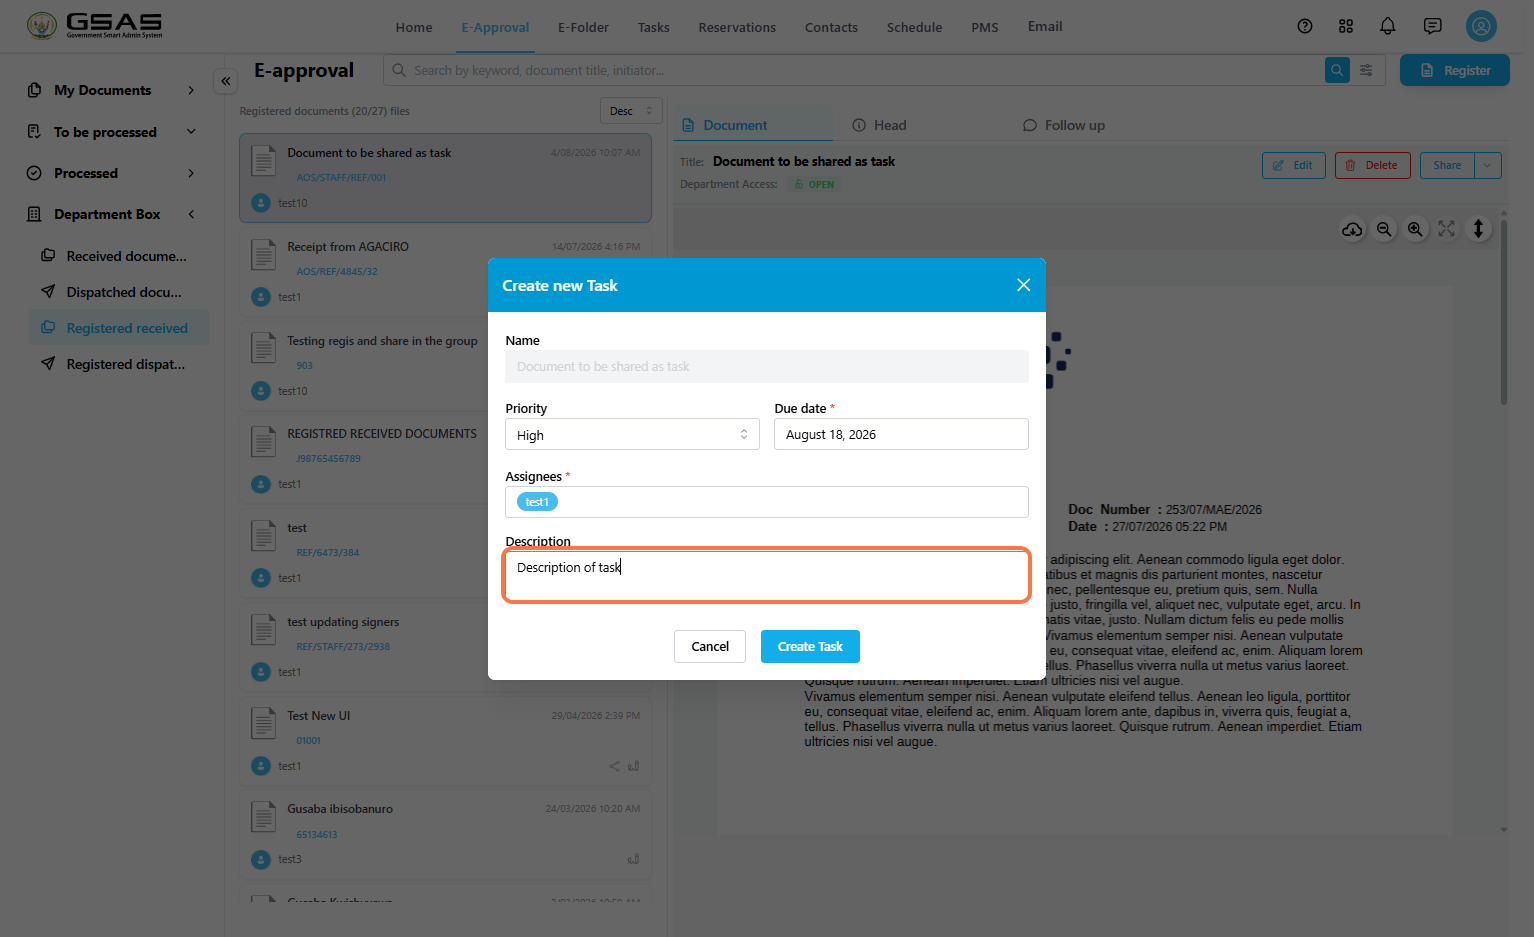
6\. Optionally, enter a short **Description** explaining what the assignee needs to do.
[](https://docs.smartadmin.rw/uploads/images/gallery/2026-08/7C6image.png)
---
Step 5
### Create the task
After the assignee and description are added, the **Create Task** button becomes active.
- Review the priority, due date, assignee, and description.
- Click **Create Task**. [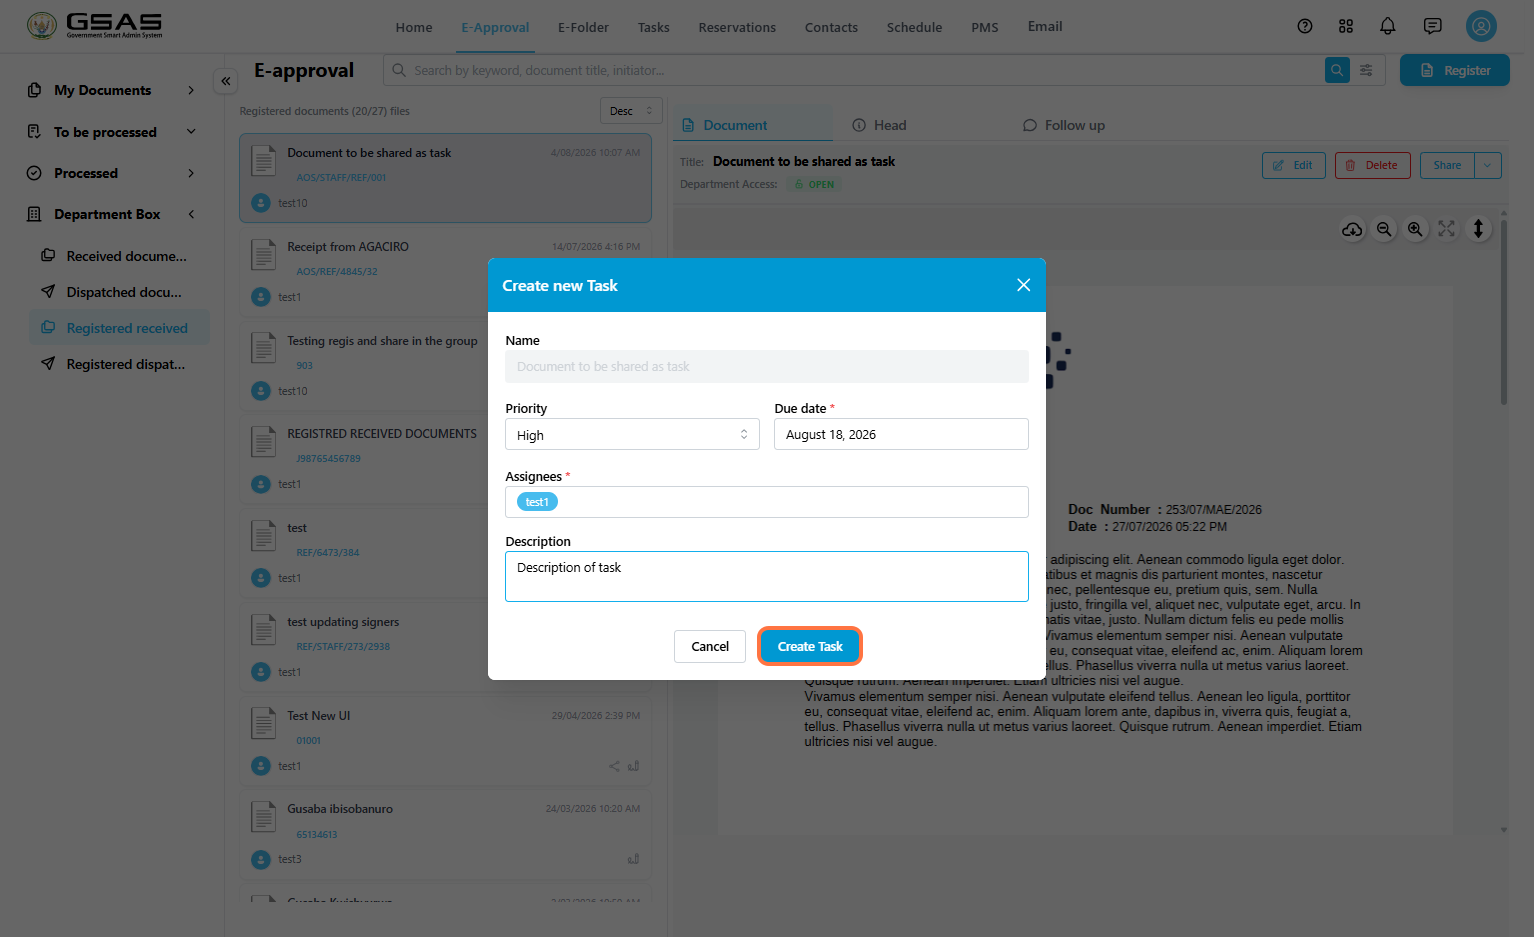](https://docs.smartadmin.rw/uploads/images/gallery/2026-08/mwIimage.png)
---
Step 6
### View the created task
After the task is created, the system creates or updates a related task project in the **Tasks** module.
- Go to **Tasks**.
- Click **Initiated By Me**.
- The task project containing the task is titled "**Registered\_Received\_Year**"
- Click the three-dot menu on the project card, then click **Open**. [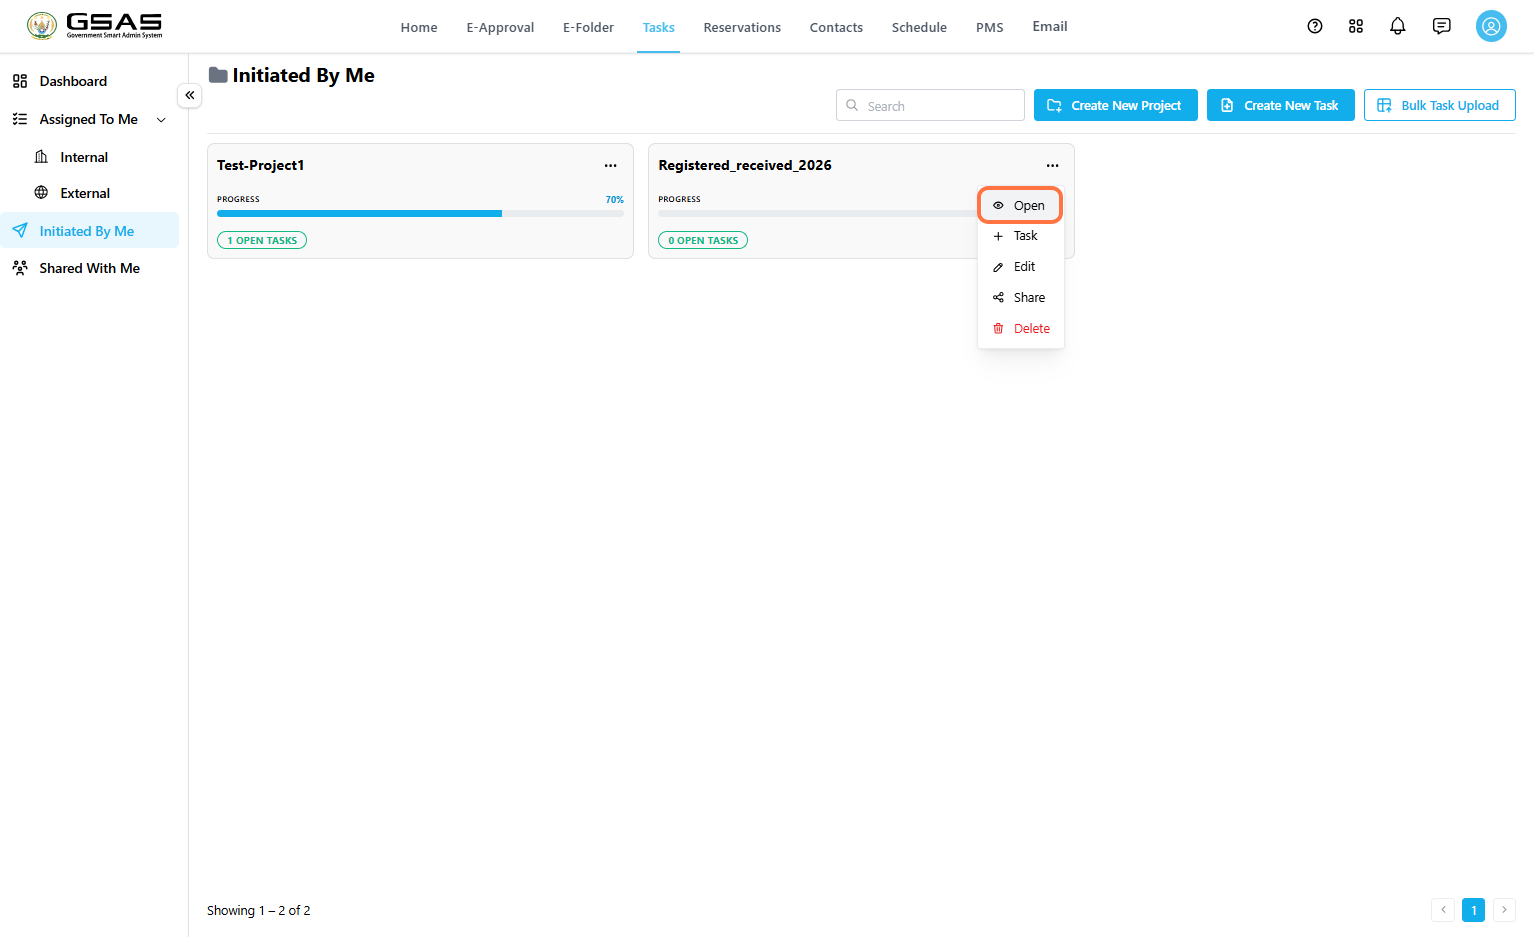](https://docs.smartadmin.rw/uploads/images/gallery/2026-08/S7Dimage.png)
Inside the project workspace, the task appears in the task table. You can view the task name, progress, priority, status, assignee, and due date.
[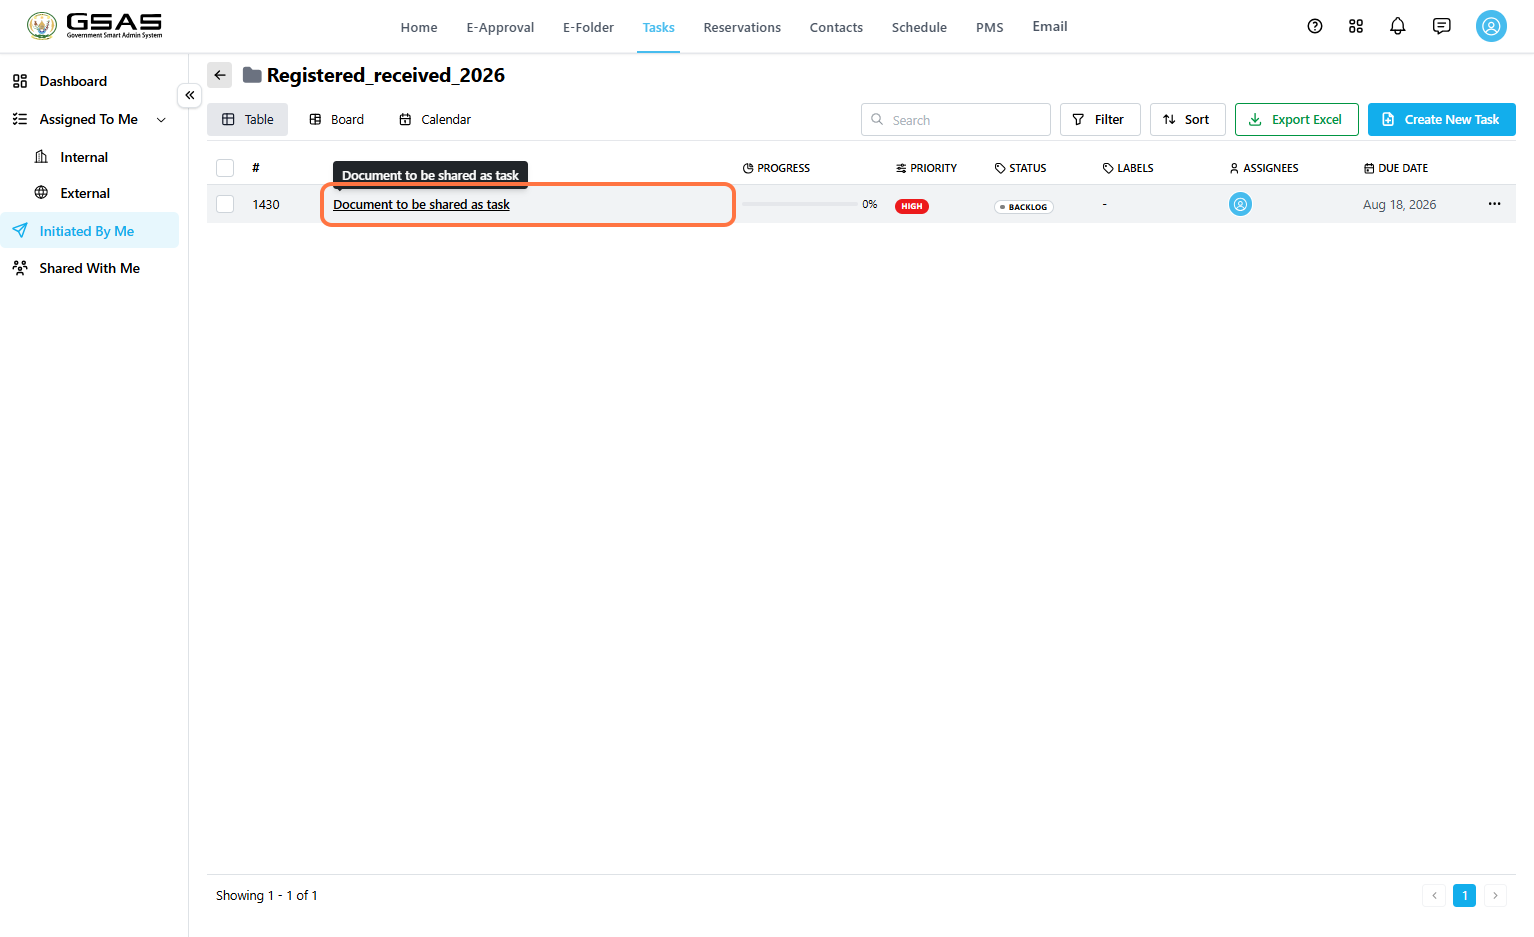](https://docs.smartadmin.rw/uploads/images/gallery/2026-08/rmVimage.png)
The task assignees will open the task from **Tasks → Assigned To Me - Internal** if it was assigned to them by a user within their institution or **External** if it was by a user from another institution.
***Proceed to the [Responding to and Tracking tasks](https://docs.smartadmin.rw/link/44#bkmrk-page-title) page to see how to update a task assigned to you.***
---
Step 7
### Track the task progress from the document
Return to the original document in **E-Approval**. The document displays task progress, completion percentage, and task status.
1. Select the original registered document.
2. Review the **Task progress** section.
3. Click **Details** to open the task details panel. [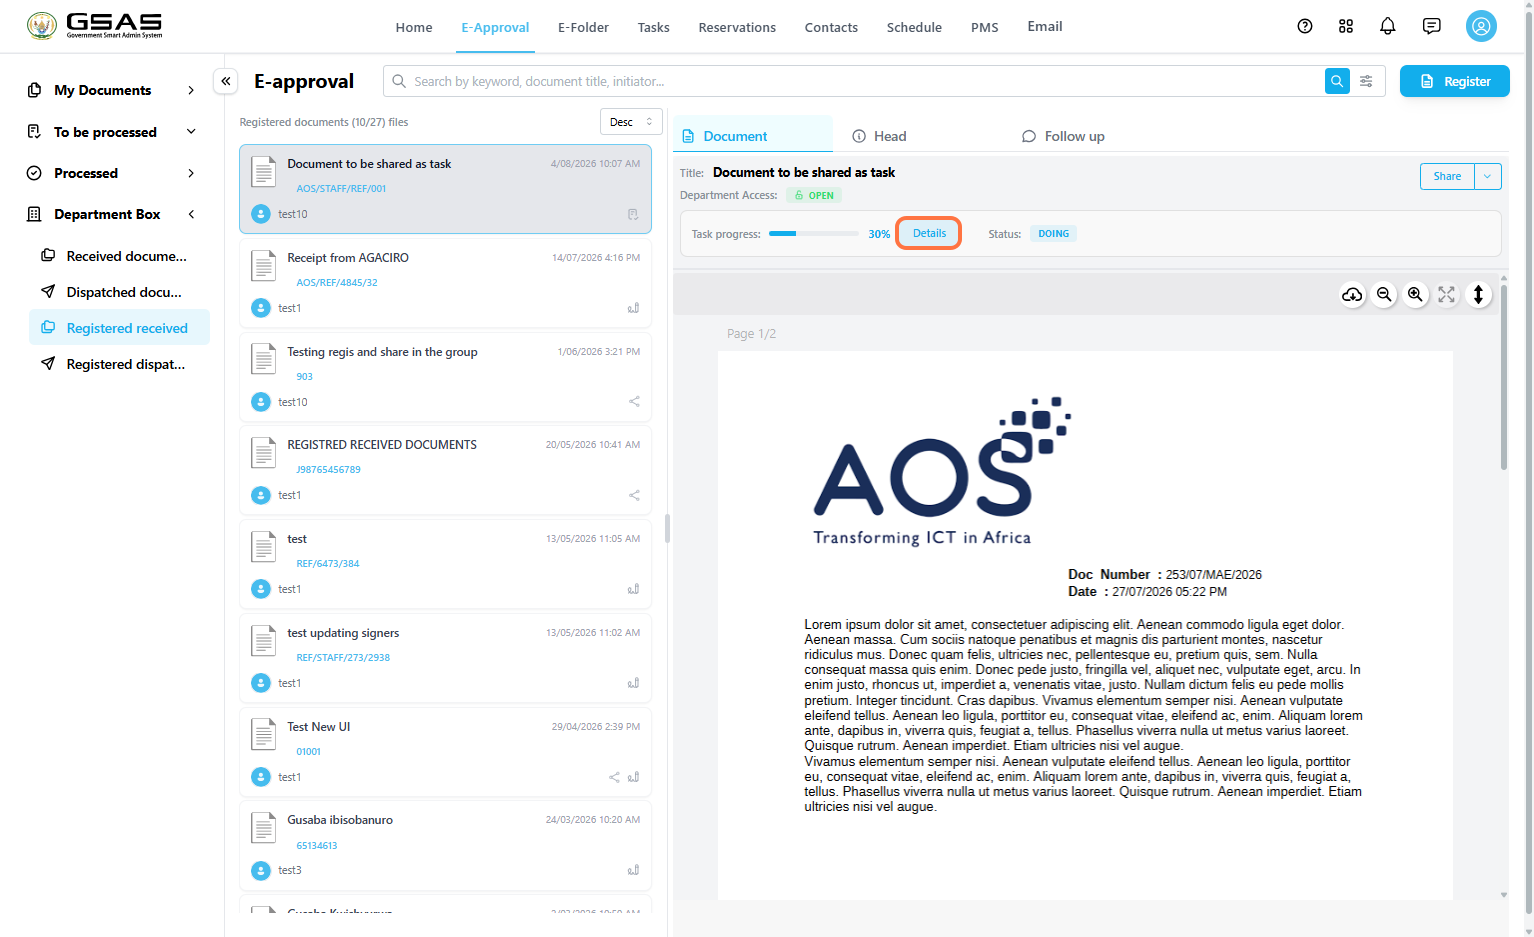](https://docs.smartadmin.rw/uploads/images/gallery/2026-08/JFGimage.png)
[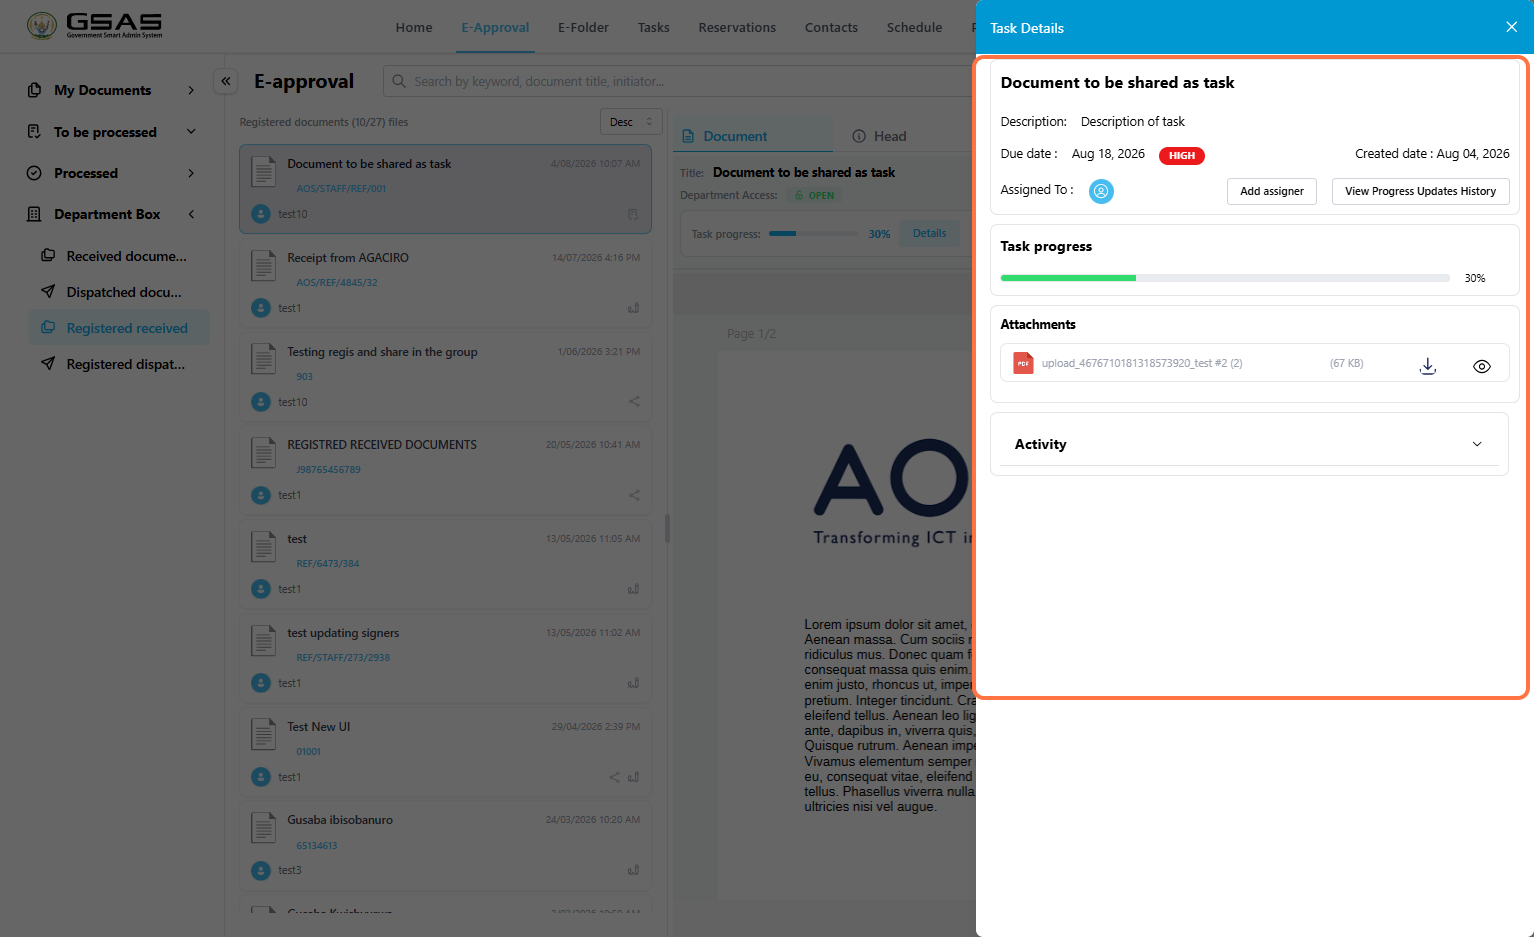](https://docs.smartadmin.rw/uploads/images/gallery/2026-08/Y3Nimage.png)
4\. Expand **Activity** to view recent task activity.
[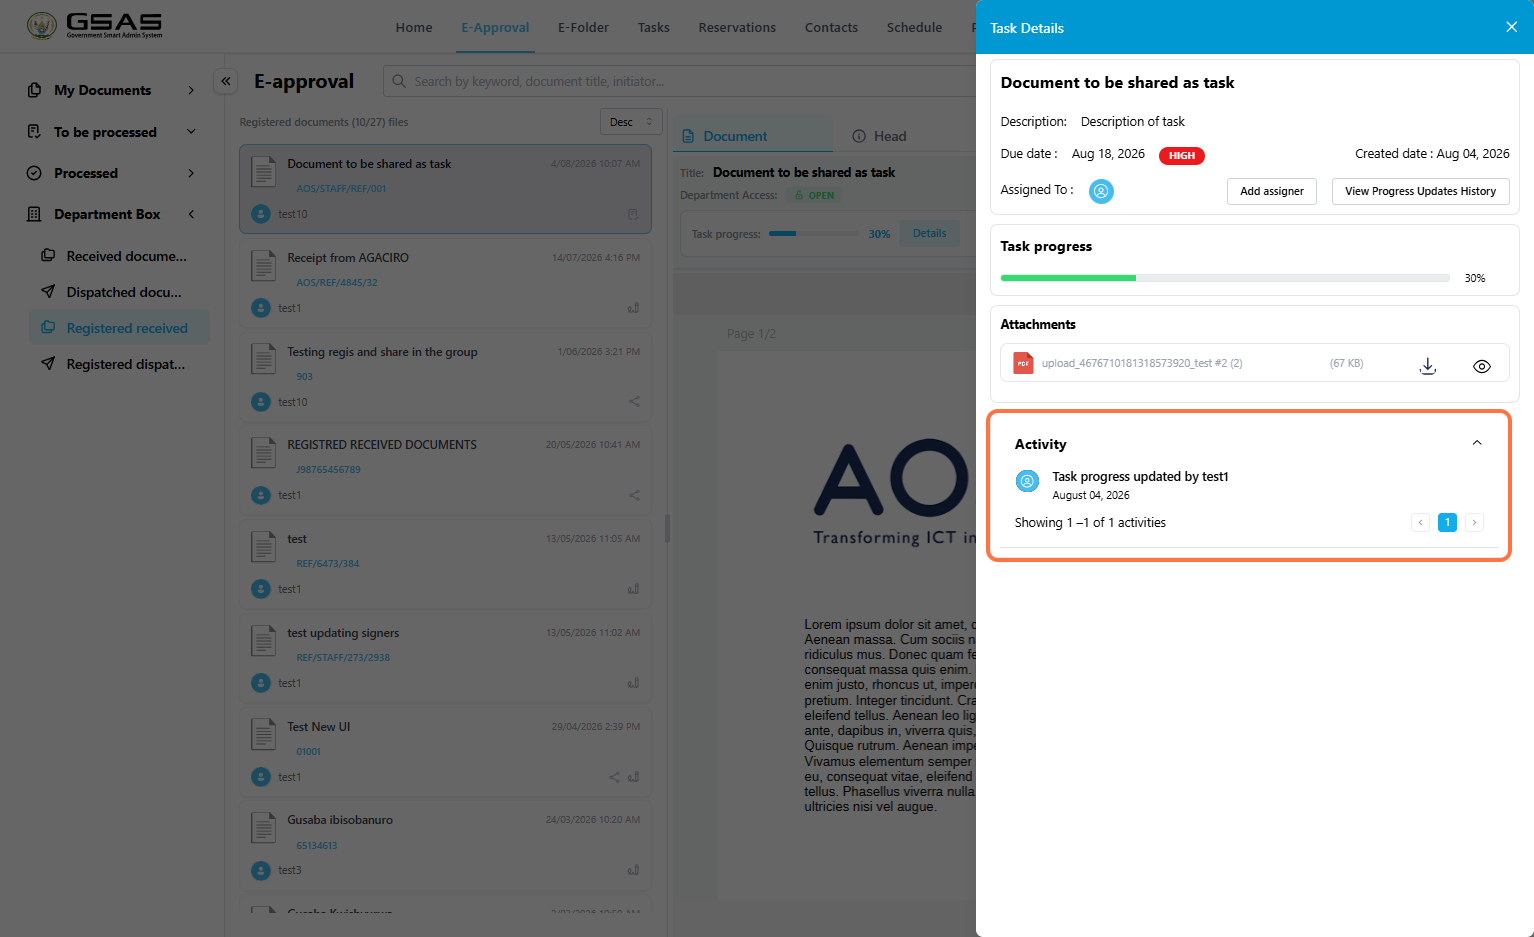](https://docs.smartadmin.rw/uploads/images/gallery/2026-08/zVsimage.png)
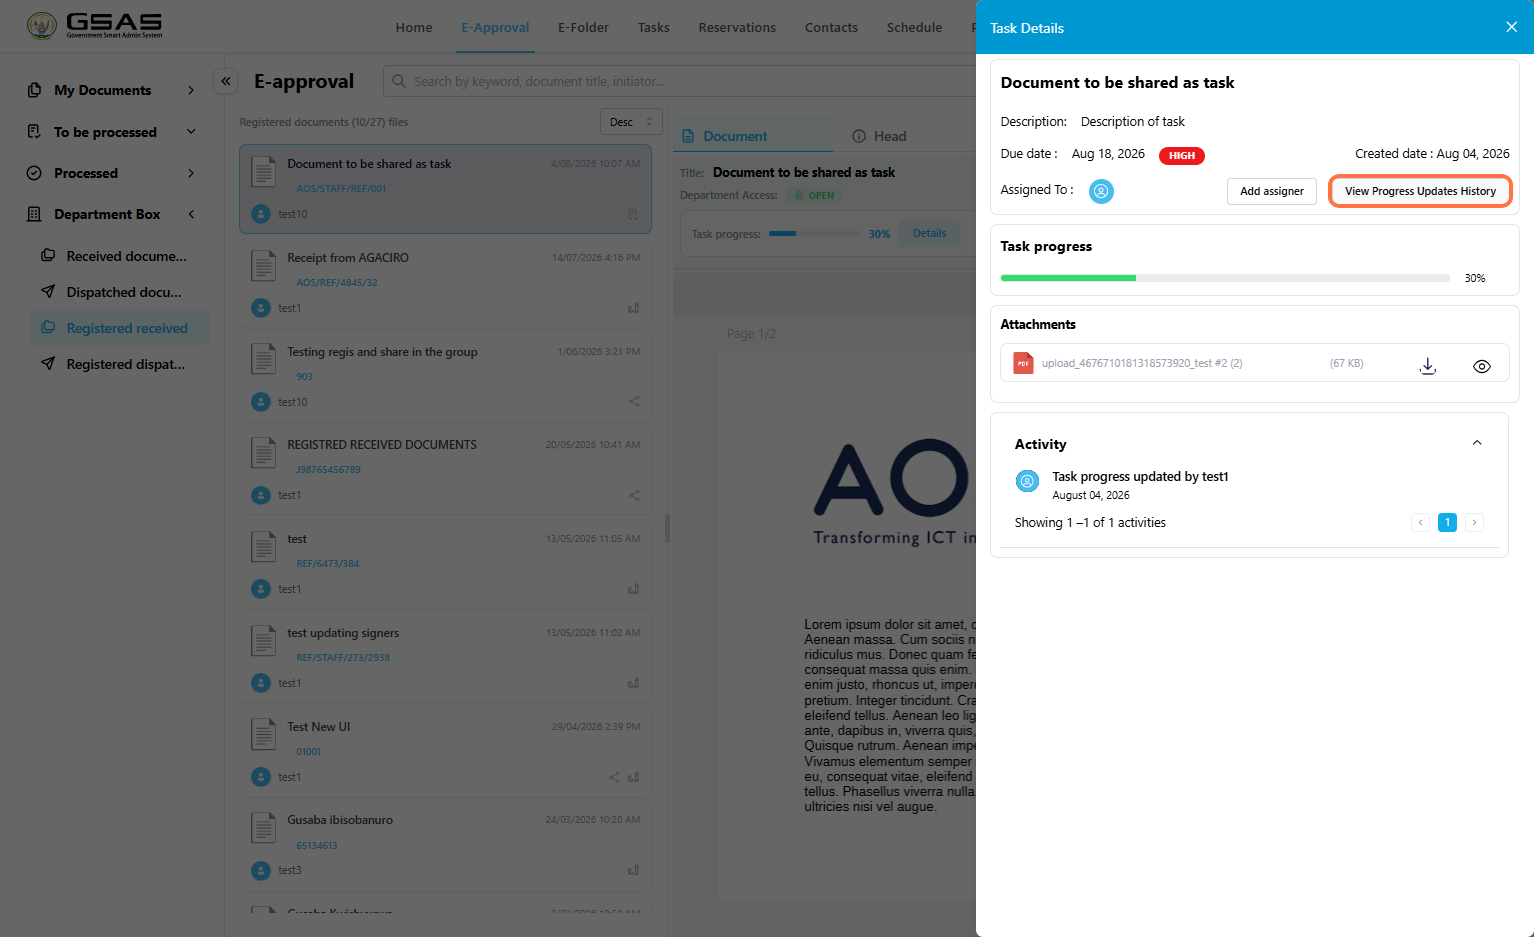
5\. Click **View Progress Updates History** to see submitted progress updates.
[](https://docs.smartadmin.rw/uploads/images/gallery/2026-08/AUAimage.png)
Review the update details, attachments, update date, and the user who submitted the update.
---
***Proceed to the [Responding to and Tracking tasks](https://docs.smartadmin.rw/link/44#bkmrk-page-title) page to see how to keep track of tasks you create and delegate from the Tasks module.***