# Outgoing Approval Requests

---

Submitting an Outgoing Approval Request

Outgoing requests are used when you need to send an official document to another institution, both those that use Smart Admin and those that do not. The process is largely the same as submitting an internal request, but with two key differences: you select a template with the type **Outgoing**, and you specify who the document is being sent to before submitting.

<table id="bkmrk-before-you-begin%3A-th" style="width: 100%; background-color: #eef4fb; border-left: 3px solid #185fa5; border-radius: 4px; border-collapse: collapse; margin-bottom: 24px;"><tbody><tr><td style="padding: 10px 14px; font-size: 12px; color: #555; line-height: 1.65;">**Before you begin:** This page focuses on what is unique to outgoing requests. If you have not tried submitting an internal request before, it is worth reading the [Internal Approval Requests](https://docs.smartadmin.rw/books/gsas-user-guide/page/internal-approval-requests) page first, it covers the shared steps in full detail.</td></tr></tbody></table>

---

Step 1

### <span style="color: rgb(0, 0, 0);">Choosing a template</span>

Click **Initiate** and select a template from the list. For outgoing requests, look for templates with the type **Outgoing** in the last column.

[![image.png](https://docs.smartadmin.rw/uploads/images/gallery/2026-06/scaled-1680-/MkEimage.png)](https://docs.smartadmin.rw/uploads/images/gallery/2026-06/MkEimage.png)

---

Step 2

### <span style="color: rgb(0, 0, 0);">Filling in the Head tab</span>

Fill in the title, due date, attachments, and aassignees as you would for an internal request. You can also attach documents from E-Folder using the **GSAS Documents** section on the right.

[![image.png](https://docs.smartadmin.rw/uploads/images/gallery/2026-06/scaled-1680-/dvnimage.png)](https://docs.smartadmin.rw/uploads/images/gallery/2026-06/dvnimage.png)

---

Step 3

### <span style="color: rgb(0, 0, 0);">Adding recipients</span>

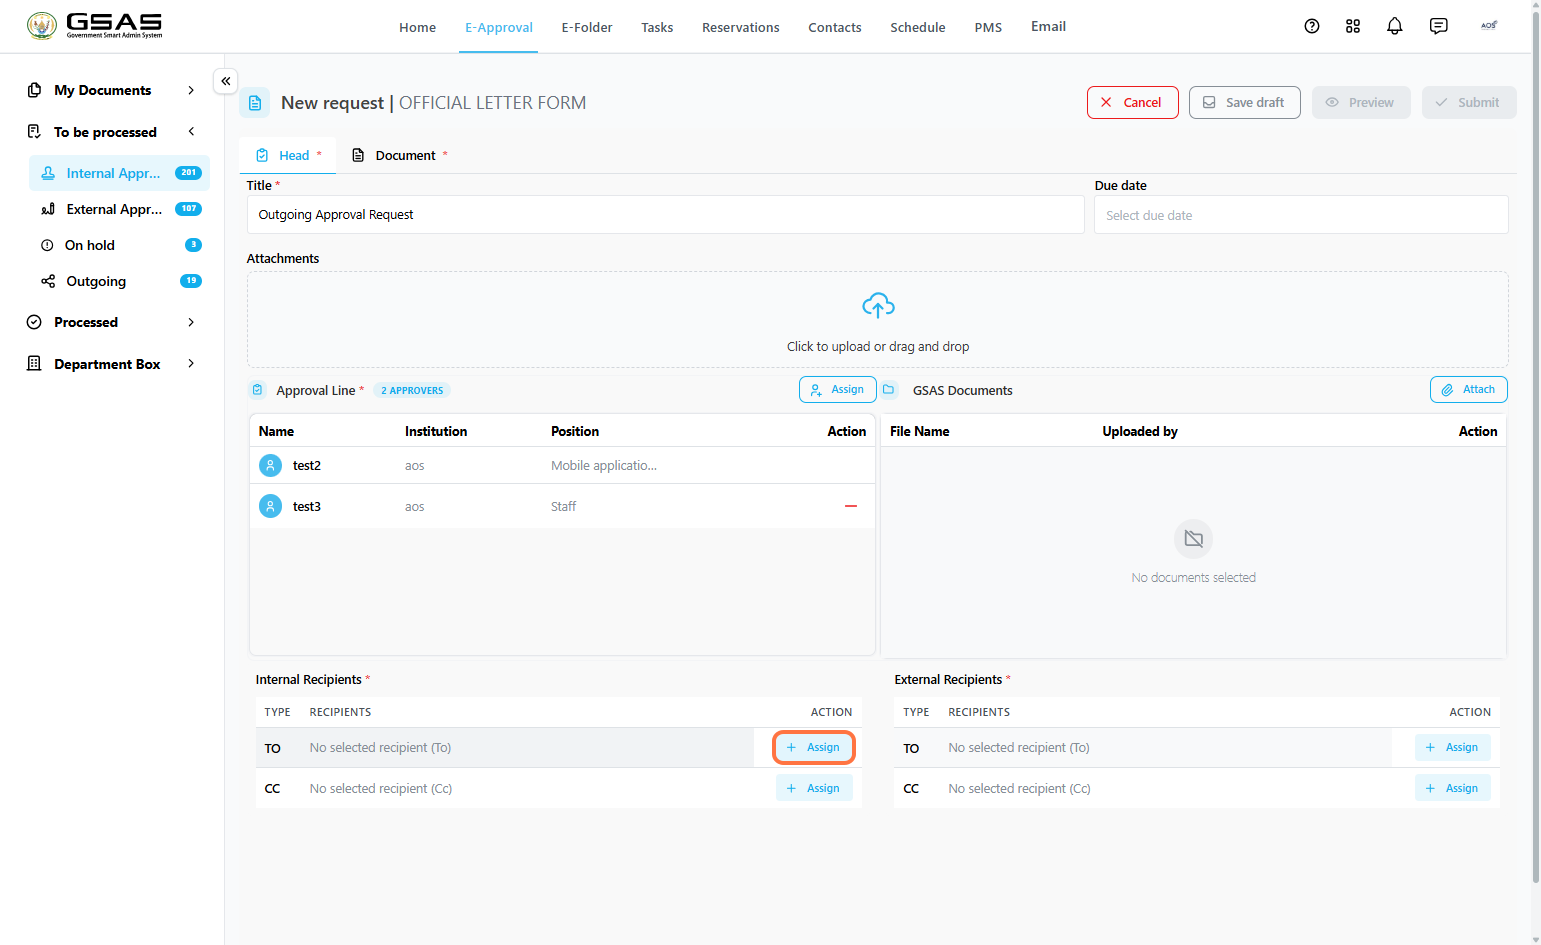
You will see two sections — **Internal Recipients** for institutions and individuals who use Smart Admin, and **External Recipients** for those who do not. You can fill in one or both.

[![image.png](https://docs.smartadmin.rw/uploads/images/gallery/2026-06/scaled-1680-/xrpimage.png)](https://docs.smartadmin.rw/uploads/images/gallery/2026-06/xrpimage.png)

<table id="bkmrk-3.1-internal-recipie" style="width: 100%; border-collapse: collapse; border: 1px solid #c5d8f0; border-radius: 6px; margin-bottom: 16px;"><tbody><tr><td style="padding: 16px;">#### 3.1 Internal Recipients/Public Institutions

<span style="color: rgb(0, 0, 0);">Recipients that use Smart Admin</span>

- Click **Assign** next to the **TO** or **CC** field.

[![image.png](https://docs.smartadmin.rw/uploads/images/gallery/2026-06/scaled-1680-/WL3image.png)](https://docs.smartadmin.rw/uploads/images/gallery/2026-06/WL3image.png)
- A dialog will appear with two tabs; **Institutions** to send to an institution as a whole, and **Individuals** to send to a specific person.

[![image.png](https://docs.smartadmin.rw/uploads/images/gallery/2026-06/scaled-1680-/eA8image.png)](https://docs.smartadmin.rw/uploads/images/gallery/2026-06/eA8image.png)
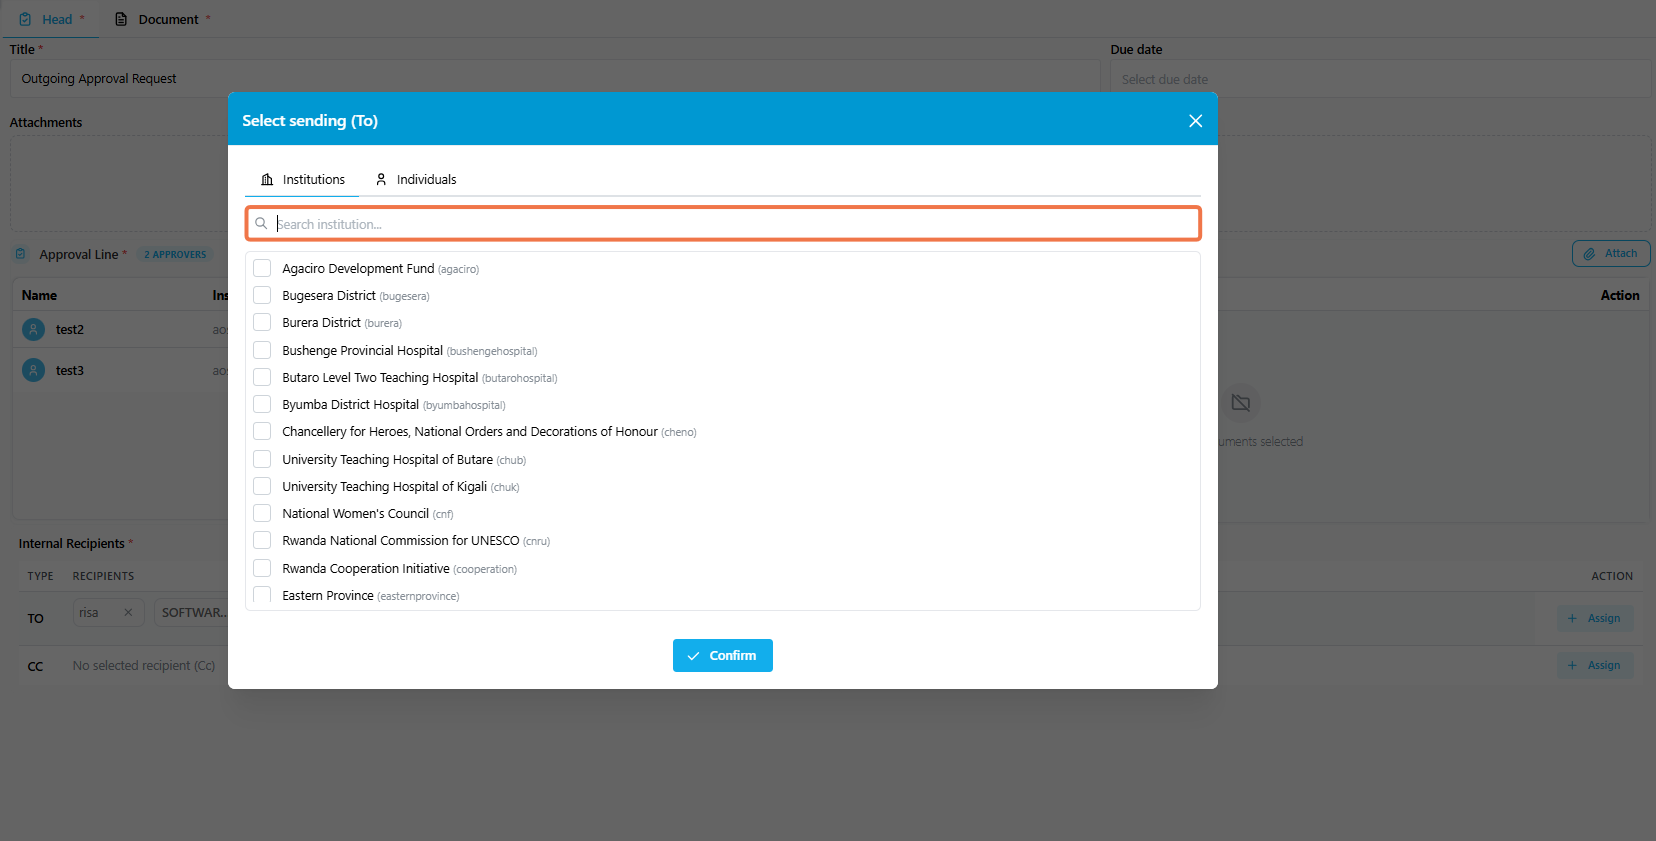
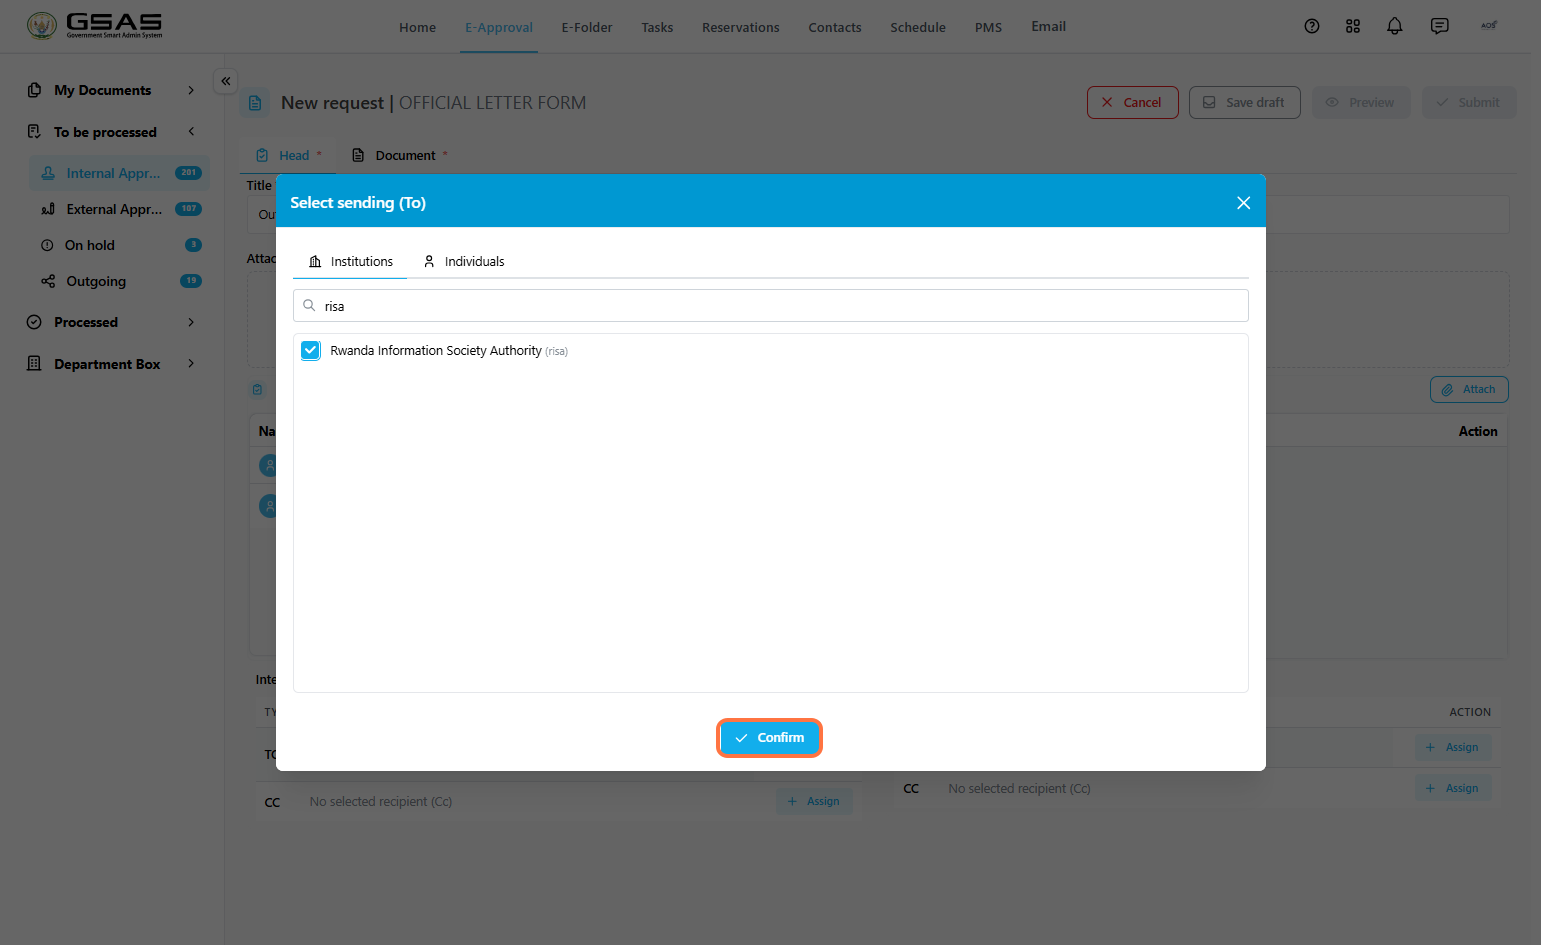
*→ Send to an institution (Internal)*

- Under the **Institutions** tab, search for the institution by name or abbreviation, check the box next to it, then click **Confirm**.

[![image.png](https://docs.smartadmin.rw/uploads/images/gallery/2026-06/scaled-1680-/ninimage.png)](https://docs.smartadmin.rw/uploads/images/gallery/2026-06/ninimage.png)
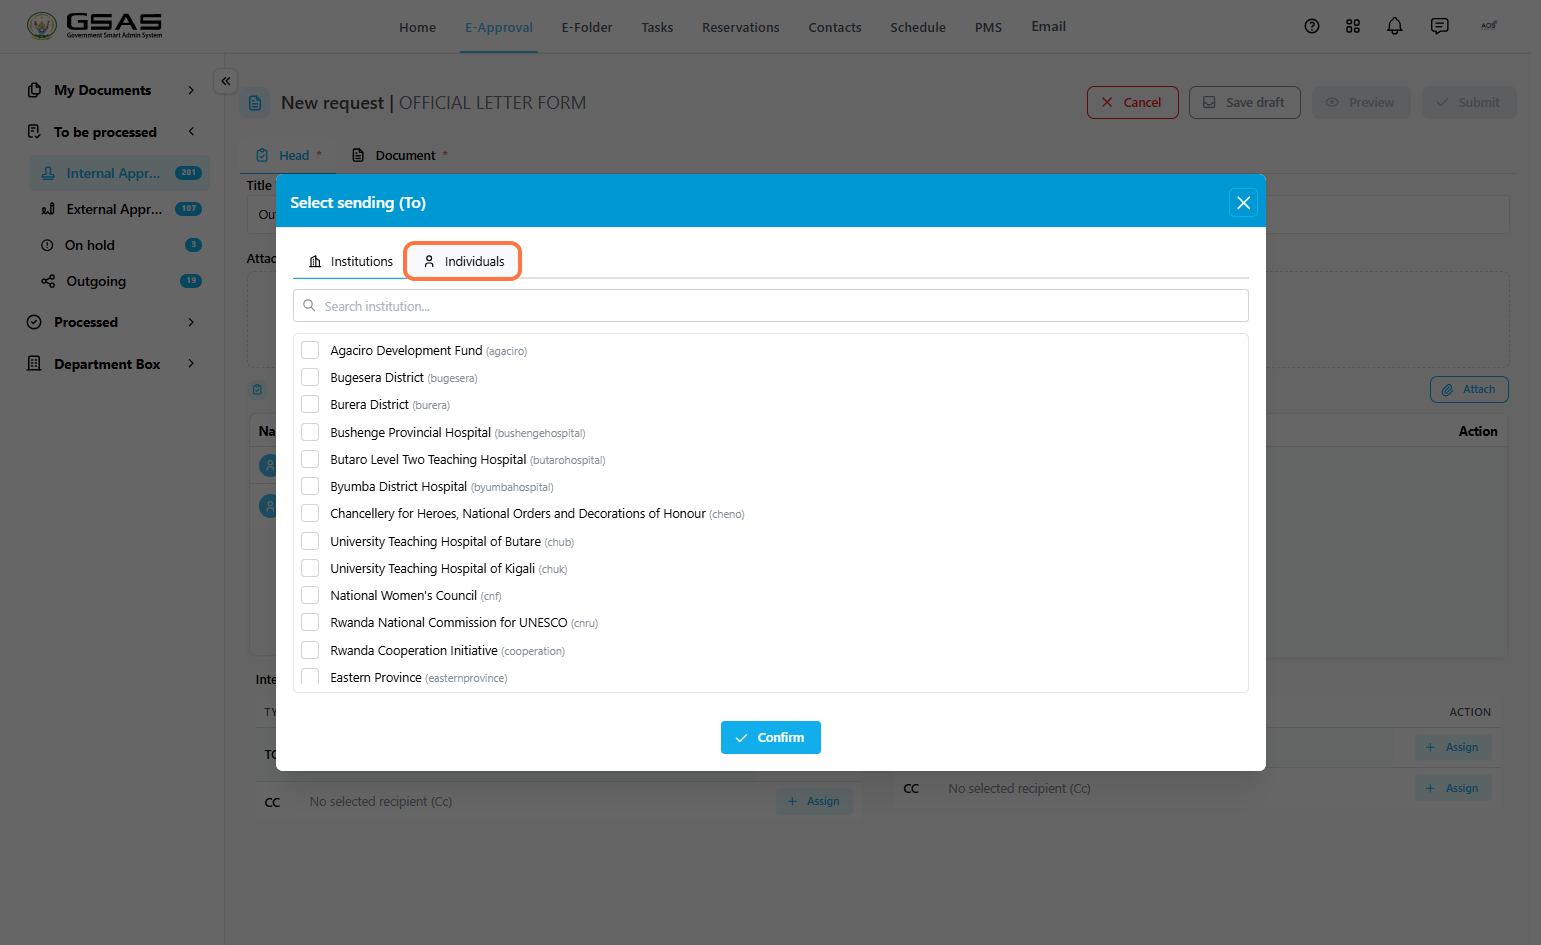
*→ Send to an individual (Internal)*

- Under the **Individuals** tab, select the institution the person belongs to from the dropdown on the left.

[![image.png](https://docs.smartadmin.rw/uploads/images/gallery/2026-06/scaled-1680-/WXXimage.png)](https://docs.smartadmin.rw/uploads/images/gallery/2026-06/WXXimage.png)
[![image.png](https://docs.smartadmin.rw/uploads/images/gallery/2026-06/scaled-1680-/LDDimage.png)](https://docs.smartadmin.rw/uploads/images/gallery/2026-06/LDDimage.png)

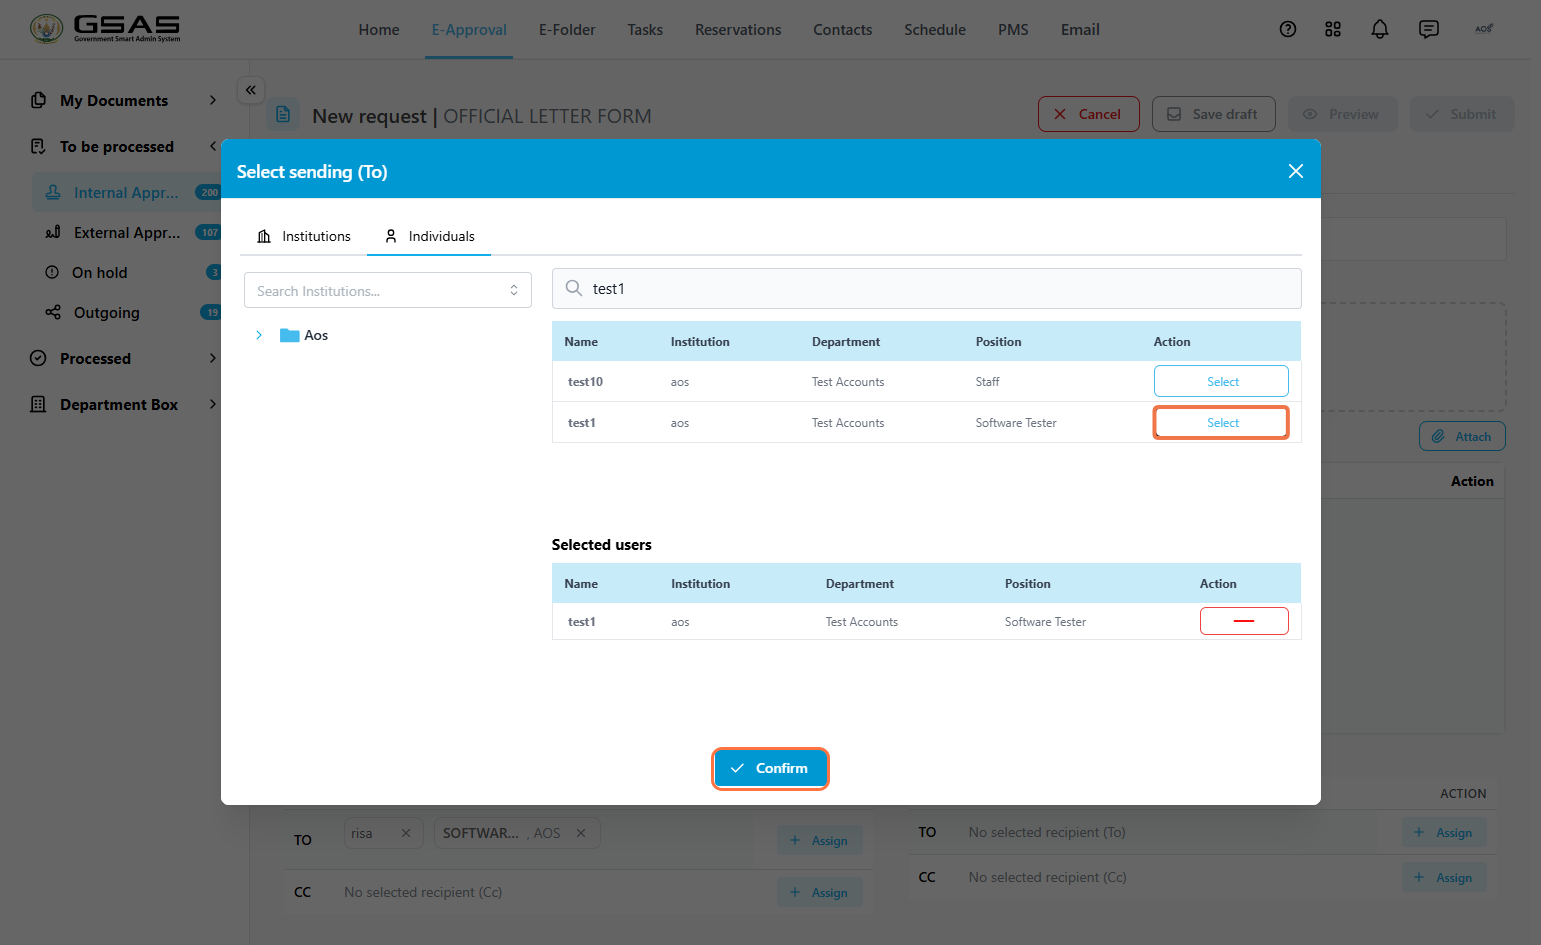
- The users from that institution will appear on the right; search by name, click **Select** next to the person you want to add, then click **Confirm**.

[![image.png](https://docs.smartadmin.rw/uploads/images/gallery/2026-06/scaled-1680-/nySimage.png)](https://docs.smartadmin.rw/uploads/images/gallery/2026-06/nySimage.png)
***CC***

To copy someone in, click **Assign** next to the **CC** field and follow the same steps above.

</td></tr></tbody></table>

<table id="bkmrk-3.2-external-recipie" style="width: 100%; border-collapse: collapse; border: 1px solid #c5d8f0; border-radius: 6px; margin-bottom: 16px;"><tbody><tr><td style="padding: 16px;">#### 3.2 External Recipients/Private Institutions

For recipients who do not use Smart Admin, their details have to be entered manually.

*→ Sending to an institution (External)*

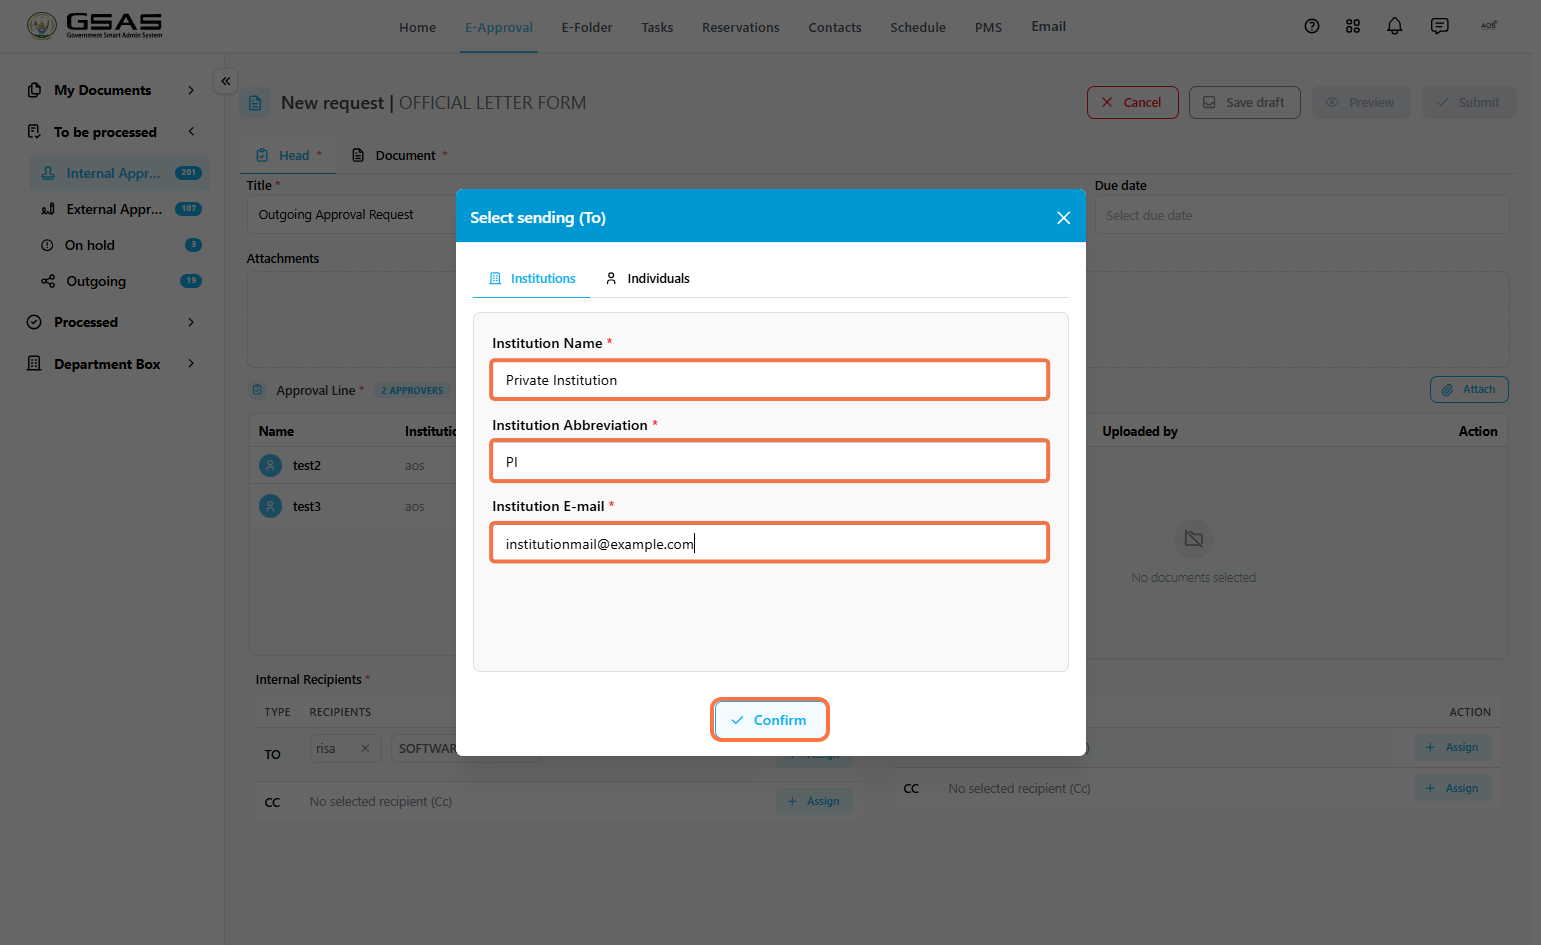
- Under the **Institutions** tab, enter the institution's name, abbreviation, and email address, then click **Confirm**.

[![image.png](https://docs.smartadmin.rw/uploads/images/gallery/2026-06/scaled-1680-/21Cimage.png)](https://docs.smartadmin.rw/uploads/images/gallery/2026-06/21Cimage.png)
*→ Sending to an individual (External)*

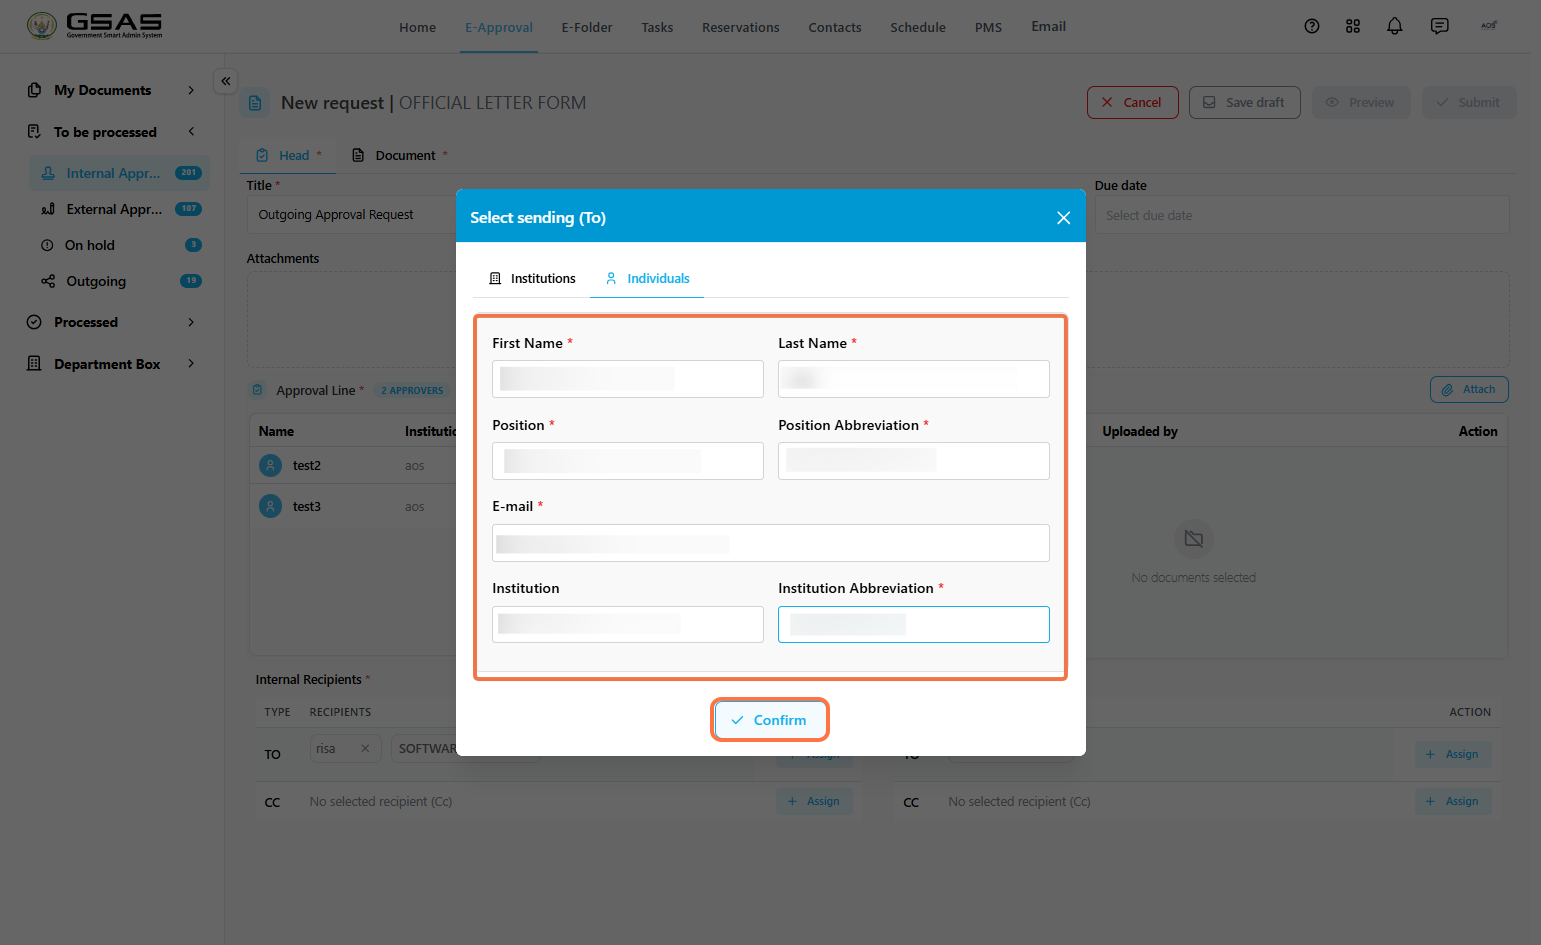
- Under the **Individuals** tab, enter their first name, last name, position, position abbreviation, email address, institution name, and institution abbreviation, then click **Confirm**.

[![image.png](https://docs.smartadmin.rw/uploads/images/gallery/2026-06/scaled-1680-/l99image.png)](https://docs.smartadmin.rw/uploads/images/gallery/2026-06/l99image.png)
</td></tr></tbody></table>

---

Step 4

### <span style="color: rgb(0, 0, 0);">Filling in the Document tab and submitting</span>

Fill in the content of the request in the **Document** tab just like it's done with [internal approvals](https://docs.smartadmin.rw/link/4#bkmrk-fill-in-the-document) and click **Submit**.

[![image.png](https://docs.smartadmin.rw/uploads/images/gallery/2026-08/scaled-1680-/59Nimage.png)](https://docs.smartadmin.rw/uploads/images/gallery/2026-08/59Nimage.png)

Enter a message to the external recipients, it will be included in the email sent to them along with your request, then submit.

[![image.png](https://docs.smartadmin.rw/uploads/images/gallery/2026-08/scaled-1680-/mBAimage.png)](https://docs.smartadmin.rw/uploads/images/gallery/2026-08/mBAimage.png)

Once all approvers have approved, the request will appear in the Sender Manager's **Outgoing** folder to be dispatched. (See [Sender and Receiver Manager Controls](https://docs.smartadmin.rw/link/52#bkmrk-page-title)).

The addressed institutions and individuals will receive the request once it's been sent by the Sender Manager.

---

***Proceed to the [Managing approval requests](https://docs.smartadmin.rw/books/gsas-user-guide/page/managing-approval-requests) page to learn how to keep track of your request after it has been submitted.***