Getting Started
System overview, login, account management and dashboard navigation.
Overview
Smart Admin is a web-based platform designed to streamline administrative operations across government institutions. It brings together key functions; including document approvals, task management, facility reservations, contact management, scheduling, and internal file storage into a single unified system, enabling staff to manage their day-to-day responsibilities efficiently and transparently. The core features of Smart Admin include;
e-Approval
Submit approval requests, and track where they stand every step of the way. Go to e-Approval →
e-Folder
Keep your documents organized and accessible in one secure space, and share them with the right people when needed. Go to e-Folder →
Tasks
Assign work, follow up on progress, and keep everyone accountable without needing a separate check-in. Go to Tasks →
Reservations
Book meeting rooms and shared facilities, and see what's already reserved before you plan around it. Go to Reservations →
Schedule
Plan, see and receive reminders for your upcoming events and deadlines at a glance. Go to Schedule →
Contacts
Look up anyone using Smart Admin across your institution or any other one on the system. Go to Contacts →
How to login
Follow this quick guide to log into your account
|
Step 1 Open Smart AdminNavigate to your institution's Smart Admin URL in any web browser. You'll land on the login screen shown here. |
 |
|
Step 2 Enter your email addressType in the email address your administrator registered you with. If you're not sure which one to use, check with your IT department. |
 |
|
Step 3 Enter your passwordType your password, then click Login |
 |
Step 4
Authentication
If your account uses two-factor authentication, you'll be asked to confirm your identity.
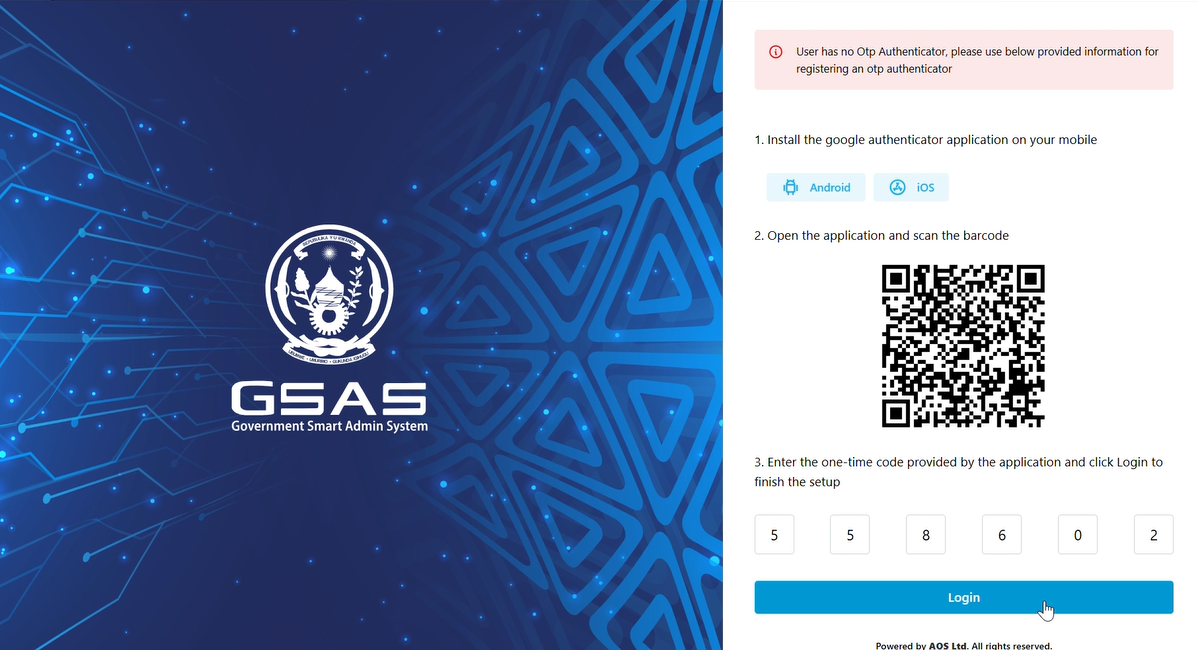
First time login? (If you've logged in before, scroll down to the Returning User section.)
Follow these steps to set up your OTP:

Returning user?
Open your Google Authenticator and view the current 6-digit code.
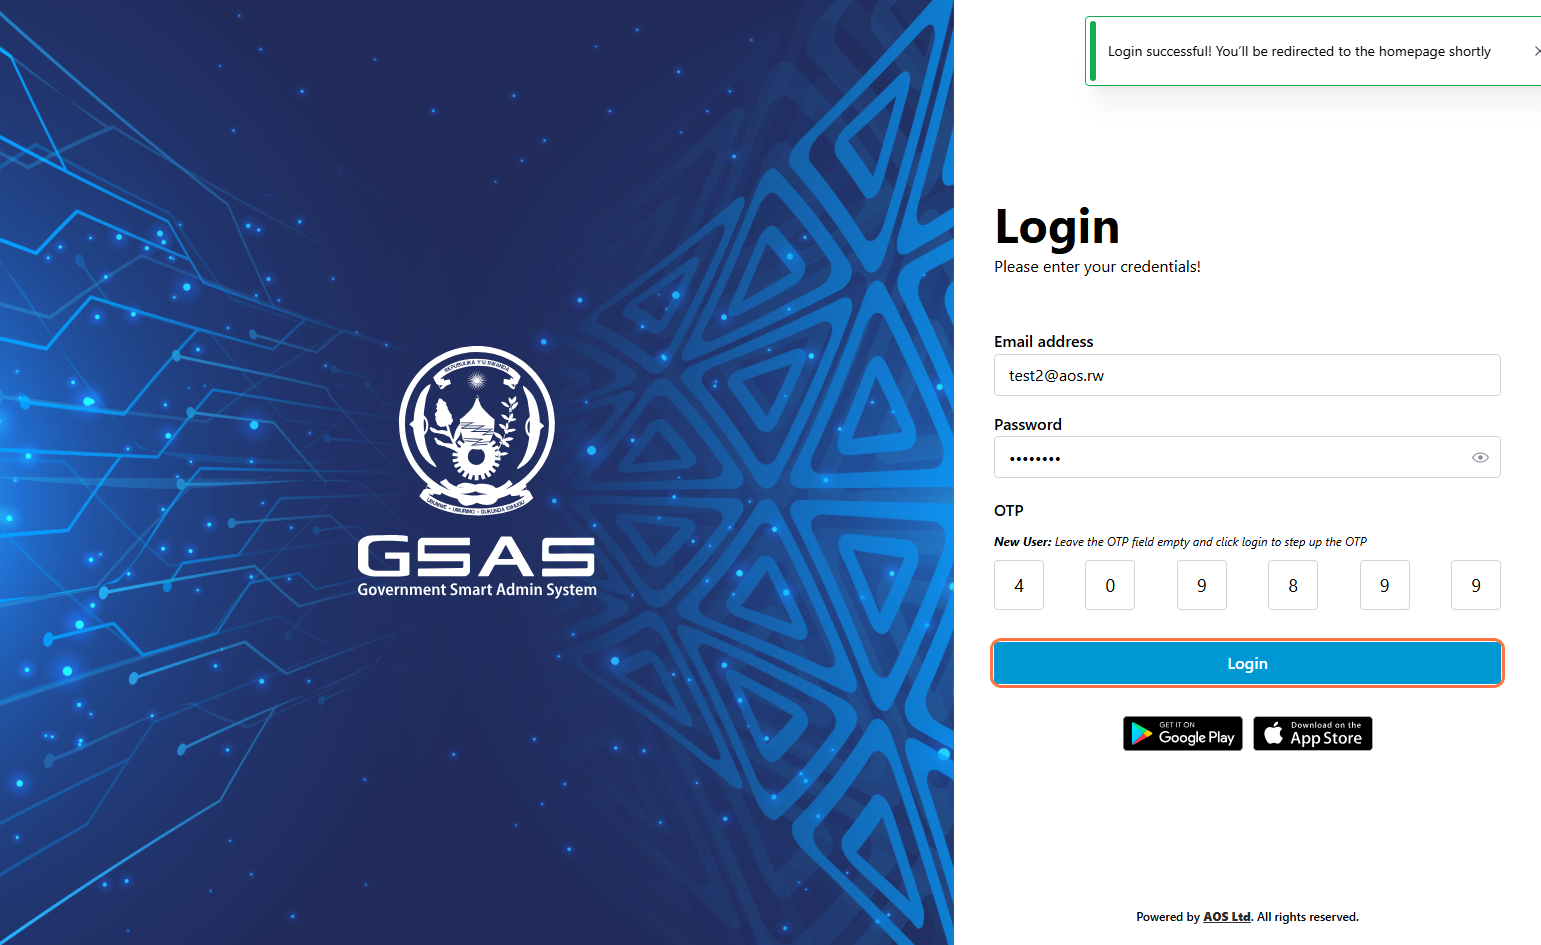
Don't see an OTP field? Your account is using Simple Authentication, skip the OTP step and click Login directly. For stronger account security, we recommend enabling OTP Authentication. Reach out to your administrator to get it set up.
|
Step 5 Access grantedYou'll be redirected to your dashboard upon successful login.
|

Troubleshoot common log in issues
- Login failed. Please check your credentials and try again.
Possible causes:
- Your password is incorrect.
- Your OTP does not match the current code in Google Authenticator.
Make sure your laptop and phone are using a similar time zone. If not, update your time zone settings and ask your administrator to reset your OTP and sign in again as a first-time user.
- No user was found with provided information.
Possible cause:
- Your email address was entered incorrectly.
- Invalid credentials. Please contact your system administrator.
- Call us or text us on +250 792 108 784 or use our toll free number 4747.
Your dashboard
The Dashboard
When you log in, you are taken to your dashboard. It gives you a snapshot of your activity across the system so you can stay on top of pending items without navigating to each module individually.
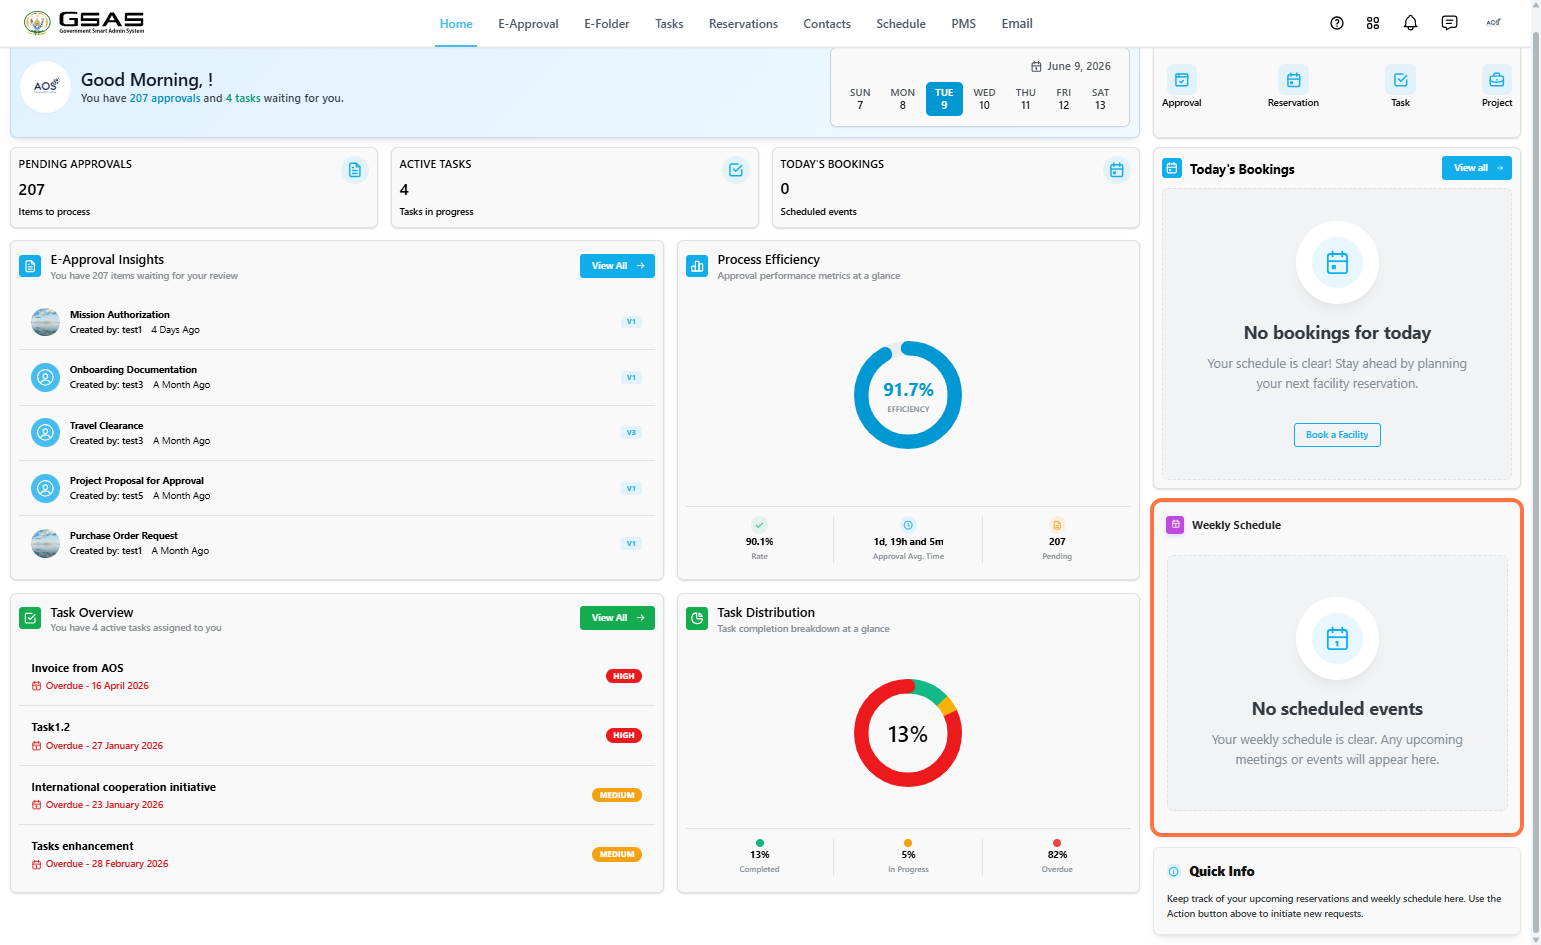
What you'll find on your dashboard
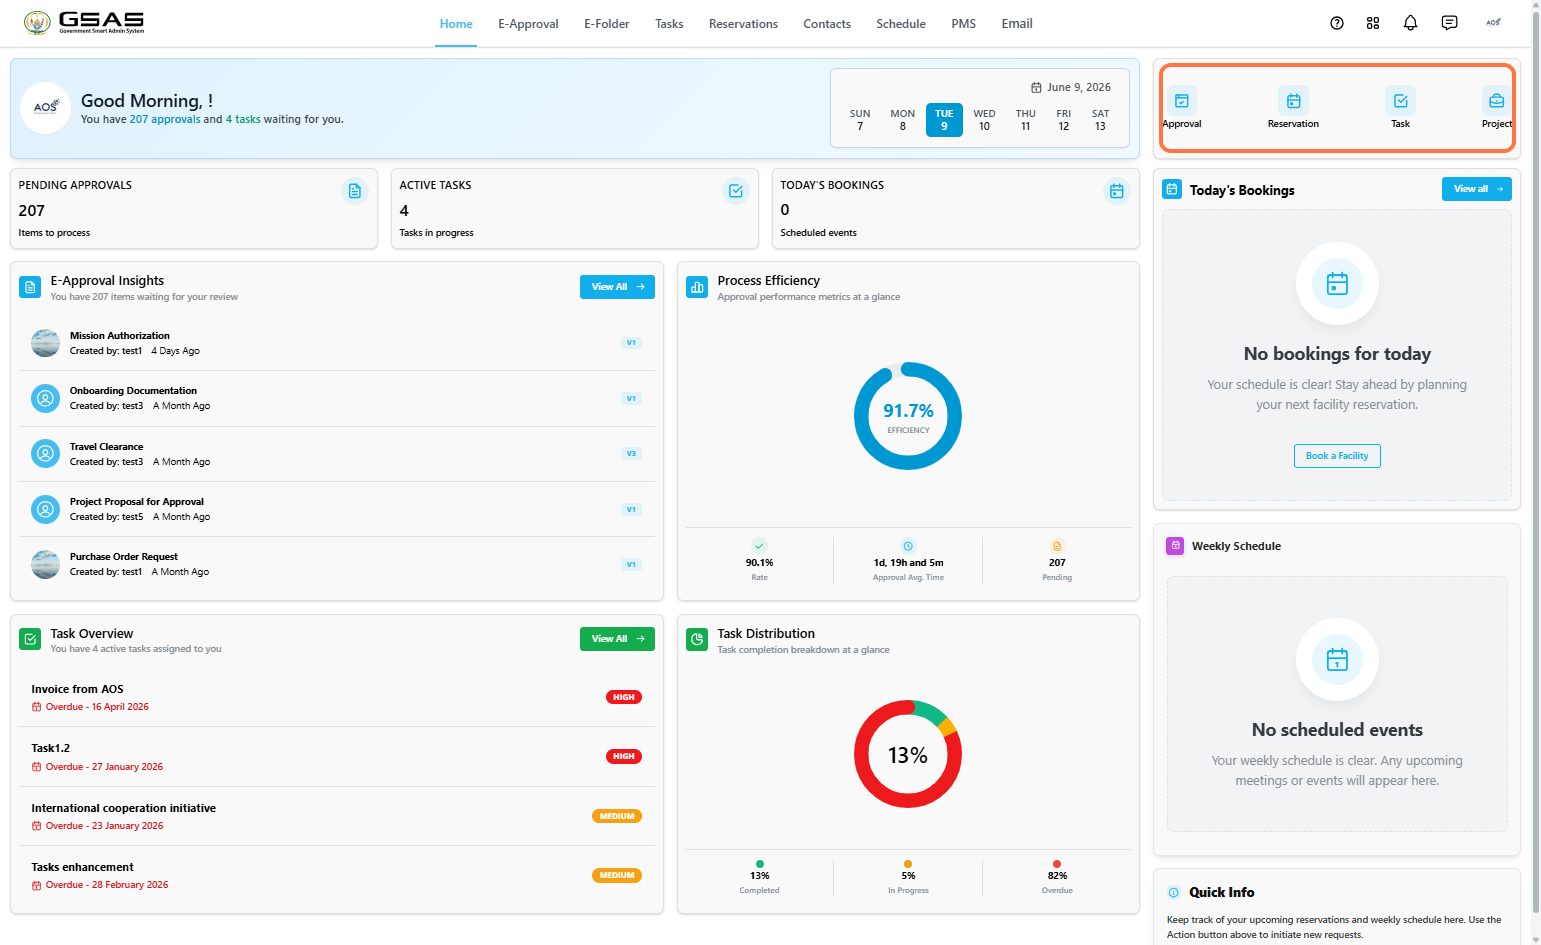
1. Quick Access Shortcuts
Shortcuts to the Approval, Reservation, Task, and PMS modules in the top right corner of the page. Each shortcut lets you take action directly from the homepage; initiate an approval request, book a facility, create a task, or create a new project.
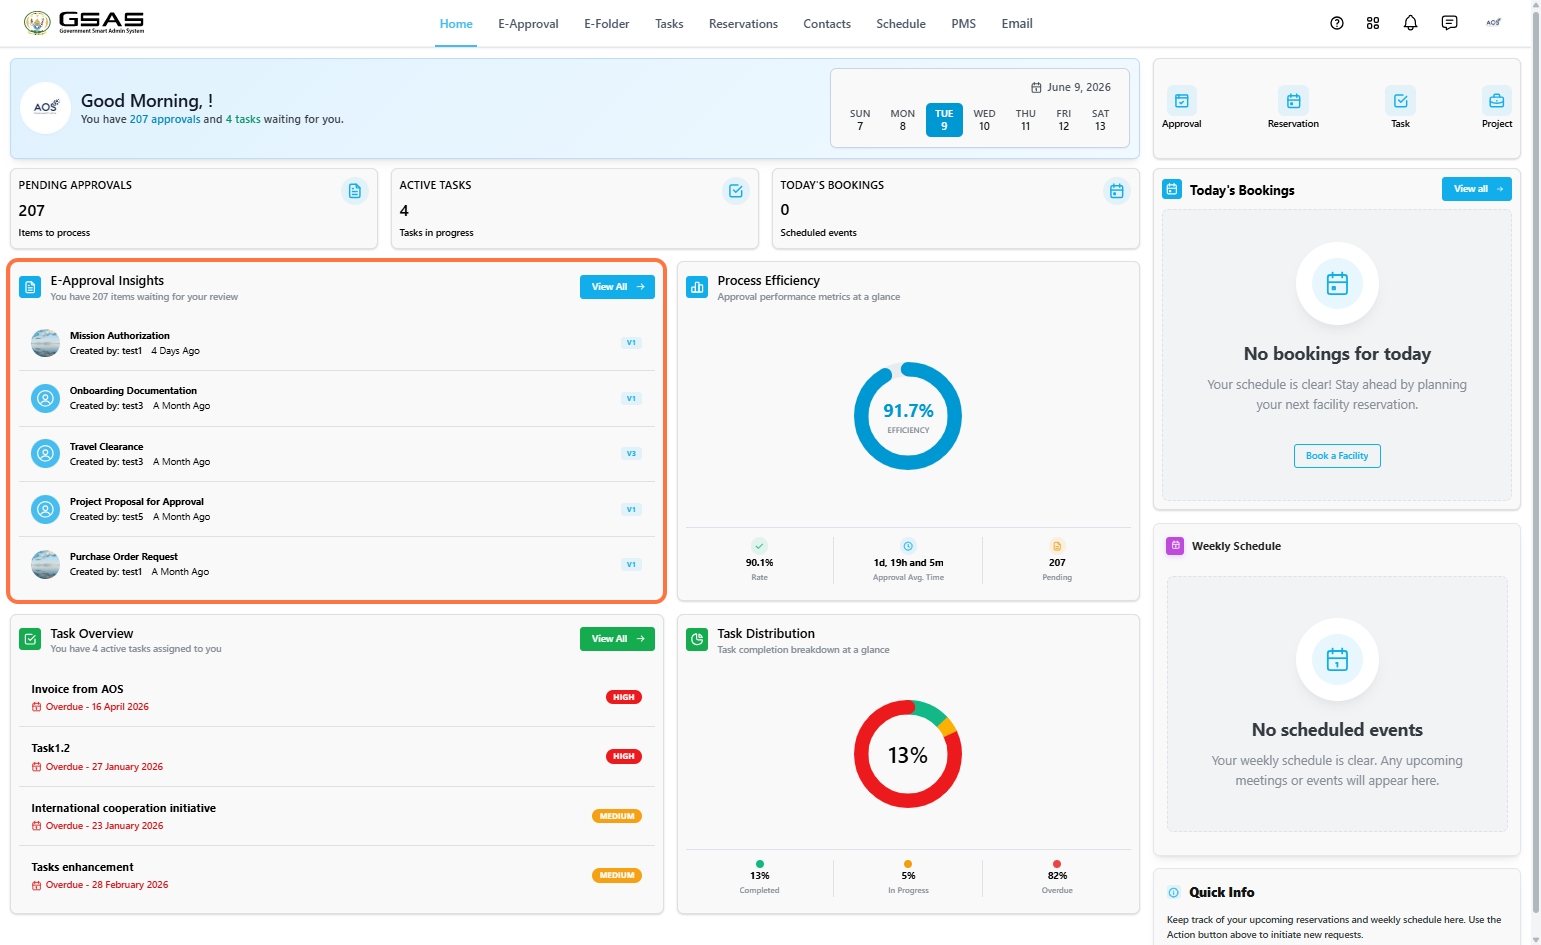
2. E-Approval Insights
A list of the most recent approval requests waiting for your review. Click View All to go directly to your internal approval folder.
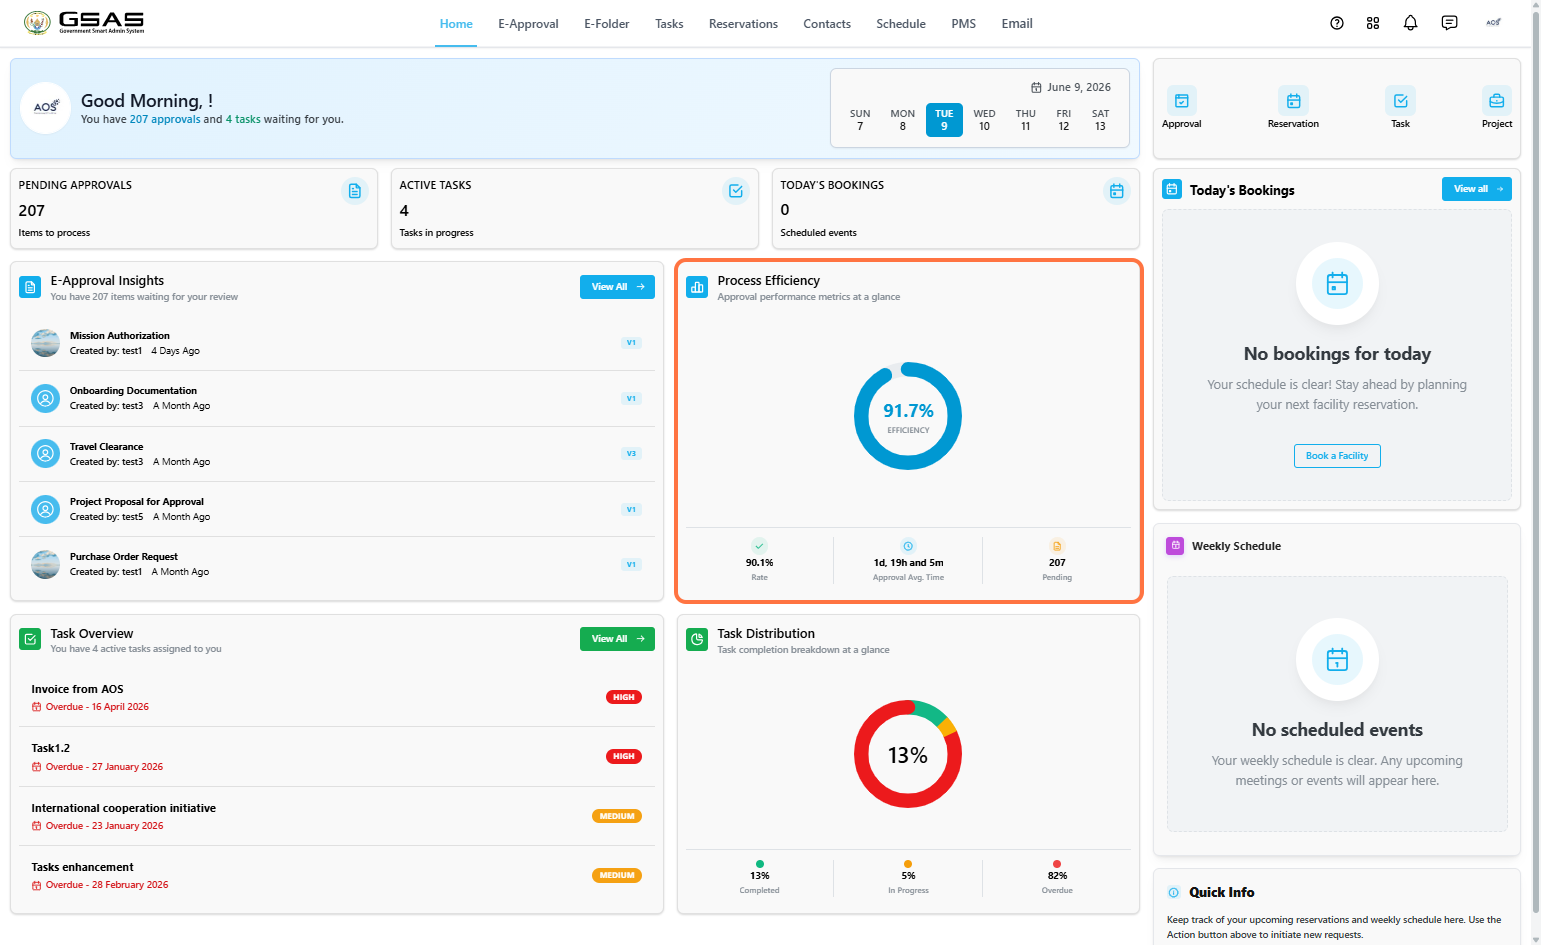
3. Process Efficiency
A visual overview of your approval performance, including your approval rate, average approval time, and number of pending items.
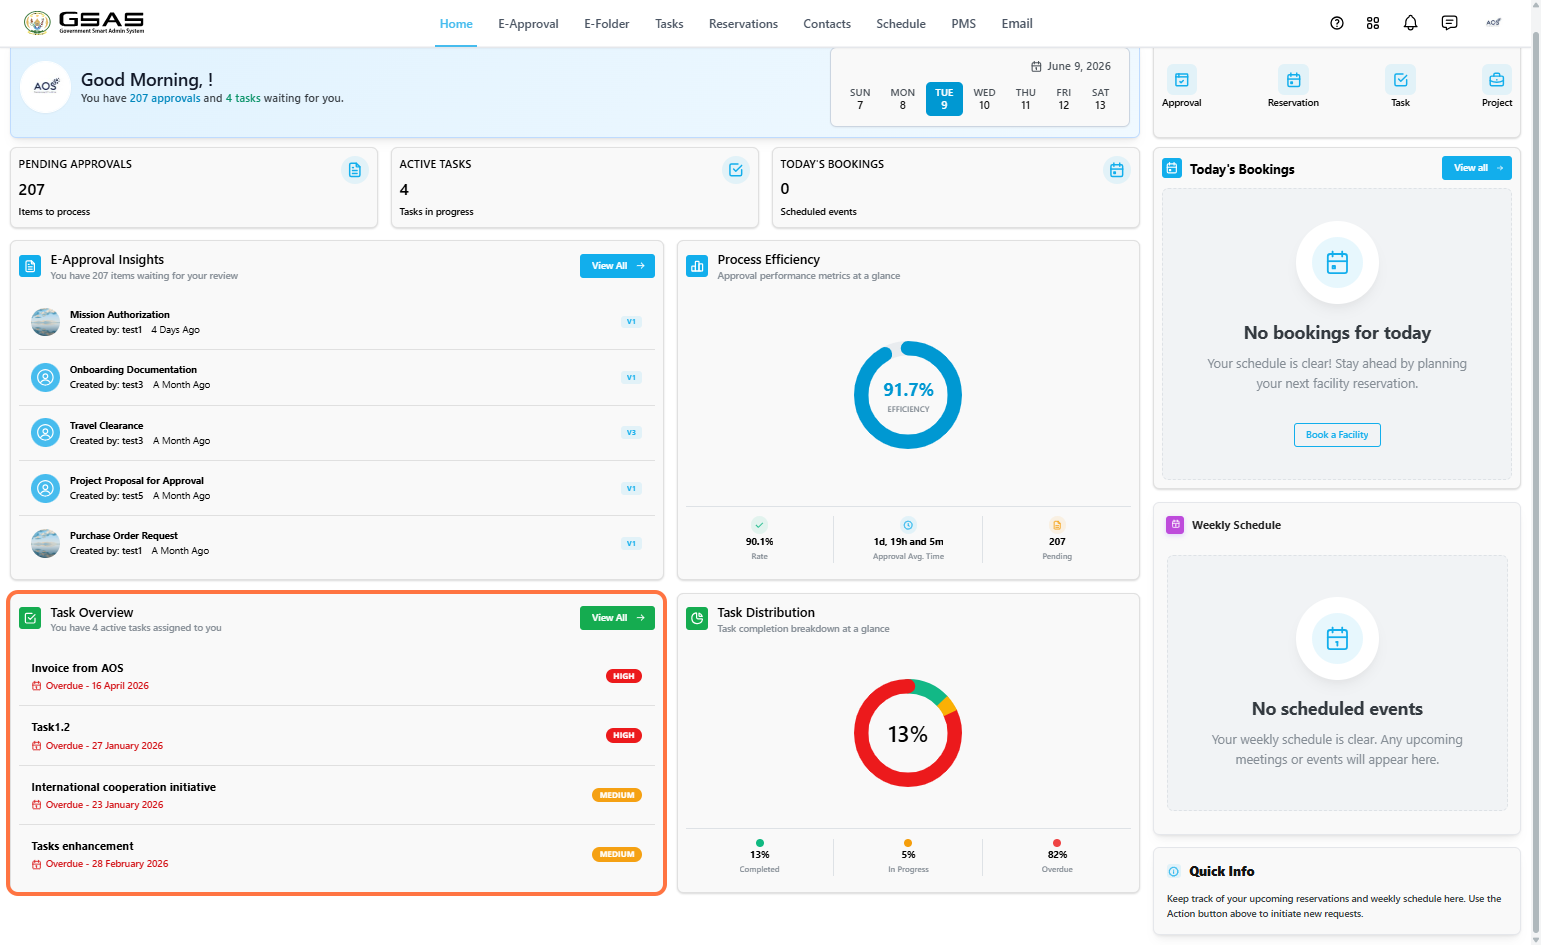
4. Task Overview
A list of your active tasks with their due dates and priority levels. Click View All to tasks assigned to you.
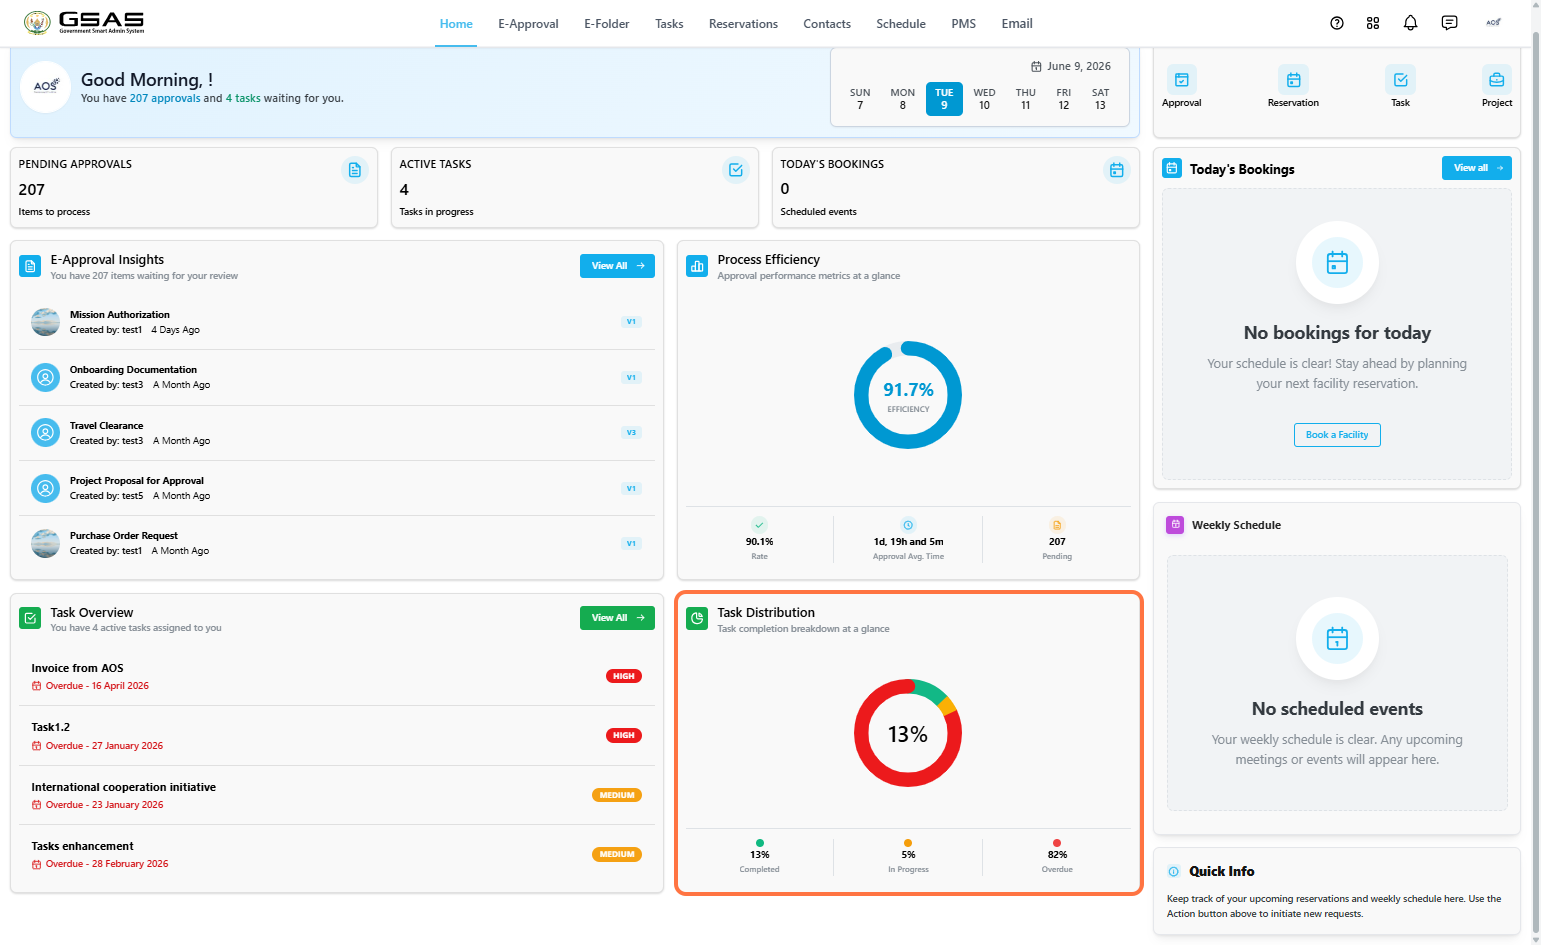
5. Task Distribution
A breakdown of your tasks by status; completed, in progress, and overdue.
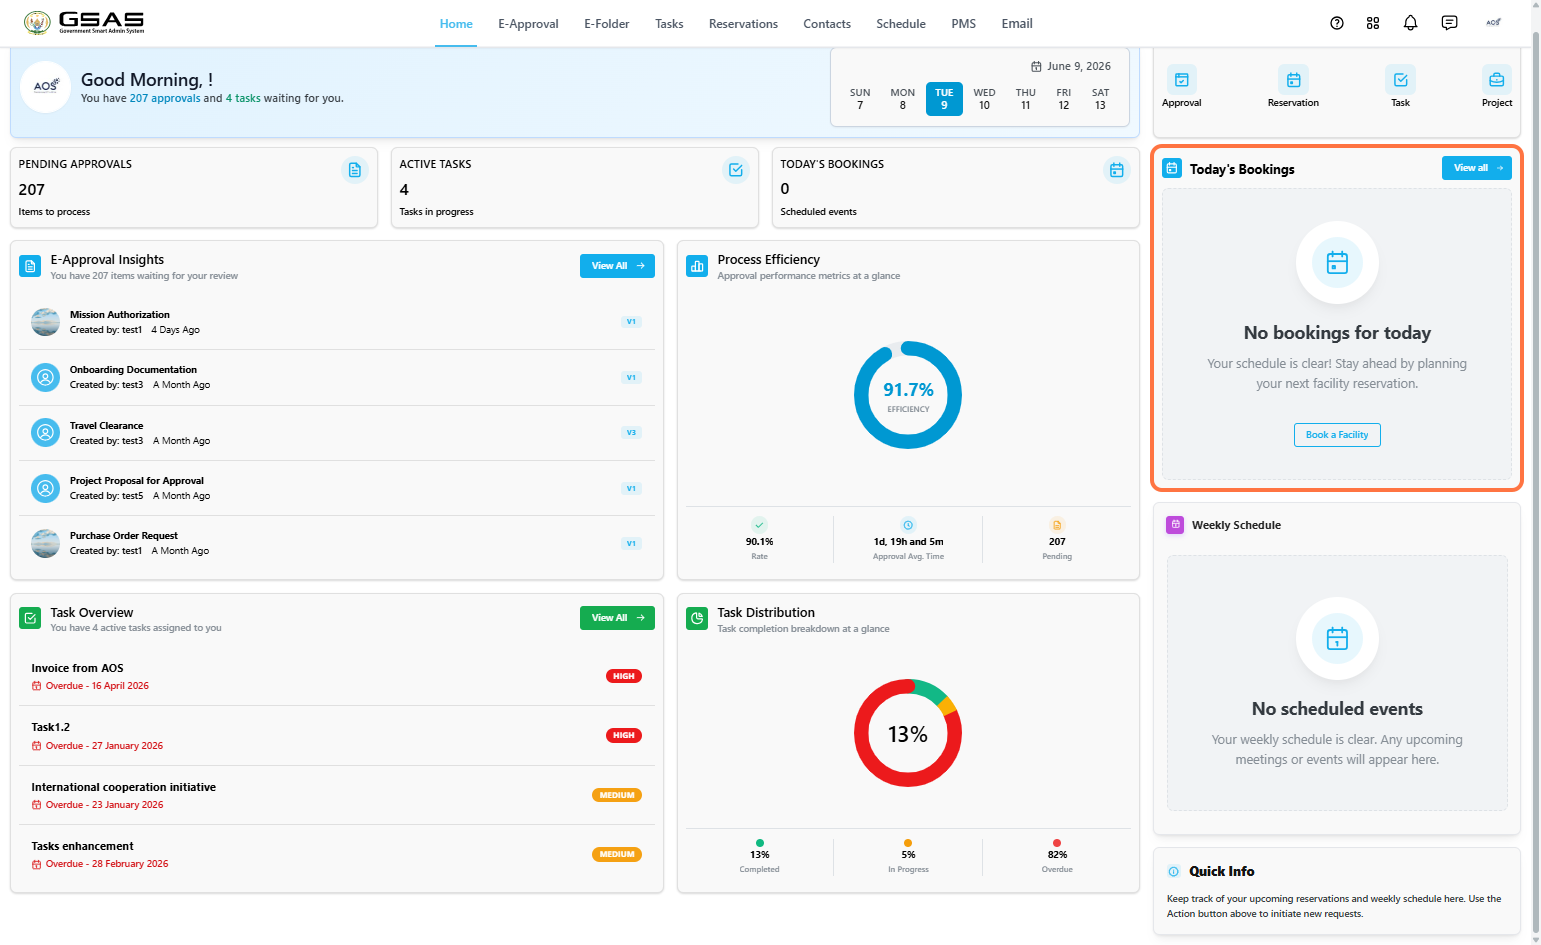
6. Today's Bookings
A detailed view of your facility reservations for the day. Click Book a Facility to make a new reservation.
7. Weekly Schedule
Any upcoming meetings or events scheduled for the week.
A few shortcuts sit in the top right corner of every page.
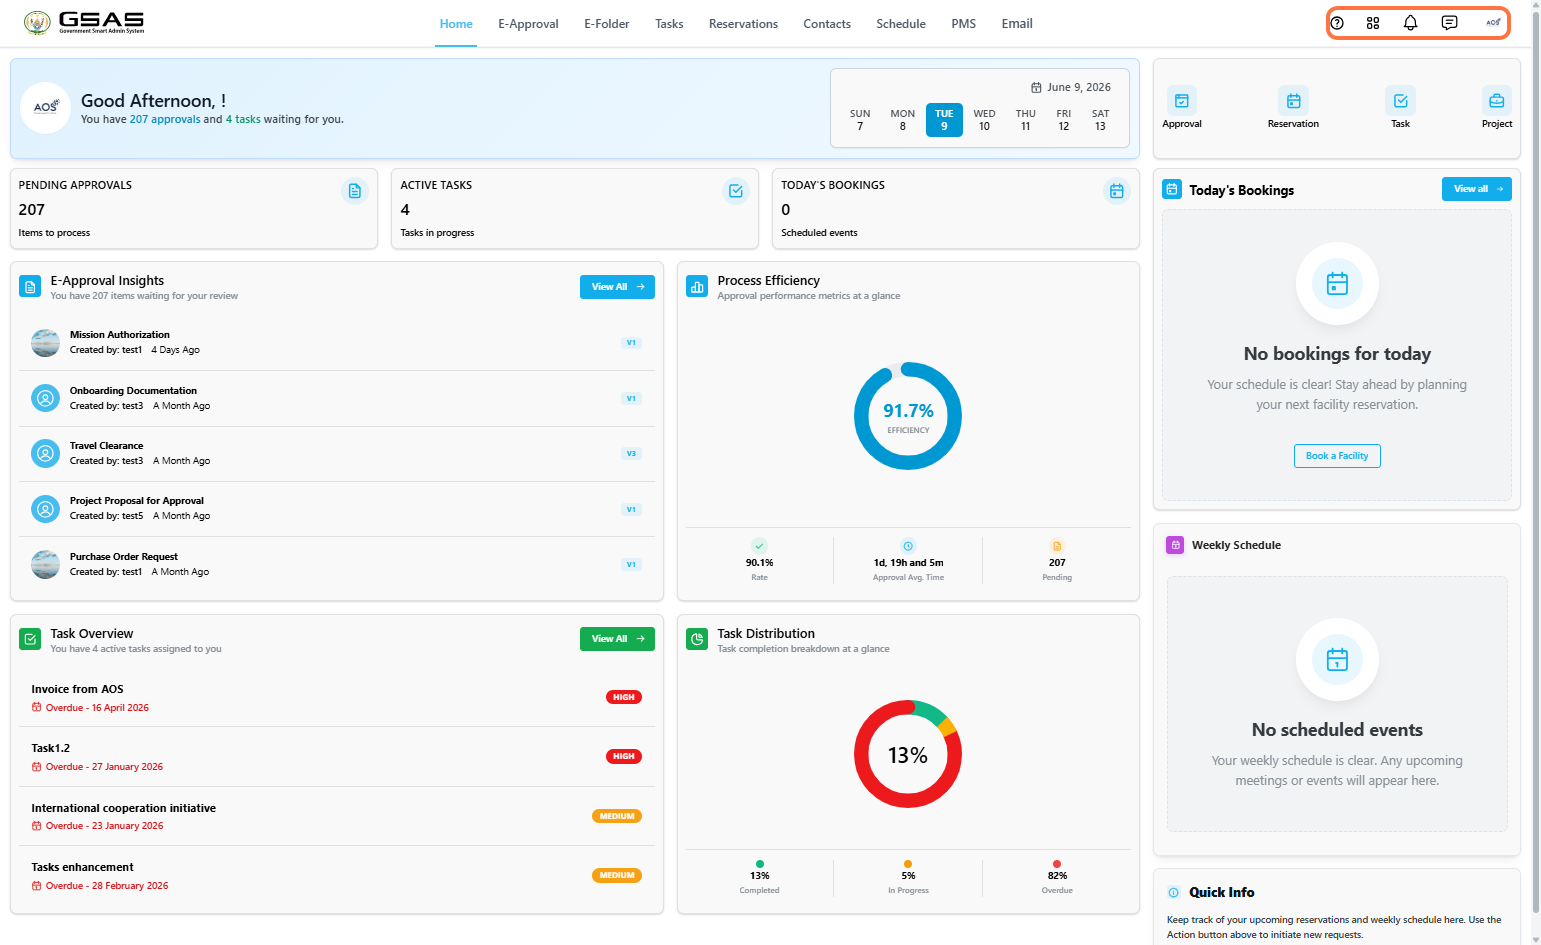
- The question mark icon drops down with links to the User Guide and a Contact Us modal with our phone number for any inquiries.
- Clicking the grid icon opens a dropdown with links to the GSAS mobile app for both iOS and Android.
- The bell icon opens your notifications panel.
- The chat icon redirects you to GSAS Talk, Smart Admin's messaging platform.
- The profile avatar opens a dropdown with your settings and a logout option.
Your account and profile
Your Profile
Your profile page gives you an overview of your account and organizational details. Some fields are managed by your administrator, you can only edit a few fields yourself.
| How your account is set up: Once your account is synchronized to Smart Admin, the IT Administrator of your institution sets up your organizational details (department, position) and assigns you any relevant roles. |
Accessing your profile
Click your avatar in the top right corner of the screen, then select Settings from the dropdown menu.

Personal Information
These fields identify you within the system. Only Phone Number and Fax can be edited by you. All other fields are set by your administrator.

| First Name | Set by your administrator. Contact them if this needs to be corrected. |
| Last Name | Set by your administrator. Contact them if this needs to be corrected. |
| Phone Number | You can update this yourself at any time. |
| Your login email. Not editable. | |
| Fax | You can update this yourself at any time. |
Organization Details
These fields reflect your place within the institution. They are all managed by your administrator, you cannot edit them yourself.

| Organization | The name of your institution. |
| Employee ID | Your employee identification number, if applicable. |
| Department | The department you have been assigned to by your administrator. |
| Position | Your job position within your department. Assigned by your admin. |
| Roles | Roles control what you can see and do in the system. Assigned by your administrator if applicable. |
System & Other Details
Additional details about your account. Only Description can be edited by you.

| Description | A short note about yourself. You can update this yourself at any time. |
| Private Folder Storage Limit | Displays the storage limit allocated to your account. The default is 1 GB, but your administrator can increase it if needed. |
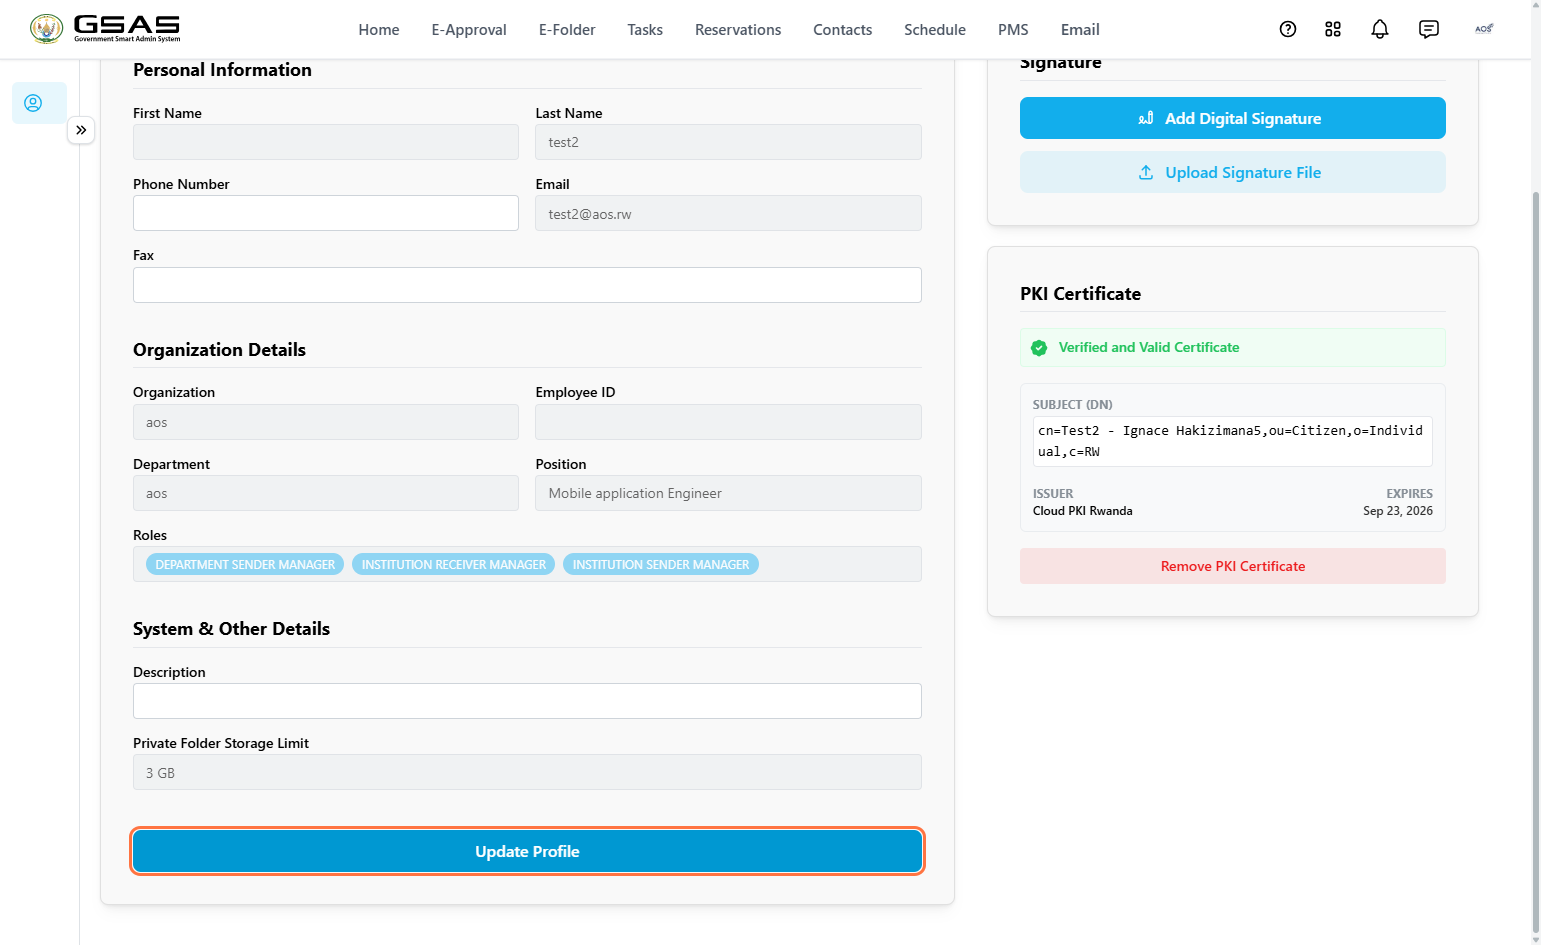
Once you have made your changes, click Update Profile at the bottom of the page to save.
Availability
The Availability panel on the right side of your profile lets the system know whether you are currently reachable or away.
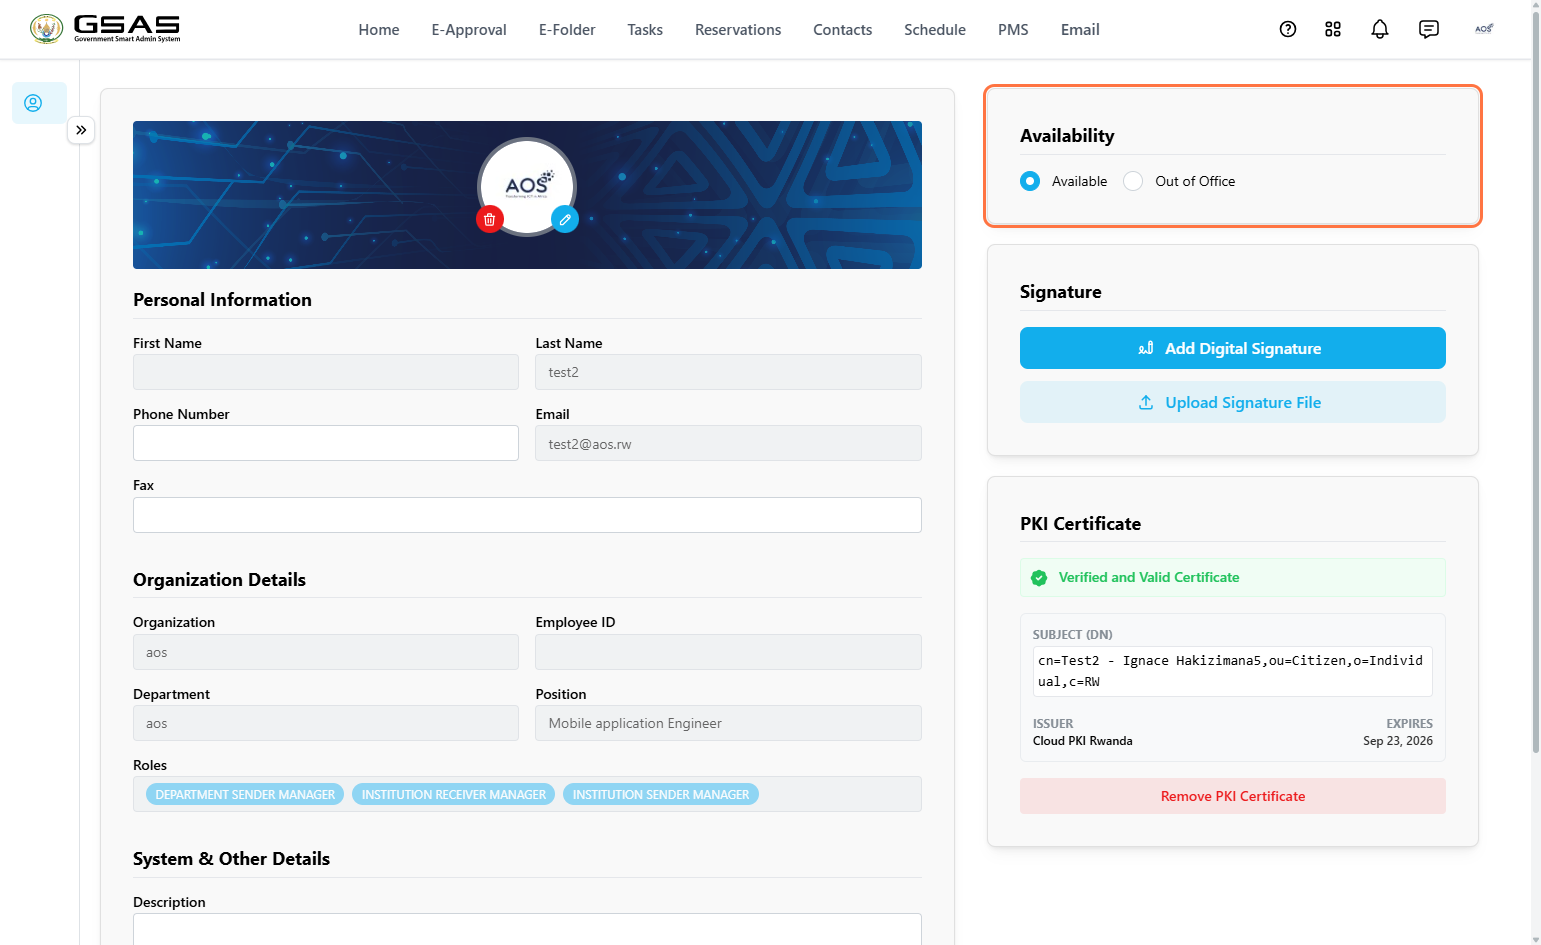
| Available | You are active and reachable. This is the default status. |
| Out of Office | Select this when you are away. You will be asked to assign a stand-in, set a date range, and provide a reason. All requests assigned to you while you are out-of-office will be sent to your stand-in. |
When you select Out of Office, a dialog will appear.
- Search for and select a colleague to act as your stand-in,
- Pick the dates you will be away, and enter a reason.
- Confirm.
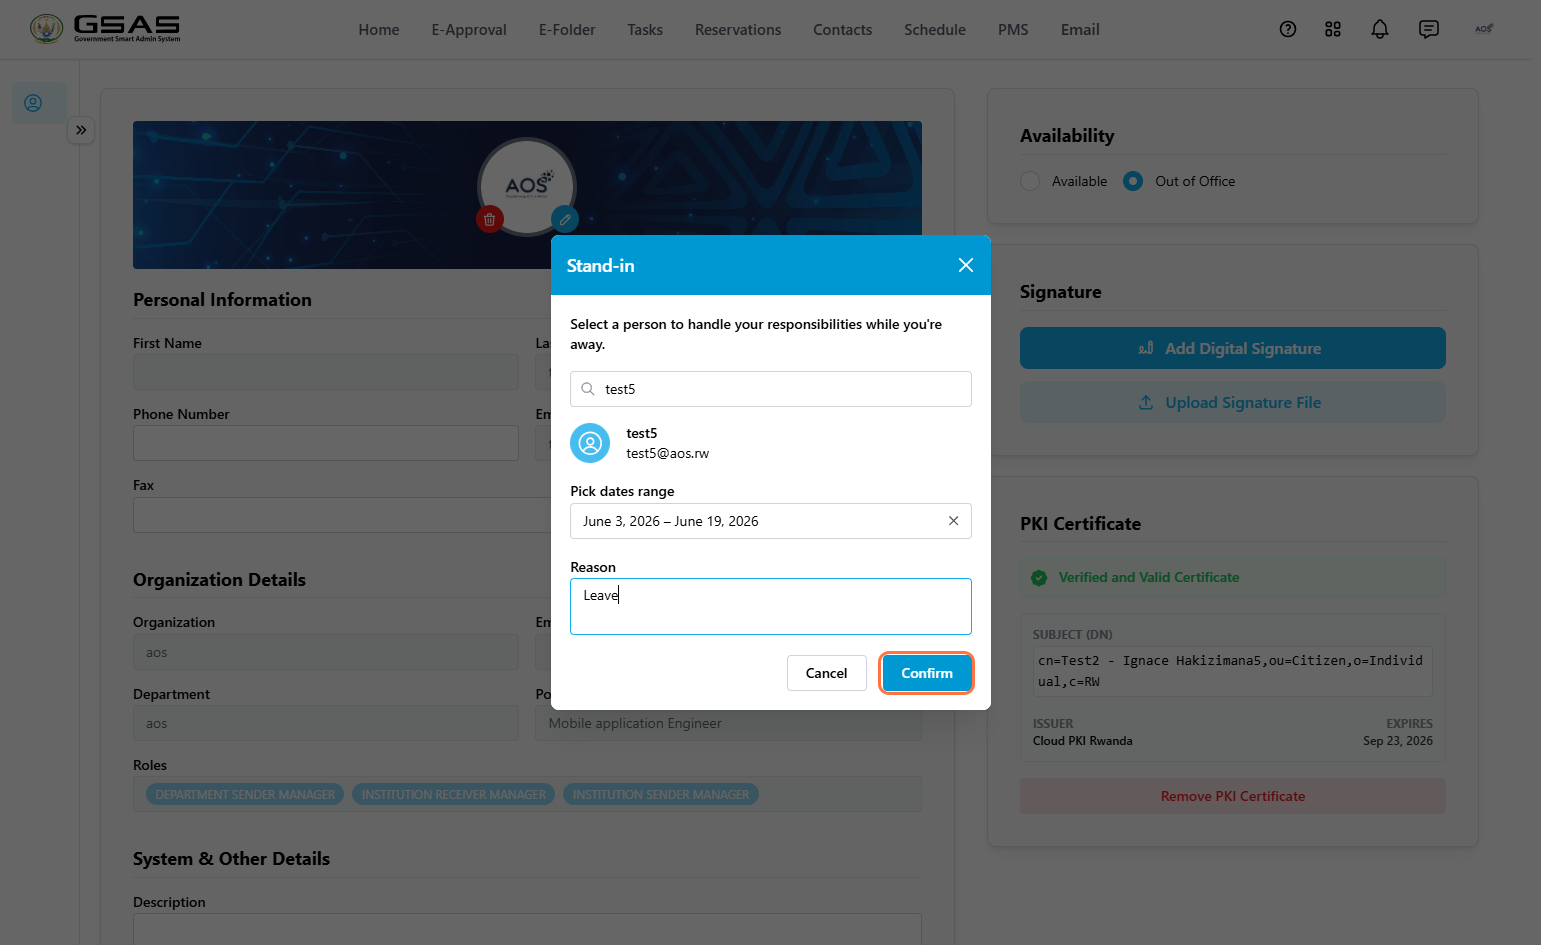
Once confirmed, your stand-in's name, the period, and the reason will appear in the Availability panel. To cancel your out-of-office status, click Remove Availability Status.

Signature
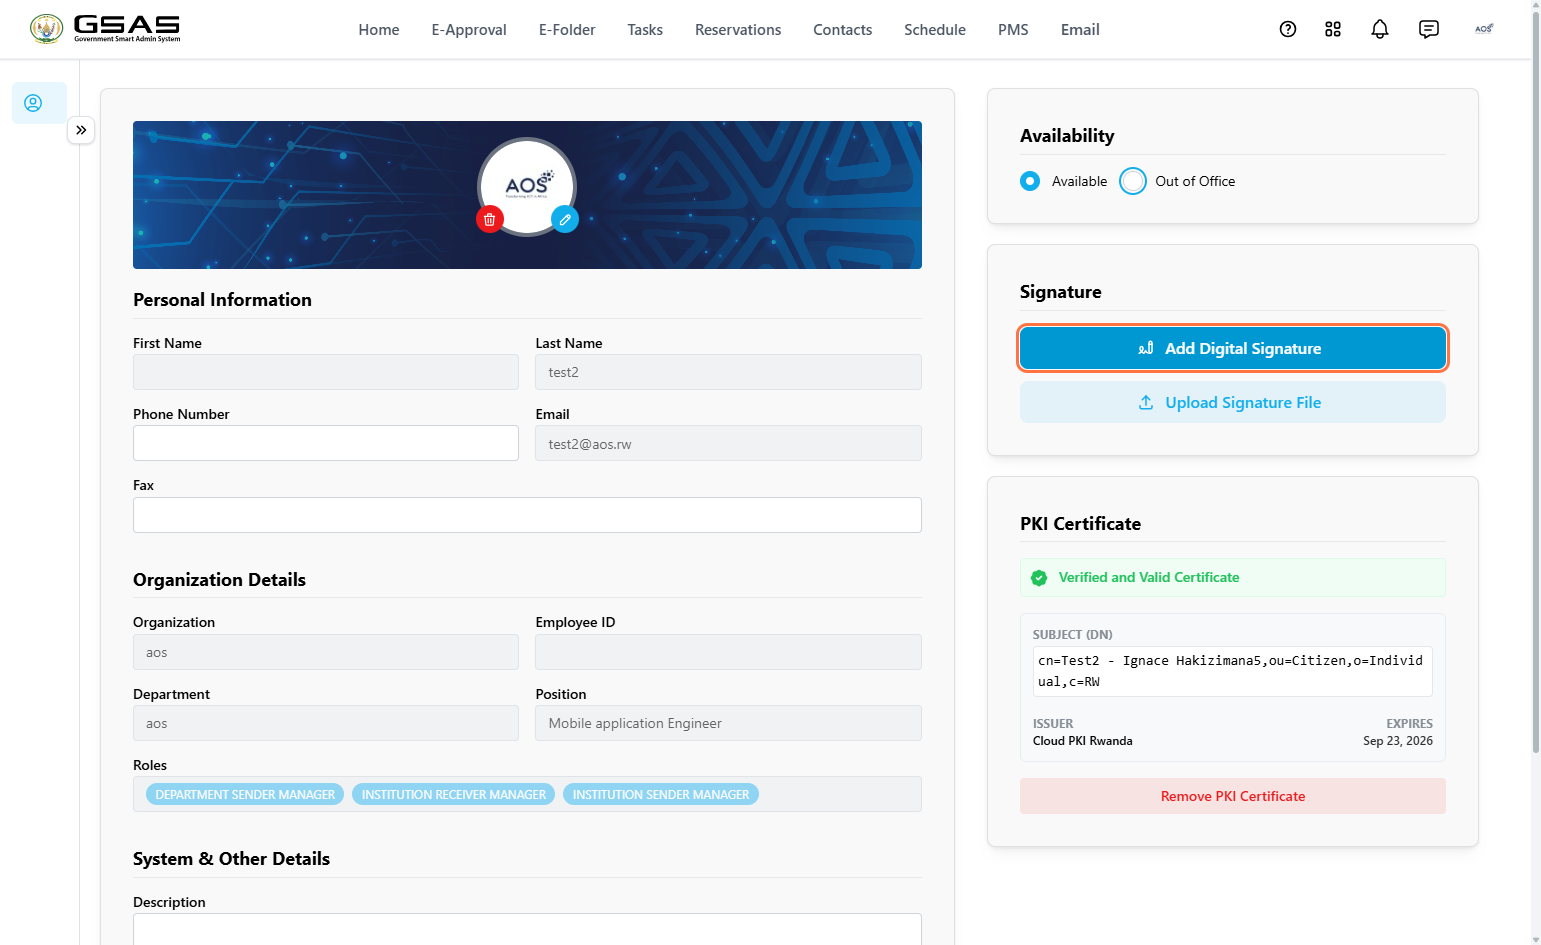
Your signature is used when submitting forms and requests in the system. You can register it in two ways.

Option 1 — Draw your signature
- Click Add Digital Signature.

- A drawing canvas will open, use your mouse or touchscreen to draw your signature, then click Create to save it.

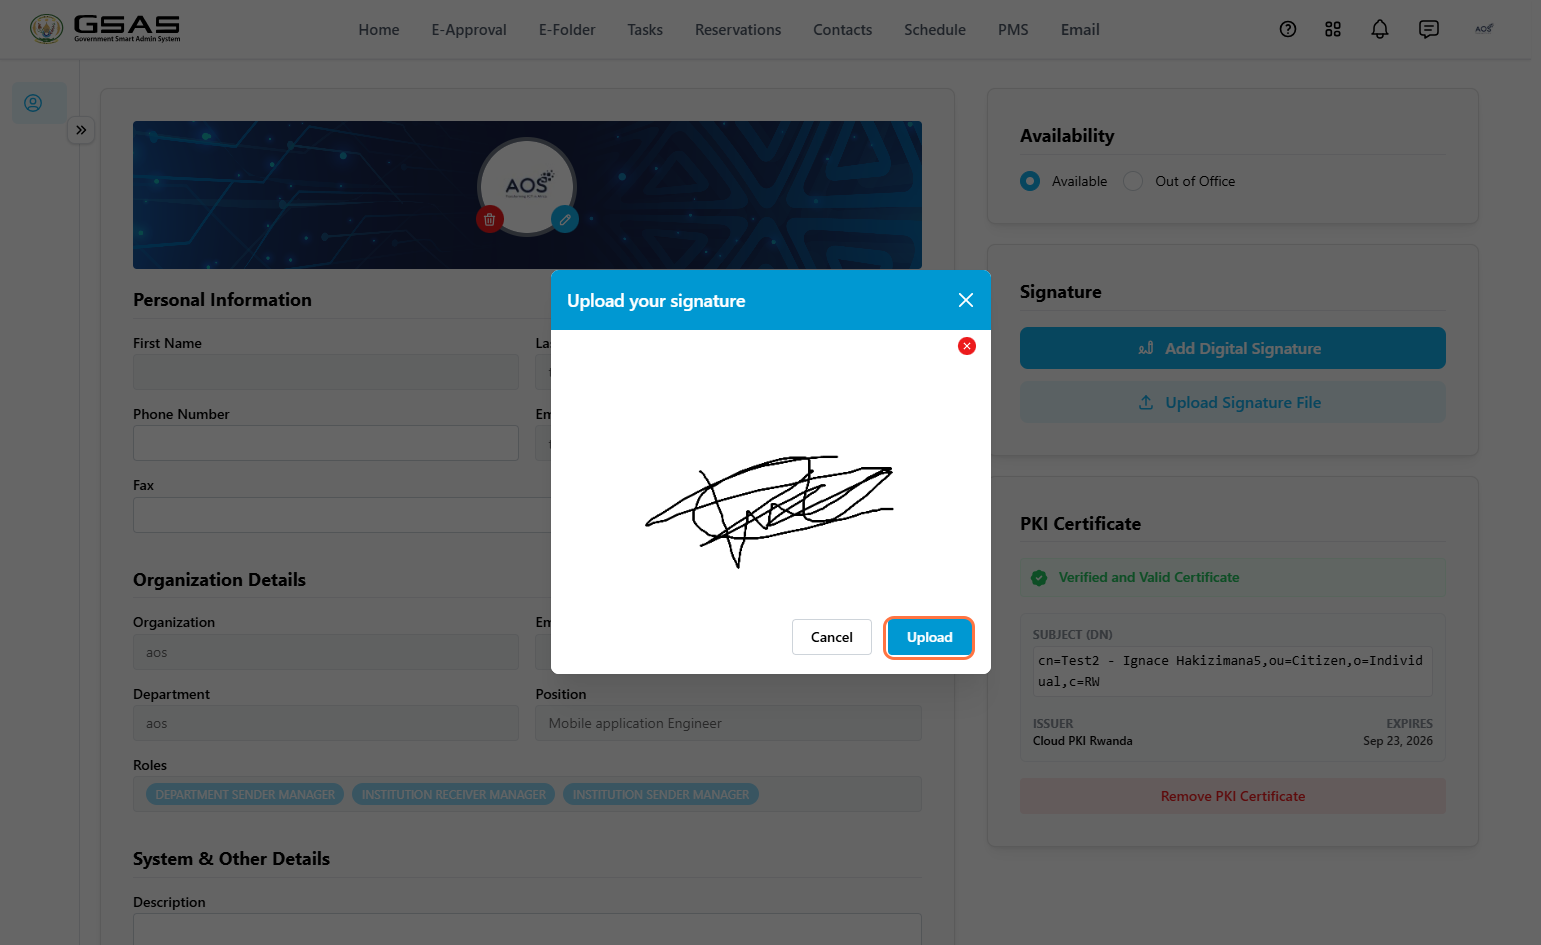
Option 2 — Upload a signature file
- Click Upload Signature File.

- A dialog will open, drag and drop your signature file or click to select from your computer. A preview of the uploaded image will be shown. Click Upload to confirm. Once saved, your signature will appear in the panel. To remove it, click Remove Signature.
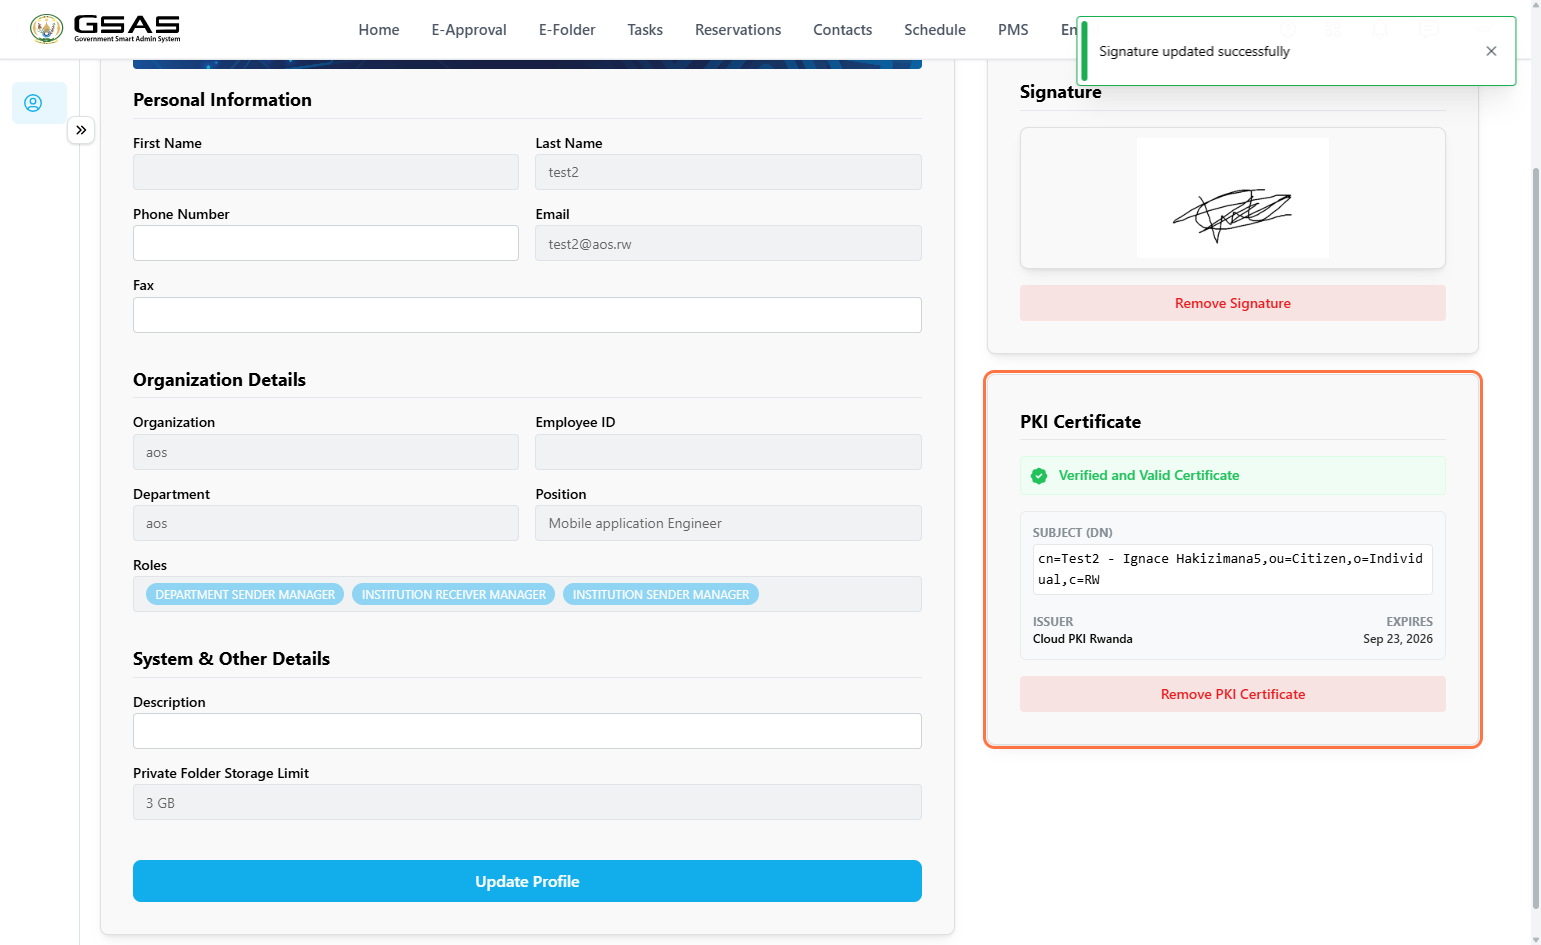
PKI Certificate
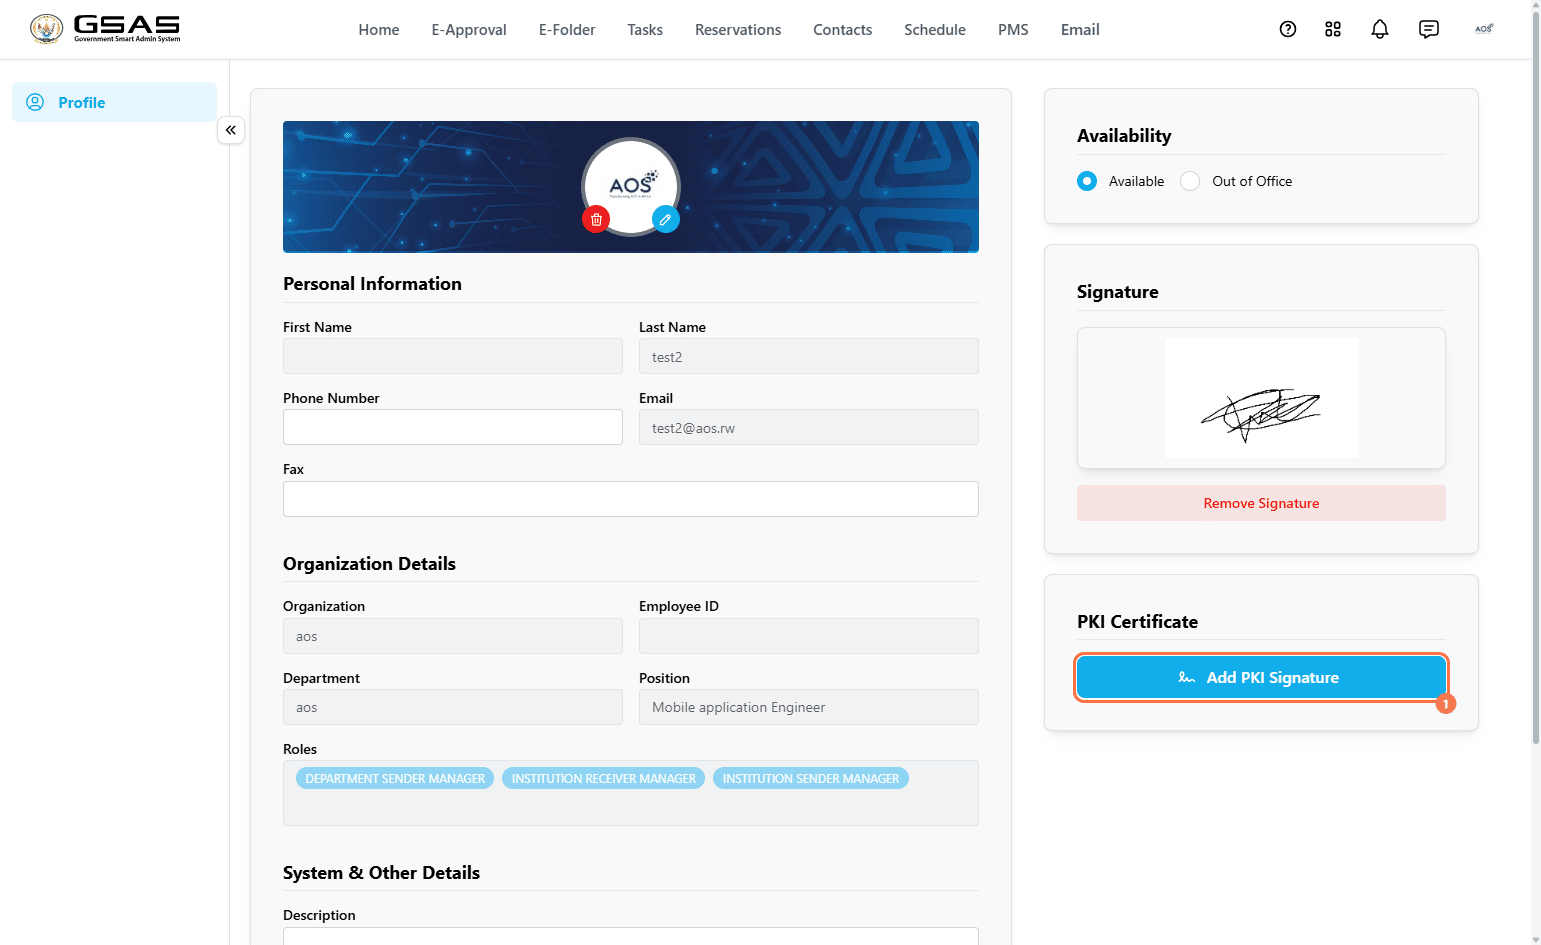
Some forms in the system are configured to require a PKI (Public Key Infrastructure) signature. If your account has one registered, it will appear in this panel with its verification status, subject details, issuer, and expiry date. (Scroll down to learn how to register your PKI).
How to register your Public Key Infrastructure (click to open)
- Click on the Add PKI Signature button.

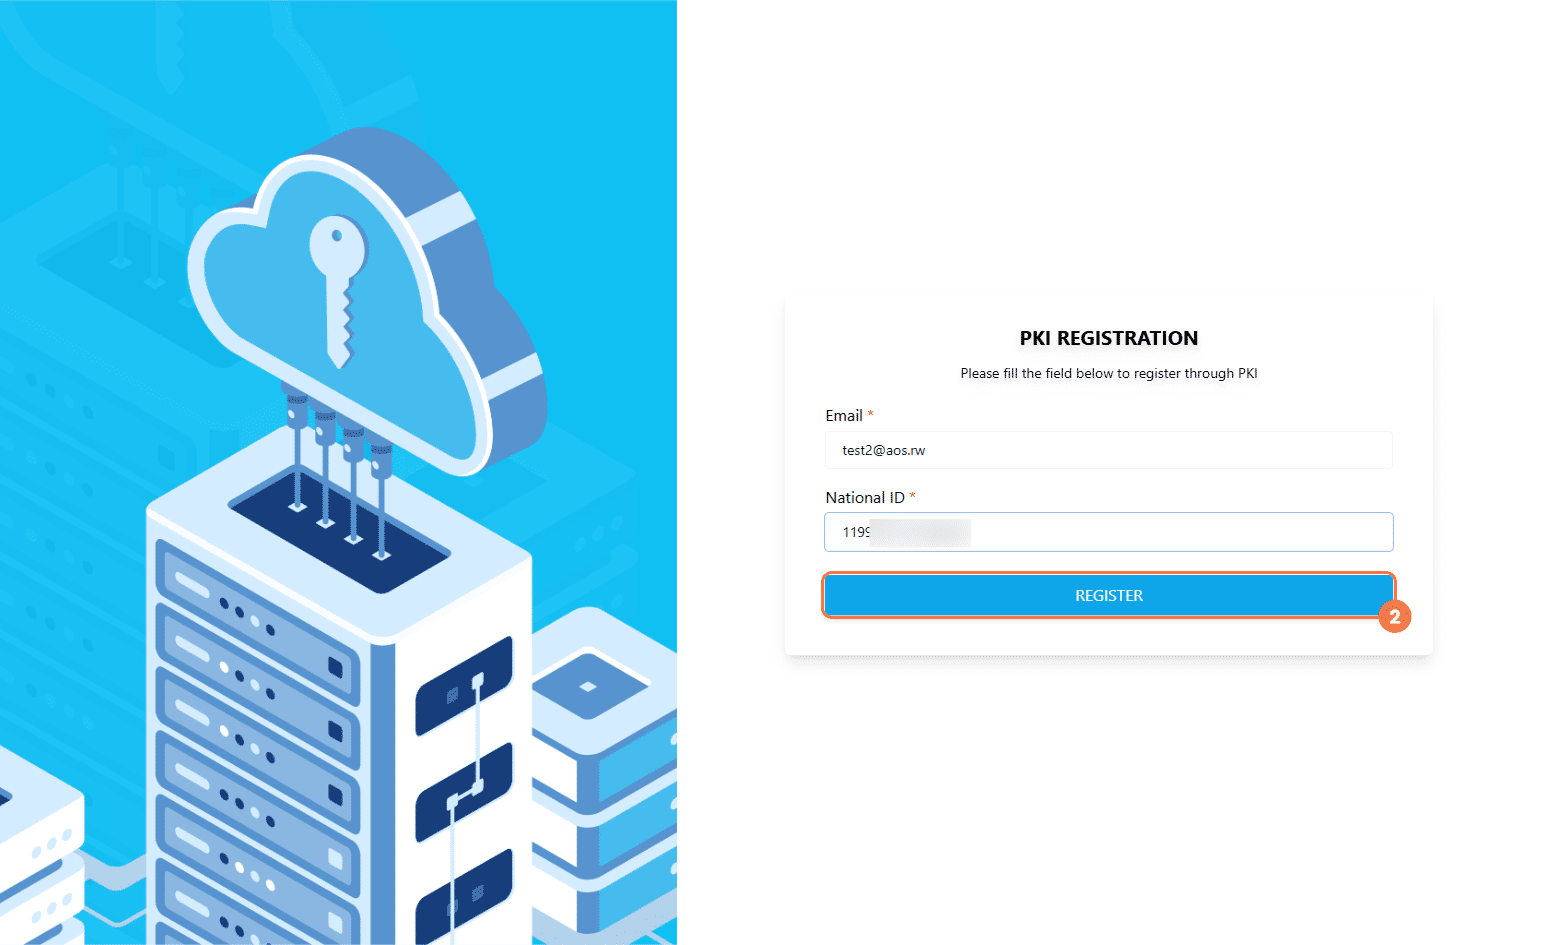
- Enter your email address and National ID number, then click Register.

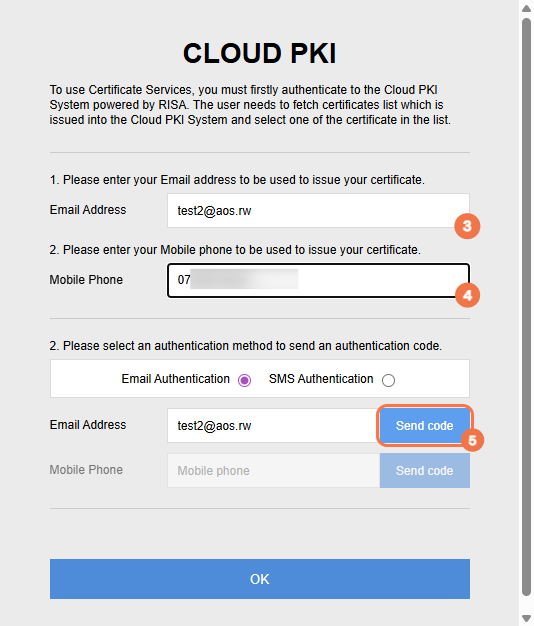
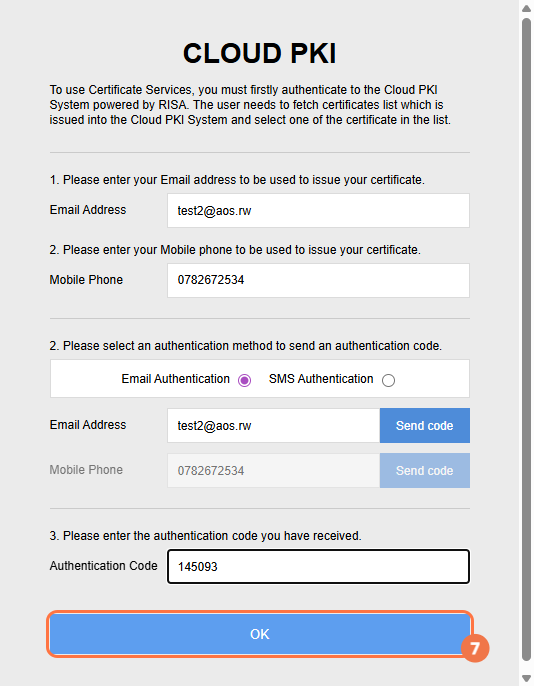
- Enter your email address and mobile phone number, then click Send Code to receive an authentication code.

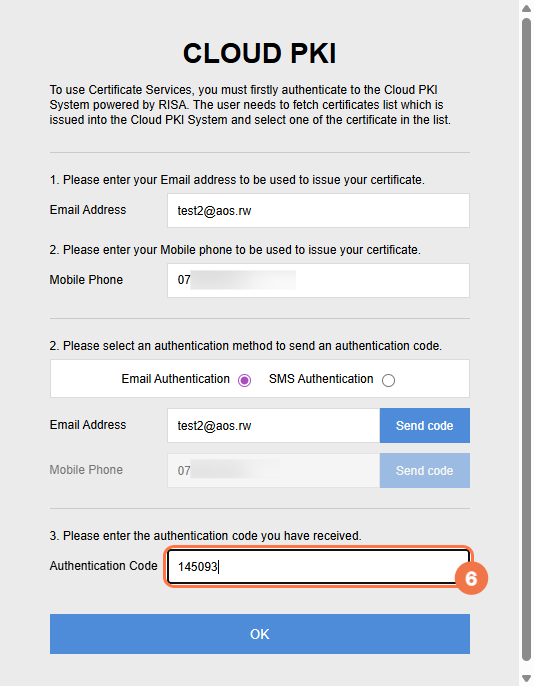
- Enter the authentication code you received, then click OK.


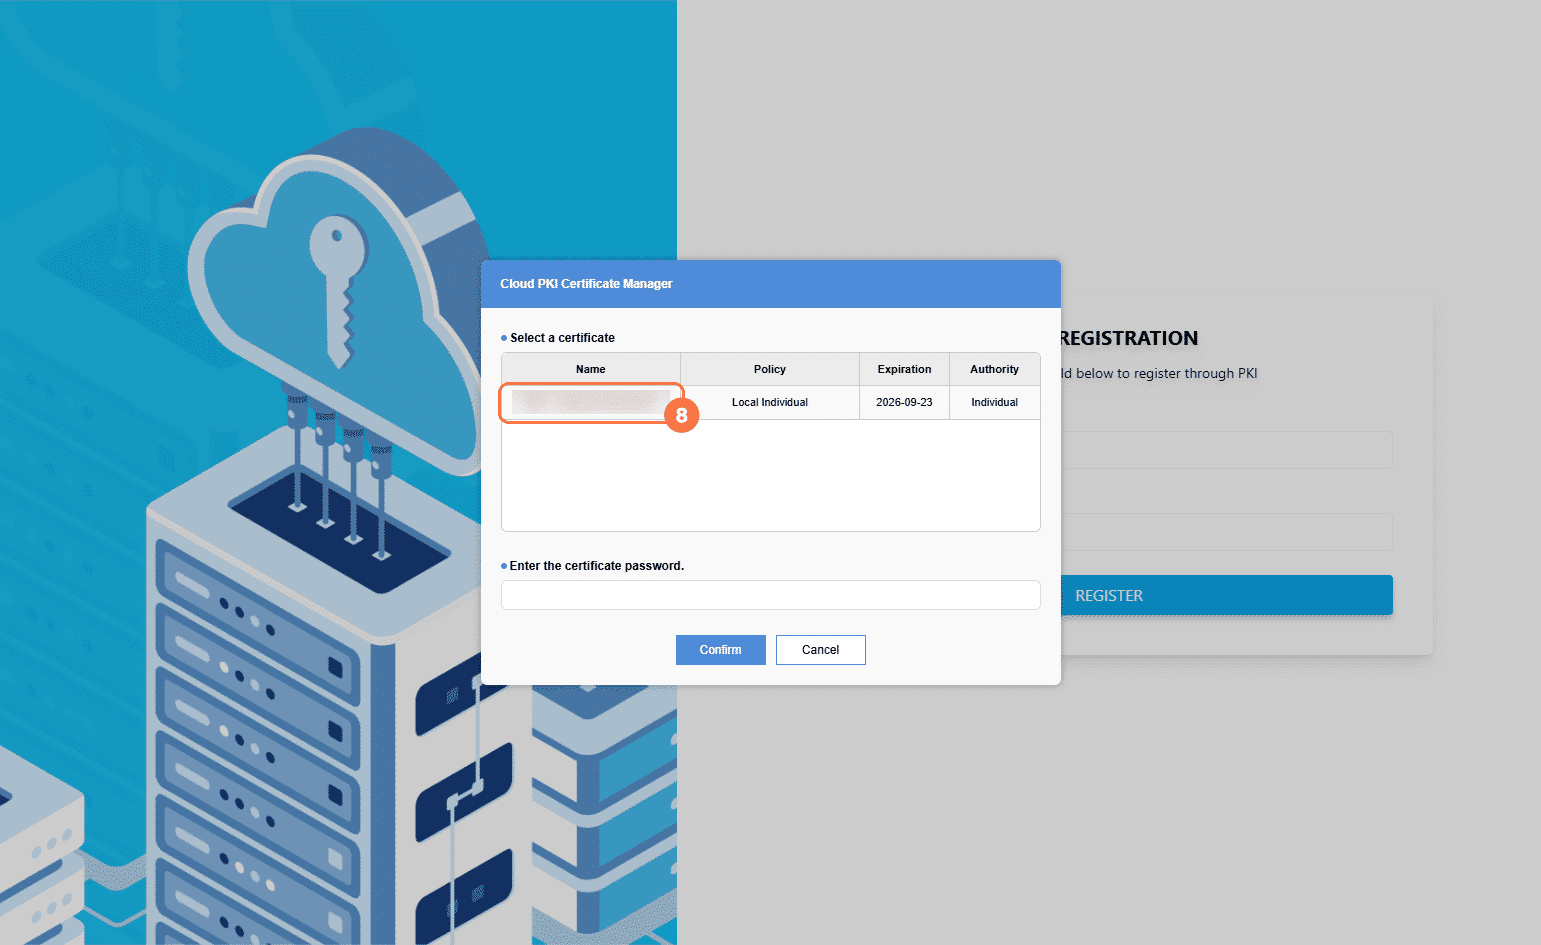
- Click on your name to select your certificate, then enter your password and confirm.


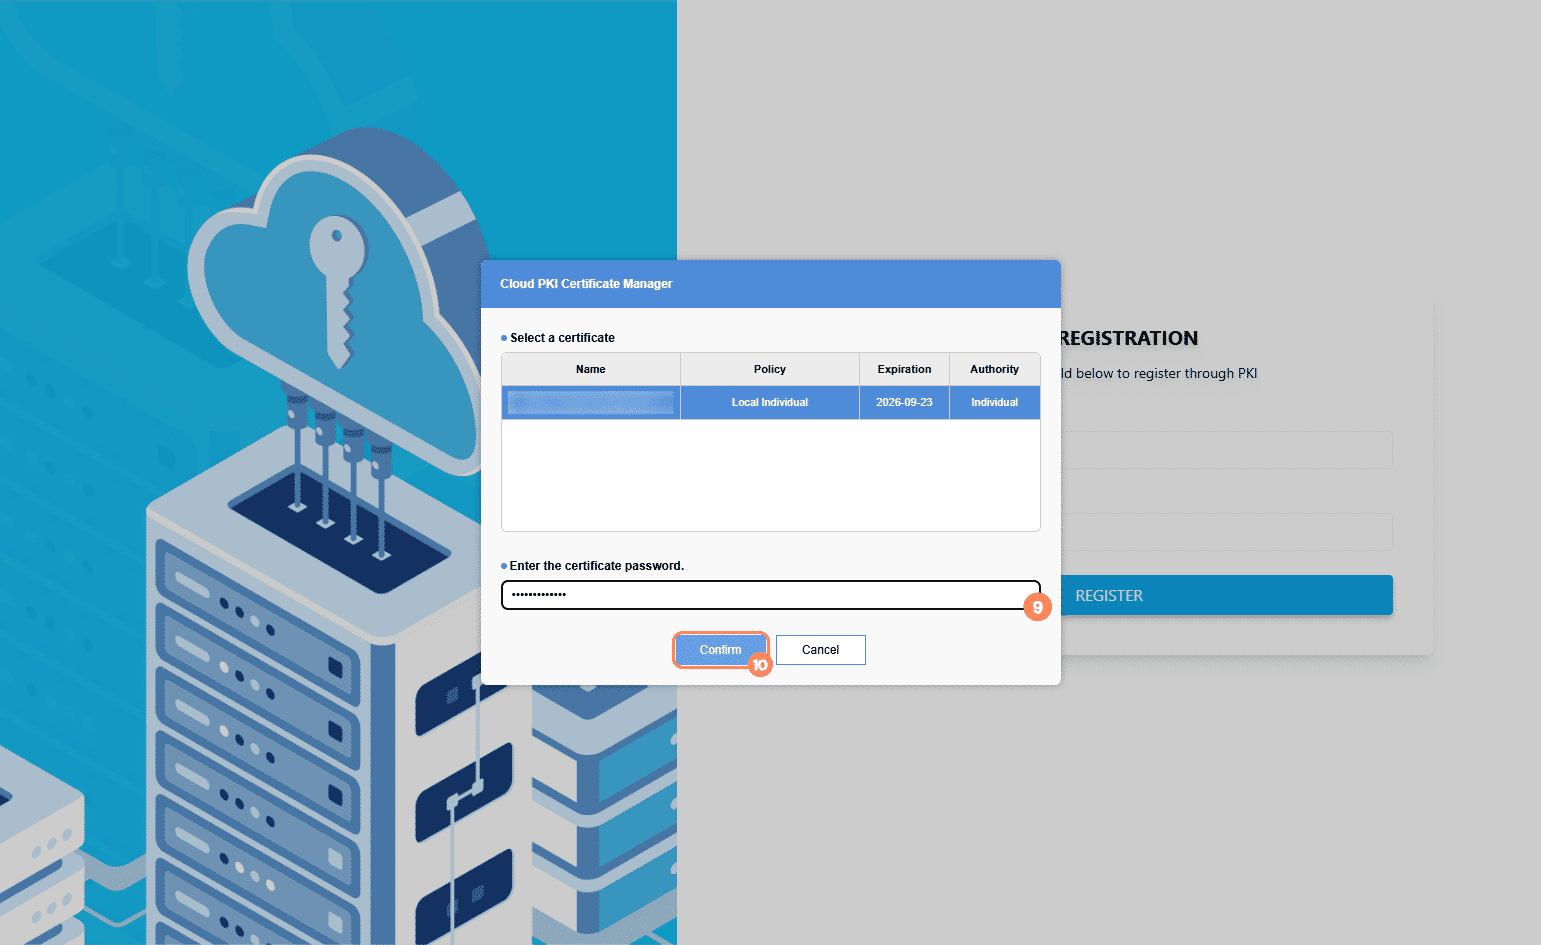
A success message will appear. Re-login to your GSAS account to confirm that the certificate has been registered
| Important: If a form requires a PKI signature and you do not have one registered, you will not be able to sign it. Contact your administrator if you need guidance to set one up. |